In general, you get what you pay for. So far we have not found a good option for less than $50. There are plenty of low-cost options available, but they lack build quality, audio quality, and/or comfort.
For better sound quality and better hearing protection, you may want to consider using earbuds rather than speakers.
Not all Bluetooth implementations are the same. You may find that your preferred headset won’t pair with your Bluetooth radio. You will therefore either need to chose a different headset, or a different radio.
Introduction
As mentioned in a previous post, our family has enjoyed using two-way radios to communicate while we ride our dirt bikes. We used heavy duty wiring harnesses and headsets from Rugged Radios. These have worked flawlessly, but they are very expensive, and you have to remember to plug in your helmet and the push-to-talk (PTT) button.
For several years I have been on the lookout for a wireless solution that would work for dirt biking where we often get spread out beyond the range of Bluetooth helmet communicators. This post covers some of our research and offers some possible solutions.
An Affordable Wired Solution
Our family has been using the Rugged Radios Race Series headsets with good luck for many years. While they work great, they are very expensive. By the time you buy a jumper cable for your radio, you are paying around $275 plus the cost of your radio.
Rugged Radios now offers a lower cost option called the Super Sport Series. This series uses smaller cables and smaller connectors, which should still be adequate for recreational riding. This looks like a good option, but it is still fairly expensive, coming in at around $185 plus radio.
The Rugged Radio headsets use high quality speakers and high quality dynamic microphones. This sets them apart from all of the super cheap options out there. A quality mic and speakers is critical if you want to be able to communicate while riding in a noisy environment.
I believe it is possible to pair the Super Sport headset with a much lower cost wiring harness. You can buy the Super Sport headset for $65. You can (I think) pair that with a $20 wiring harness from Amazon. This wiring harness is very light-weight, and certainly not as durable as a Rugged Radios harness, but if you place the PTT button on your backpack shoulder strap rather than on the your handlebars, it might work good enough.
Low-Cost Bluetooth Options
The main focus of this blog post is on Bluetooth solutions. In order to use Bluetooth for communications, you need a Bluetooth headset, as well as a Bluetooth radio (covered in another post).
If your only interest is communicating via two-way radio (or only listening to music), then you would think a low-cost Bluetooth headset would work. We have tested a few, and not yet found any sub-$50 headsets that work very well. They generally lack a quality microphone, so it is very difficult for others to understand you, and because the Bluetooth controller is attached directly to the speaker, the speakers are quite thick, and therefore very uncomfortable inside a helmet. Furthermore, some of them will not pair with a Bluetooth radio – they will only pair with a phone.
From a YouTube review, it appears that this EJEAS E1+ works well when paired with a Bluetooth radio, but the speakers are 0.51″ thick, so they may be uncomfortable.
If you want to try one of these low-cost approaches, be prepared to test multiple units until you find one that works for you.
Bluetooth Intercom Options
The next step up in quality is the Bluetooth intercom helmet headsets that are on the market. There are dozens to choose from. There are cheap units costing less than $100, but, like the low-cost options discussed above, they are of questionable build quality and they have poor speakers and microphones.
One of my friends uses a Fod Sport M1S Plus, costing right around $100. While the Bluetooth functionality is okay, the speakers are less than satisfactory.
I also have friends that use the top-of-the-line Cardo Packtalk Edge units, but they cost around $400 each.
Some Bluetooth communicators use standard audio jacks for the speakers, so you can easily swap them out for earbuds if you choose.
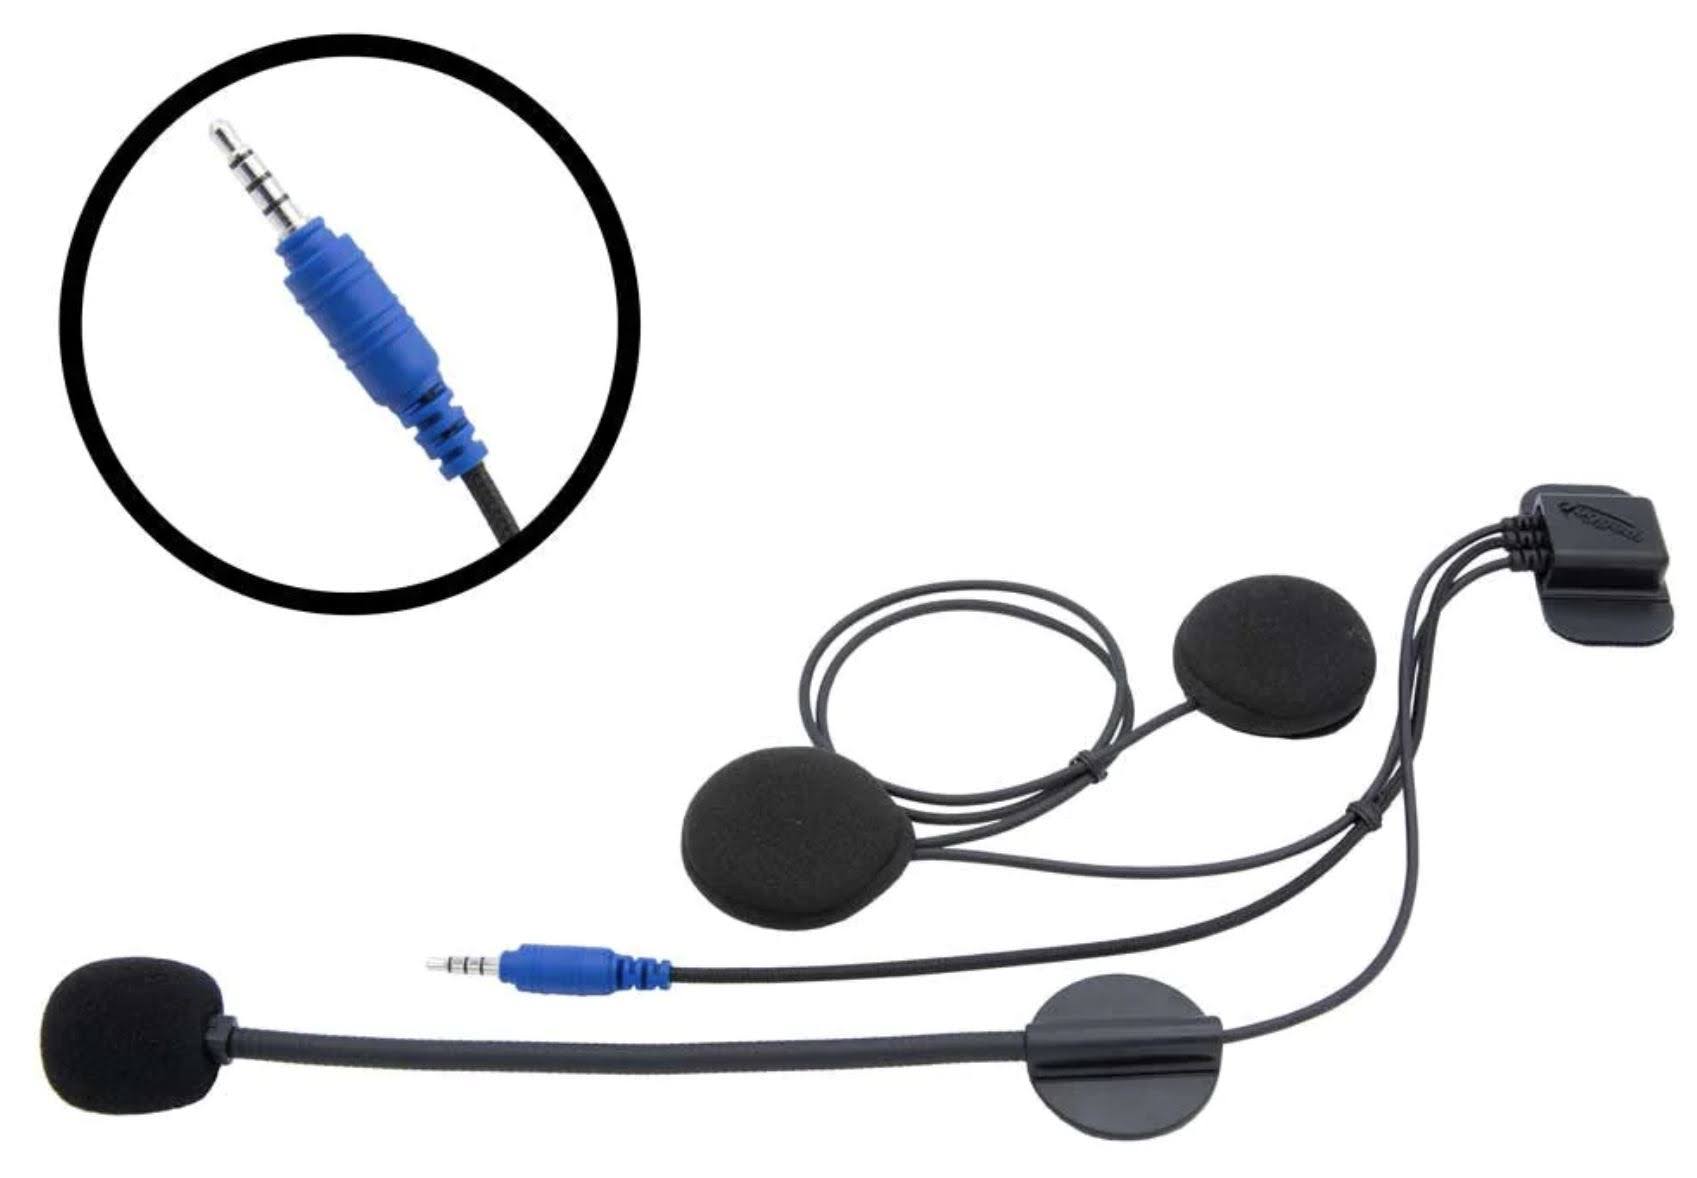
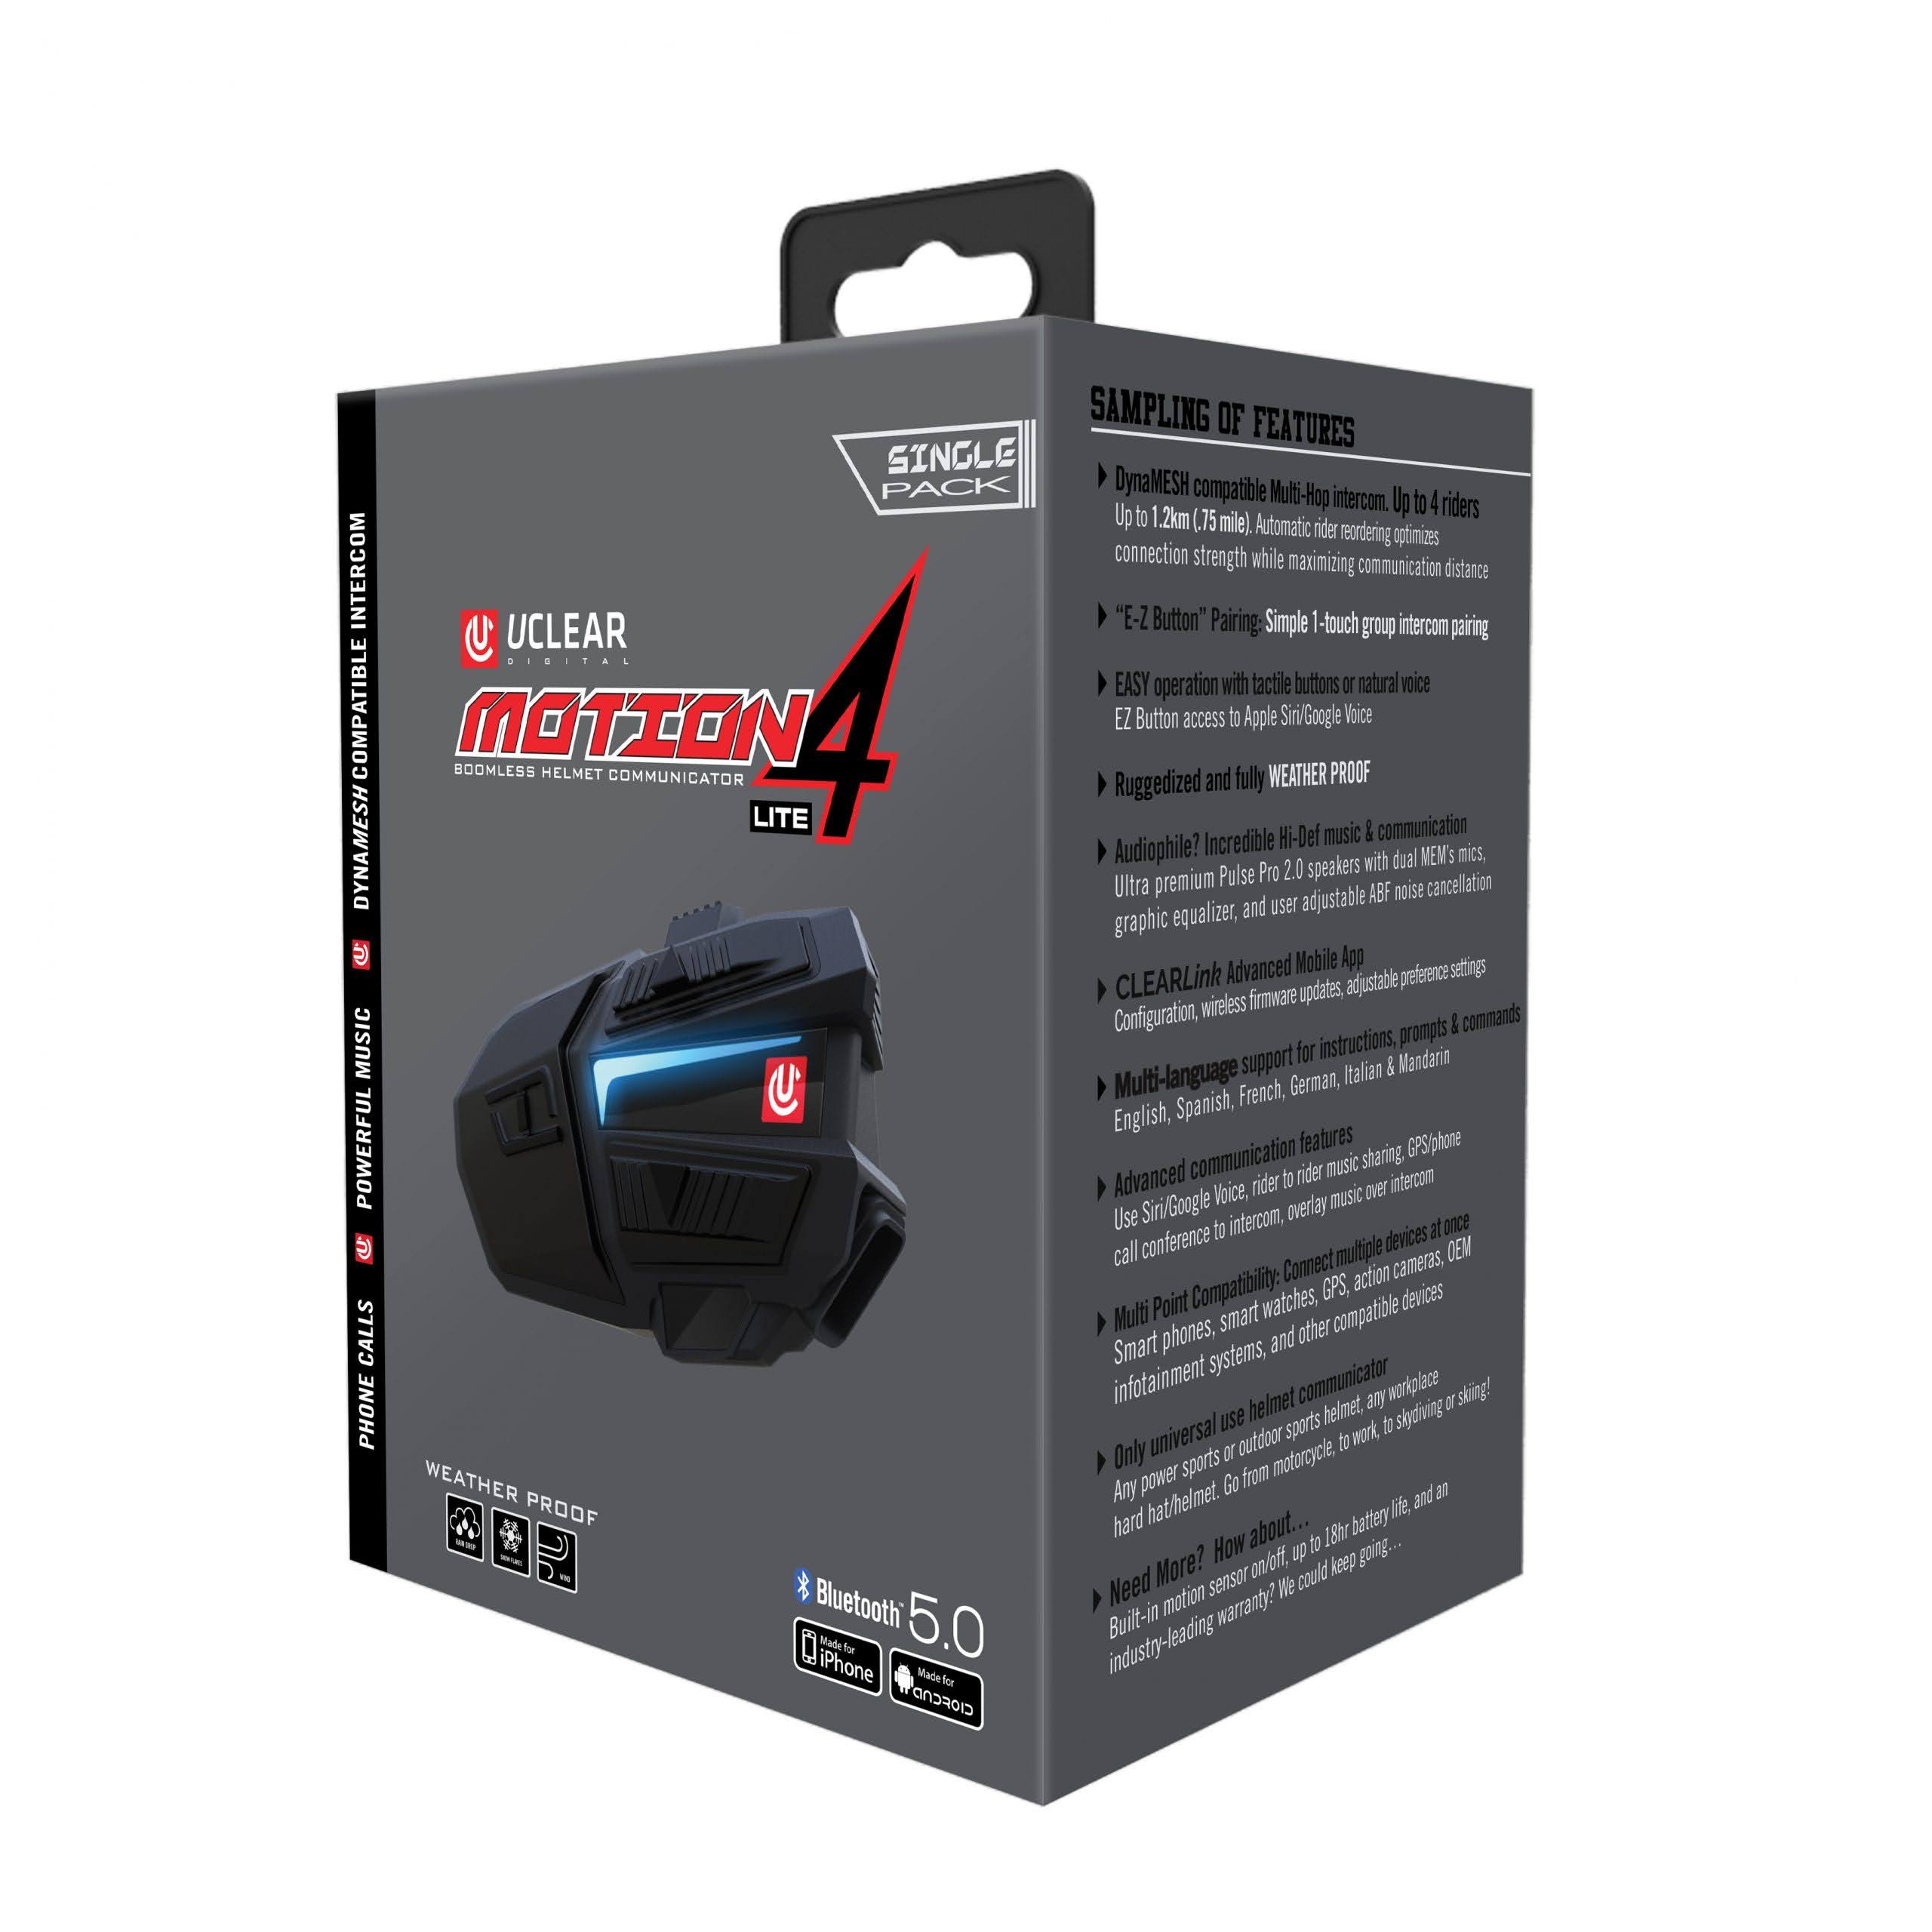
I chose a middle of the road option with the UCLEAR Digital Motion series. The Motion 4 Lite costs around $175. It has very good speakers, dual noise cancelling microphones, and is very easy to install.
This type of communicator has the Bluetooth controller on the outside of the helmet, so they can provide thin speakers that fit comfortably inside the helmet.
They support communication via your phone (music or phone calls), Bluetooth voice activated intercom between riders, as well as communication via a Bluetooth two-way radio (which was my primary objective).
I don’t have personal experience with other brand Bluetooth communicators, but I suspect they all have similar capabilities. While I wasn’t particular interested in the Bluetooth intercom, I have actually found it more useful than expected. I wouldn’t want to be joined to a large network of riders, but it is nice to easily be able to talk with family members when traveling in close proximity. The range of the Bluetooth intercom is extremely limited.
There is, however, a learning curve to use these units – especially the intercom. There are a lot of configuration settings you need to play with. The default settings seem to be aimed at street riders in a less noisy environment than dirt biking. We had to play with the microphone sensitivity to prevent us from hearing each other breath.
We also had to tune how much the music gets attenuated when using the intercom. With the mic sensitivity too high, our music was constantly being attenuated, and it was quite annoying. Once we got the tuning set the way we like it, it works quite well.
But the primary goal was communication via a two-way radio, using a PTT button. The radio gives us much longer range than Bluetooth ever could. I ended up pairing my UCLEAR Motion headset with the BTech GMRS-Pro radio discussed in my other post. The headset automatically pauses my music when anyone talks over the radio, and automatically resumes once the transmission has ended.
At this point in time I have limited testing of the new wireless setup, but it looks like it is going to work!
Conclusion
The technology is now available for wireless communications between riders in moto-sports. A quality solution isn’t cheap, and in fact it may be overkill, but there are options that work.
Hopefully in the near future someone will offer a more affordable option that is optimized for moto-sports over two-way radio. Syphon Sound has a nice headset for listening to music, but it will not pair with a Bluetooth radio. Maybe someday…
The FCC requires a license to transmit from a GMRS radio. You can purchase a license on-line for $35. The license is valid for ten years, and covers your immediate family. No test is required. You will be issued a call sign.
The FCC requires you to announce your call sign at the beginning of each transmission when using a GMRS radio.
Not all Bluetooth implementations are the same. You may find that your preferred headset won’t pair with your Bluetooth radio. You will therefore either need to chose a different headset, or a different radio.
Introduction
For many years my family has used two-way radios with wired heavy duty Race Series Rugged Radio wiring harnesses and headsets to make our dirt biking a more social experience so we can chat while we ride. It has also improved safety; we can warn each other of obstacles or oncoming traffic, and it helps prevent someone from getting lost.
While these systems work great and are very robust, it is a bit of nuisance to plug in your headset and your push-to-talk (PTT) cables each time you get on the bike. Furthermore, these heavy duty headsets and cables cost around $275, and that does not count the radio.
For several years there have been Bluetooth intercom helmet headsets that work quite well for riding on the street, but they lack the range for dirt biking where we get spread out over large distances. And they are very expensive.
This report is on some research and testing my friends and I have been doing recently with two-way radios using Bluetooth to connect to the headset.
Bluetooth Radios
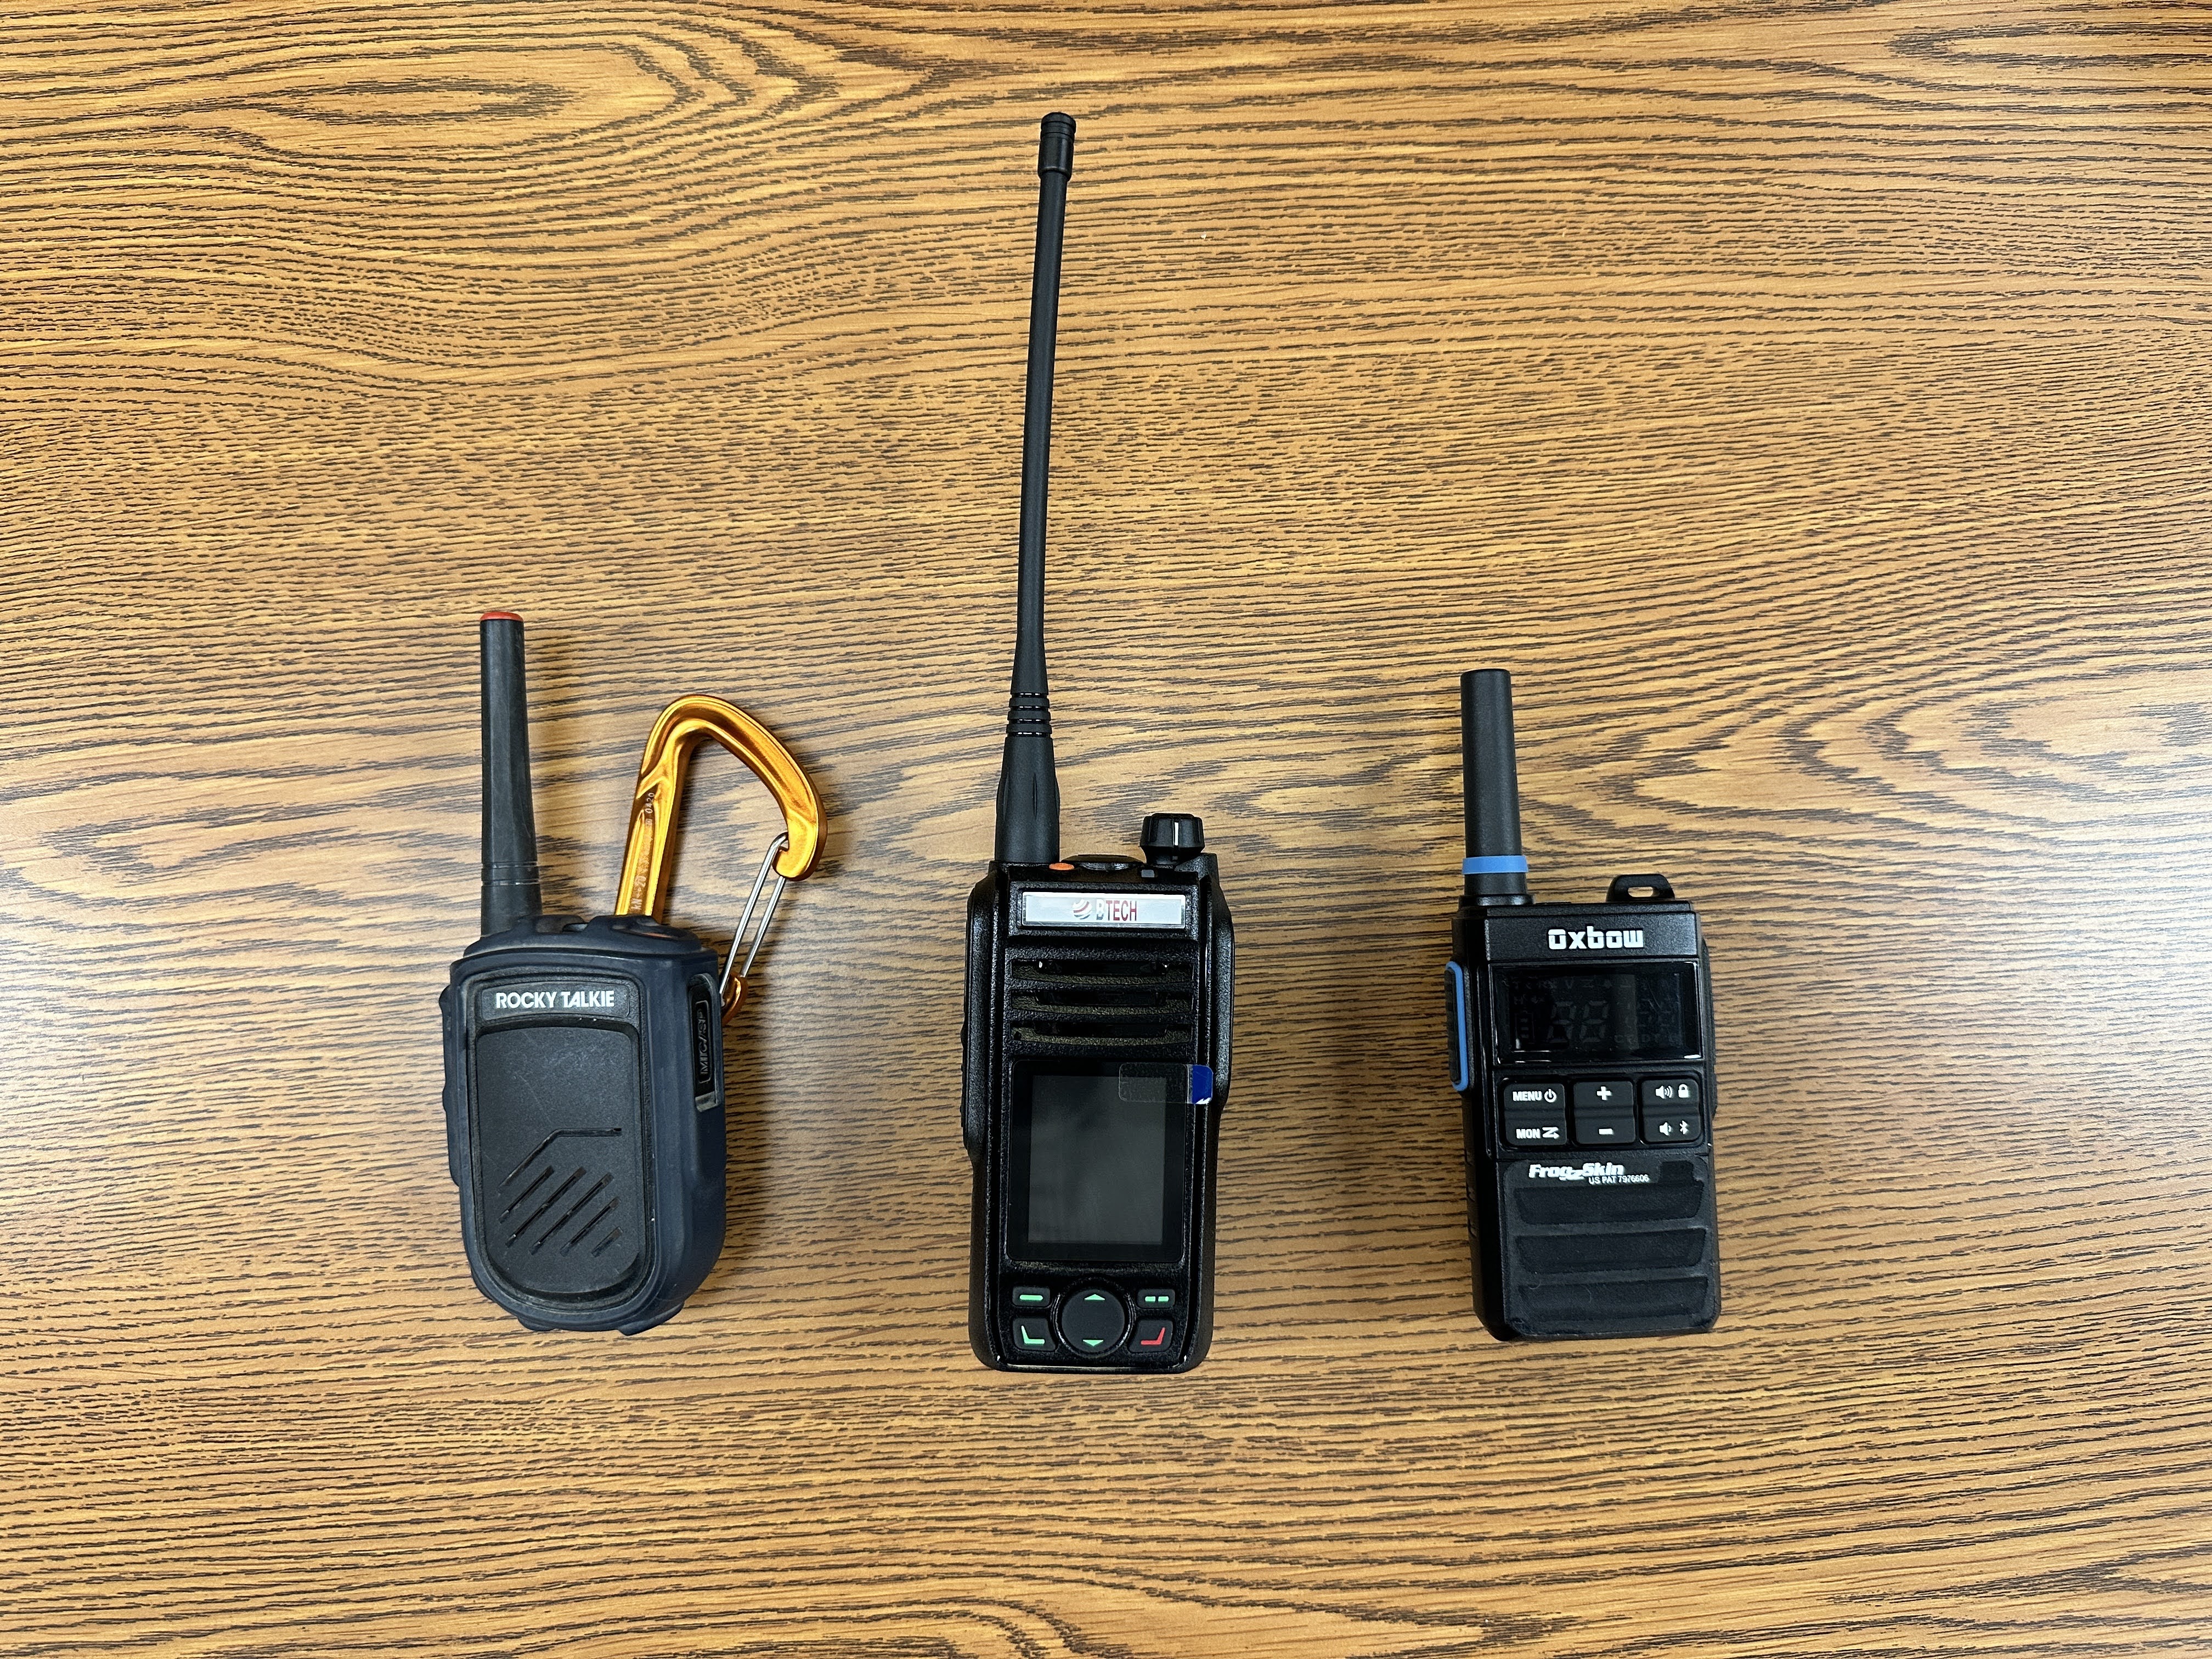
We have been testing three different Bluetooth radios options. All three choices work, but they each have different pros and cons.
Oxbow Renegade X Bluetooth 2-watt FRS radio ($180). A great easy to use integrated solution.
BTech GMRS-Pro ($140). An excellent 5-watt GMRS radio, but you have to program it.
Push-To-Talk (PTT) Buttons
With a two-way radio you have to push a button in order to talk to others. You have three options for PTT:
Use the PTT on the side of the radio. This is sufficient if you carry the radio in a convienent location like your backpack shoulder strap.
A Bluetooth PTT that is compatible with your radio. Some seem to be brand specific and are not interchangeable.
Or a wired PTT. Simple and effective, but you need to mount it near the radio.
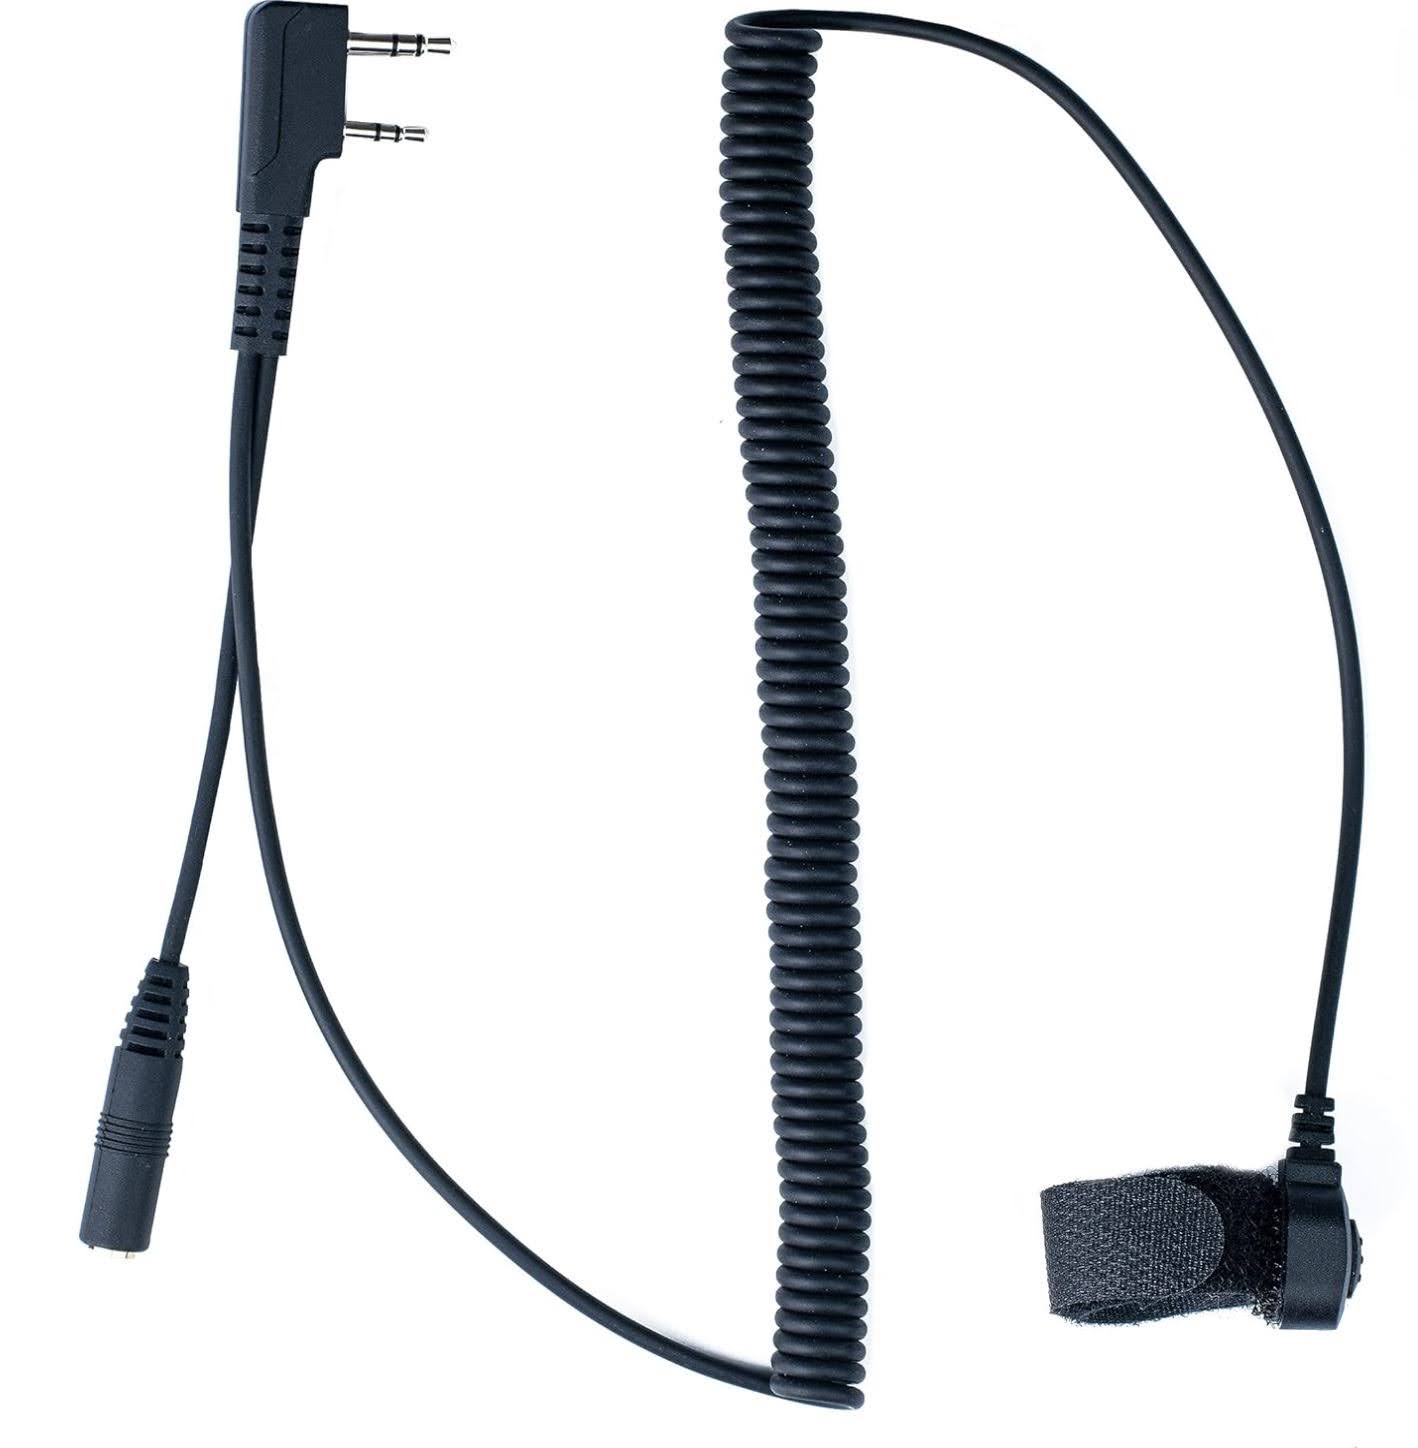
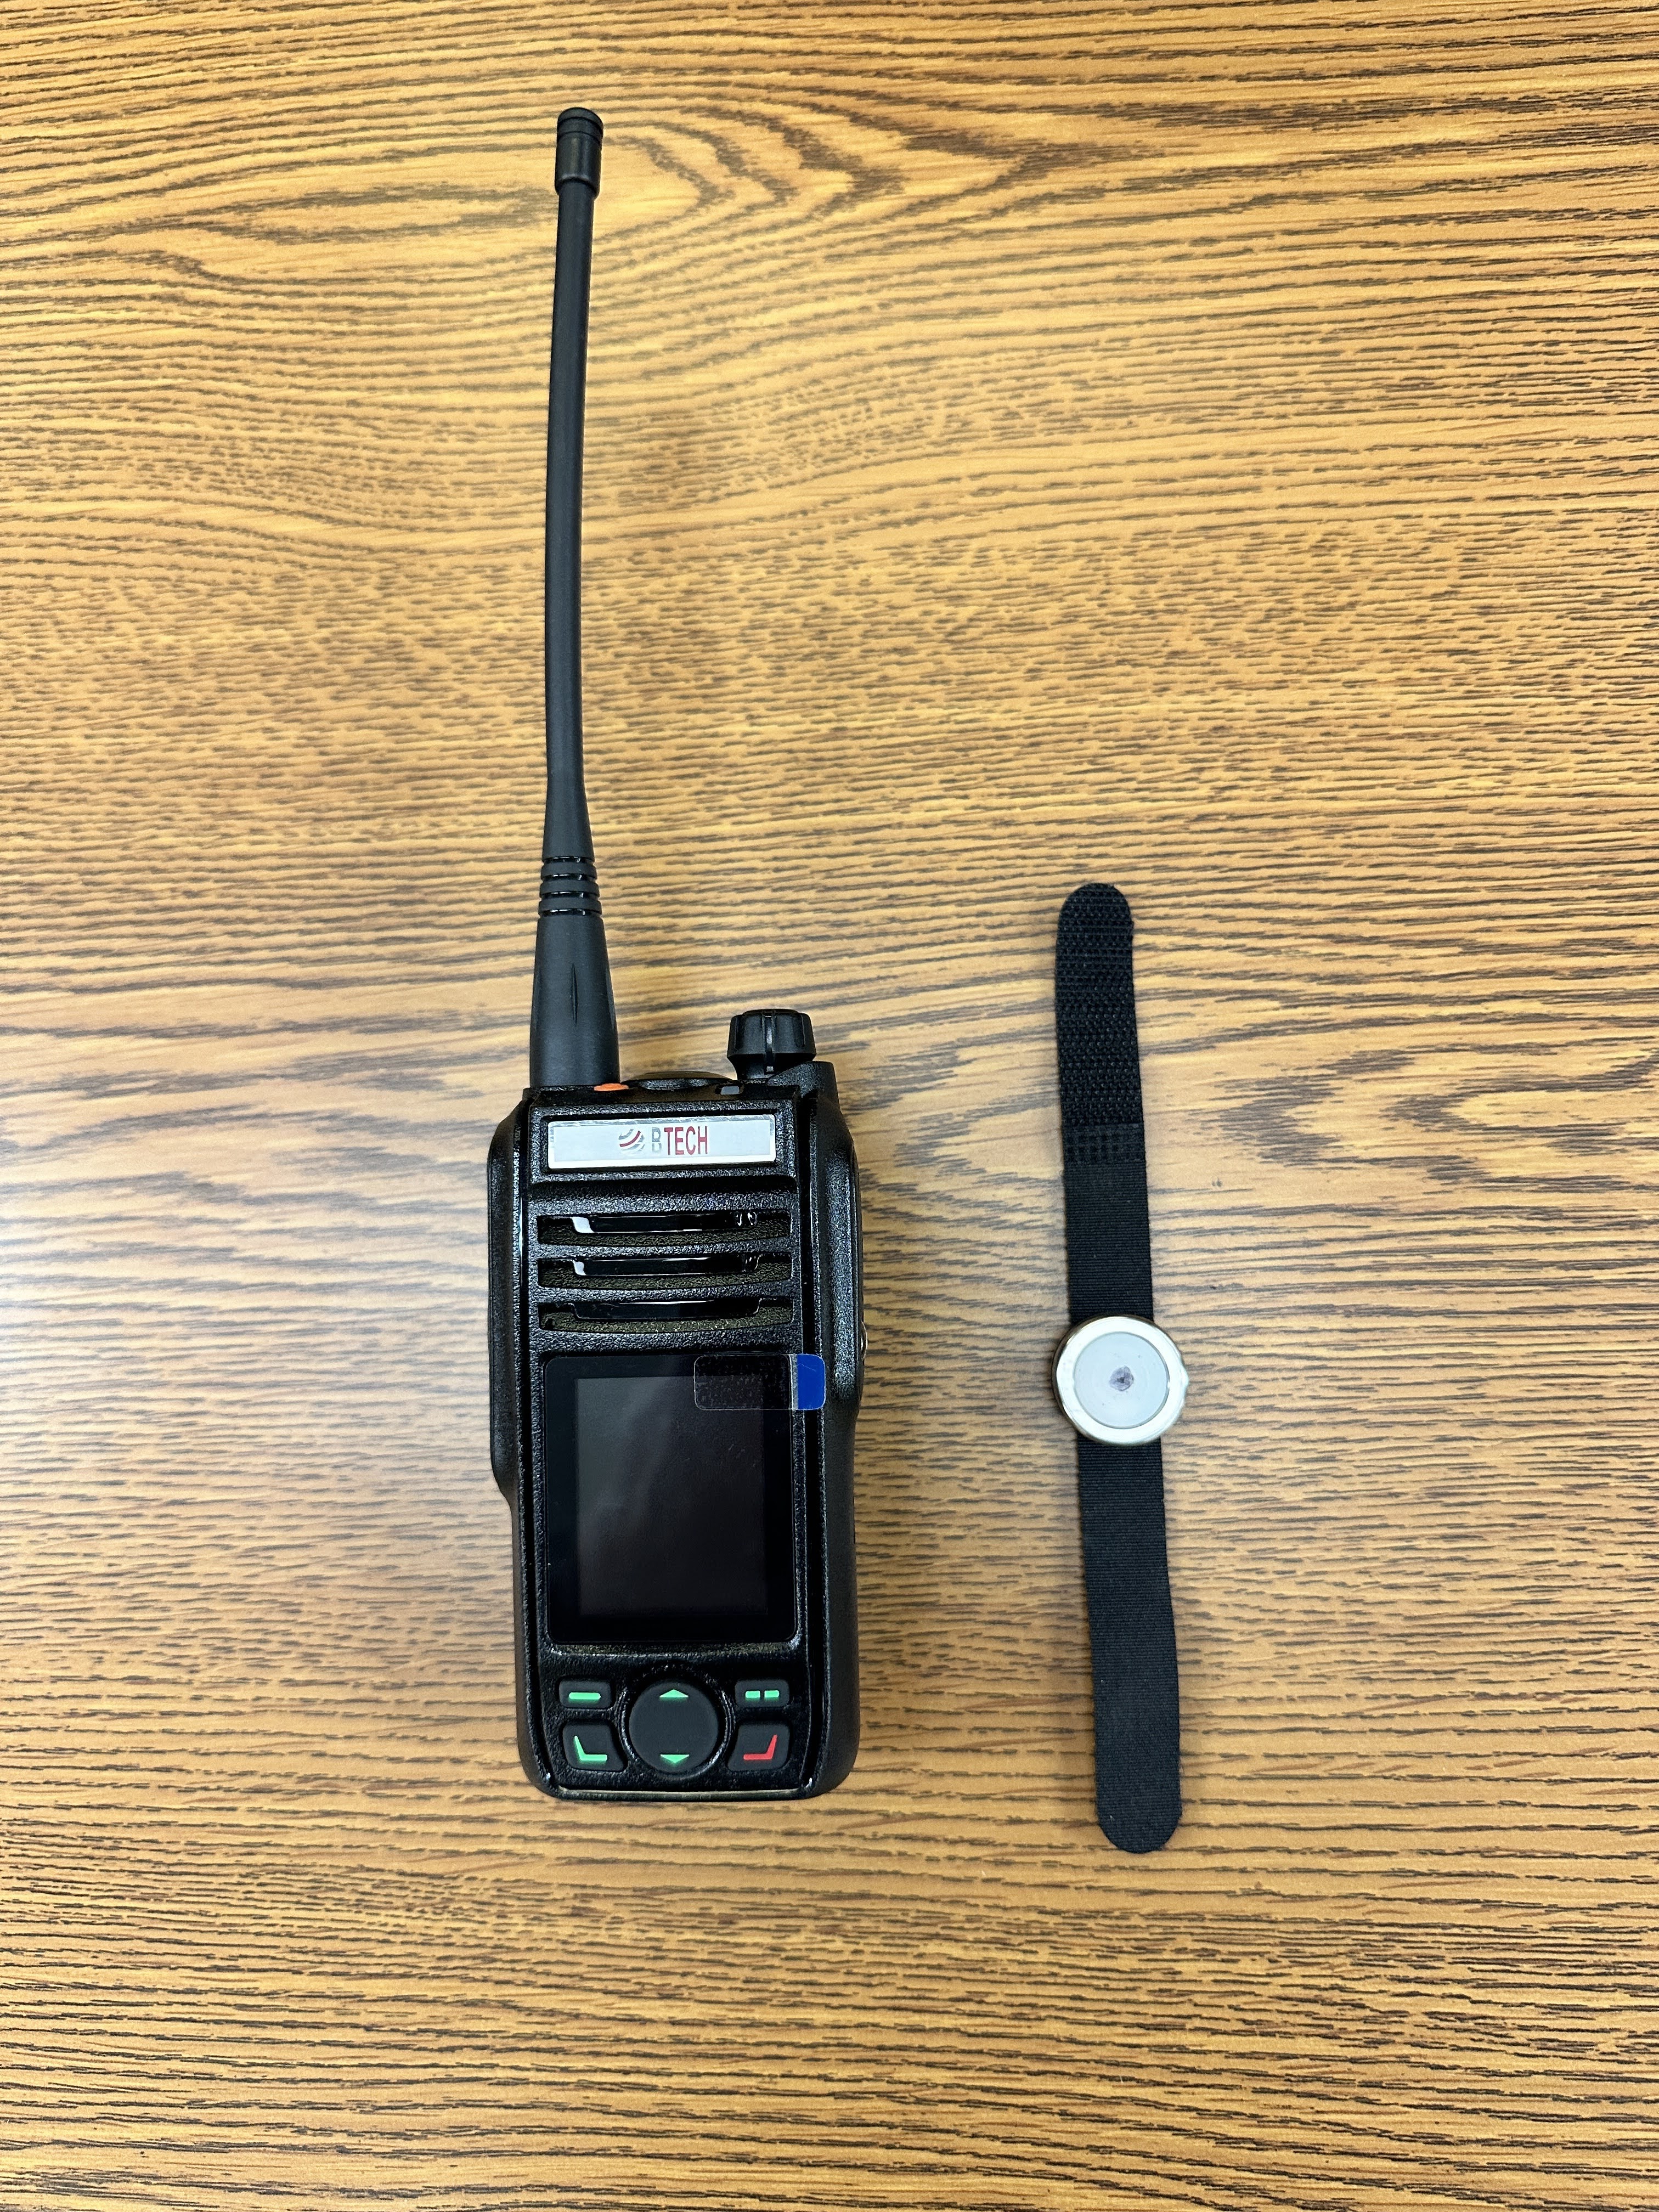
This $20 PTT from Amazon works fine on any of the Bluetooth radios in this report. It may be possible to get this to work with the Bluetooth adapter with some additional cables, but it won’t work as is because the adapter and the PTT both want to plug into the K1 port of the radio.
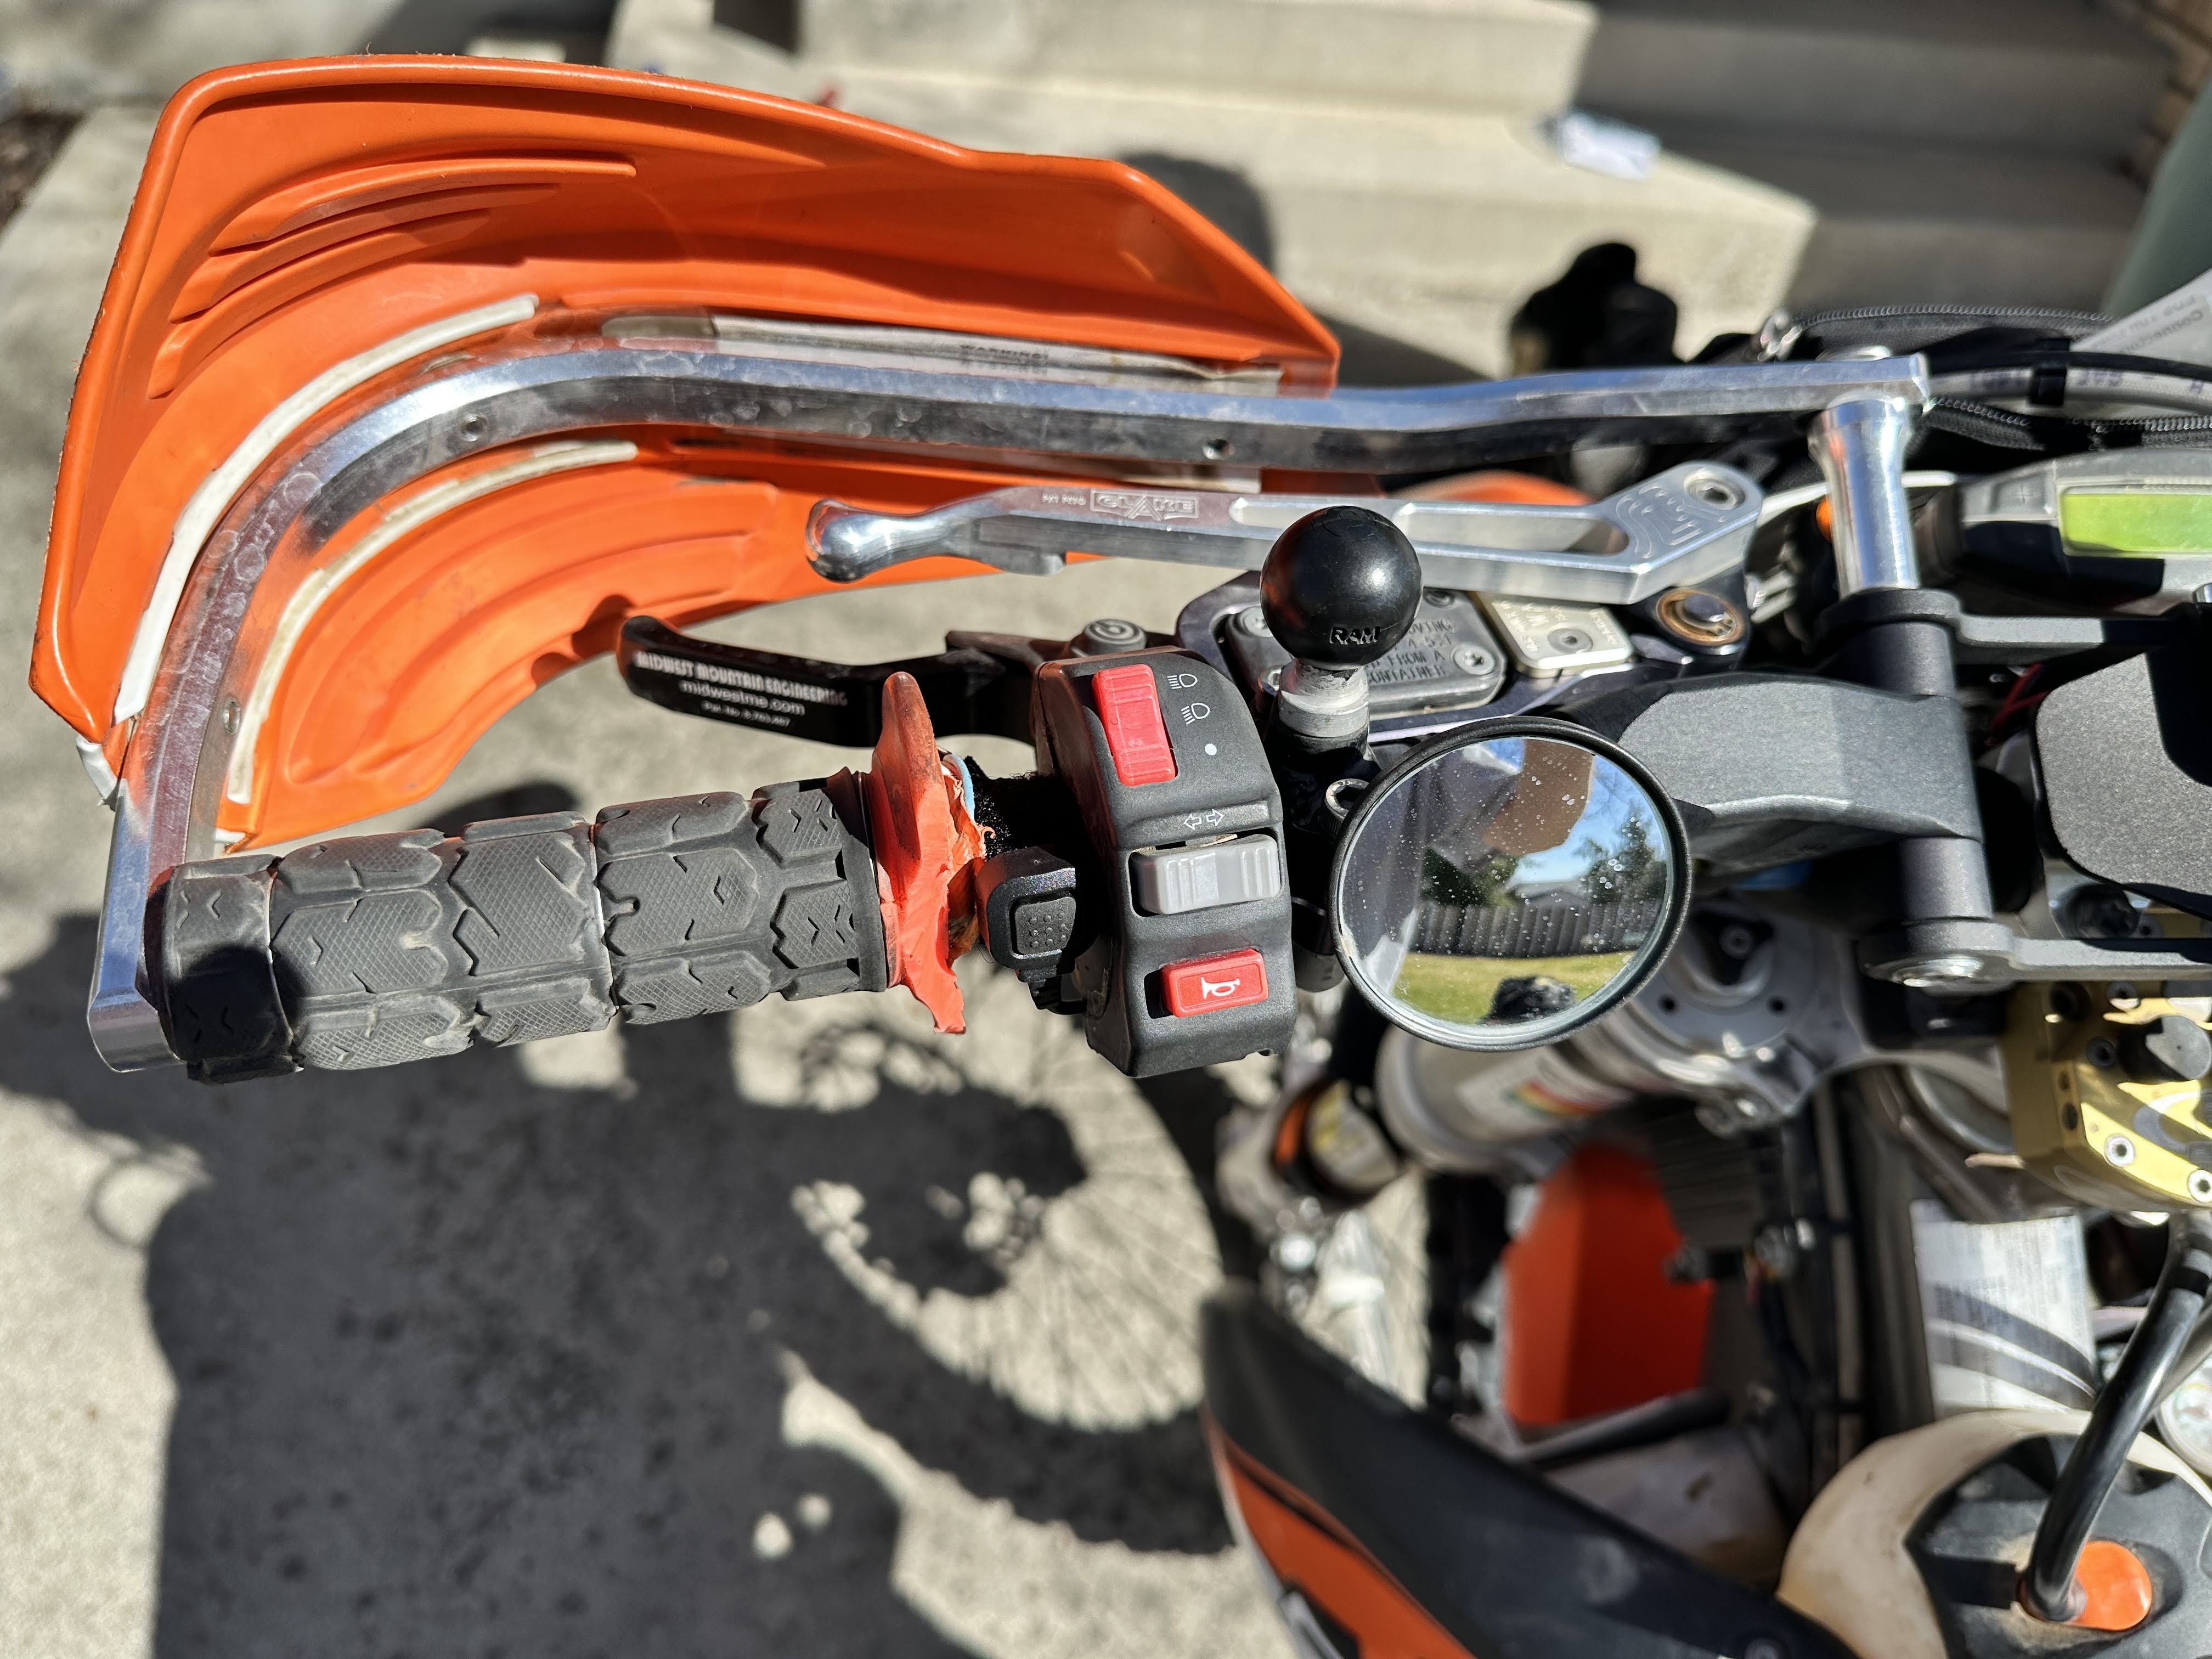
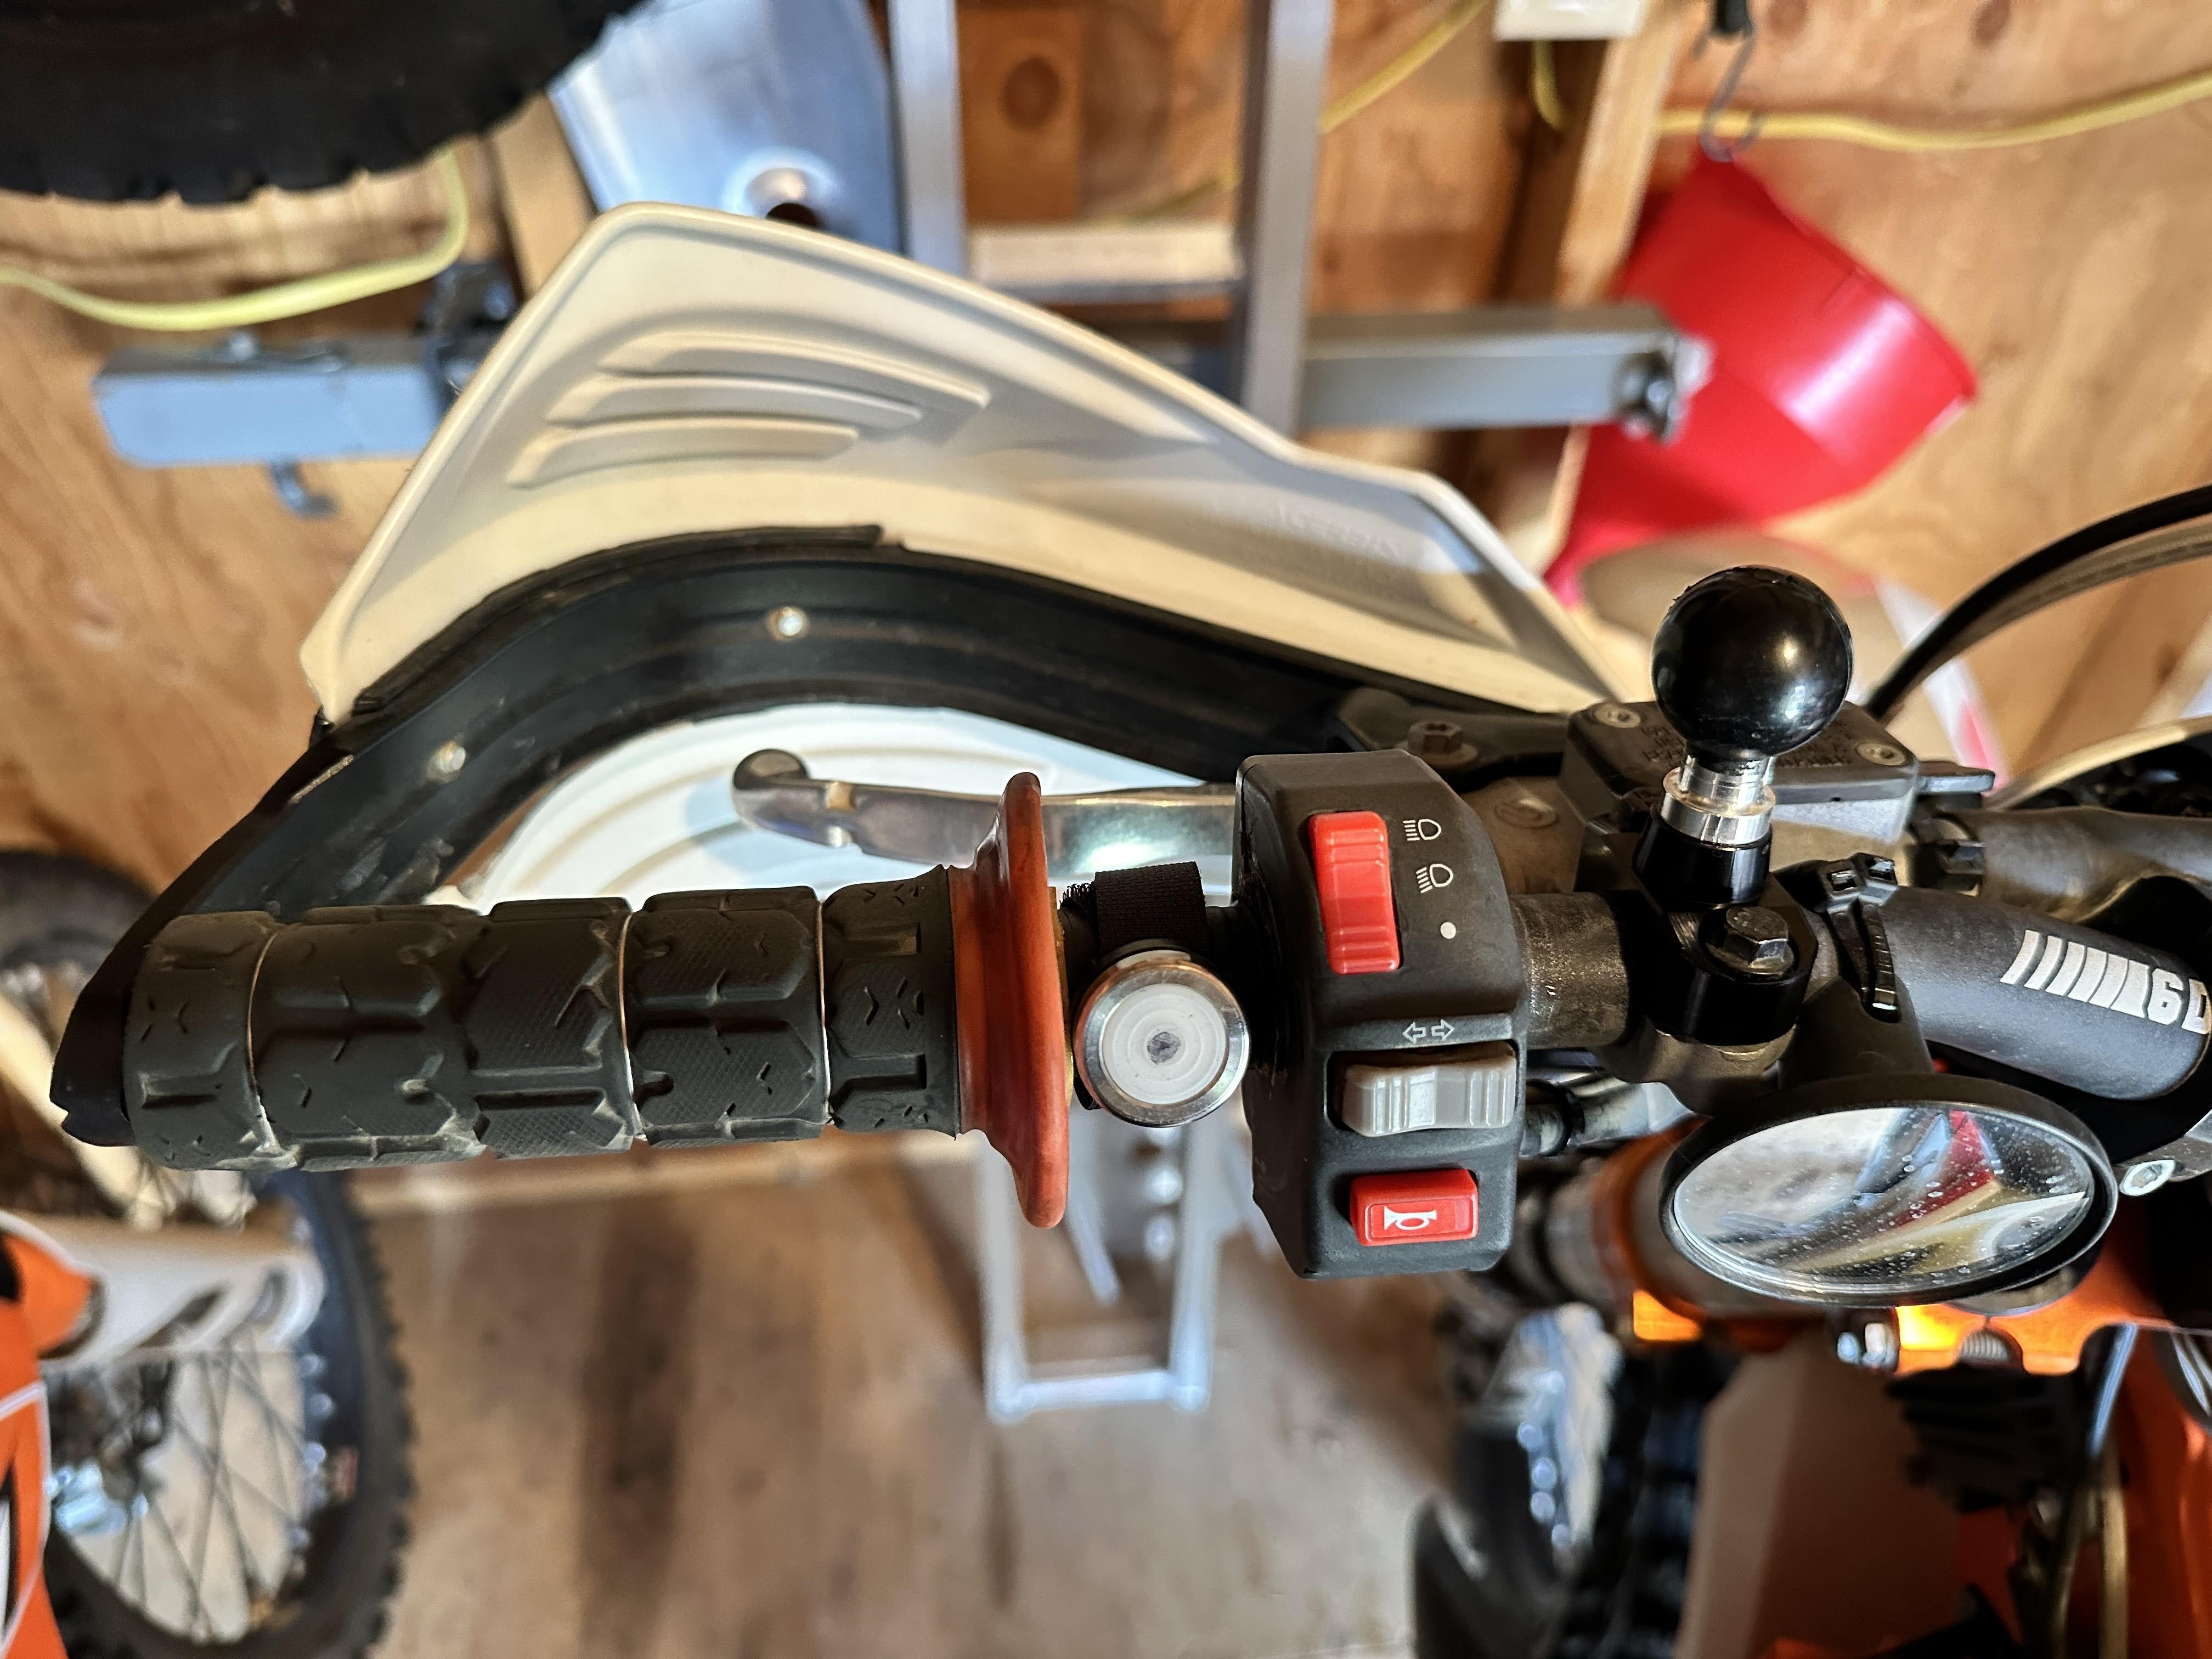
Here is this small button mounted on my crowded handlebar. This is convenient, but requires that you also carry the radio on your handlebars. Another option would be to mount this button on your shoulder strap so you can carry the radio inside your backpack.
Budget Option
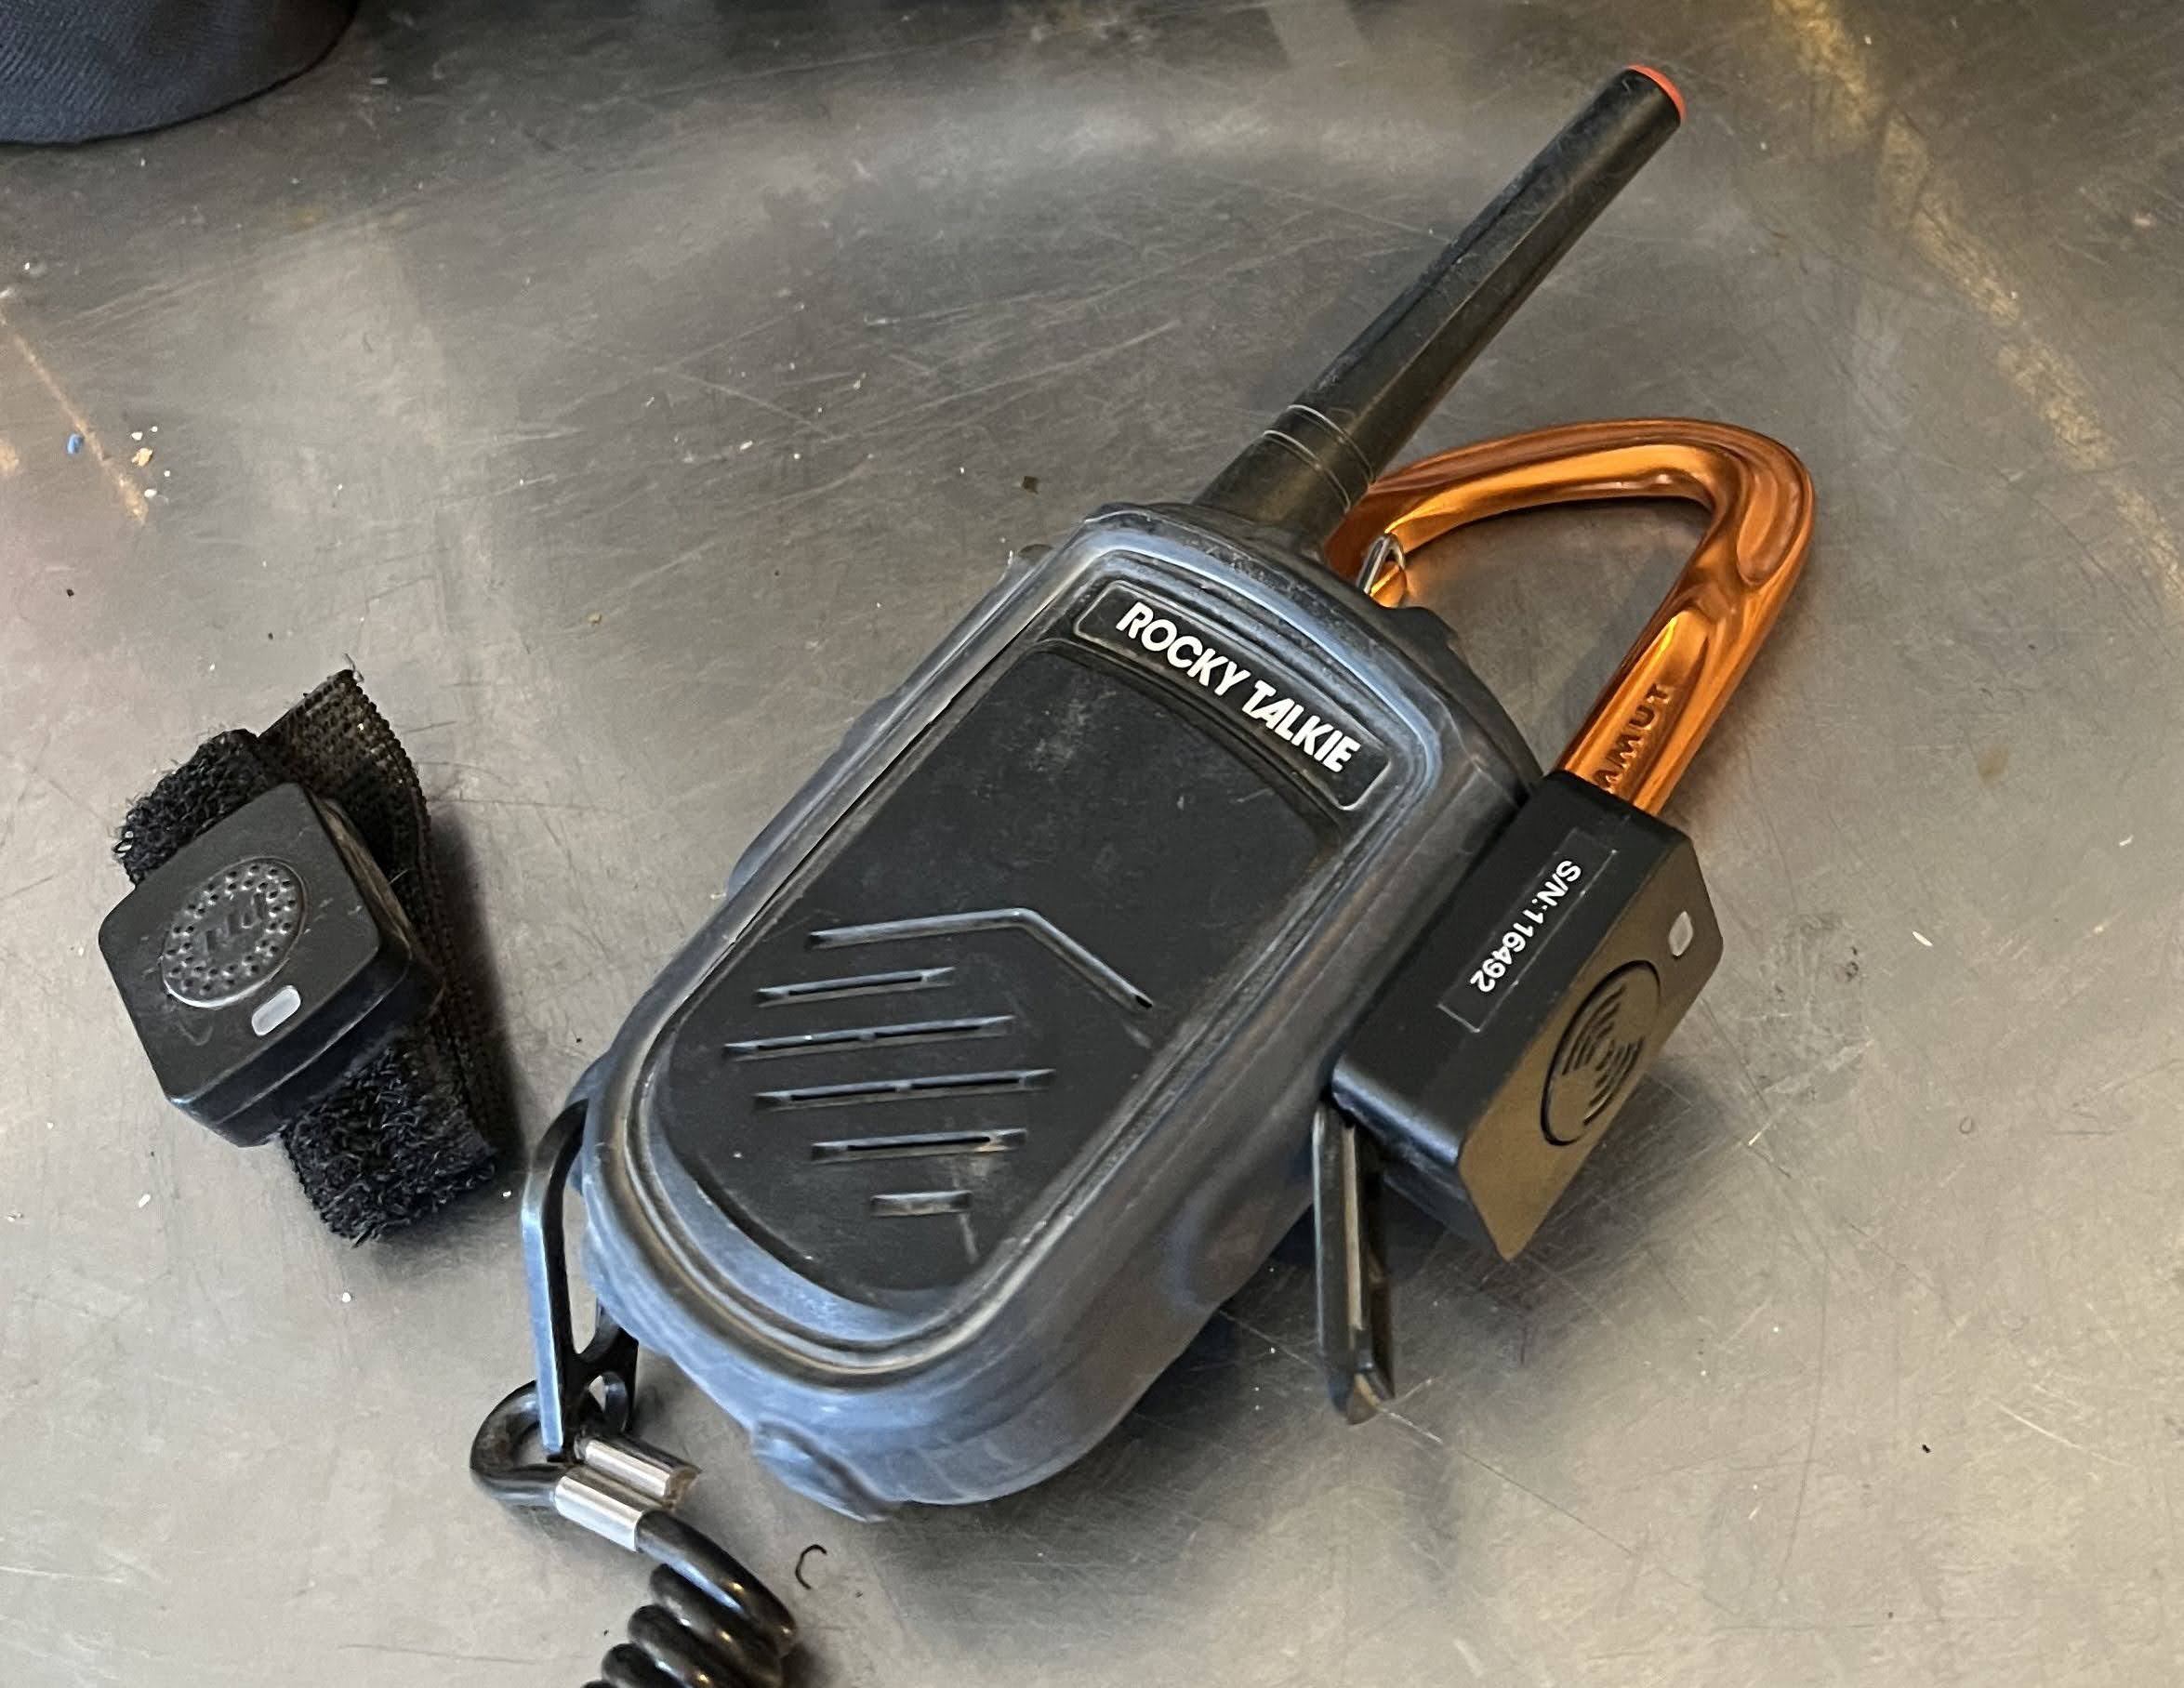
If you already have a radio, the cheapest solution is to purchase a Bluetooth adapter that is compatible with your radio. Here is an example of a $40 adapter for a K1 (Kenwood) style radio. It also includes a Bluetooth PTT button. We tested this with the Rocky Talkie Mountain radio, but it should work with any K1-style radio.
This low-cost approach works quite well, but there are a few drawbacks;
If you separate the radio, PTT, or headset beyond the Bluetooth range, the devices will disconnect. They will not automatically pair once back in range, so you may not realize you lost radio functionality.
In addition to charging your radio and headset, you need to remember to charge the adapter and the PTT.
Long term reliability is not yet known.
Easy To Use Option
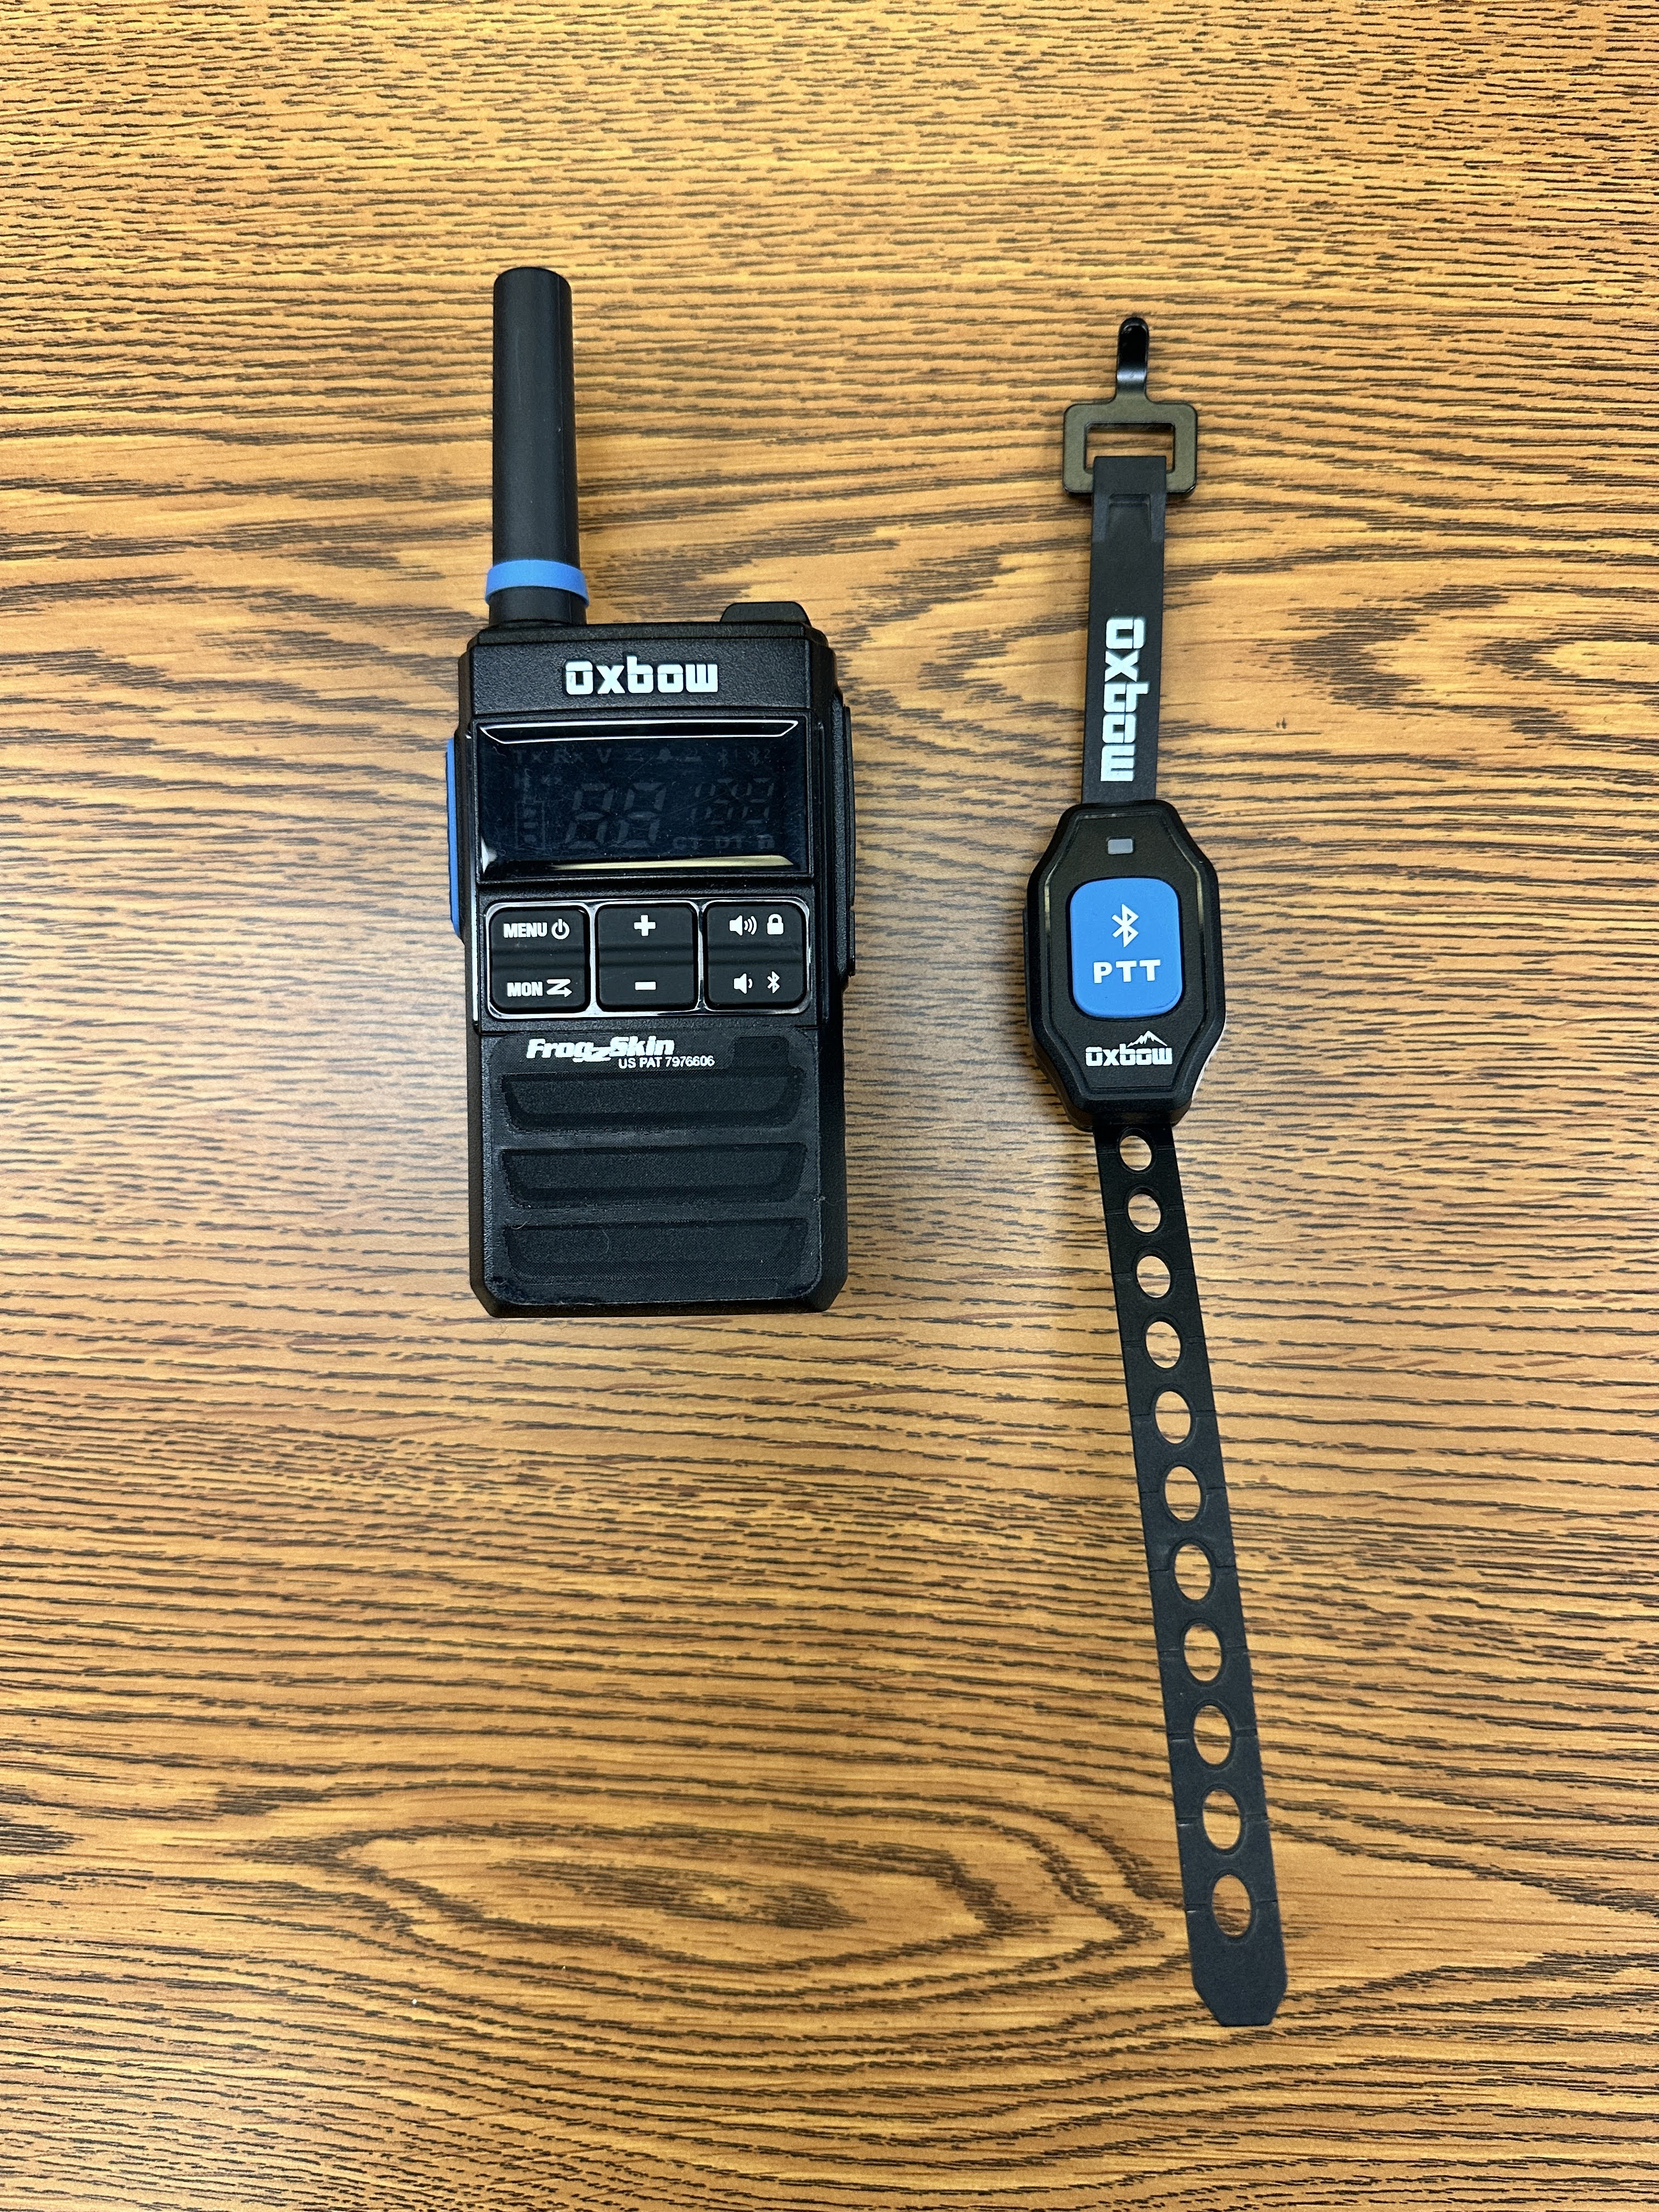
If you want a more integrated solution that is very easy to use, consider the Oxbow Renegade X Bluetooth radio and PTT. These are high quality products designed specifically for motor-sports. They are very easy to use, but currently have to pair them to your headset every time you power them on. Oxbow is working on a firmware update that will allow them to automatically reconnect after a power cycle. They also hold the channel open for 28 seconds after a radio transmission, so if you like to listen to music, you will have to wait the 28 seconds before your music will begin playing again.
These are FRS radios, so no license is required to use them.
The cost is quite high at around $180 for the radio, plus another $30 for the PTT button.
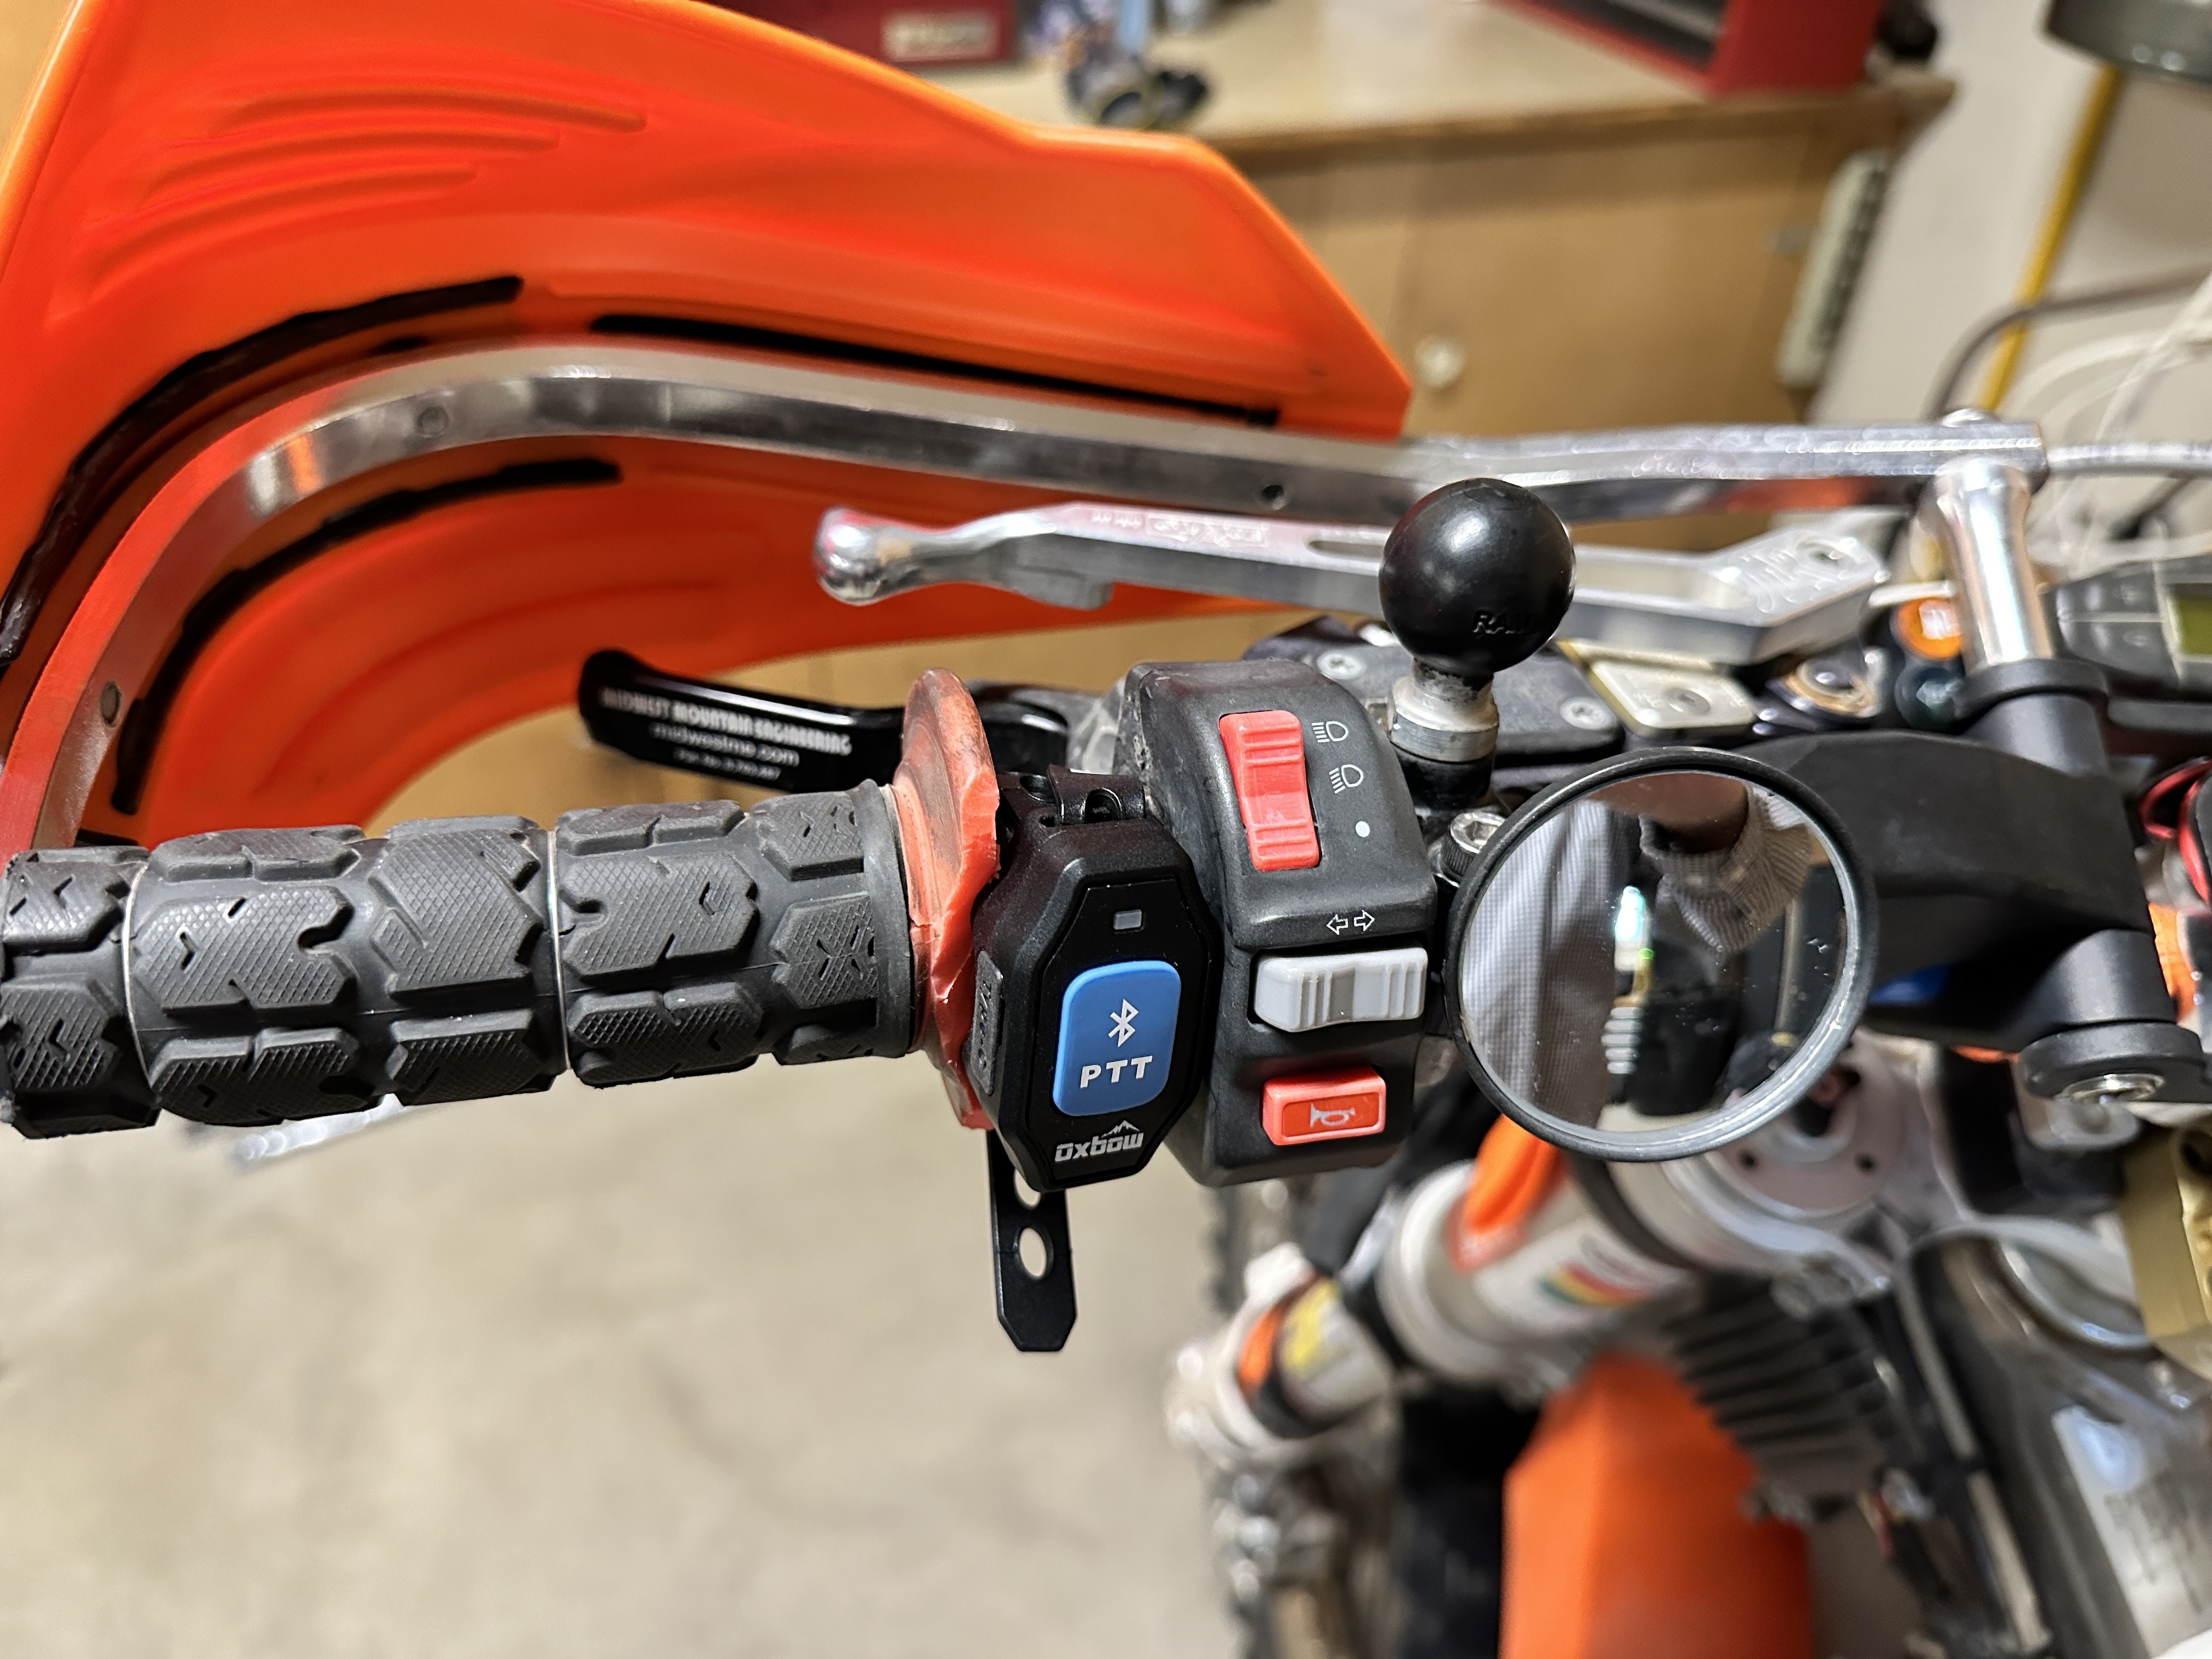
The PTT is fairly large, so it may be difficult to fit on your handlebar if you have a lot of controls like I do. I had to trim my hand grip to get it to fit.
Robust 5-Watt Option
For a little less money (around $140) you can get a more sophisticated radio. The BTech GMRS-Pro is an excellent GMRS radio with 5-watts of transmit power instead of 2-watts like many other choices. This is a programmable radio, giving you control over many features and capabilities of the radio. It is very flexible and tunable, but fairly complicated to set up. If you are not afraid of learning to program the radio (via an app on your phone as well as menus on the radio), this is an excellent choice. If that seems overwhelming to you, you might consider the Oxbow solution.
This radio will give you more range out in the field, and it will automatically connect to your phone and headset when everything is powered on – once you get it set up and paired the first time.
Furthermore, it supports dual-watch. This allows me to allocate one channel for communicating with my family, and a second channel to communicate with the larger group. This way our family chats don’t bother everyone else.
The PTT button is also very high quality. It is waterproof and runs off a small watch-like battery so you don’t have to continually recharge it. It costs around $28. It is slightly larger than the wired PTT, but much smaller than the Oxbow button.
Note that if you wish to use a K1 wired PTT button, you will need to buy a BTech K1 adapter cable for around $20.
Radio Comparison
All three of the radios we tested work. They each have their unique advantages and disadvantages, but they all work. The following table may help you zero in on what would work best for you.
Radio
Pros
Cons
Bluetooth Adapter
Low cost (if you already have a radio)
Two more items to charge Unknown quality Questionable PTT May not work with wired PTT
Oxbow Renegade X
Ease of use Integrated solution Quality products No FCC license required Good PTT
Expensive 28 second pause after transmission
BTech GMRS-Pro
Reasonably priced if you need a new radio No extra items to charge Full featured Dual-watch 5-watt for increased range Waterproof Excellent PTT
May be challenging to program
Radio Comparison
Conclusion
Bluetooth radios are a viable method of communicating while operating motorized vehicles. Depending on the terrain, you may get well over one mile of range.
But to have a full solution, you also need a Bluetooth headset that mounts in your helmet. That will be the topic of my next report.
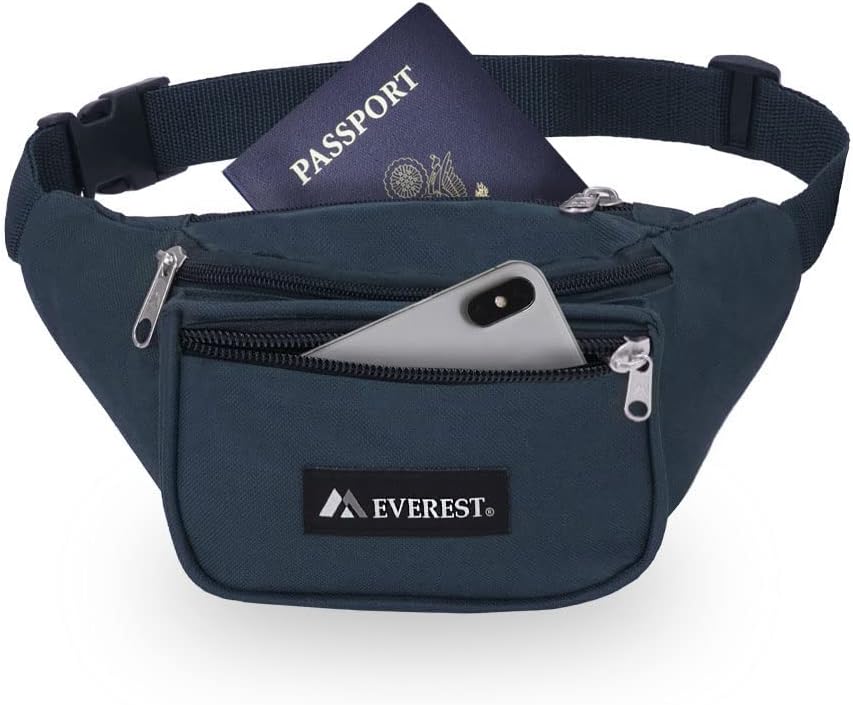
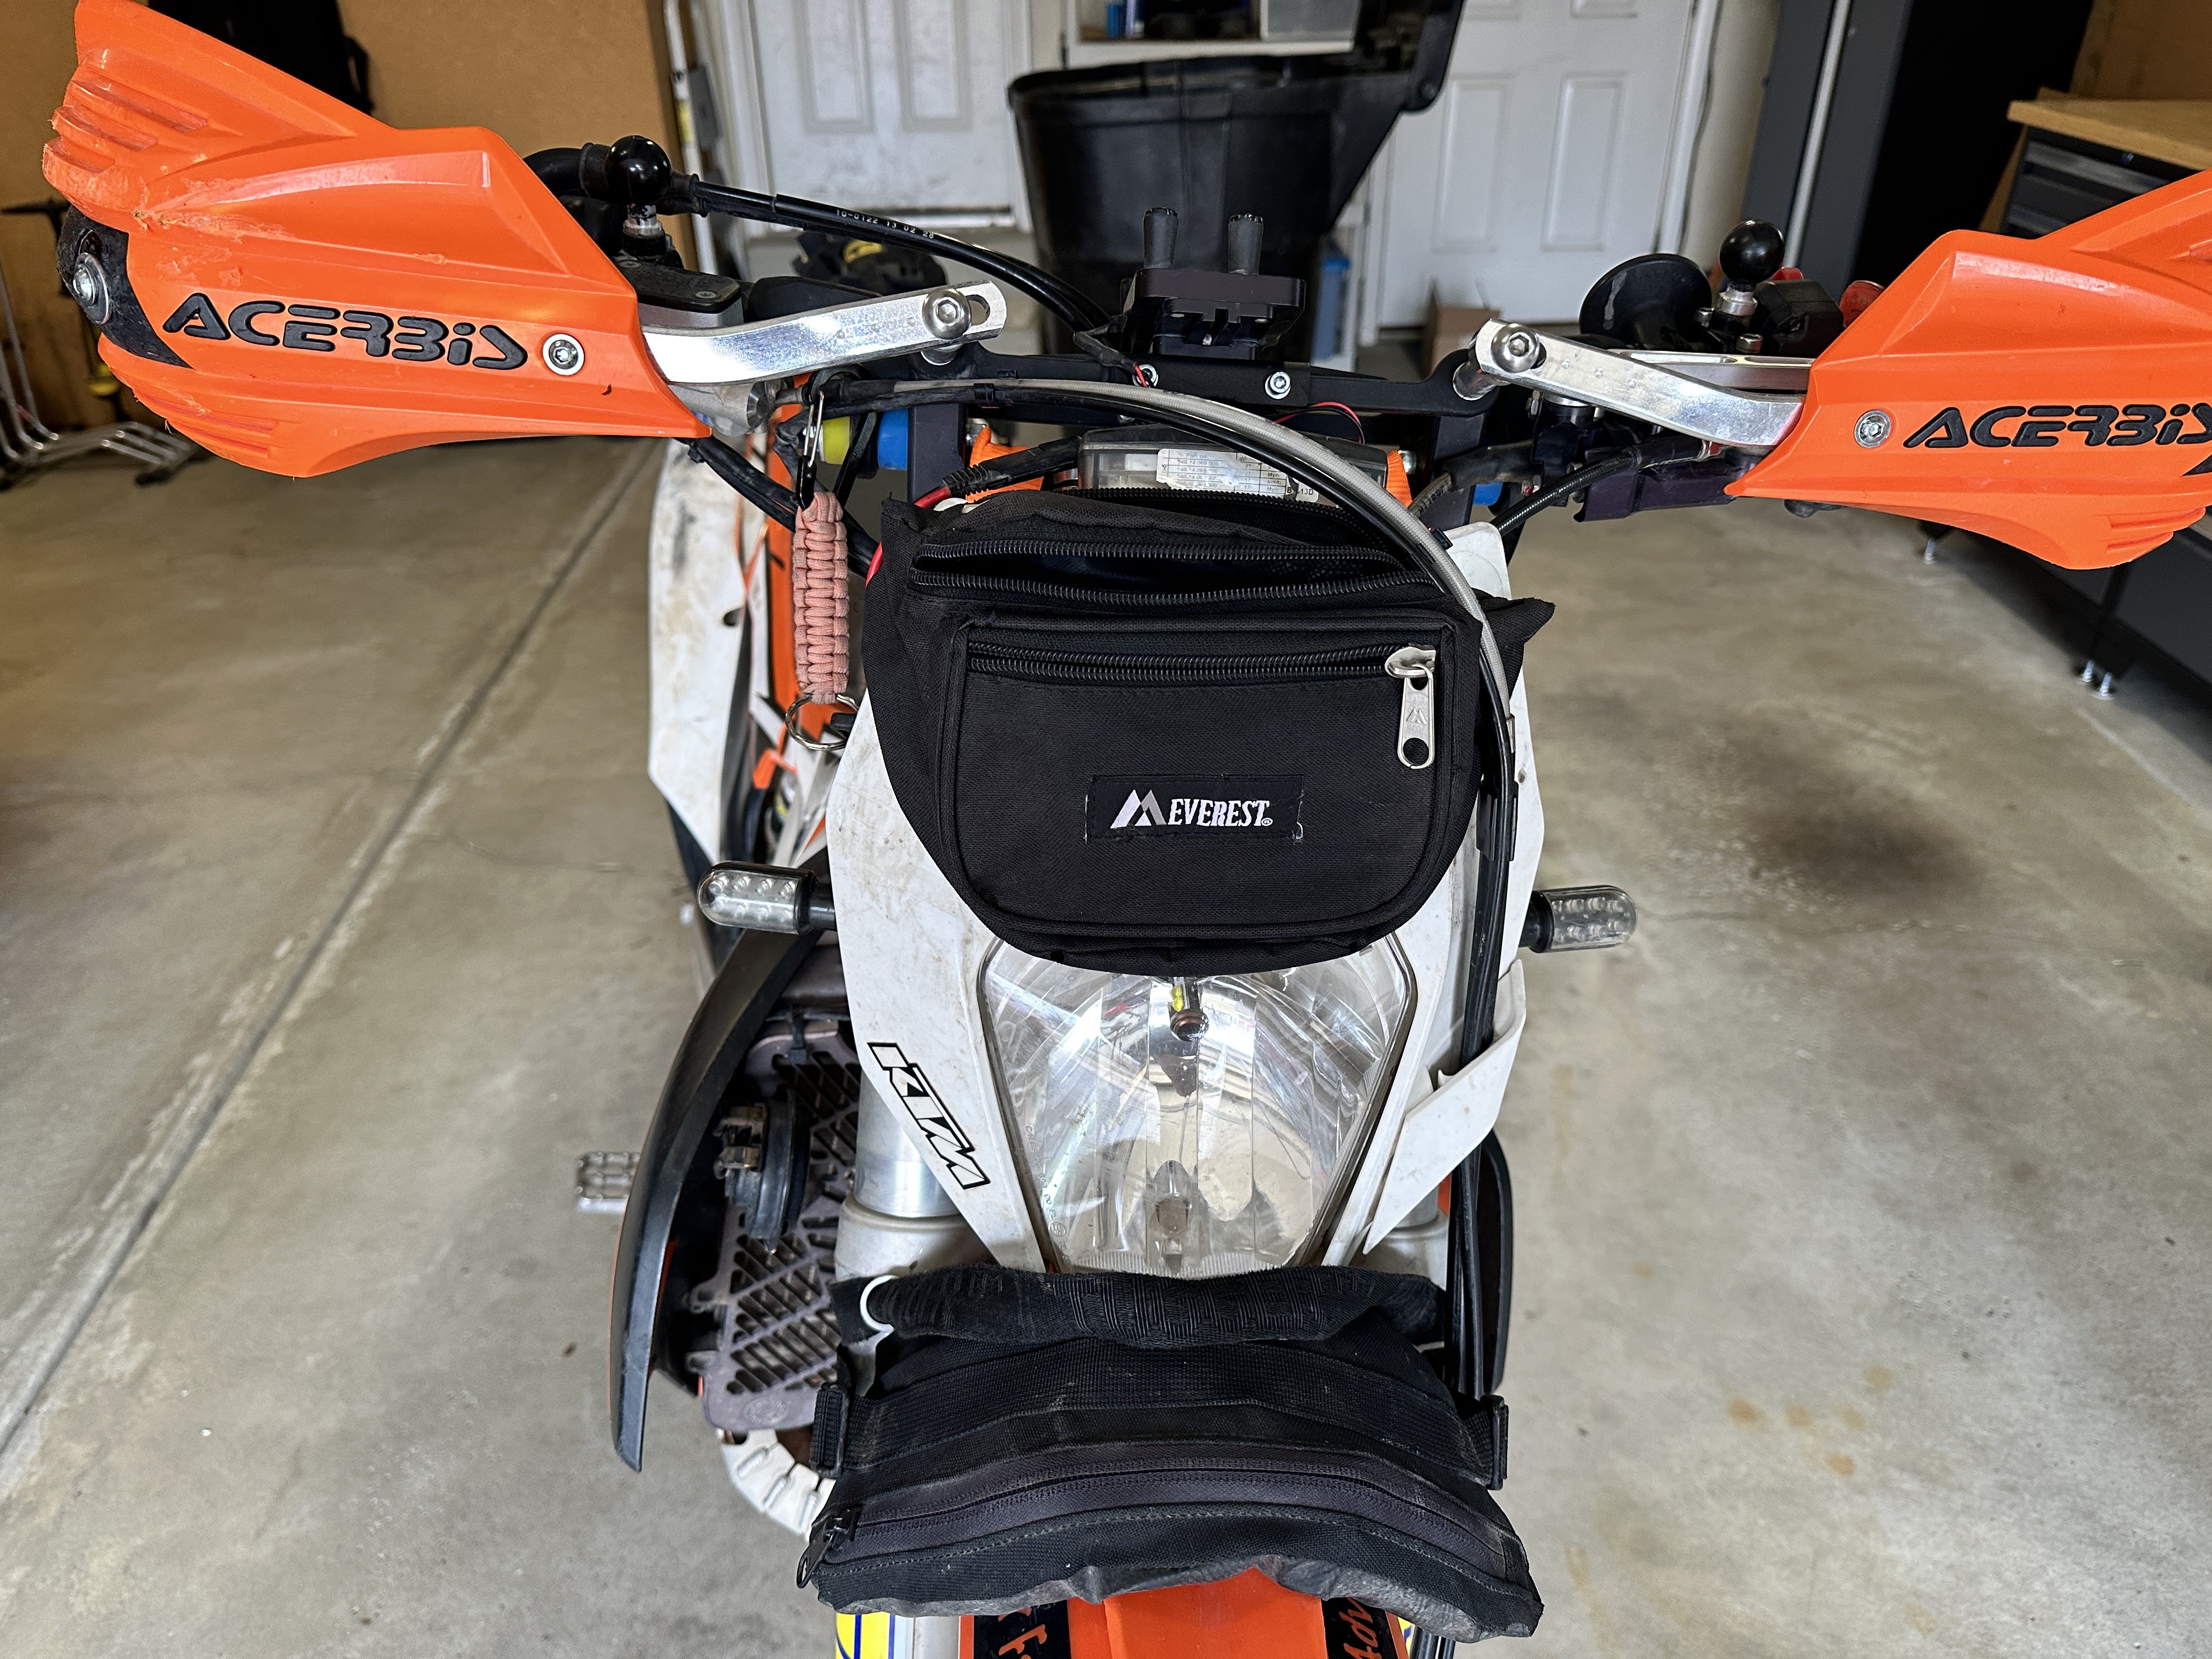
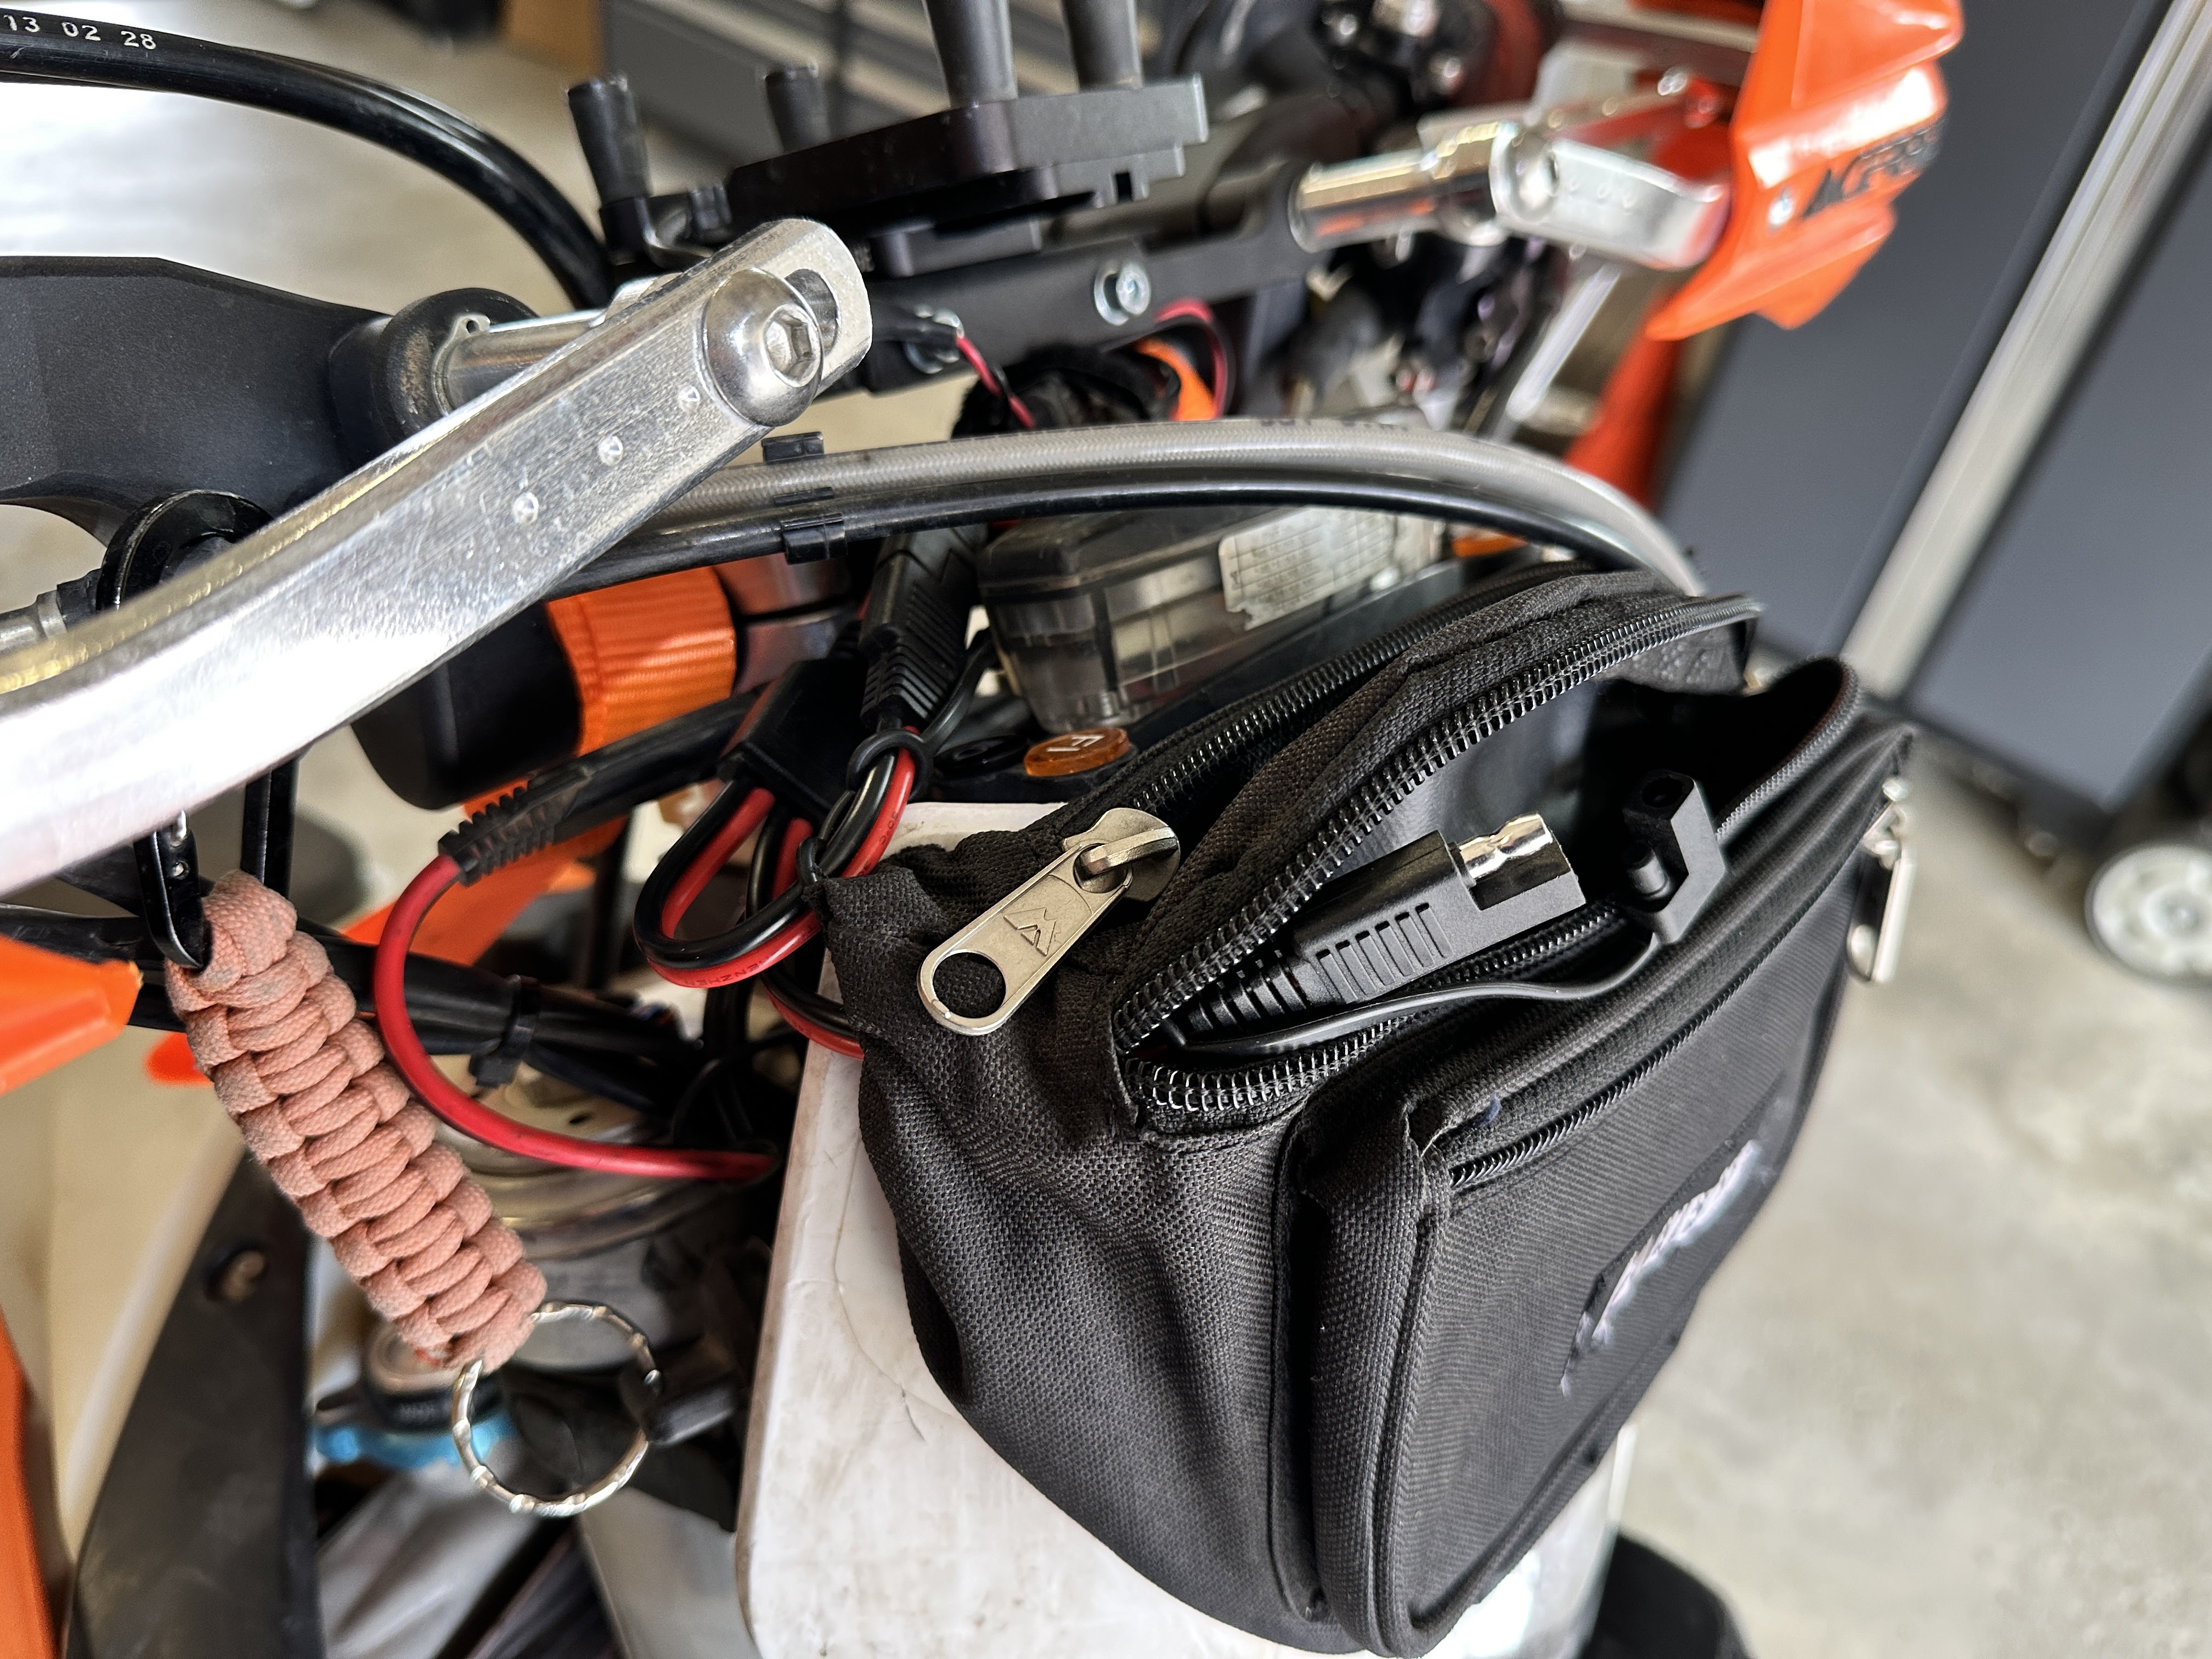
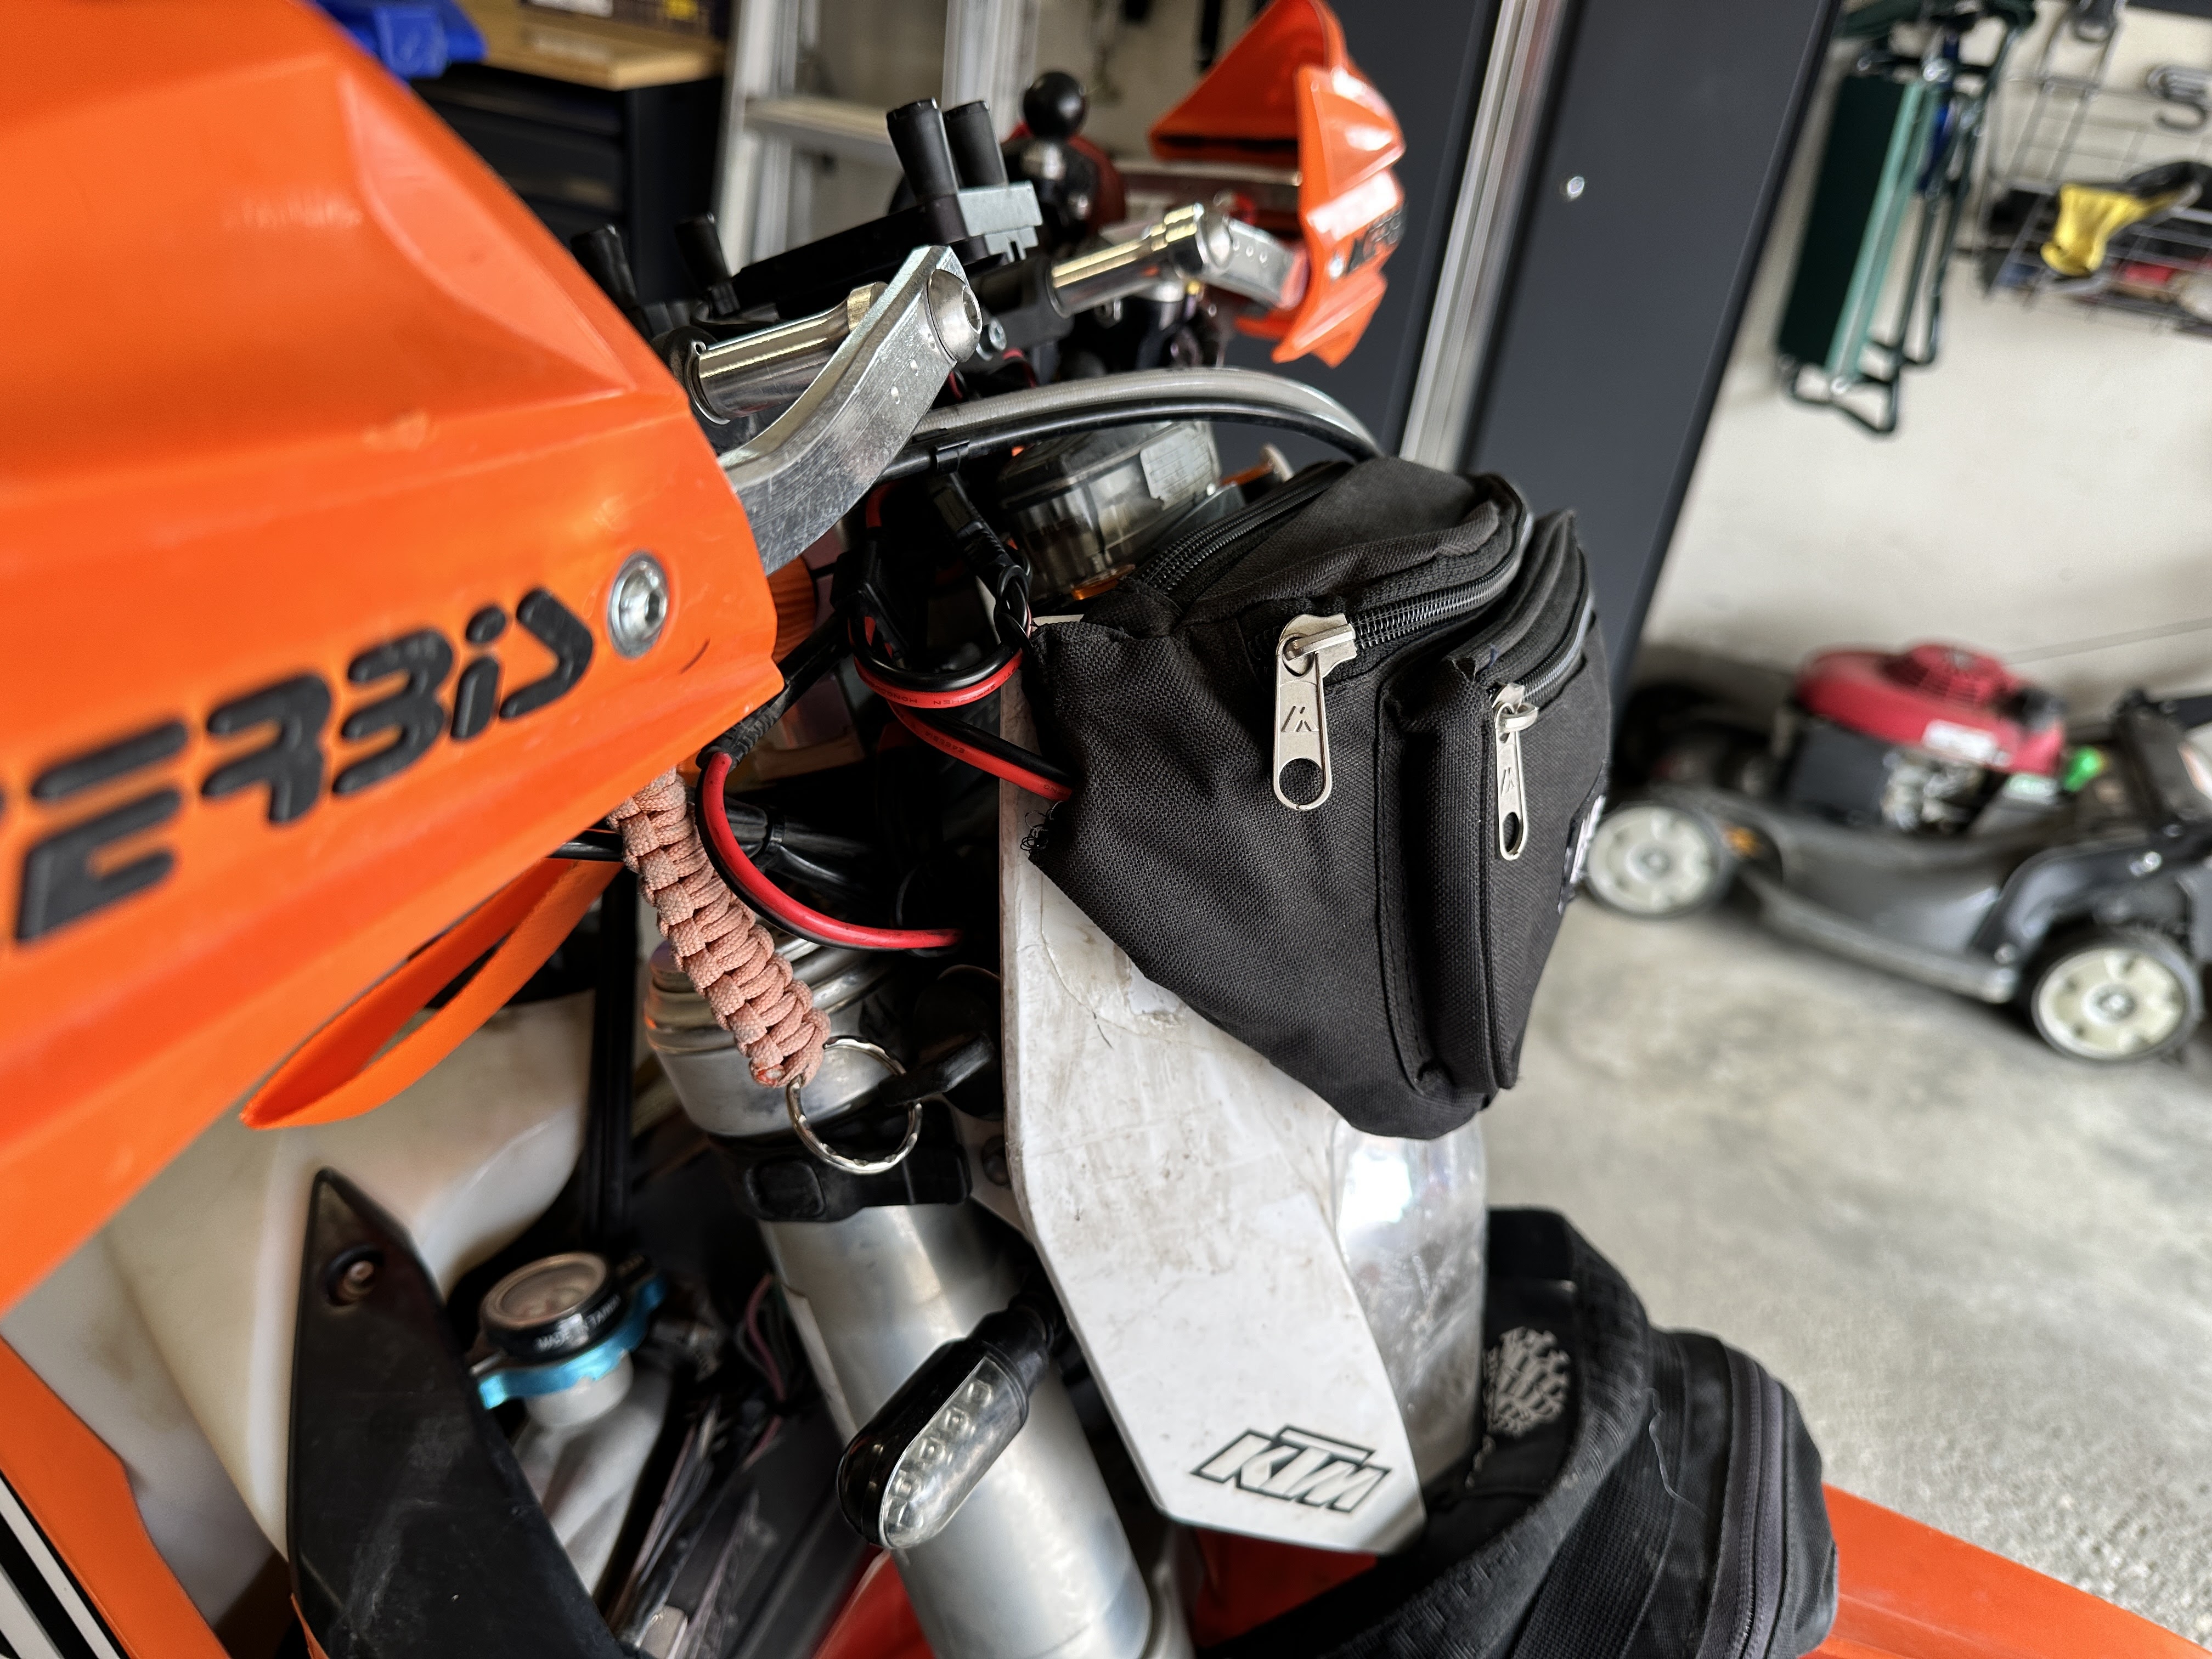
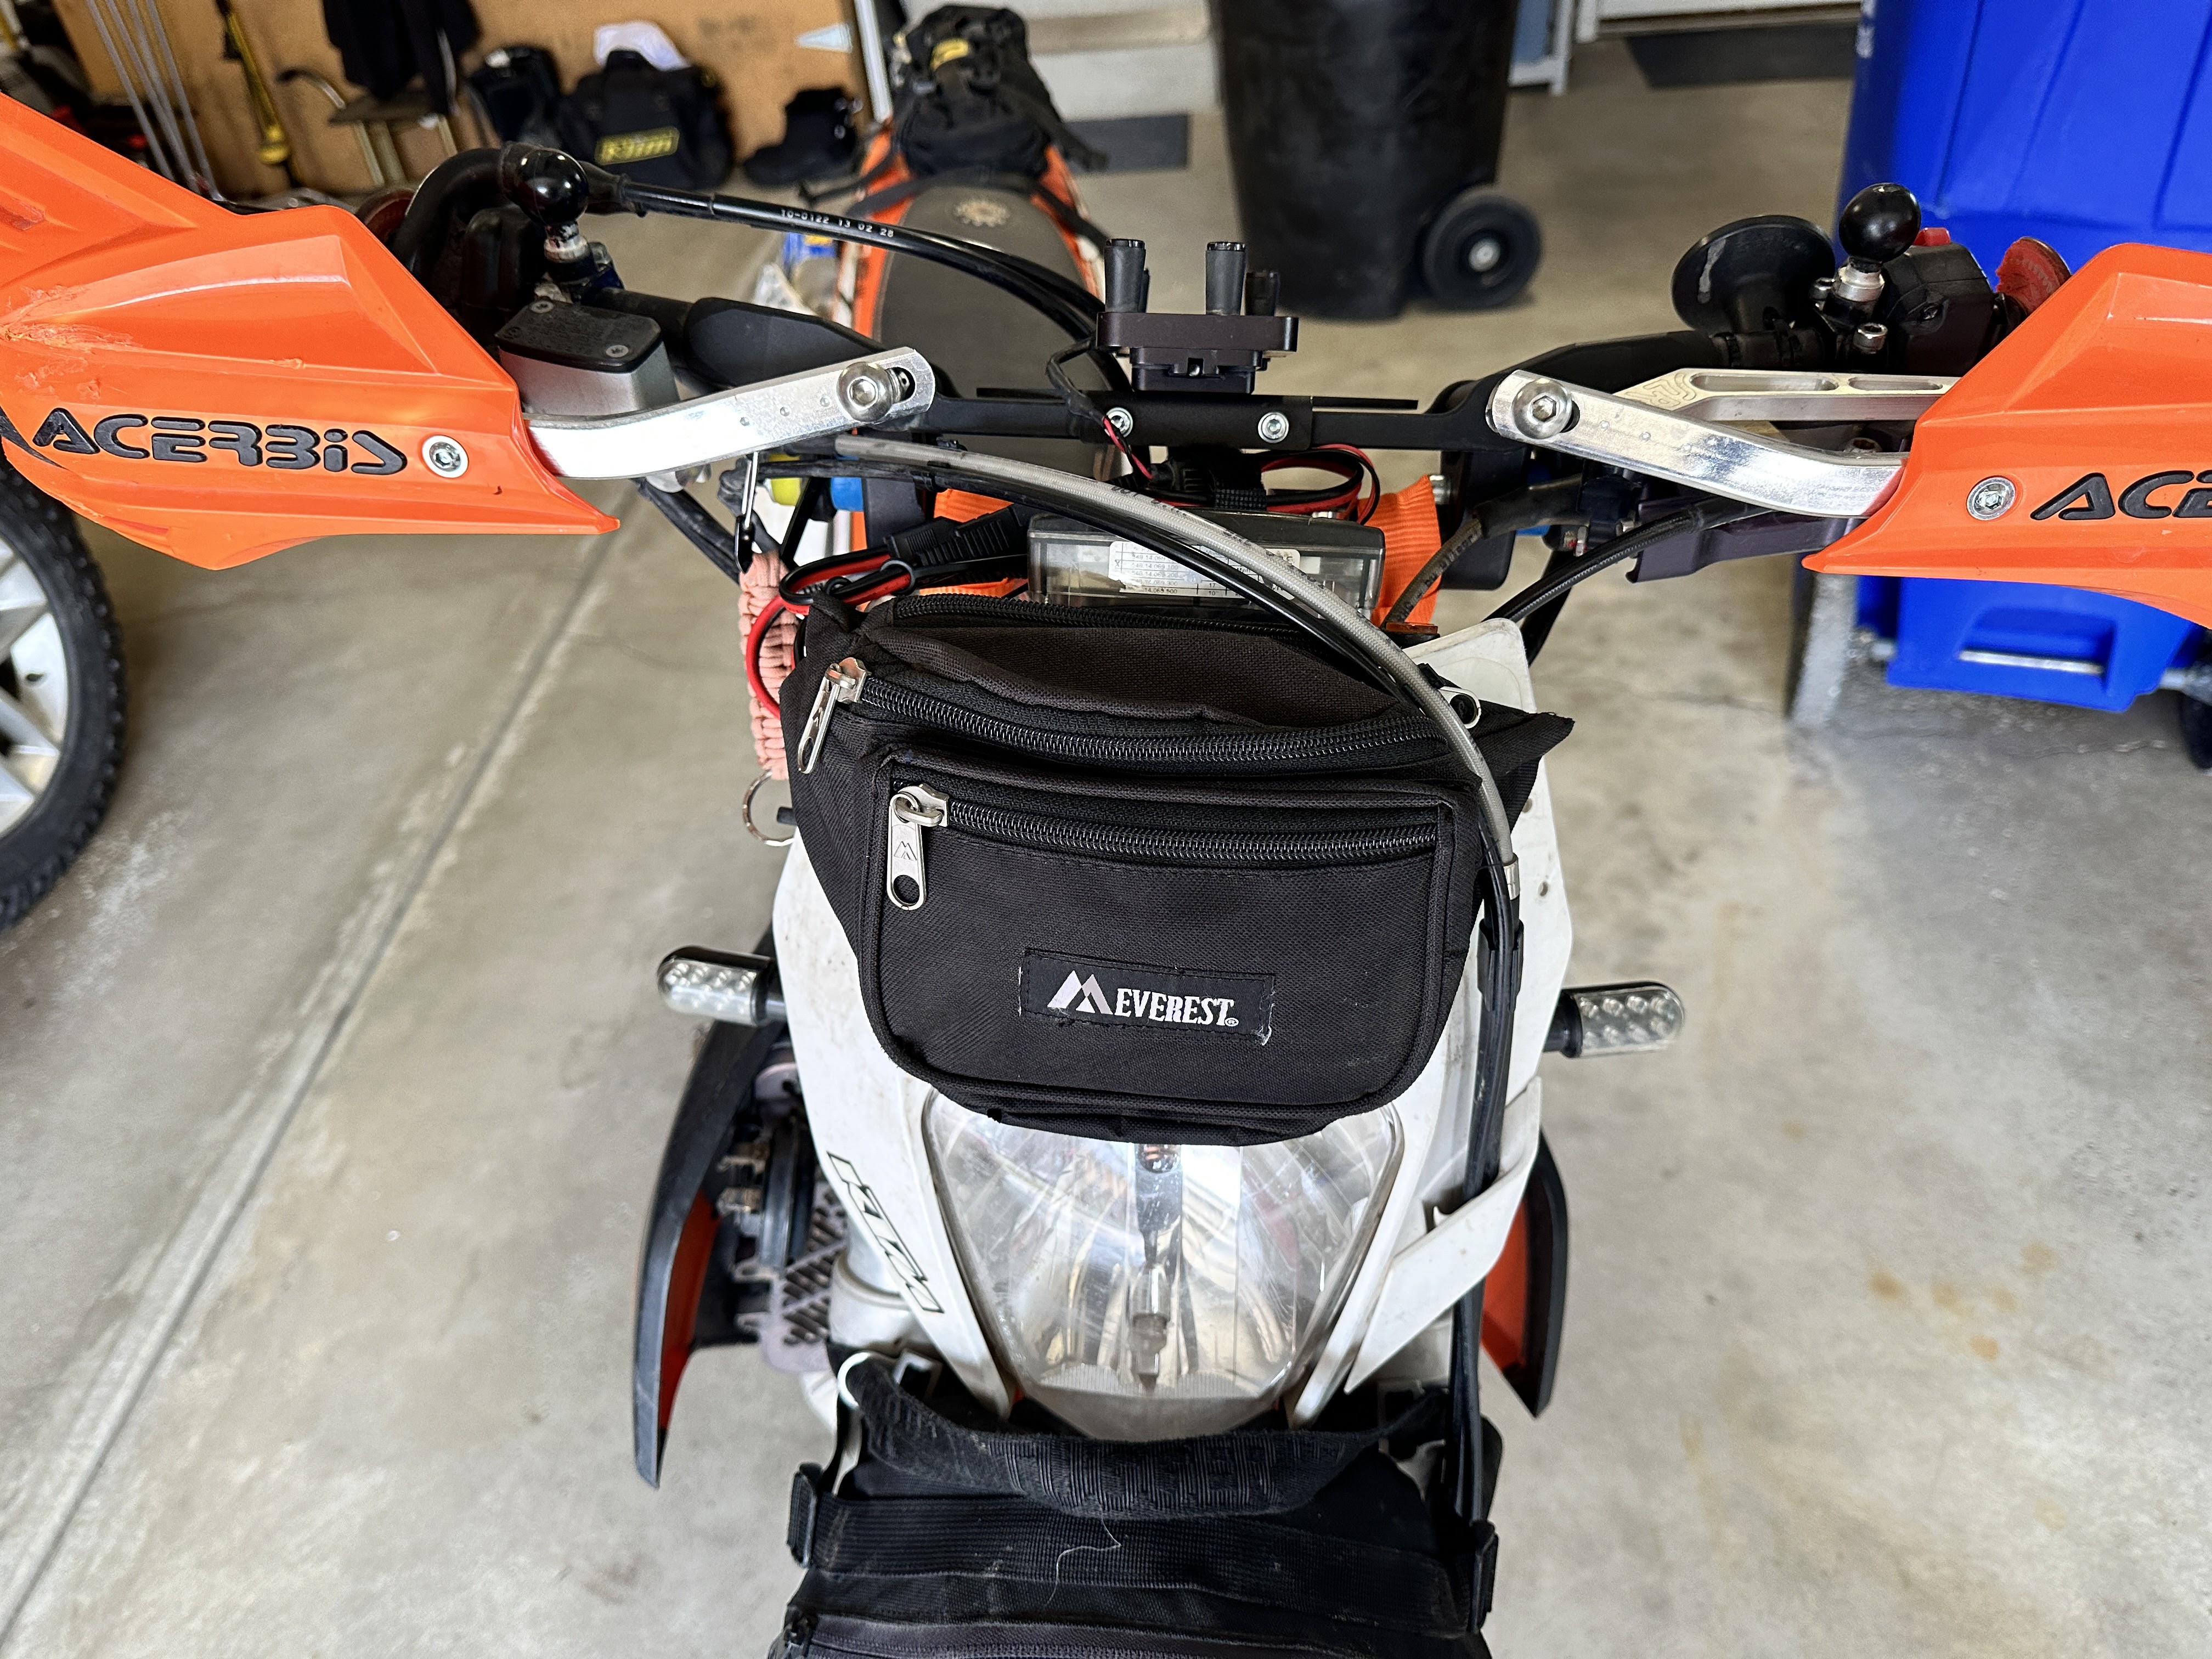
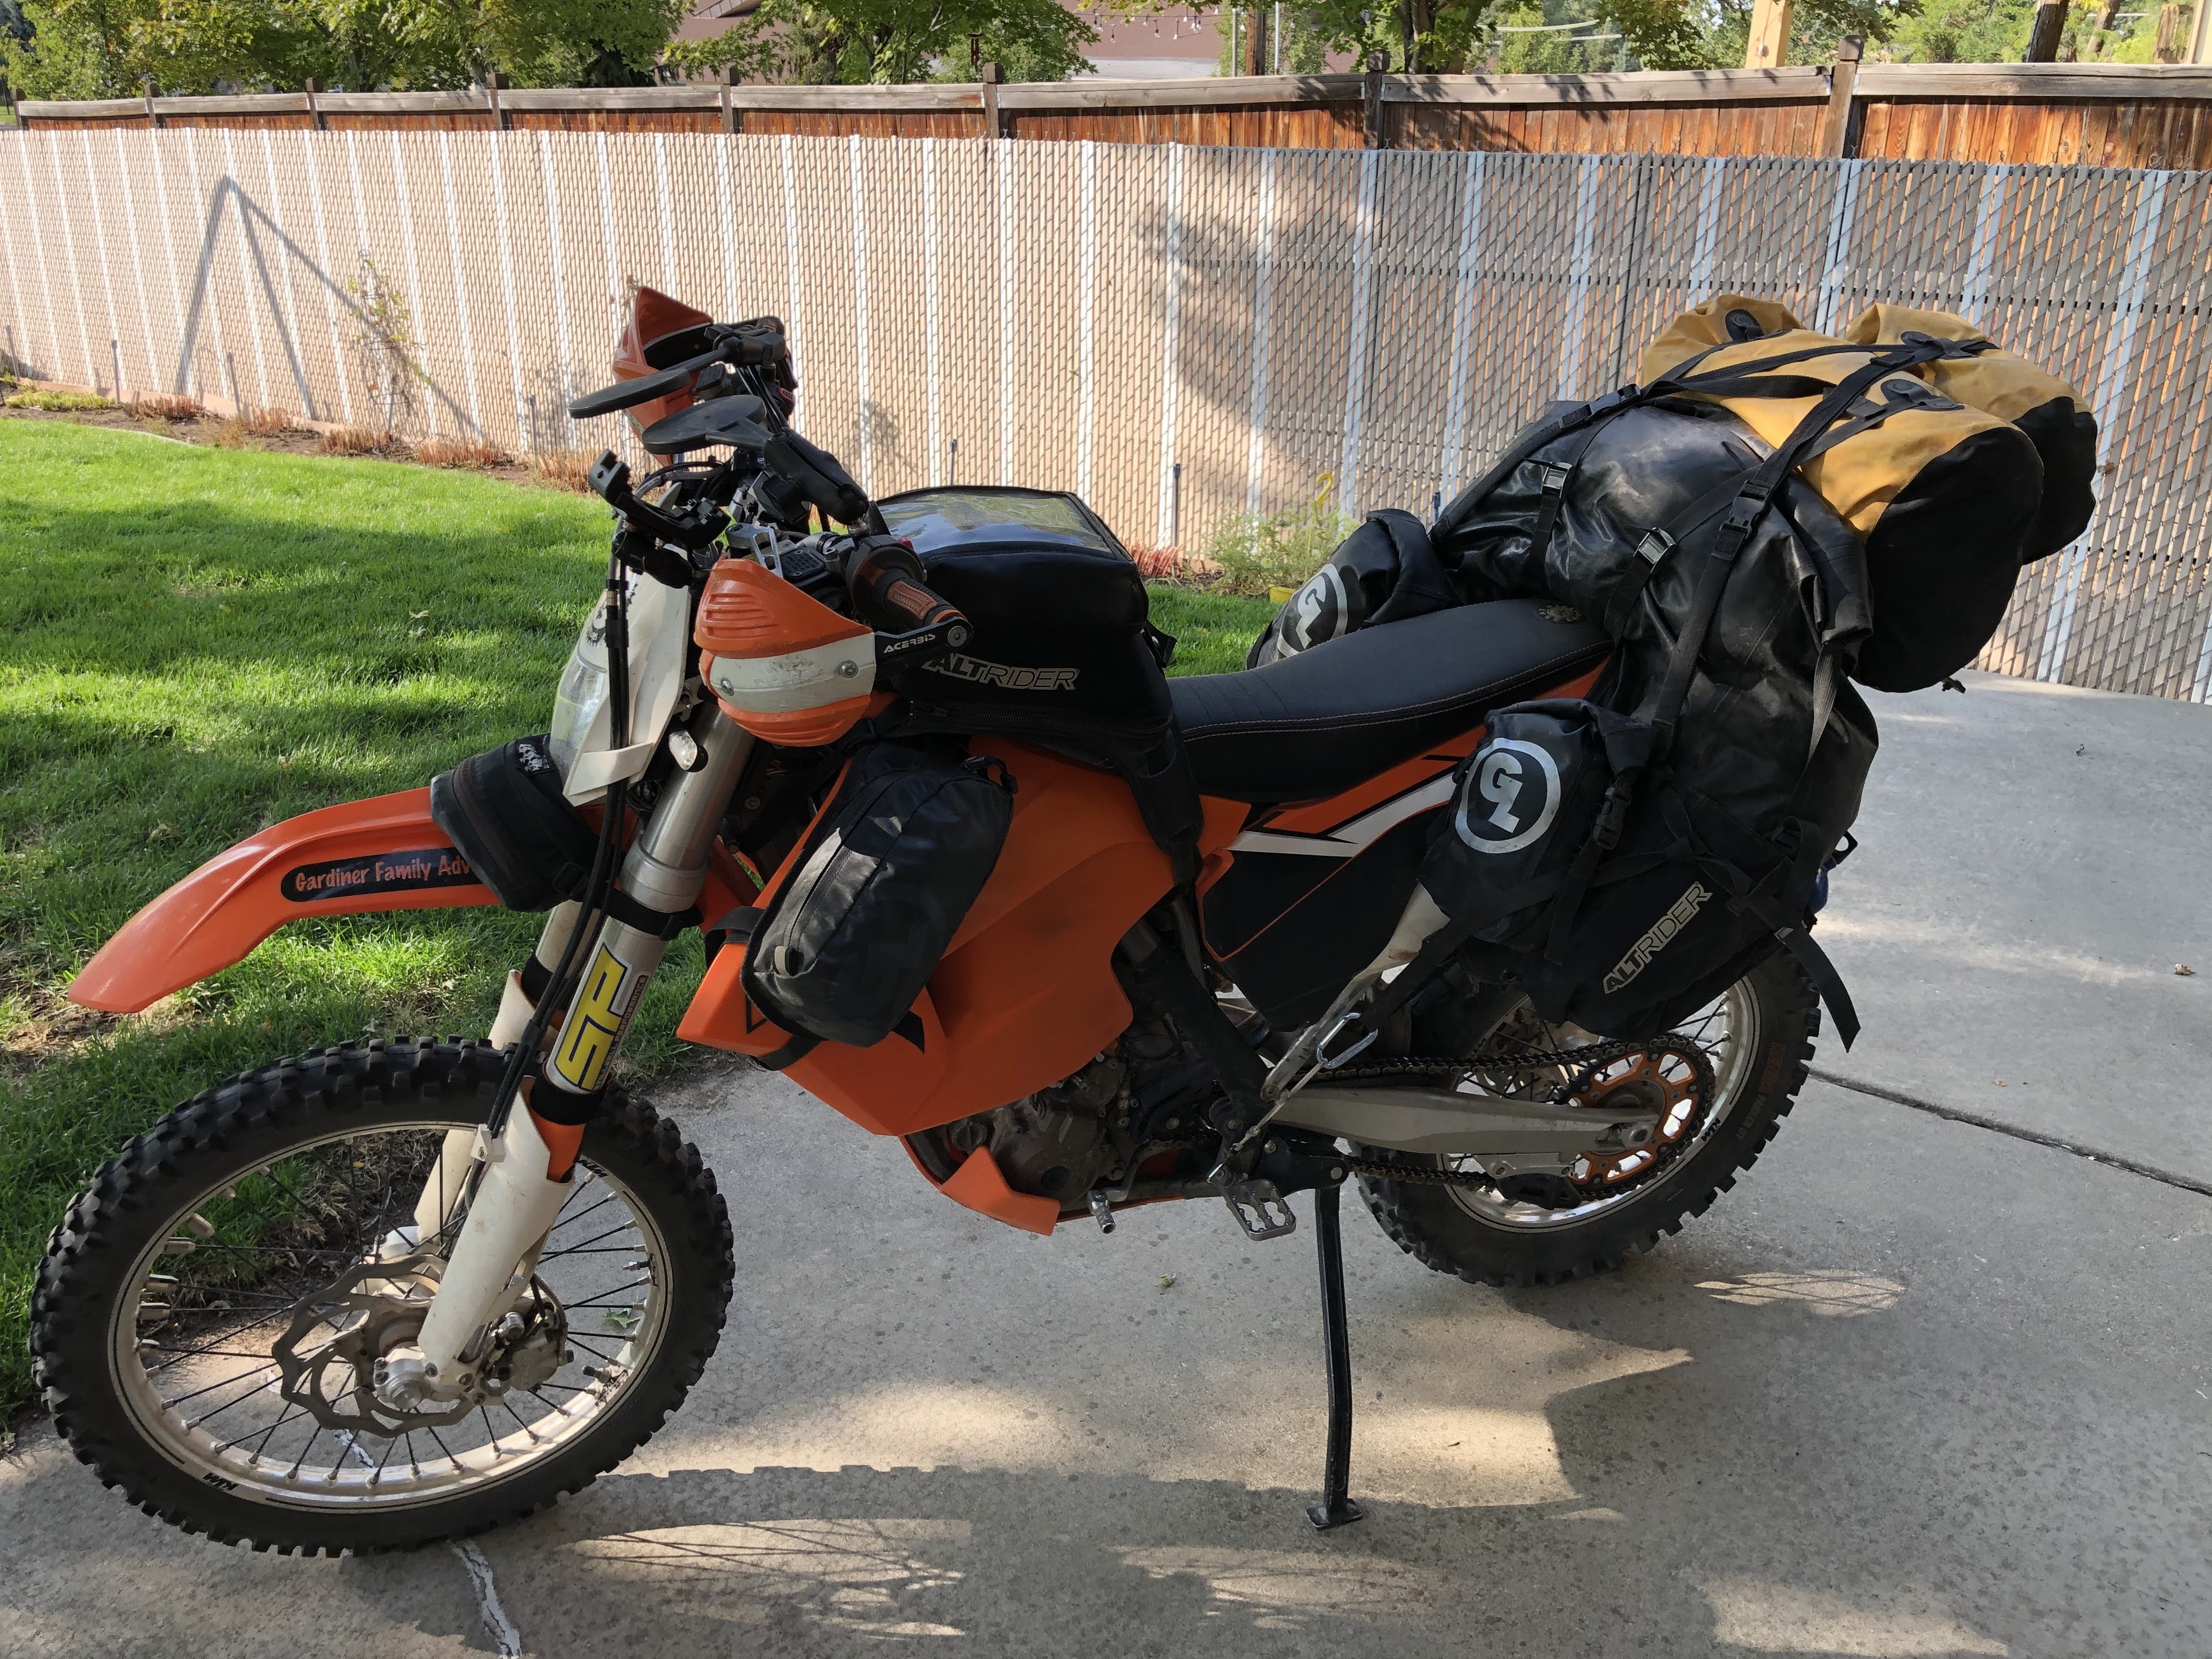
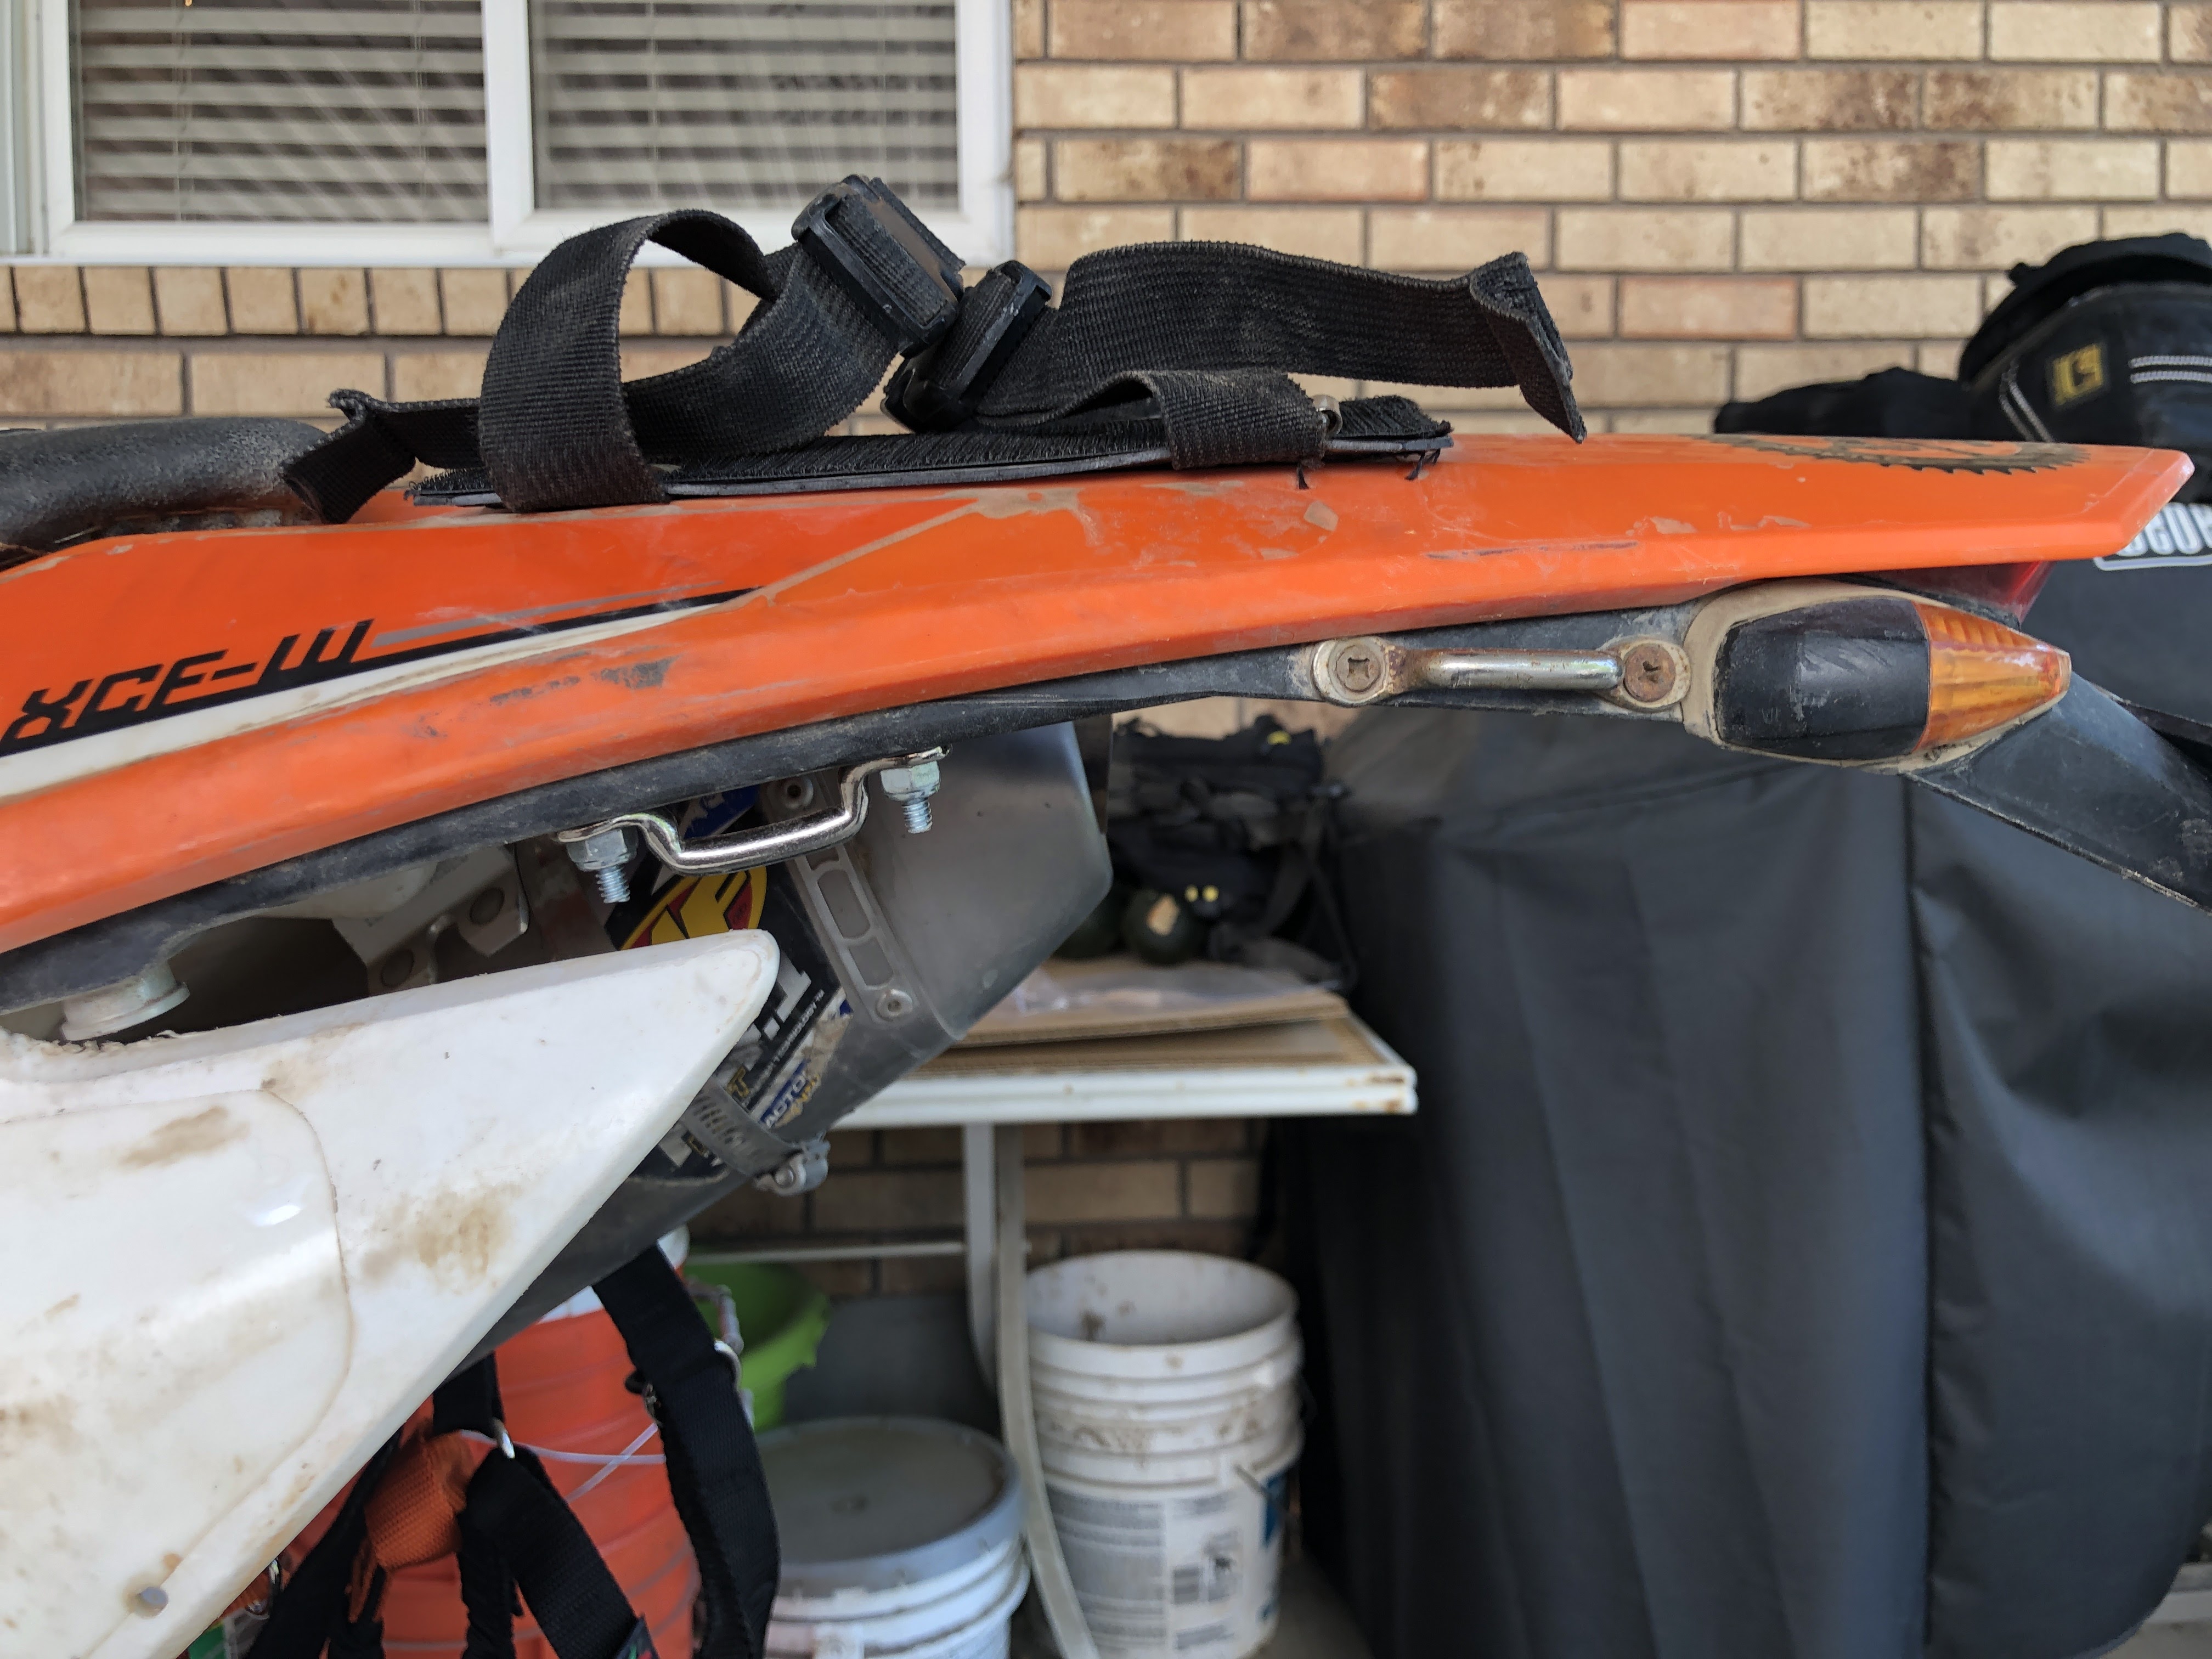
I installed a very low-cost (<$8.00) number plate bag on my dirt bike. This is a low profile bag so it doesn’t interfere with my brake line or headlight. It is perfect for carrying small, light-weight items like a Bluetooth radio, helmet headlamp, quick access tools, first-aid supplies, vehicle registration, phone, etc. I also ran a 12V auxiliary plug into the bag so I can charge devices while I ride.
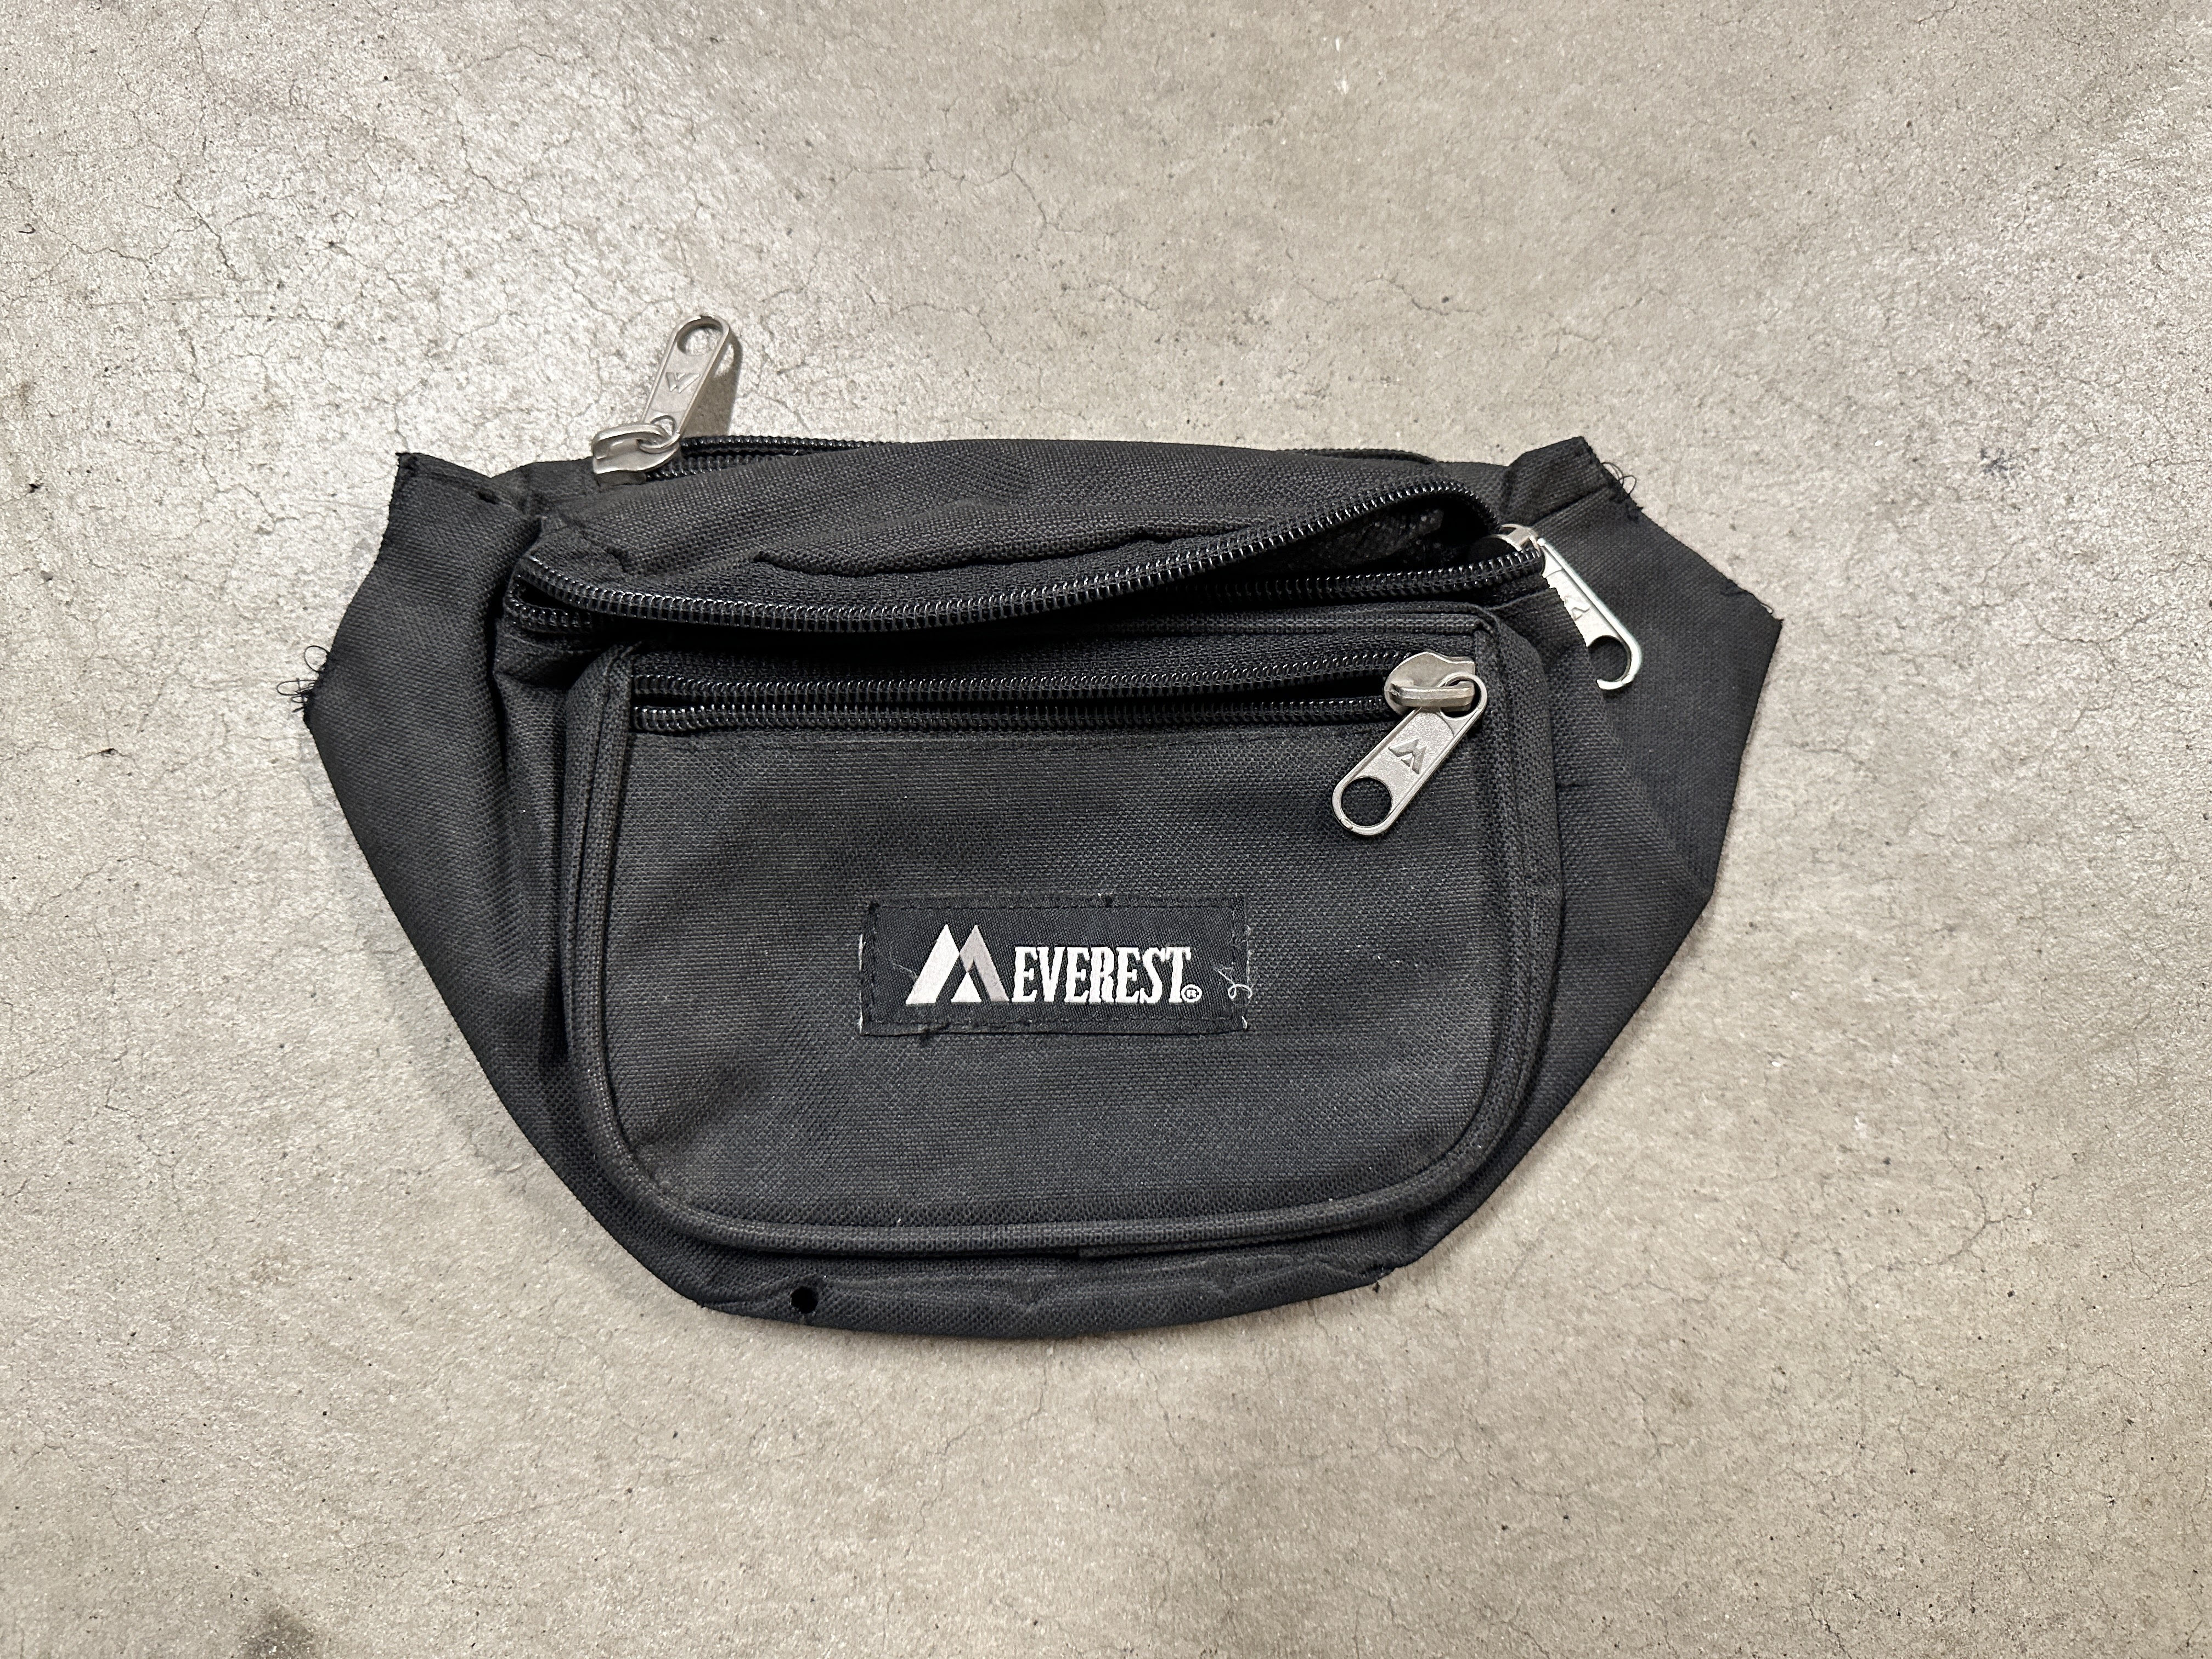
I bought an Everest medium sized fanny pack off Amazon for under $8.00.
I cut off the waist strap but left the holes in the corners so I could feed a charging cable inside the bag.
I then bolted the bag to my number plate above my headlight. I used a soldering iron to burn mounting holes in the back of the bag and drain holes in the bottom. The bag is not water resistant.
If you don’t want to drill holes in your number plate, you could cut a piece of plastic from an ice cream lid and rivet that to the bag, then attach the bag to the number plate with 3M Dual Lock strips. This would also allow you to easily remove the bag if desired.
Here are some images of my final install with the charging plug.
Motorcycle camping is a lot like backpacking. You generally want to avoid bulky or heavy items as much as possible. So, in general, you are likely to be carrying an additional 50 pounds or more when camping. Most of this weight goes on the back of the bike, and it definitely impacts how the bike handles.
This report talks about a few ways to move some of that weight to the front of the bike, providing better balance. I am focusing on dirt bikes, but the general concepts also apply to larger adventure bikes.
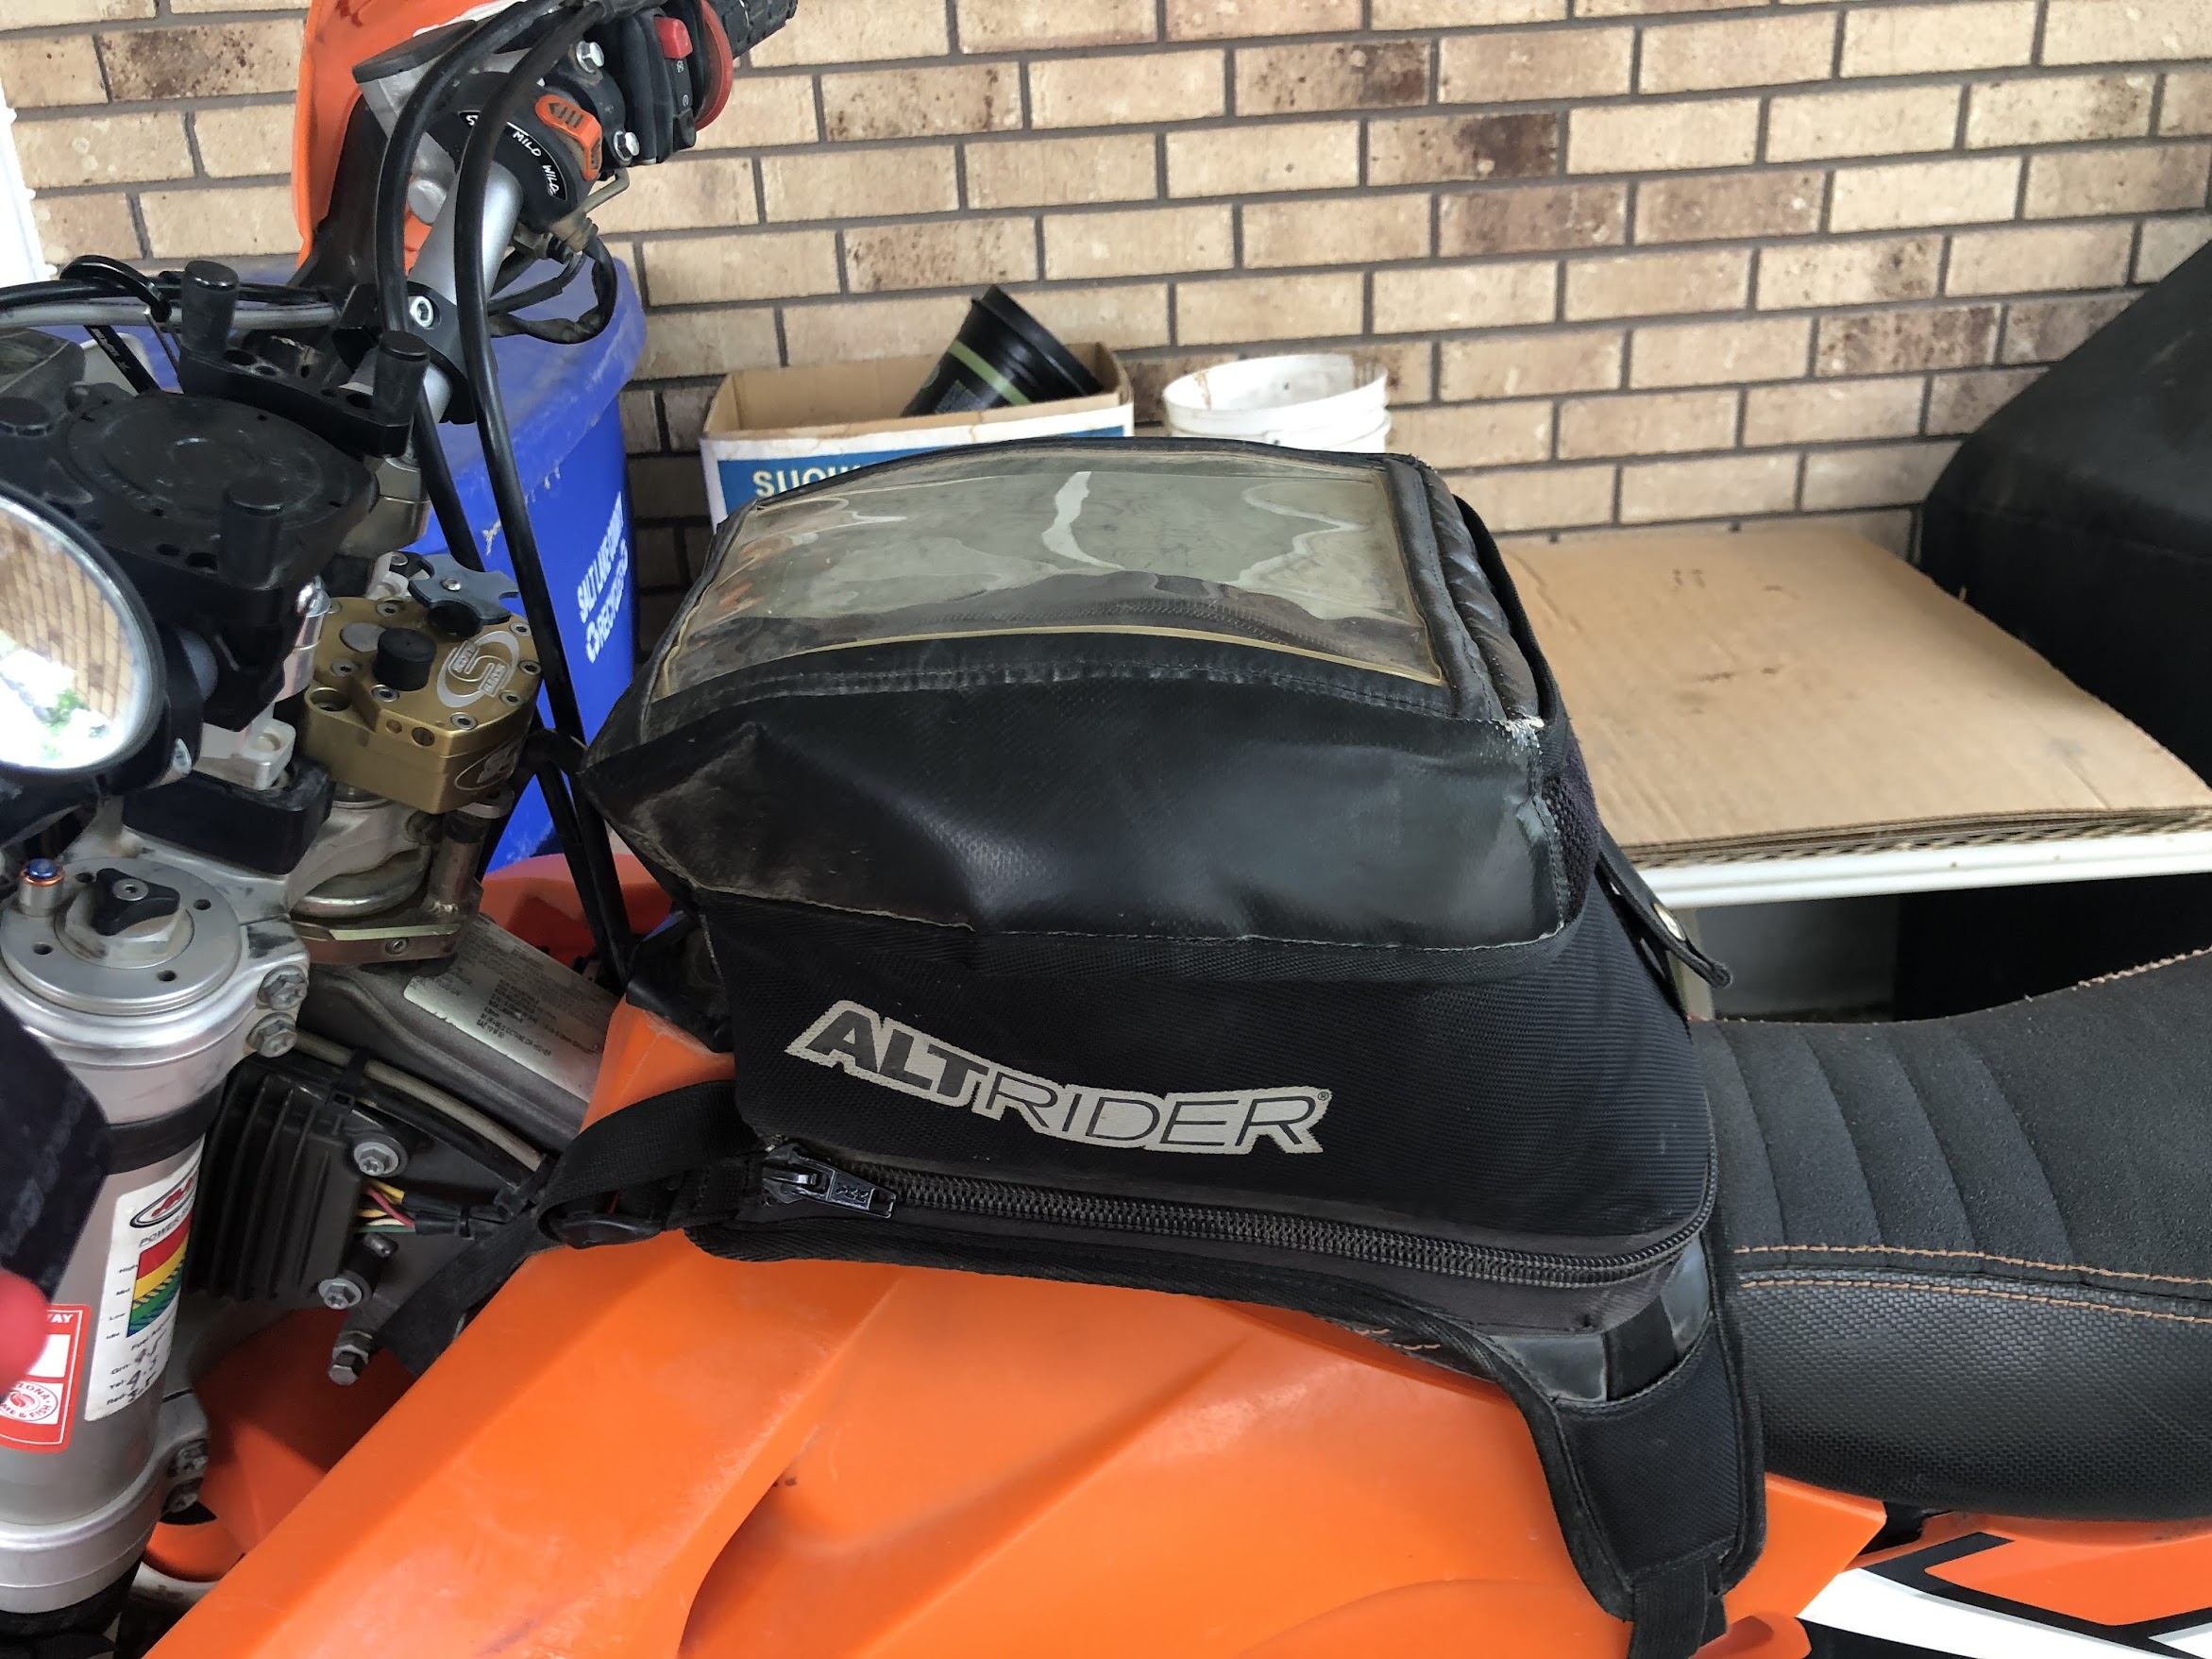
Tank Bags
Adding a tank bag is an obvious option, but on a dirt bike, you need to stick with fairly small bags. Back in 2013 I posted a report on a few options available at the time. There are more options to choose from now, but in general you probably don’t want anything larger than 10 liters or so. You need to make sure the bag does not interfere with steering, that it allows you to get forward on the seat for cornering, and that it doesn’t interfere when standing. You also need to consider how the bag will sit on your gas tank. Many tanks have tall chambers up front which prevents you from getting the bag up over the fuel cap.
I find the 11 liter AltRider tank bag to be about as big as I like. Even though it has a volume of 11 liters, it is difficult to fully utilize the space since the interior is not rectangular in shape.
AltRider Hemisphere tank bag
Front Fender Bags
A lot of people use a front fender bag to carry a spare tube. I went away from a traditional fender bag for three reasons: 1) the weight on the fender affects handling, 2) the bag can easily fall off, and 3) the bag blocks some of the illumination from the headlight.
I switched to a Dirt-Bike-Gear bag because it avoids all three of my complaints with a traditional bag. It gets the weight close to the steering axis, so it has much less impact on handling, and less blockage of the headlight. And since it attaches to the forks, it will not fall off.
Dirt-Bike-Gear front fender bag
Tank Shroud Bags
If you want to move even more weight forward, a good option is some form of bag mounted to the tank shrouds. But please note these will likely scratch up your plastics. This is less of an issue if you have a tank that does not use the stock shrouds.
Make sure your gear does not interfere with your knees and that it doesn’t block the ventilation ports. One side benefit of tank shroud bags is that they help shelter your knees from brush and rain.
If your primary goal is to move weight forward, you should consider carrying your liquid up front. Water is very heavy, weighing 2.2 lbs/liter. Gasoline is another good option, weighing in at 1.65 lbs/liter. This can easily be a large percentage of your total gear weight.
Liquid
Liters
Weight (lbs)
Water
1
2.2
Water
1.5
3.3
Water
2
4.4
Water
3
6.6
Water
4
8.8
Gas
1
1.65
Gas
1.5
2.475
Gas
2
3.3
Gas
3
4.95
Gas
4
6.6
Liquid weight
OBR Adv Gear makes some nice bottle wraps and 2 liter bottle holsters. You can buy 1, 1.5, or 2 liter water or fuel bottles that will fit in these carriers. These can easily be attached to your tank shrouds. Other companies also sell bottle holders, but I not seen anyone else that makes a carrier for the 2 liter rectangular bottles. For more details, see my 2016 blog post.
1.5 liter water bottle
2 liter fuel bottle
If you want to carry tools or other gear up front rather than liquid, the Giant Loop Pannier Pockets work really well. I have used them for years and just recently switched to carrying water up front. They are specked at 2 liters each, but they are odd shaped so you may not fit some items in them. For example, a 1.5 liter water bottle will not fit at all, and even a 1 liter bottle will poke out the top a bit. Furthermore, these bags have a zipper access and are not waterproof.
2 liter Giant Loop Pannier Pocket
If you want something a little larger, or fully waterproof, you might try the Giant Loop Possibles Pouch. Their website claims these are 3.5 liters each, but they made a mistake in their math. They are only 2.8 liters, and I can’t even fit two 1 liter bottles in. But they are very well made and very rugged.
2.8 liter Giant Loop Possibles Pouch
To my surprise, a 6 liter Wolfman small Rolie bag may also work, giving you a fair amount of storage up front. These bags are large enough to hold a camp chair or really nice air mattress.
6 liter Wolfman Rolie bag
I am sure there are plenty of other bags available that could work. Hopefully this report will give you some ideas that will help with your next adventure.
Once again I have decided to try a new luggage setup for my dirt bike. I had two primary objectives behind this upgrade:
Reduce the weight in my top bag so the bike doesn’t feel top-heavy.
Reduce the height of the top bag so it isn’t in my way on steep descents.
From the various systems I have tried, my AltRider Hemisphere bag was my favorite. It worked really well, but because I demand certain comfort items (like a chair and good air mattress), I tend to have a very large top bag.
My AltRider luggage system
I think one of the best luggage solutions for dirt bikes is the Reckless 80 bag made by Mosko Moto. Unfortunately it is really expensive. I just couldn’t justify the cost.
My friend’s Mosko Moto Reckless 80 luggage
I decided to try the Wolfman E-Base mounting platform.
Wolfman E-Base
The E-Base is well made, extremely easy to install (at least on my KTM), and very versatile. I really like that the base includes metal cam buckles instead of plastic buckles. This allows you to cinch the base down very tight.
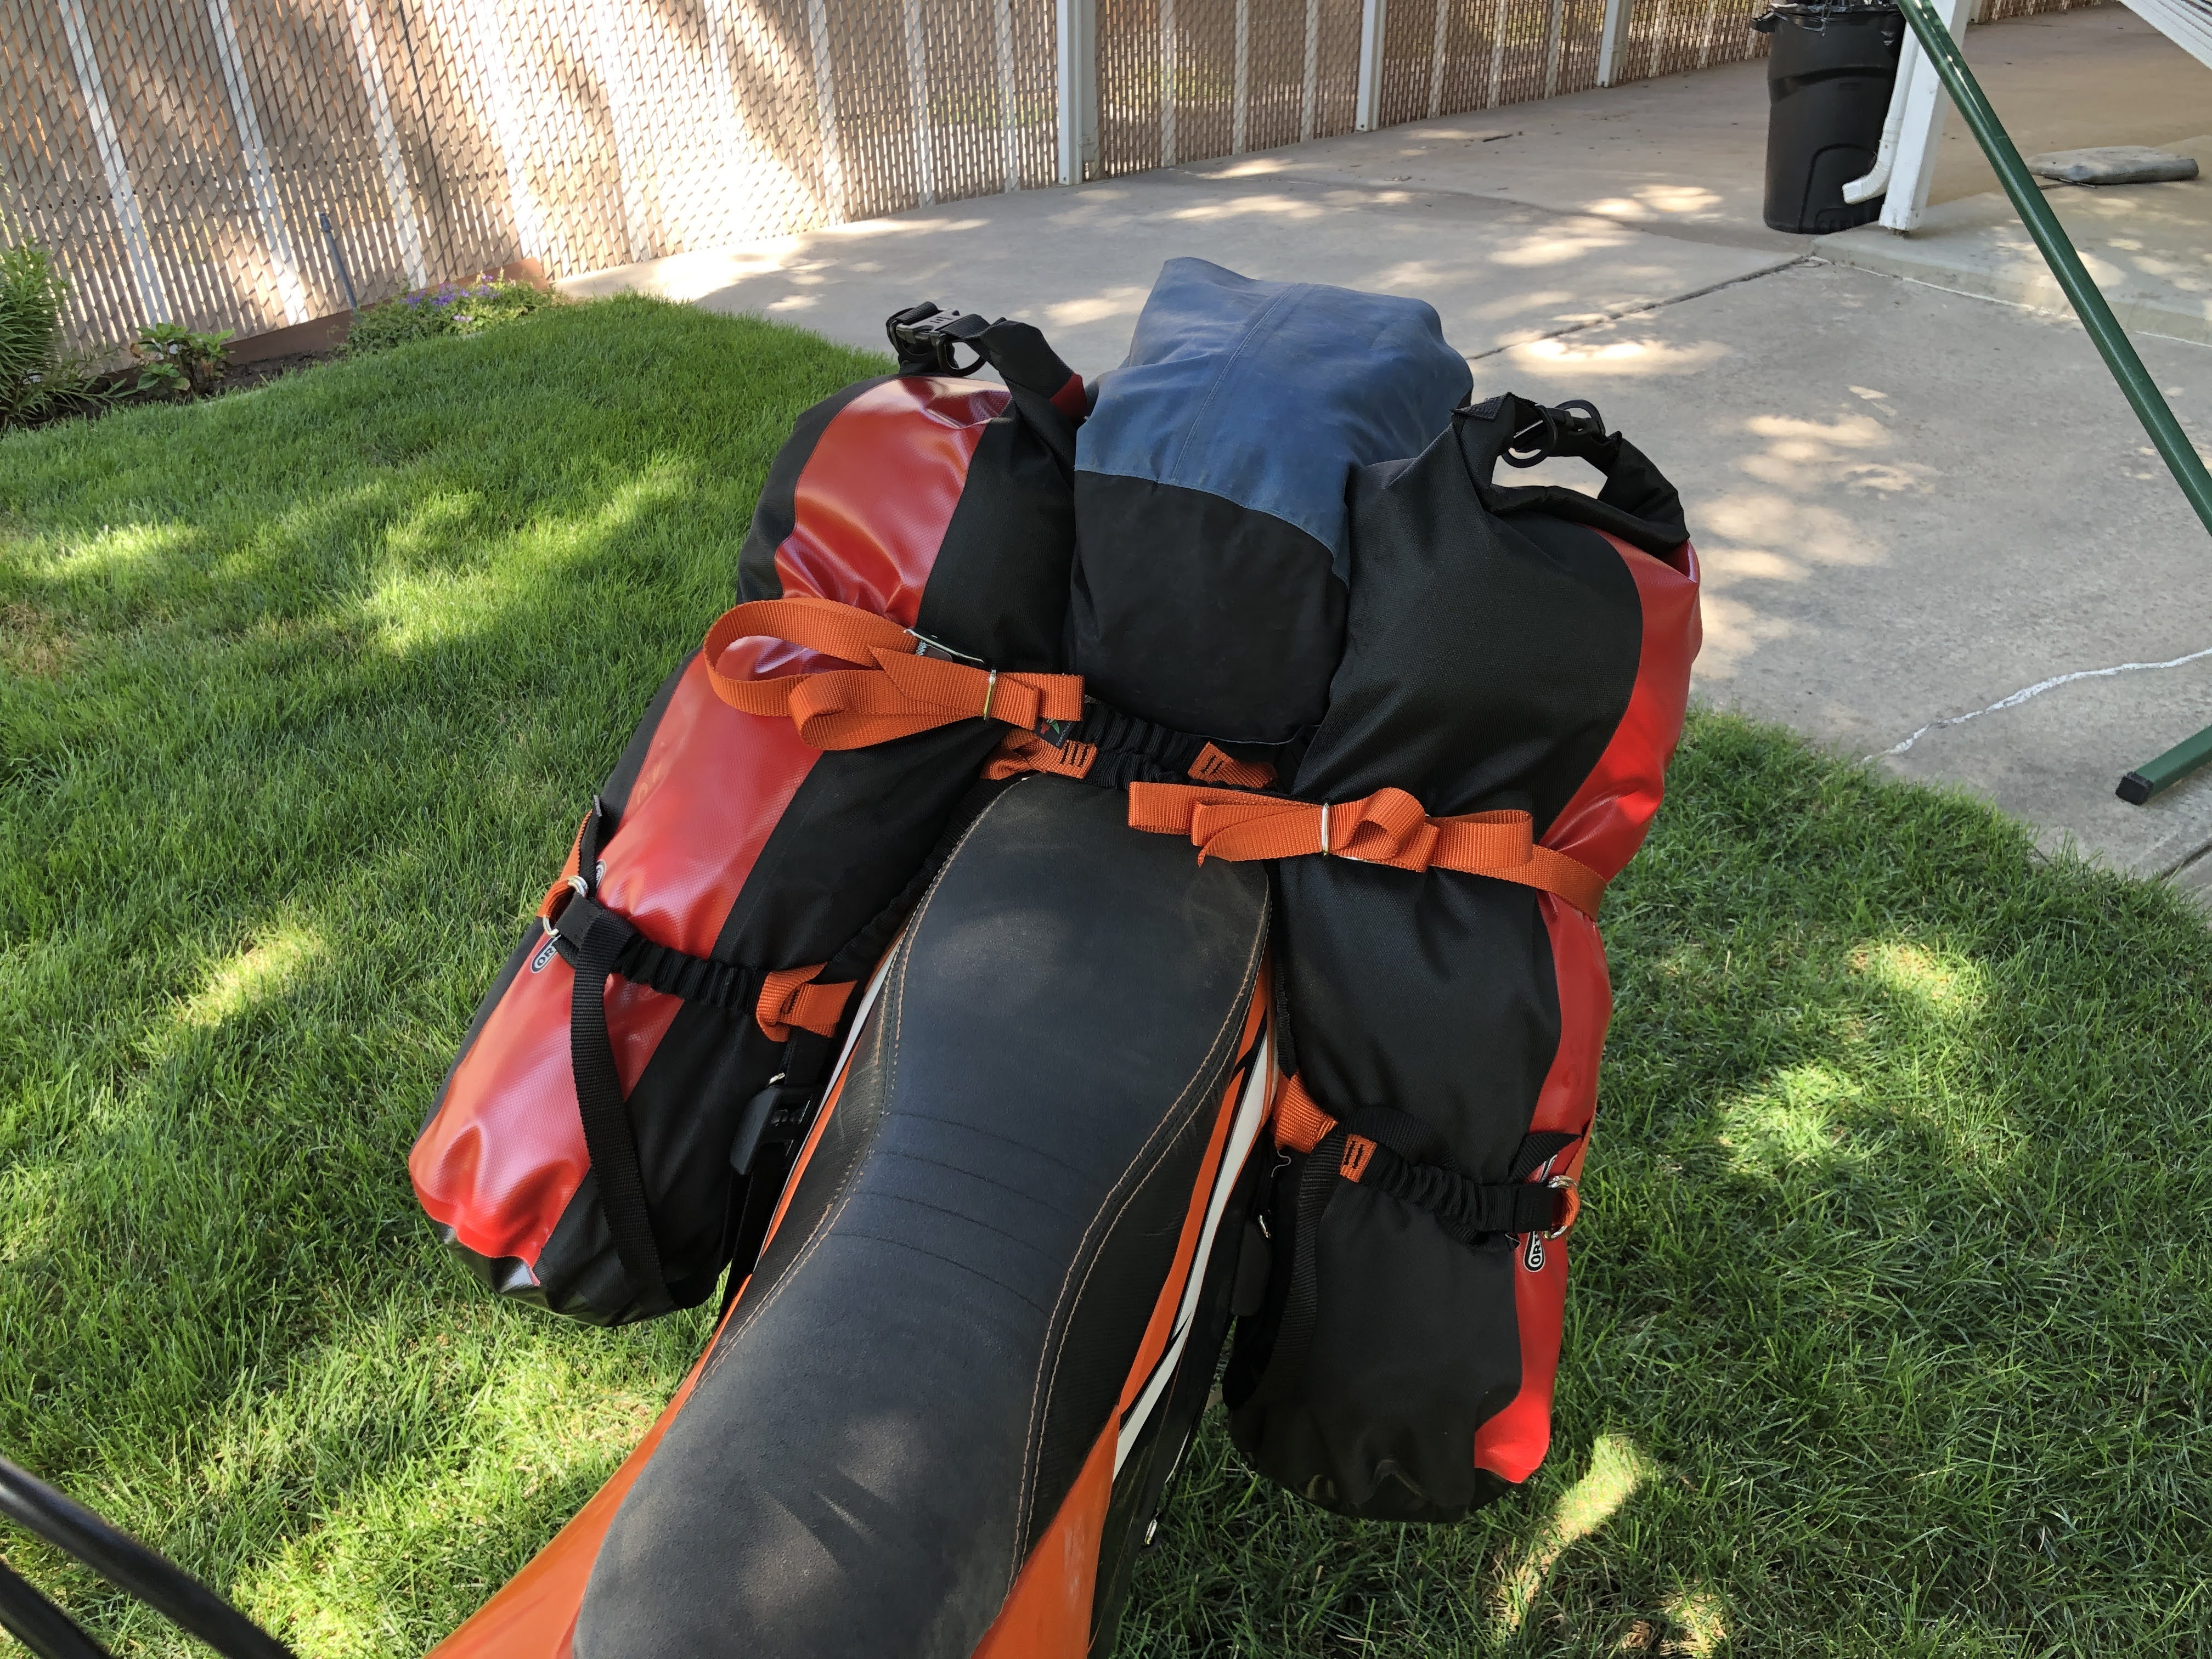
At first I thought I could just strap some existing dry bags on the side and all would be well – but it didn’t work out as well as I had hoped. So, I decided to use the Wolfman Rolie bags that were designed specifically for the base. Wolfman makes three sizes of Rolie dry bag . I decided to install a large bag (20L) on each side.
Large Wolfman Rolie bag (20L)
The bags stay in place fairly well while you load or unload your gear. Once you get loaded, you can easily cinch down the straps to get everything snug and tight. I was worried that these simple buckles would wiggle loose on the trail, but so far they have stayed nice and tight.
These 20L bags are noticeably larger than the side chambers of my AltRider system, so I can move some of the heavier and bulky items (like my chair and air mattress) out of my top bag and into the side bags. This partially achieves both of my primary objectives.
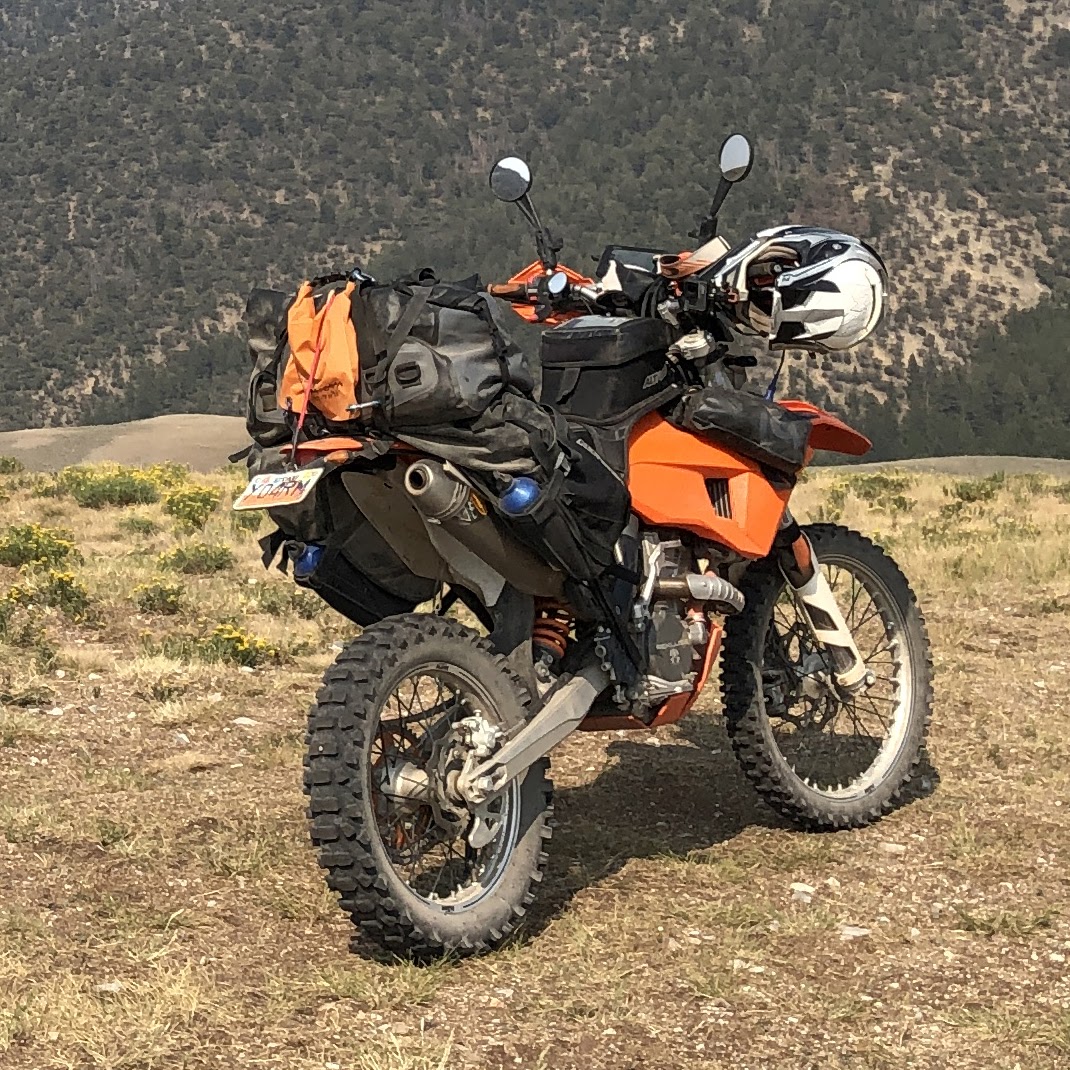
Because the side bags stick up a few inches above the seat and fender, I ended up running my top bag lengthwise on the bike rather than crossways. The top bag is still taller than I would like, but it is noticeable lower than my older setup.
My new Wolfman setup
With my AltRider luggage I would carry two 1.5L water bottles on the backside of each side bag. I have now moved the water bottles to the tank shrouds to get the weight farther forward. I also moved most of my tools into the tank bag to get better bike balance.
On my first test ride I was impressed with how secure the luggage traveled, and I could tell the bike felt more balanced with the weight lower and farther forward. I would still like to reduce the bulk of the top bag, but at least I have made noticeable improvement towards meeting my objectives.
For my next adventure I want to try using a small Rolie (6L) on the back of each large bag. If this works, it will give me 26L on each side and allow me to reduce the top bag bulk even more.
Large (20L) and small (6L) Rolie on each side
I need to test this extra bag to make sure it rides nicely and doesn’t swing into the tire.
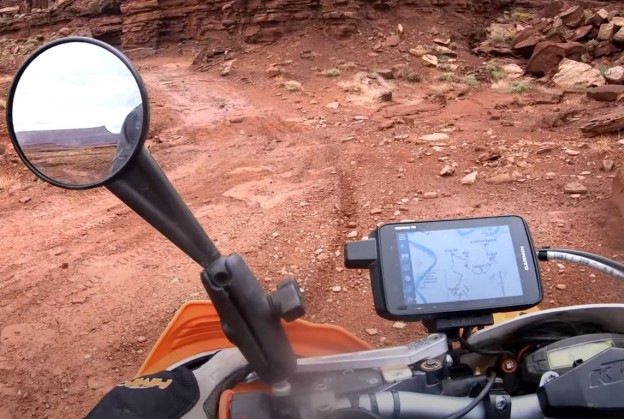
For years I have used a Garmin GPS for navigation on my dirt bike. My latest GPS was the Garmin Montana 700. It is a really nice unit with a fairly large screen, and much easier to read than prior units I have used. I used a RAM ball and arm mounting system connected to my handguard to keep the GPS out in front where I could see it.
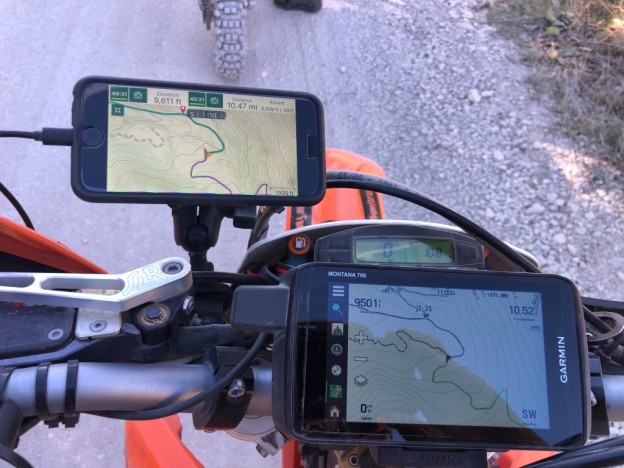
Last spring I moved the Garmin to the center of my handlebars and used an old iPhone 6 as a second navigation tool. My main goal was to have one GPS zoomed in and one zoomed out to make trail navigation easier. But I learned some interesting lessons from this experience that led me to redesigning my entire navigation system.
Power
Both GPS units were powered from the bike, and at one time or another, both suffered power failures. Over the years, keeping a solid power connection has been my biggest challenge. Whether using GPS batteries or power from the bike, the power connections often fail due to vibration and dust.
Display
One thing that surprised me was how much easier the old iPhone was to read than the Garmin. Even though the iPhone 6 has a relatively small screen, and is quite old technology, it was easier to read in all lighting conditions.
Other than the display technology, the underlying map and the color of the tracks makes a huge impact on readability.
Gaia GPS
On the Garmin I was using the Garmin maps which have good detail, but the contrast isn’t great, so it can be difficult to read – especially in full sunlight.
I started using the Gaia GPS app on both the desktop and on my phone. There are plenty of other good navigation apps out there, but I found Gaia to be very easy to use and it has dozens of map layers to choose from. The basic Gaia Topo map is very easy to read and has good detail. So far I am very impressed with this app.
Phone Navigation
As the summer progressed I found myself looking more and more at the phone and less and less at the GPS. I decided that it was now time to move from a dedicated GPS to a smartphone based navigation system.
Wireless Charging
I also wanted to get away from power connectors that were prone to failure. Many smartphones support wireless charging (Qi), so that seemed like a good solution. I ordered three wireless charger phone mounts and compared them.
RAM Mount makes a quality wireless charger, but it was quite bulky and didn’t fit on my bars the way I wanted. I also found that the side posts would hit the buttons on the side of the phone, making it awkward to mount the phone.
I have had really good luck with QuadLock mounts so I ordered their wireless charger. I use QuadLock on my mountain bike and used it for the iPhone 6 on the dirt bike. My only complaint with the QuadLock system is that you need a phone that is compatible with their phone cases. This really limits your options.
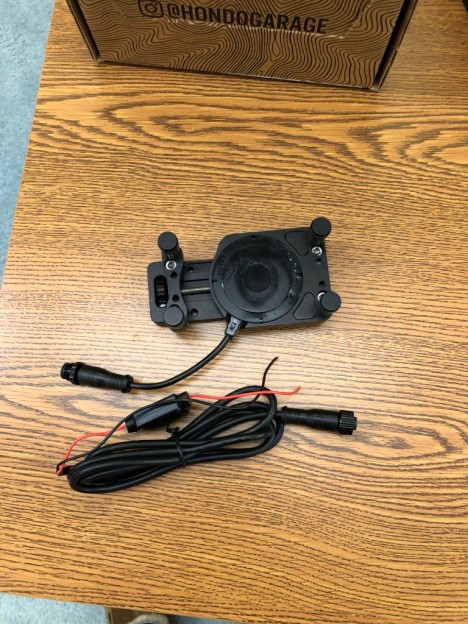
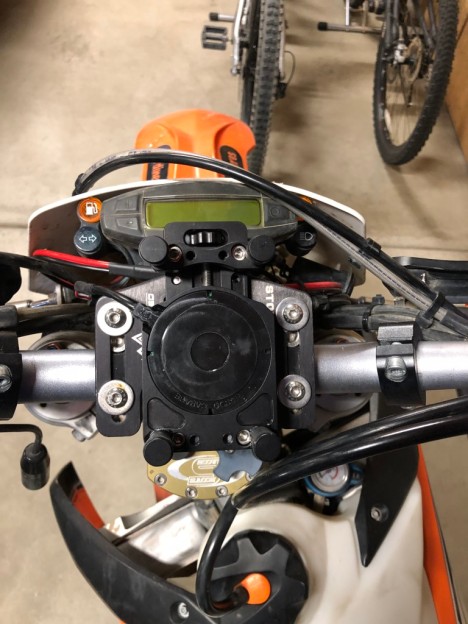
By far my favorite phone mount is the Juiced Squeeze by Hondo Garage. You can use their bar clamp mount or any RAM ball/arm setup that you like. In my case, I just mounted it to my MotoMinded Stout Mount that previously held my Garmin.
I also like their wireless charger. All of the other units use a USB connection (another potential failure point). This one hooks directly to 12 VDC. I wired mine to the bike’s power relay so it is only powered when the bike is running. That prevents it from draining my bike battery when not in use.
It should be noted that aligning the phone’s pickup coil closely with the mount’s coil is crucial to get wireless charging to work. This is particularly true with a ruggedized phone since they have pretty thick cases. It is also advisable to not use an external phone case, as this would further reduce charging efficiency.
Ruggedized Phone
My next task was to find a suitable ruggedized phone to use.
Warning: Do not mount your ‘real’ phone on your dirt bike. The vibration will likely kill your phone’s camera which has moving lenses. Apparently this is especially true for iPhones. The heat, dust, and water can also take their toll.
My old iPhone 6 kind of worked, but the operating system was so old I couldn’t run the latest version of Gaia GPS. This caused me some problems. Furthermore, the phone was difficult to operate with gloves on.
You do not need an activated phone with a sim card. In my opinion, this would make a phone an unaffordable solution.
I considered buying a refurbished iPhone X, but decided that the heat, dust, water, and vibration would eventually kill the phone. I therefore decided to try a ruggedized phone.
I needed to figure out what size phone to get. I wanted a large screen, but not so large that it blocked the view of my speedometer. And it had to fit well in the mount and align with the wireless charging coil.
I first tried a Doogee S96 Pro but found it would not charge. The metal protective case was too thick.
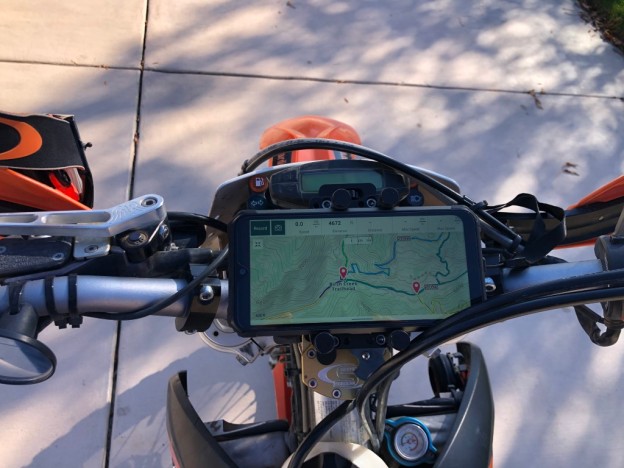
I finally settled on a Ulefone Armor 7. So far it seems perfect for my needs.
I haven’t had a good field test yet, but just riding around the neighborhood, the phone seems to work really well. The screen is easy to see and it is out of the way – much less likely to snag on branches or get broken in a crash.
I can also play music with my Bluetooth headset. Rather than using my ‘real’ phone that is safely tucked away in my backpack, this phone is readily accessible. This also allows me to hear step by step directions when following a route.
The phone has a programmable side button. For now I have it programmed to bring up a clock, launch Gaia, or launch my music player app.
I am hopefully that this new setup will work really well and be very reliable. It is easier to zoom in and out than my old Garmin, and the screen is so much easier to read. It makes it much easier to decide which direction to go a trail intersections, and route planning in Gaia GPS is much easier than in Garmin’s Basecamp.
Now I just need to give it some good trail test rides!
Update Apr 2023
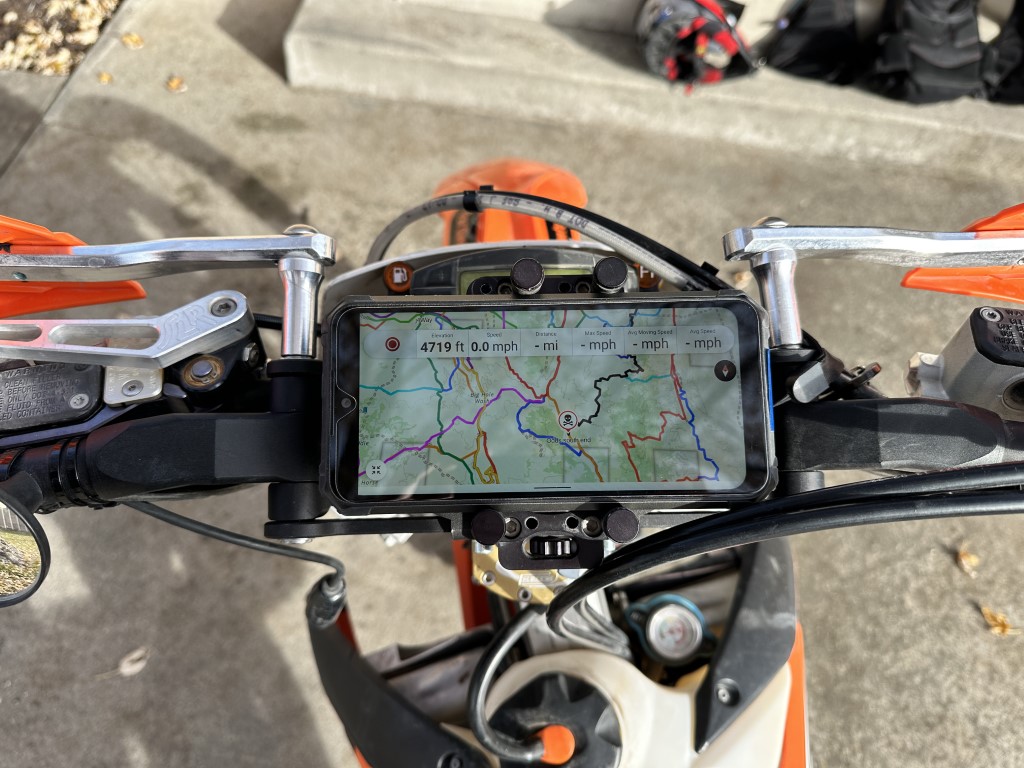
It turns out my phone does not like being in landscape mode. Some apps do not support landscape, and others pop back and forth between landscape and portrait. I can lock the phone in portrait mode, so I decided to change the phone’s orientation.
Update Nov 2023
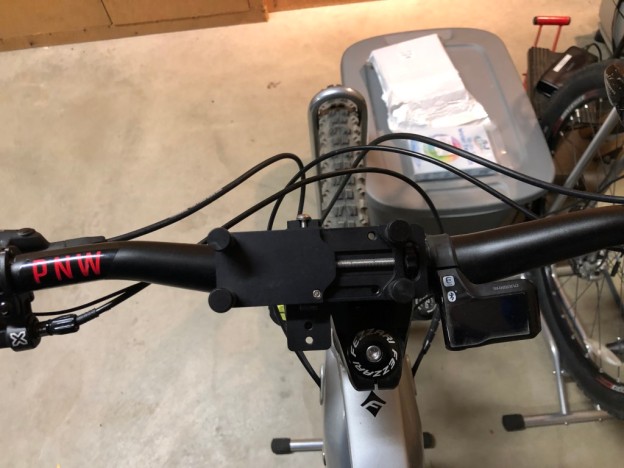
A recent update to Gaia GPS allows you to select landscape mode, so I moved my phone back to the handlebars. This time I am using a computer mount from Fastt Company for their Flexx handlebars.
Mountain Bike
I was so happy with the Juiced Squeeze phone mount that I ordered the Perfect Squeeze mount, which does not include the wireless charger. I mounted this on my mountain bike so I can use my ruggedized phone with TrailForks for navigation. I think it will work great!
For years I have wanted an electric mountain bike (emtb). I have always enjoyed mountain biking, but I have never been fit enough to ride most of the local trails. That is partially why I got into dirt biking – with a motor, going up hill can be just as fun, or more fun, than going downhill. But a good emtb is really expensive, and I haven’t been getting out riding enough to justify the cost.
Earlier this summer I noticed my neighbor riding an old mountain bike with a motor and battery. I stopped him to ask about his electric conversion story. He pointed me to JohnnyNerdOut, who has a shop not far from my home. Johnny also has YouTube videos covering all aspects of building an ebike, so I thought I would give it a try.
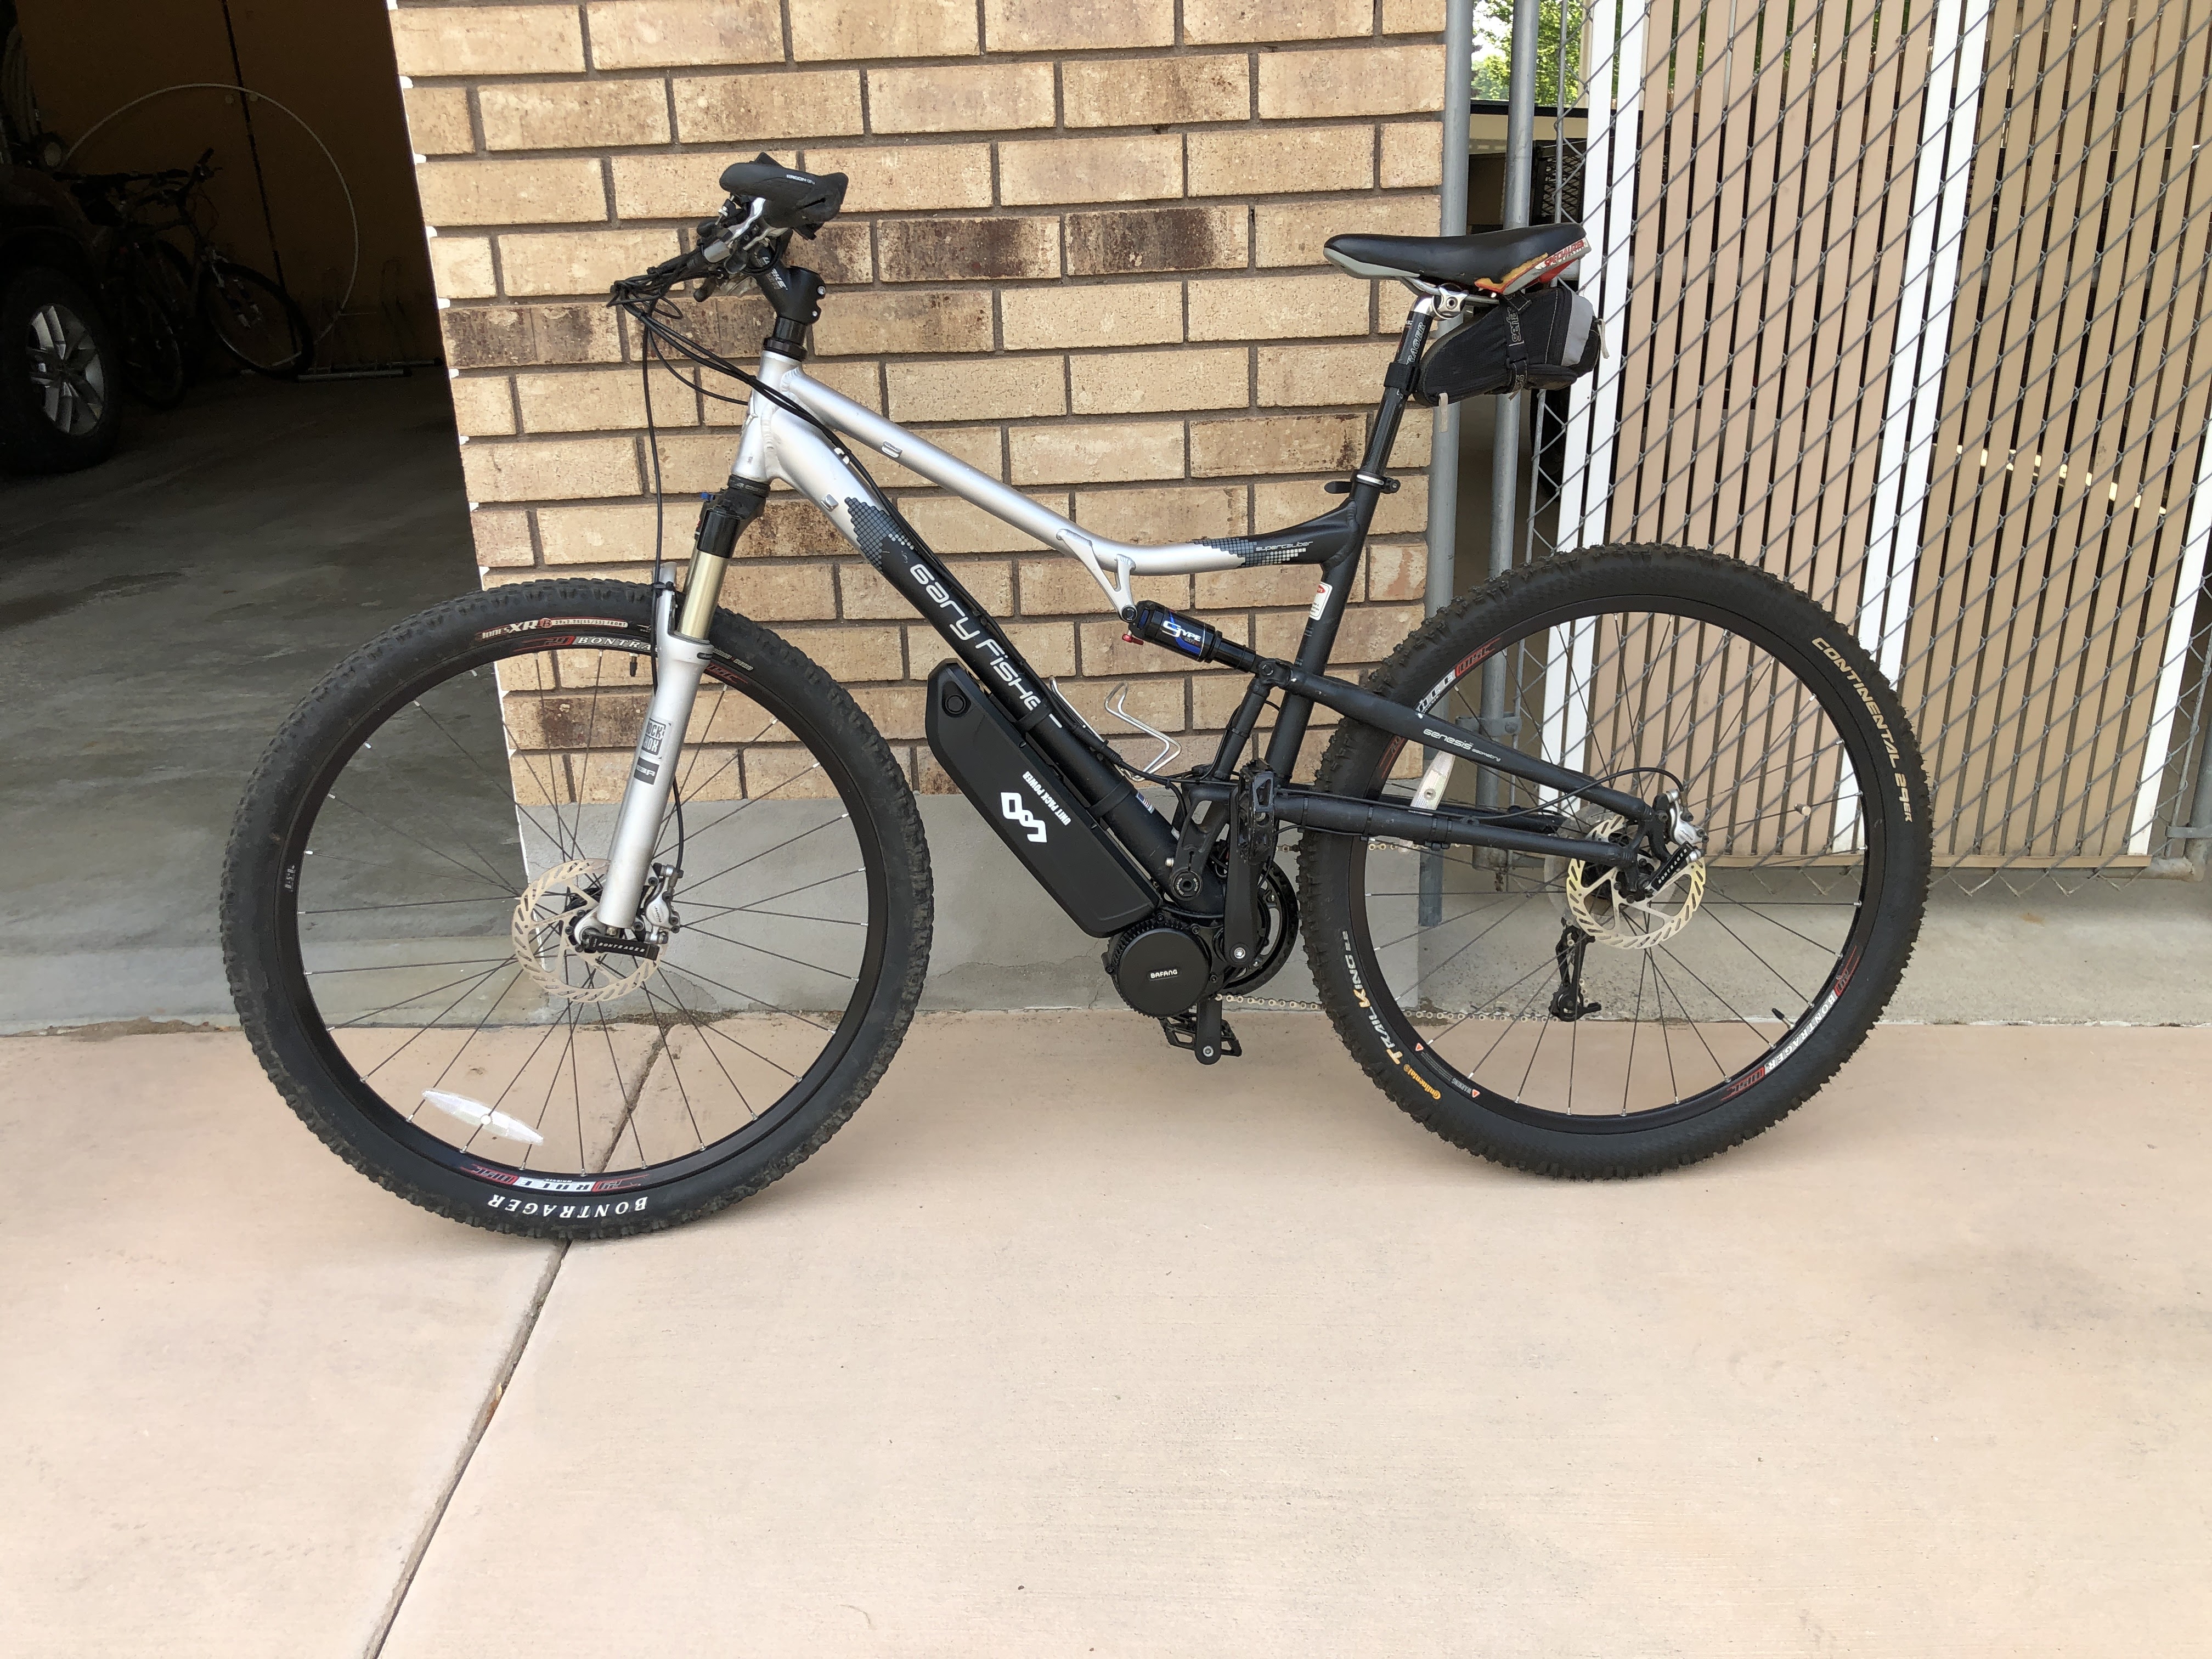
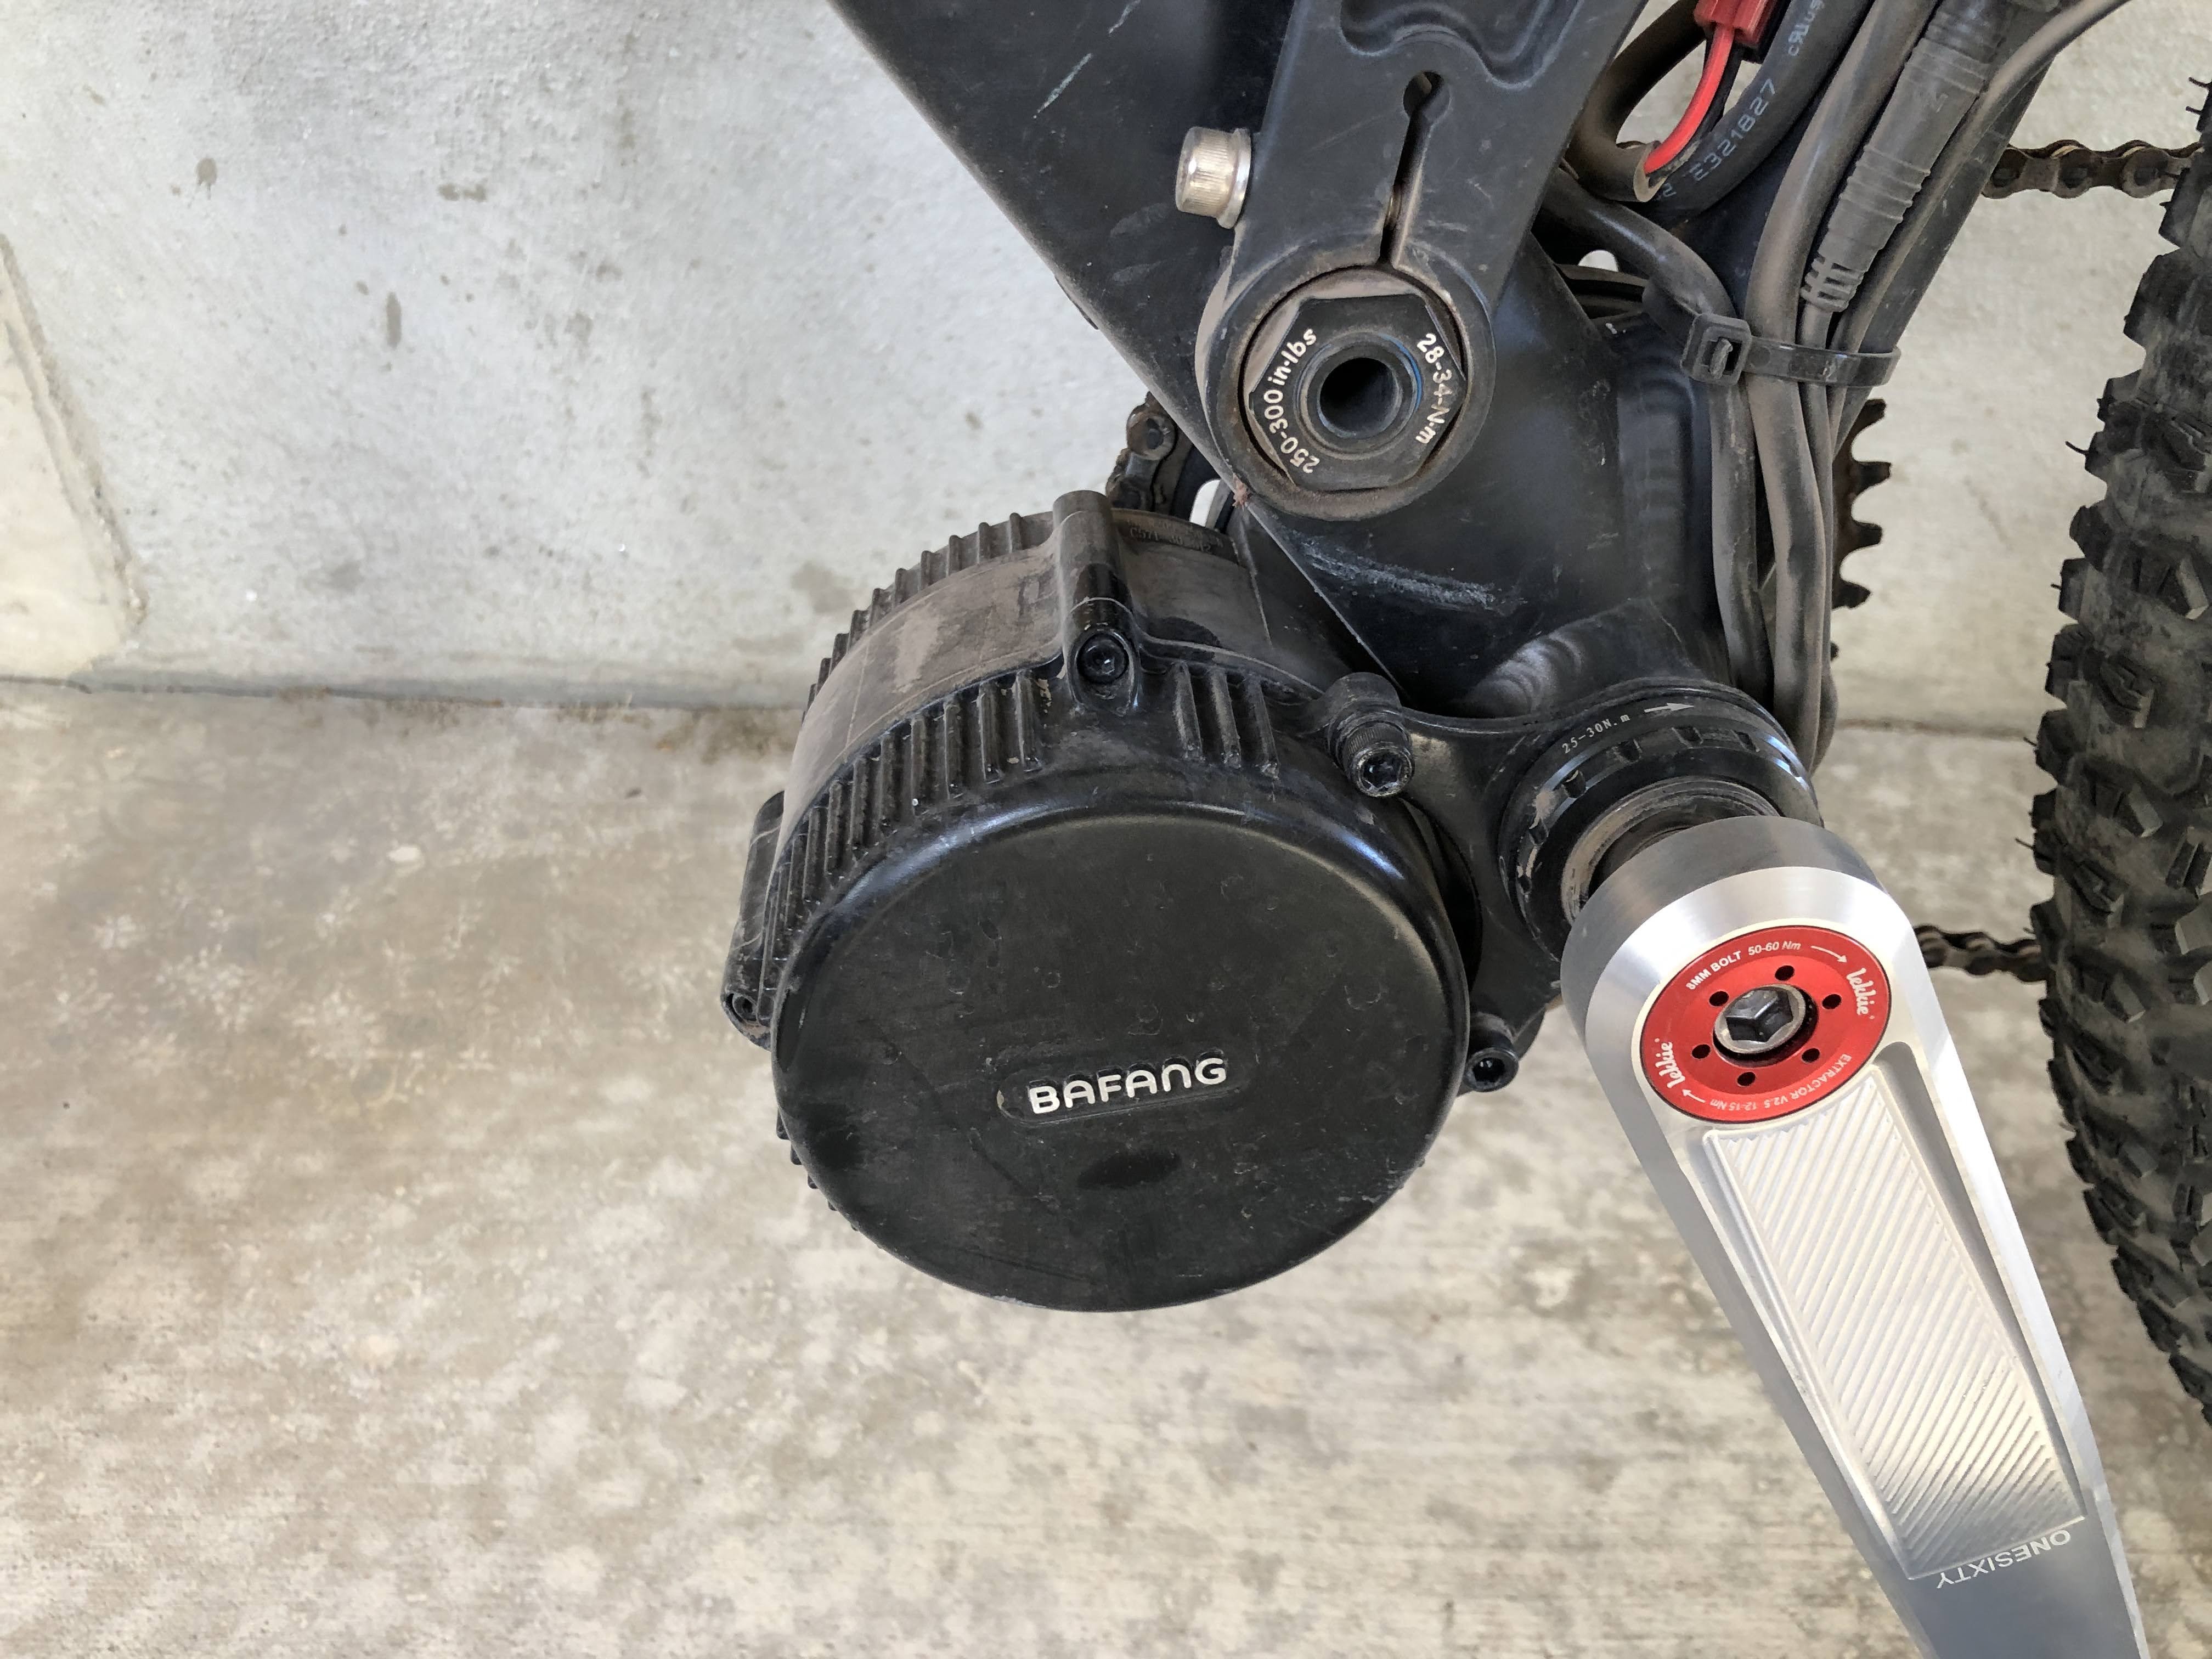
As Johnny points out, the best bike to convert to an ebike is the one hanging in your garage that isn’t being used. Well, I actually had two bikes; my really old Specialized Hardrock, and a 2007 Gary Fisher SuperCaliper 29er. The old Hardrock fit me better and was more comfortable than the full-suspension Gary Fisher, but the Gary Fisher is all around a much better bike. So I decided to add a motor to that bike. I bought a Bafang BBS02 kit from Johnny and did the install. Following his videos, it was really pretty straightforward.
My first ebike conversion
As I mentioned, my old Hardrock was more comfortable than this Gary Fisher bike. The SuperCaliper is an early generation 29er, and the bike handling was always a little sketchy. At low speeds the handlebars just wobble and it felt very unsafe. Once I got up above 7 mph or so, it felt more planted.
Adding the heavy motor and battery to the bottom of the bike made the handling even worse. It was really quite scary to ride this bike on tight, technical trails.
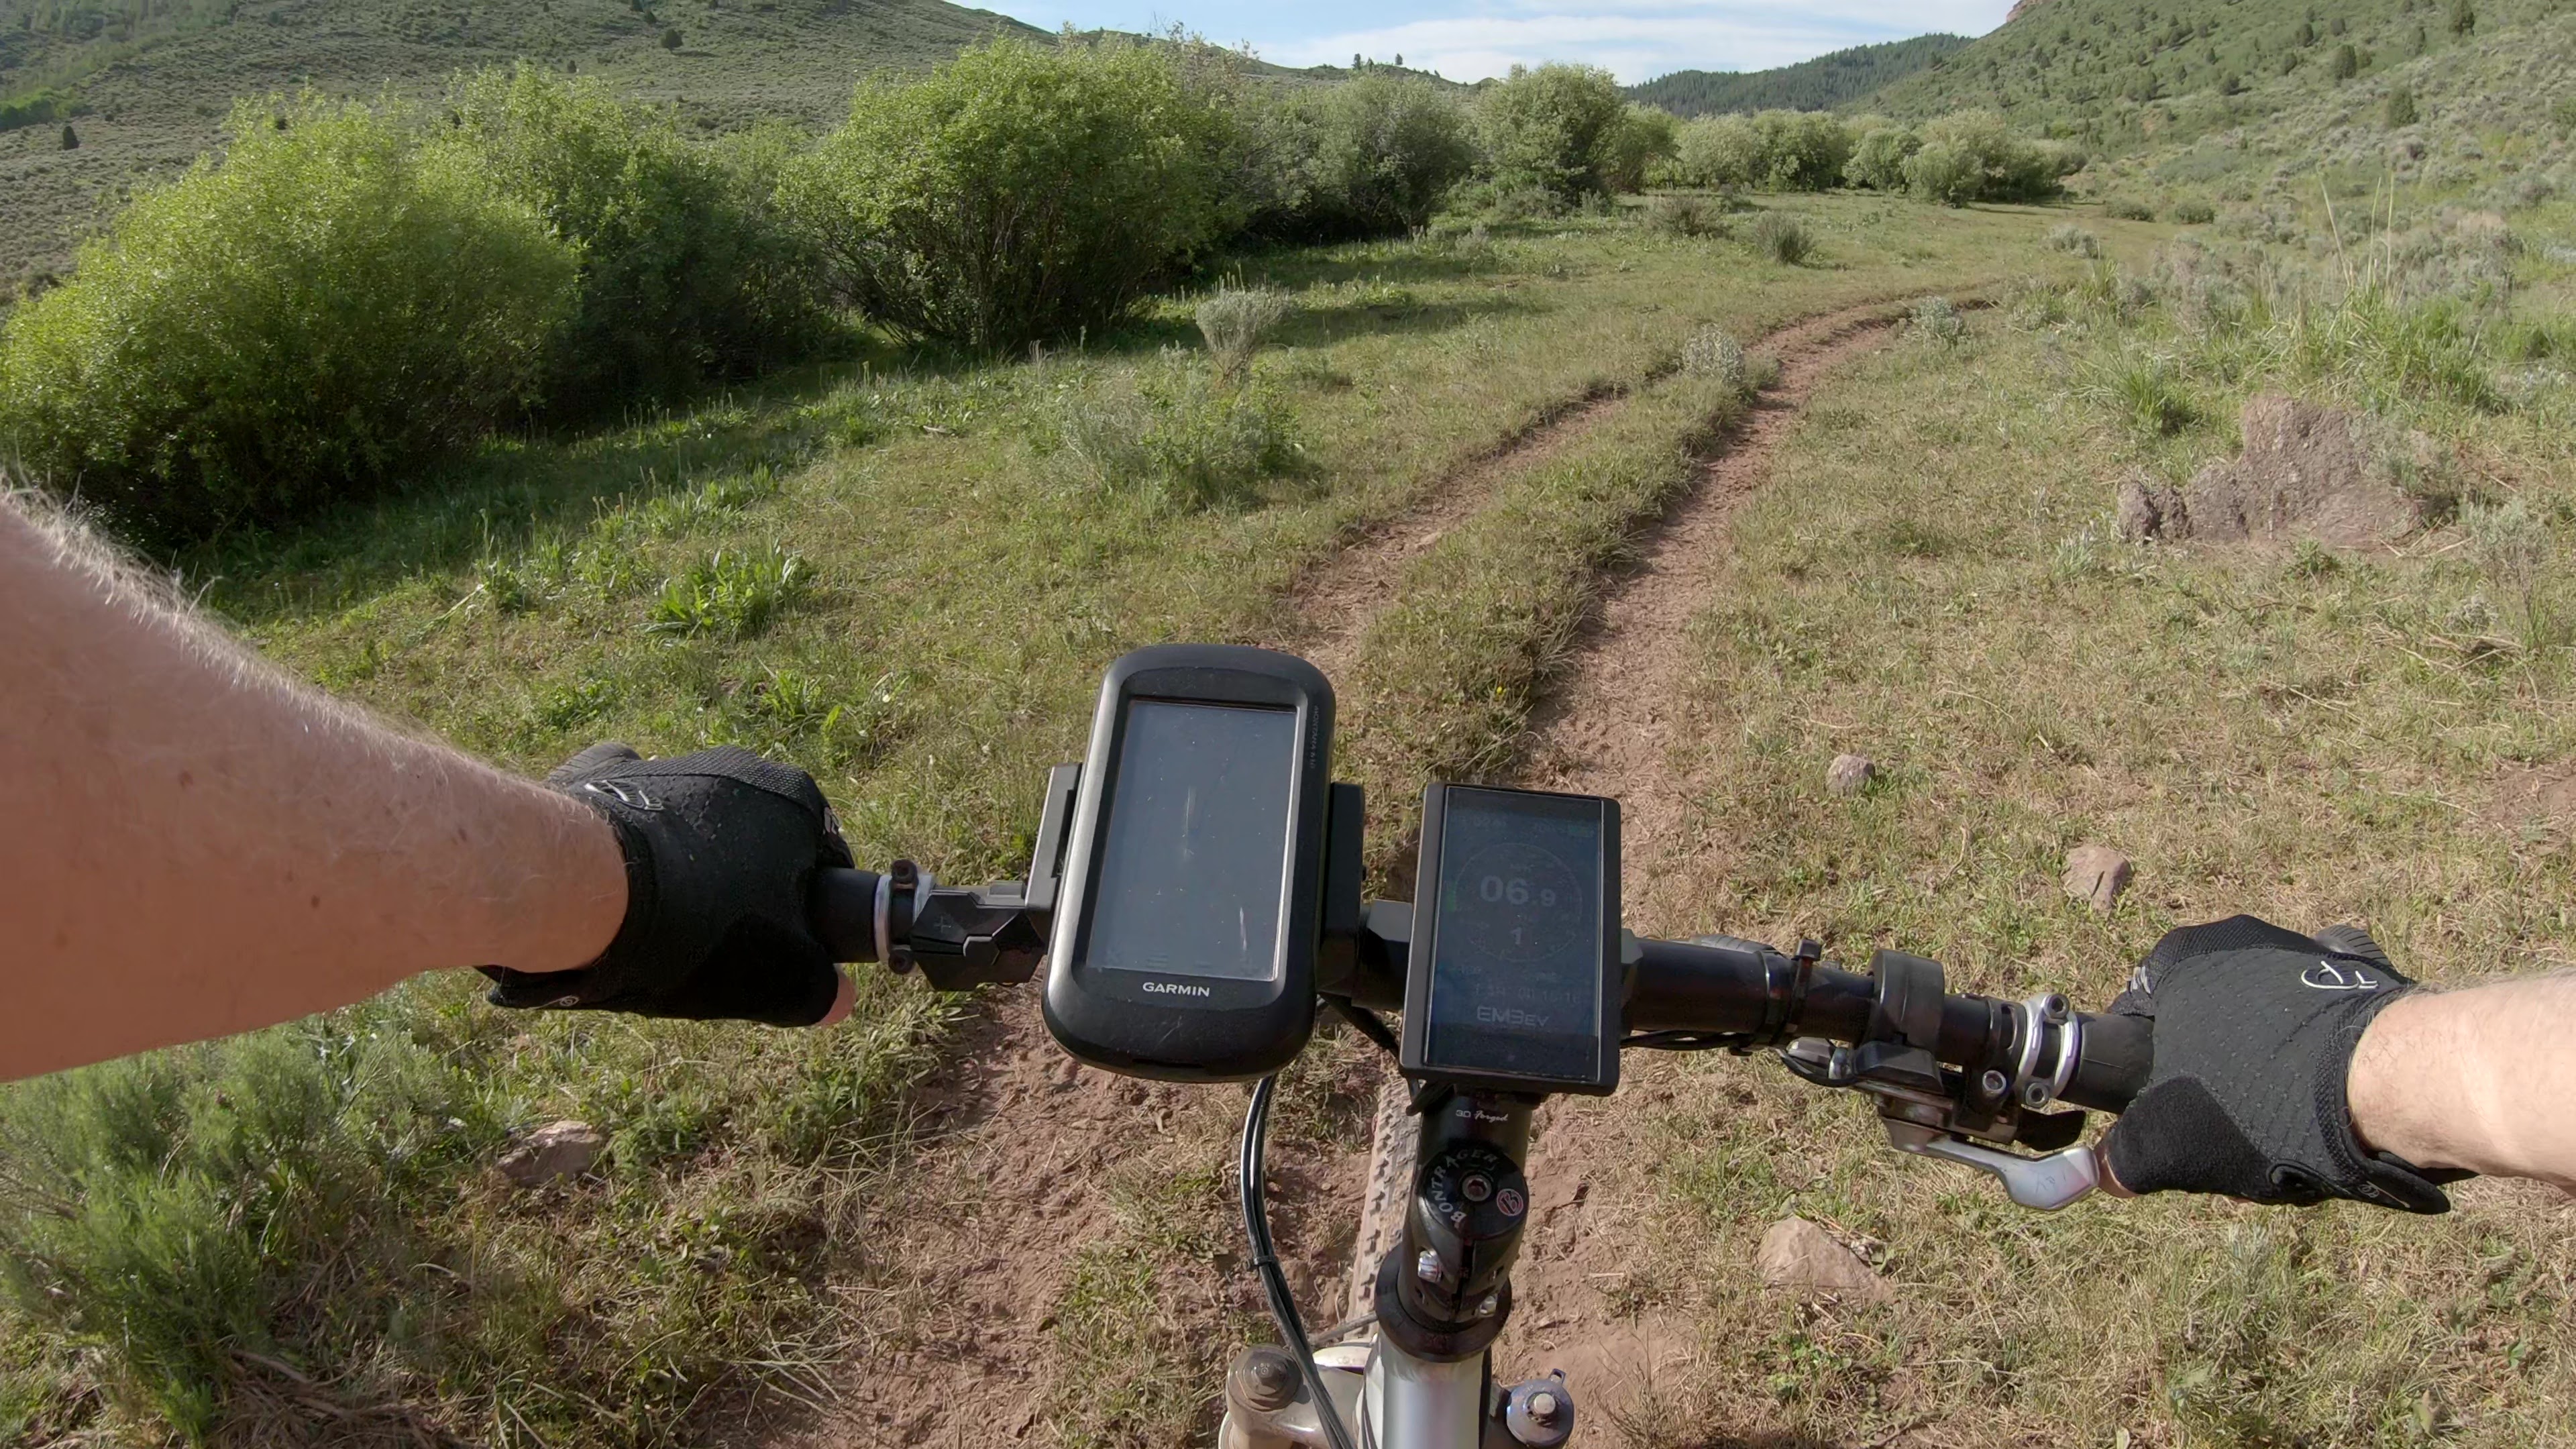
My very first trail ride was such a trail – a tight and semi-technical trail up in Wyoming near our cabin. Here is a video from that first ride:
Lessons Learned
I would recommend starting with a less technical trail for your first ebike ride. There is a learning curve associated with using the motor effectively. It was difficult to focus on the challenges of the trail, and on learning these new skills at the same time. On the next day we rode an ATV trail that had a lot more vertical climbing, but was not narrow and as technical. This was a much better place to work on the bike skills.
I had three major issues to deal with on that first ride:
The poor handling of the bike,
Insufficient pedal clearance, and,
Learning to manage the power effectively.
Each of these topics will be covered in turn, along with a lot of fine tuning I did over the next few months.
Bike Handling
I first played with the suspension tuning and tightened the steering head. This had a very minor impact on handling, but was worth doing.
The next step was to install a longer steering stem. This made the bike less comfortable, but it put more weight on the front wheel, which helped quite a bit.
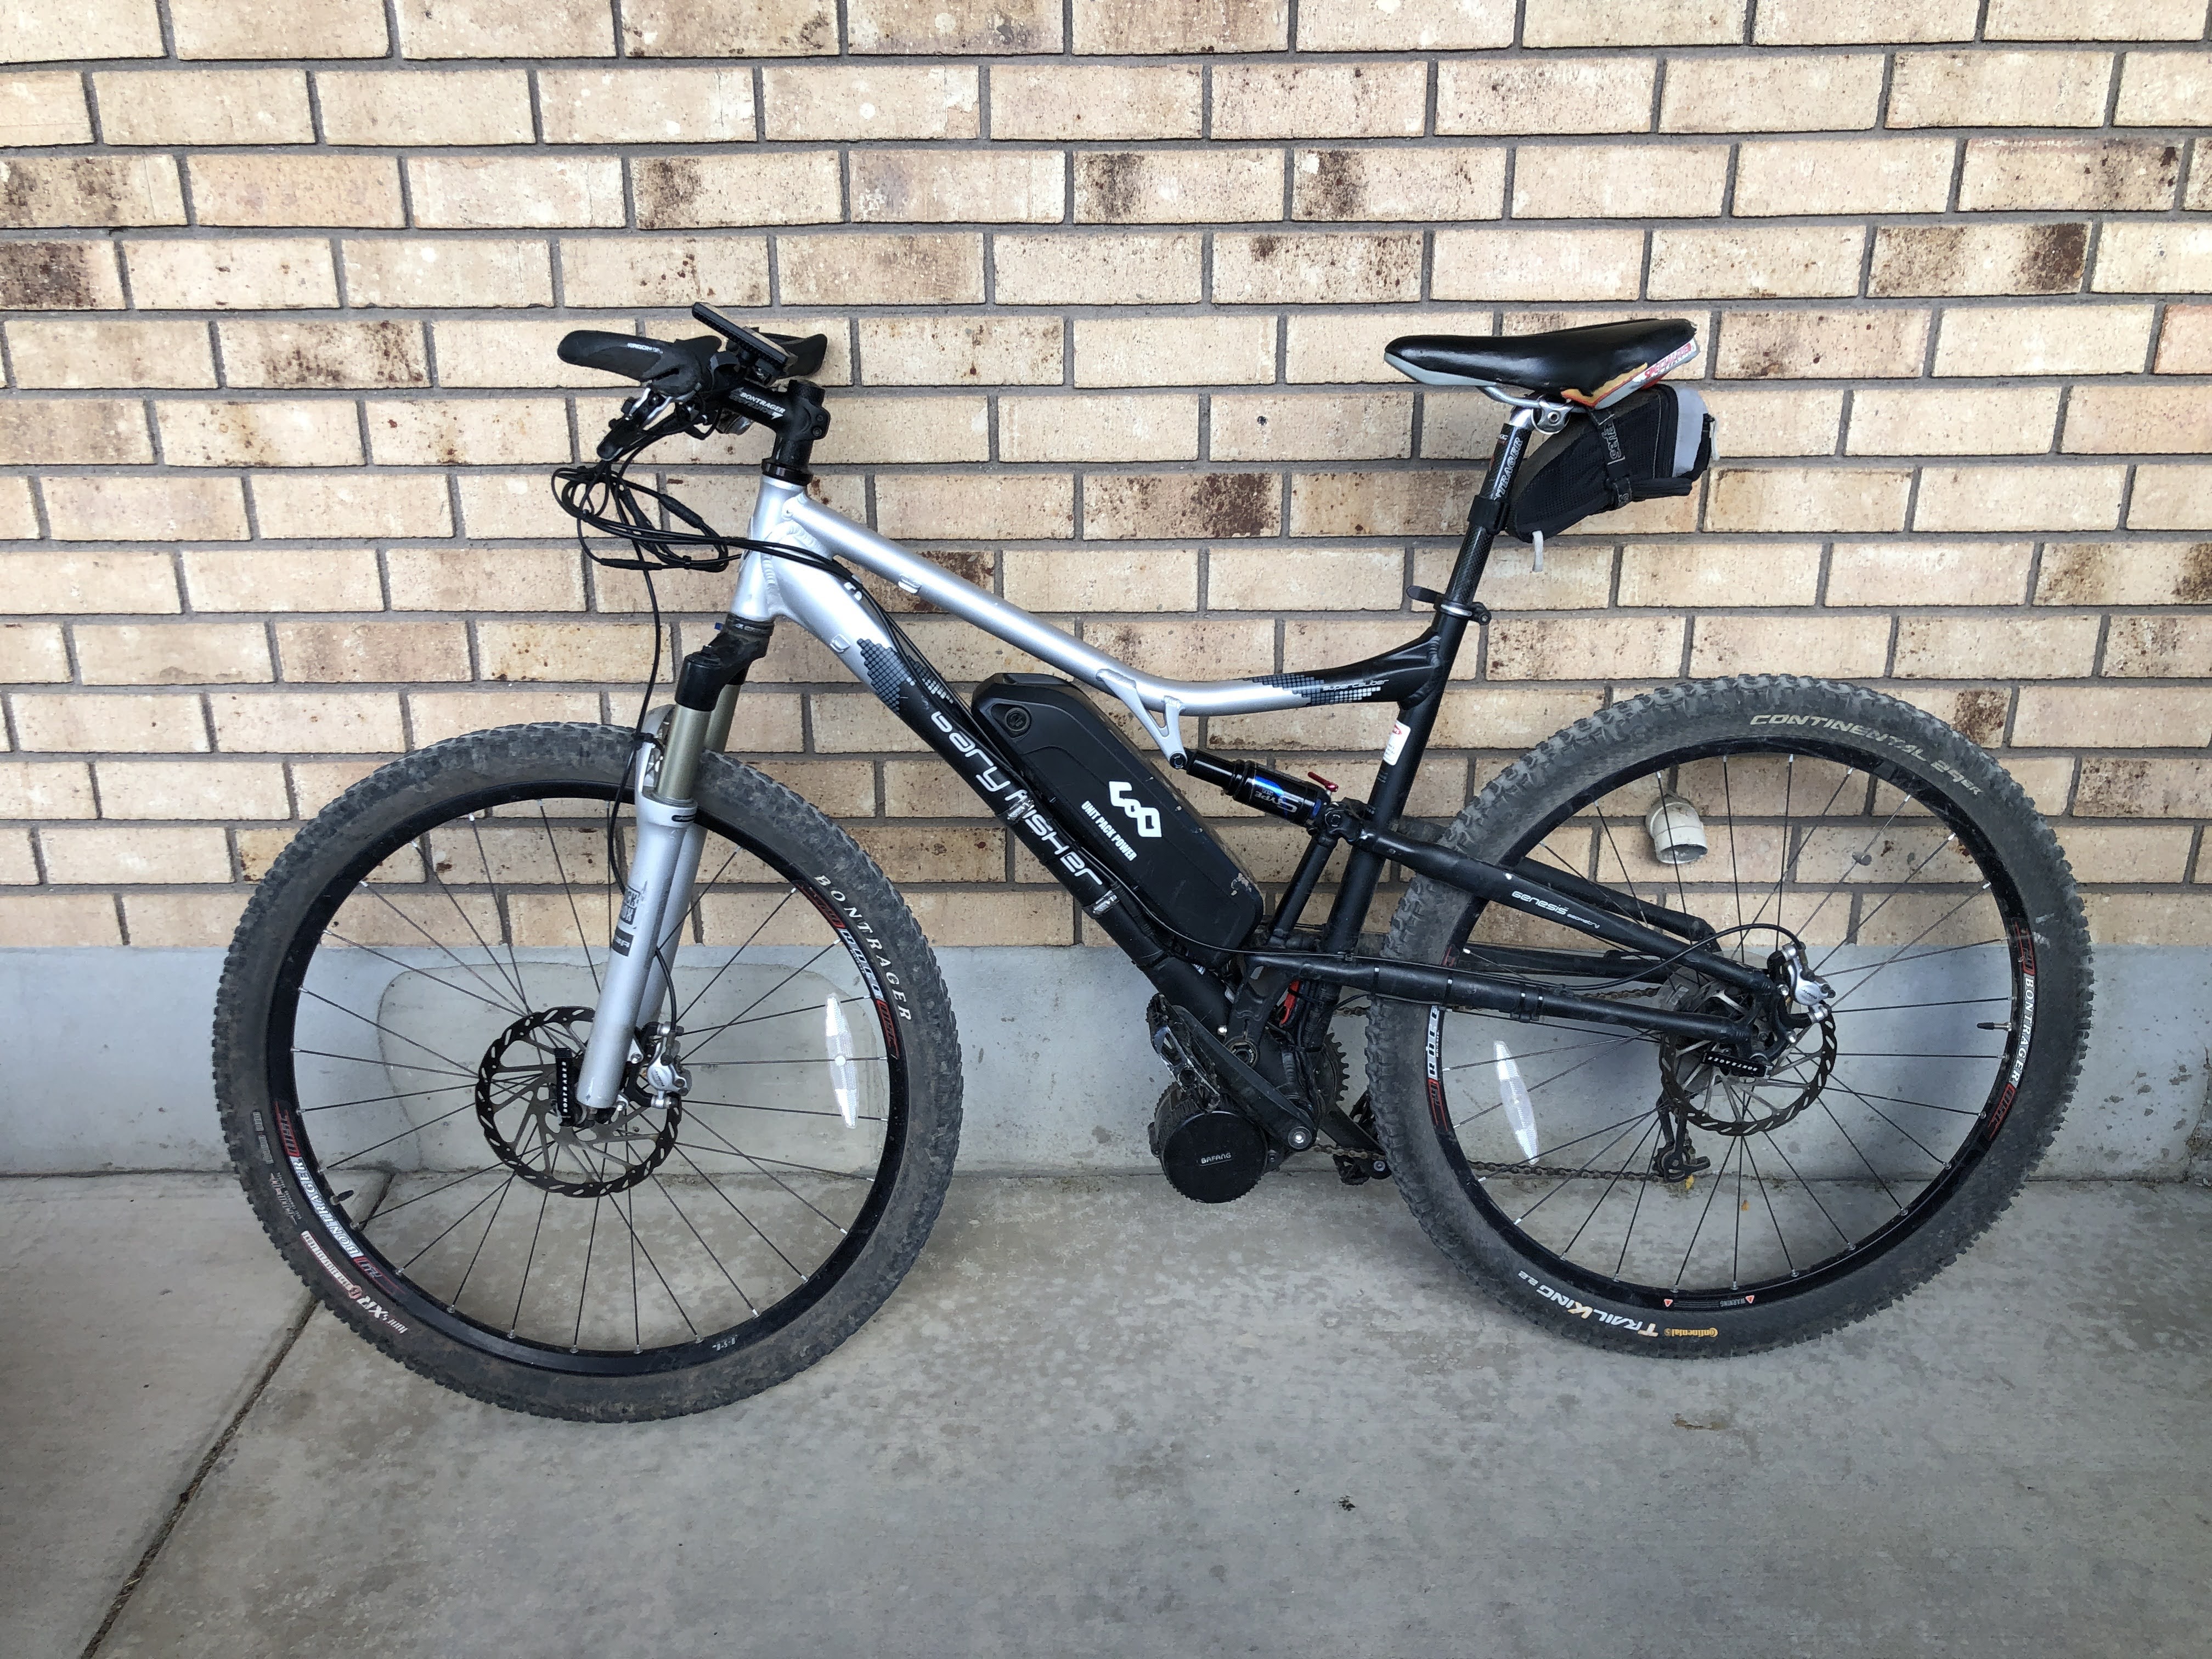
The biggest improvement came by moving the battery up higher on the bike. I didn’t think this would make much difference, but it made a significant improvement. By turning the rear shock around 180* I was barely able to mount the battery on top of the bottom tube. The bike also looks better this way and my battery isn’t exposed to rocks.
New battery location
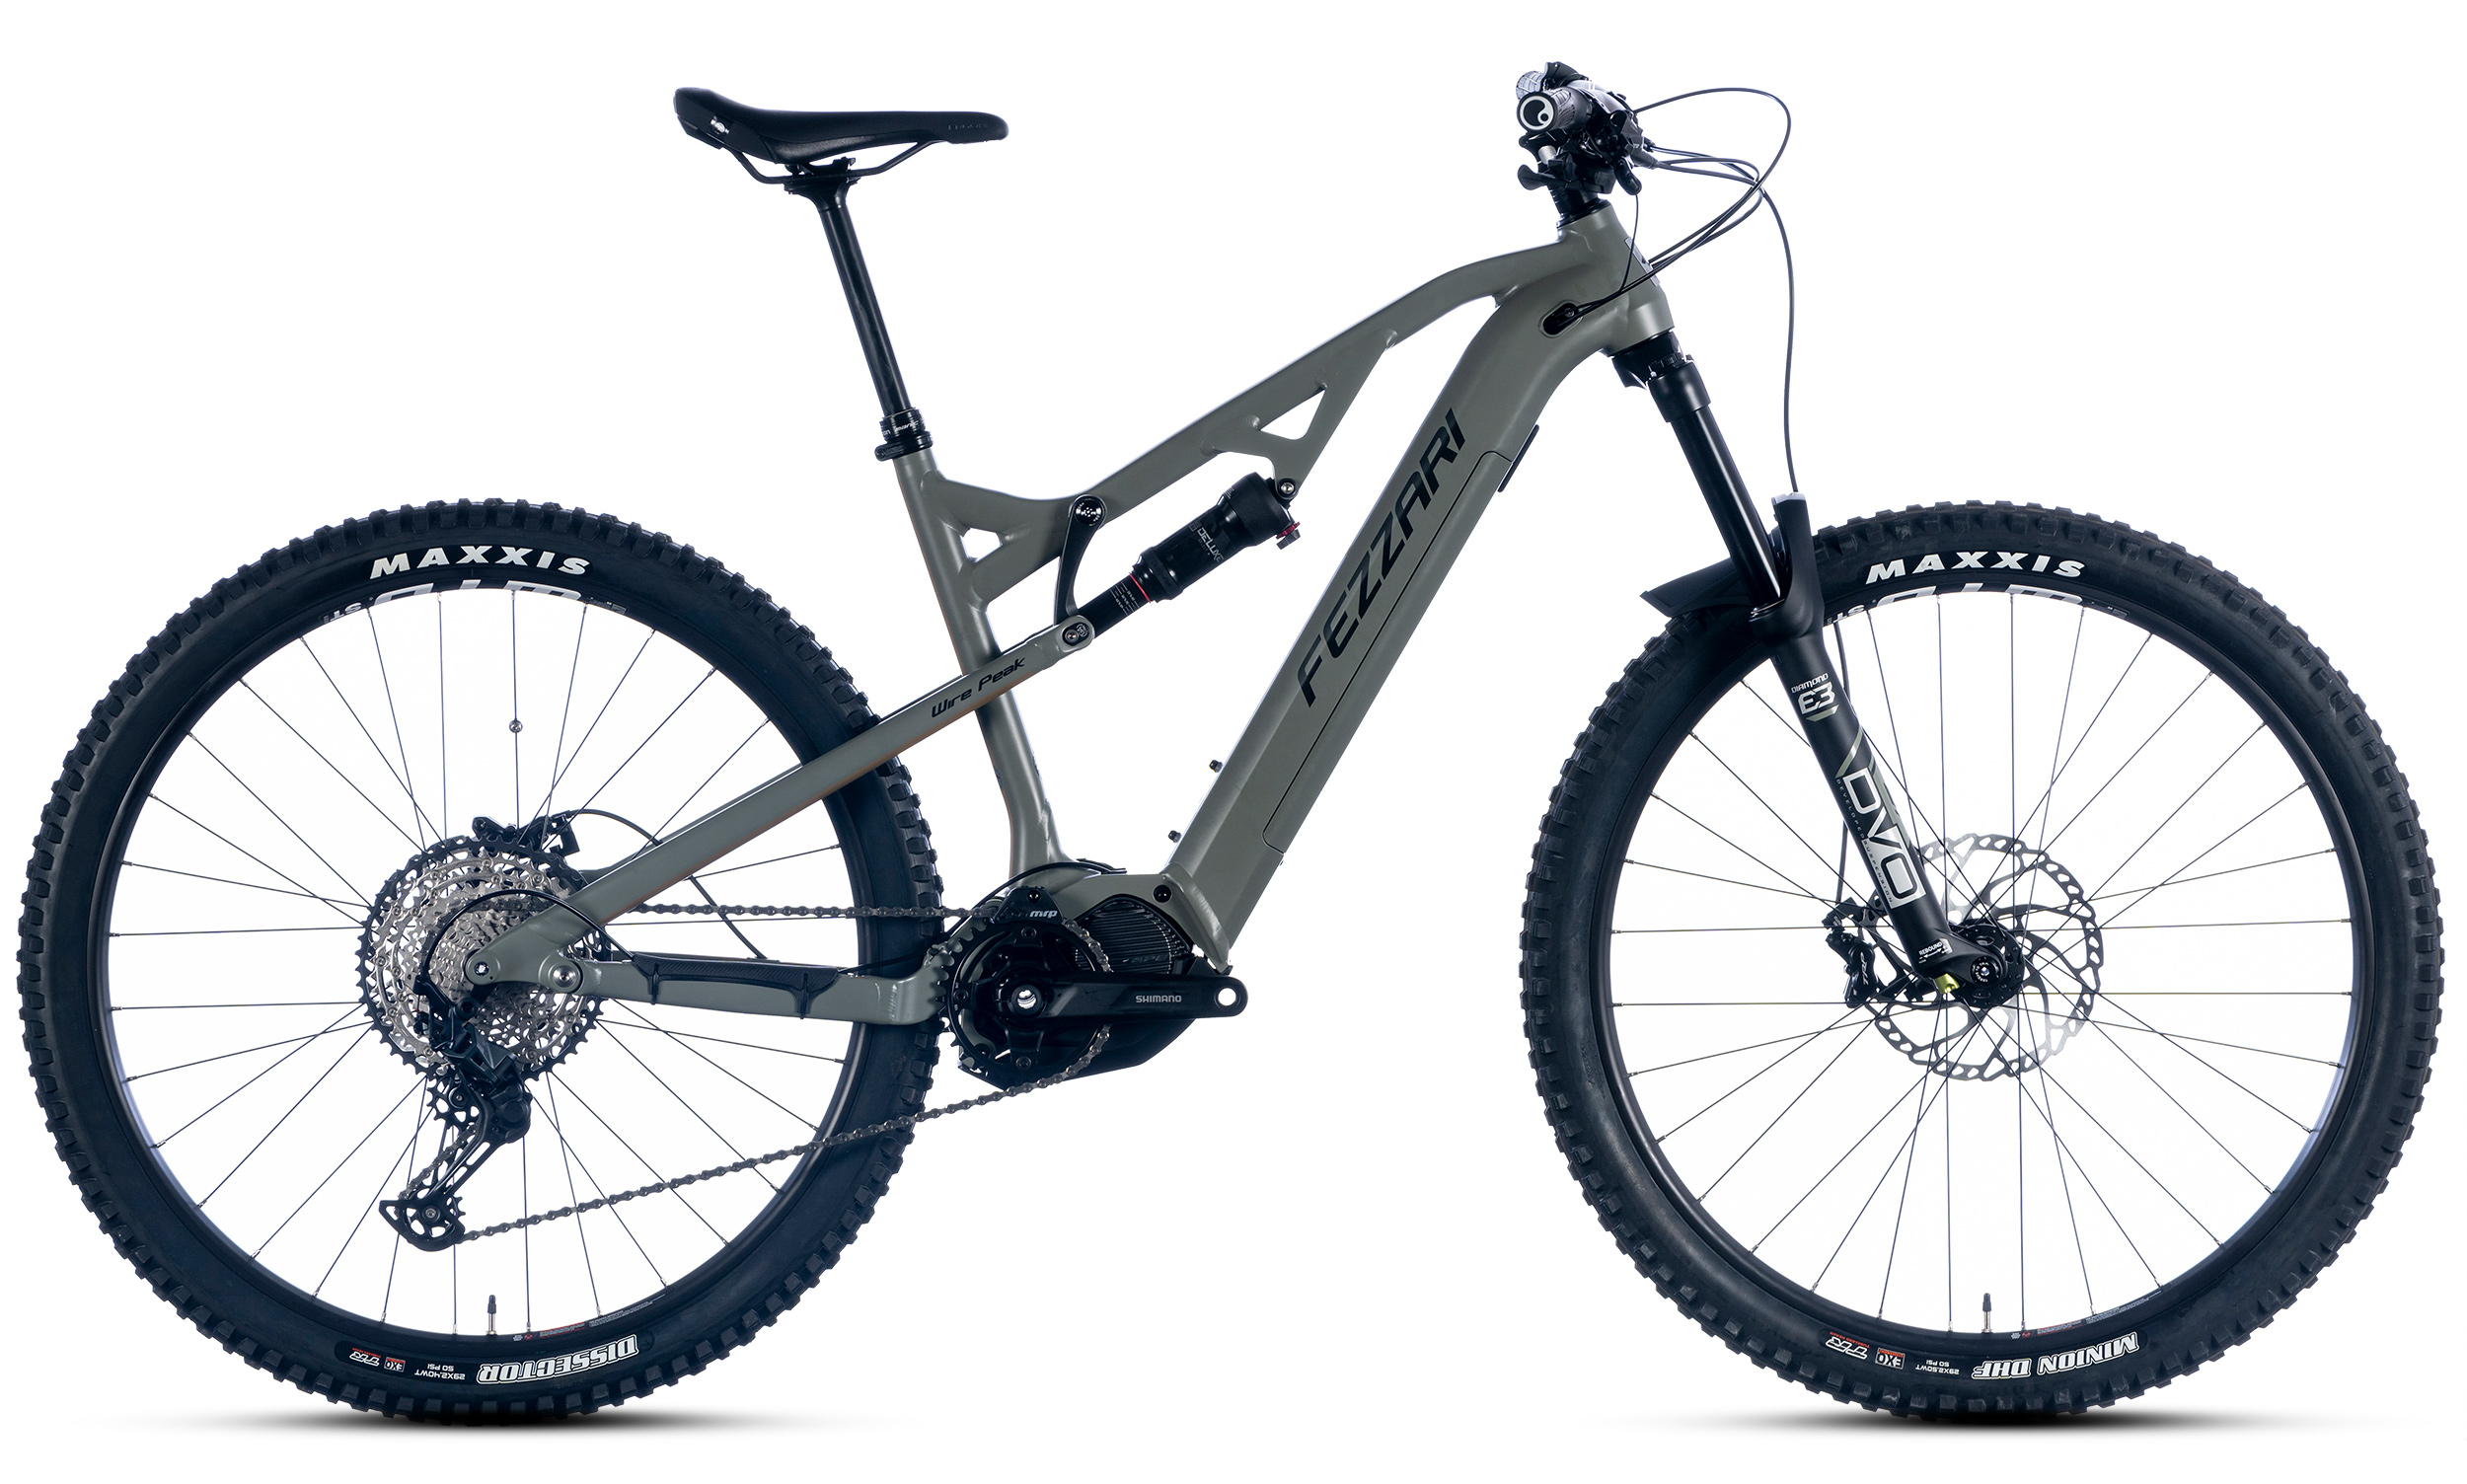
The bike now handles much better, but is still not what I consider comfortable and safe. It now handles more like it did prior to installing the motor. To make sure the handling was a bike issue and not a ‘biker’ issue, I borrowed my daughter’s Fezzari Wire Peak and rode some of the local trails. It was definitely the bike!
Pedal Clearance
Parts of the trail were narrow and deep, and I hit my pedals on the ground frequently. I also had pedal strikes on a lot of the rocks that I thought I could clear. Over the next few months I continued to have frequent pedal strikes, and it was really frustrating.
Cow trails
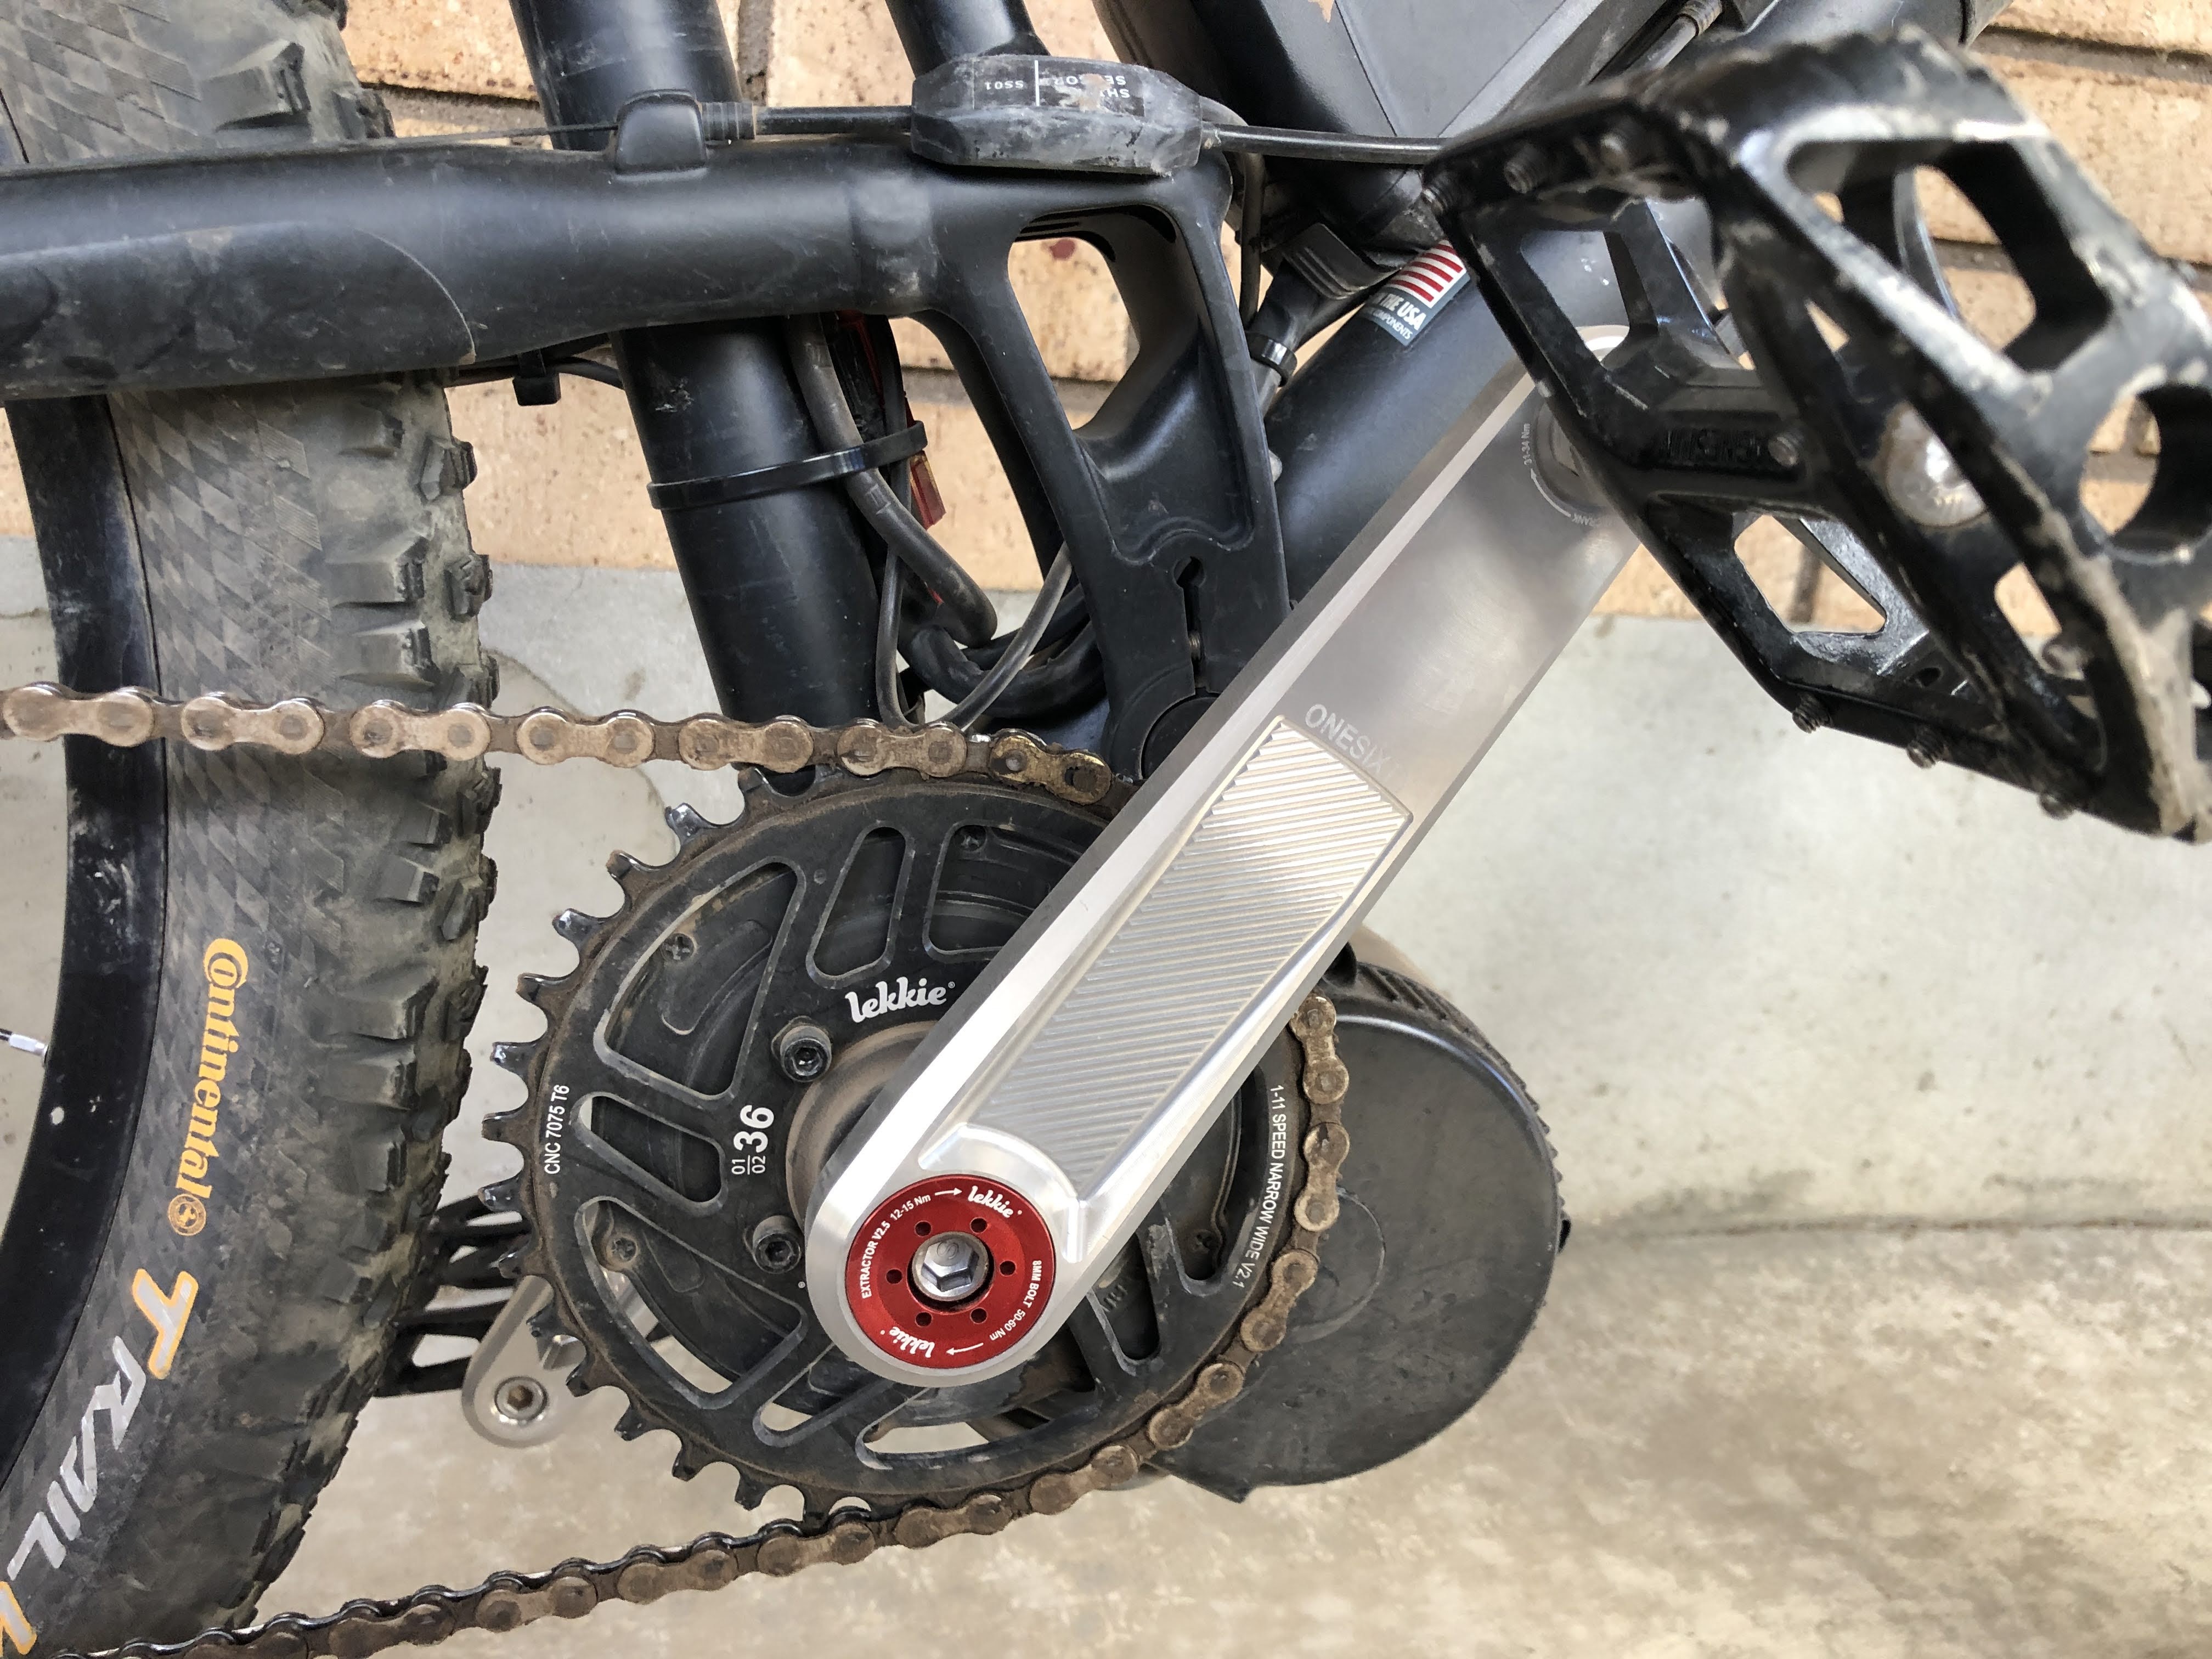
I finally found some shorter crank arms and decided to try them. The Bafang cranks were 170mm, as were my stock cranks. I ordered some Lekkie 160mm cranks. I have only done a few rides since installing them, but have not had a surprise pedal strike since. I was amazed that 1cm could make such a difference. The shorter cranks also make it easier to keep my pedal cadence up, which will be discussed more under the power management section.
160mm crank arms
Power Management
The learning curve of using the power from the motor was much larger than I expected. You only get power when you are pedaling, and the amount of power is related to your pedal cadence – not how hard you push on the pedals. I had to learn to keep my cadence up by shifting into the proper gear rather than try to muscle my way through.
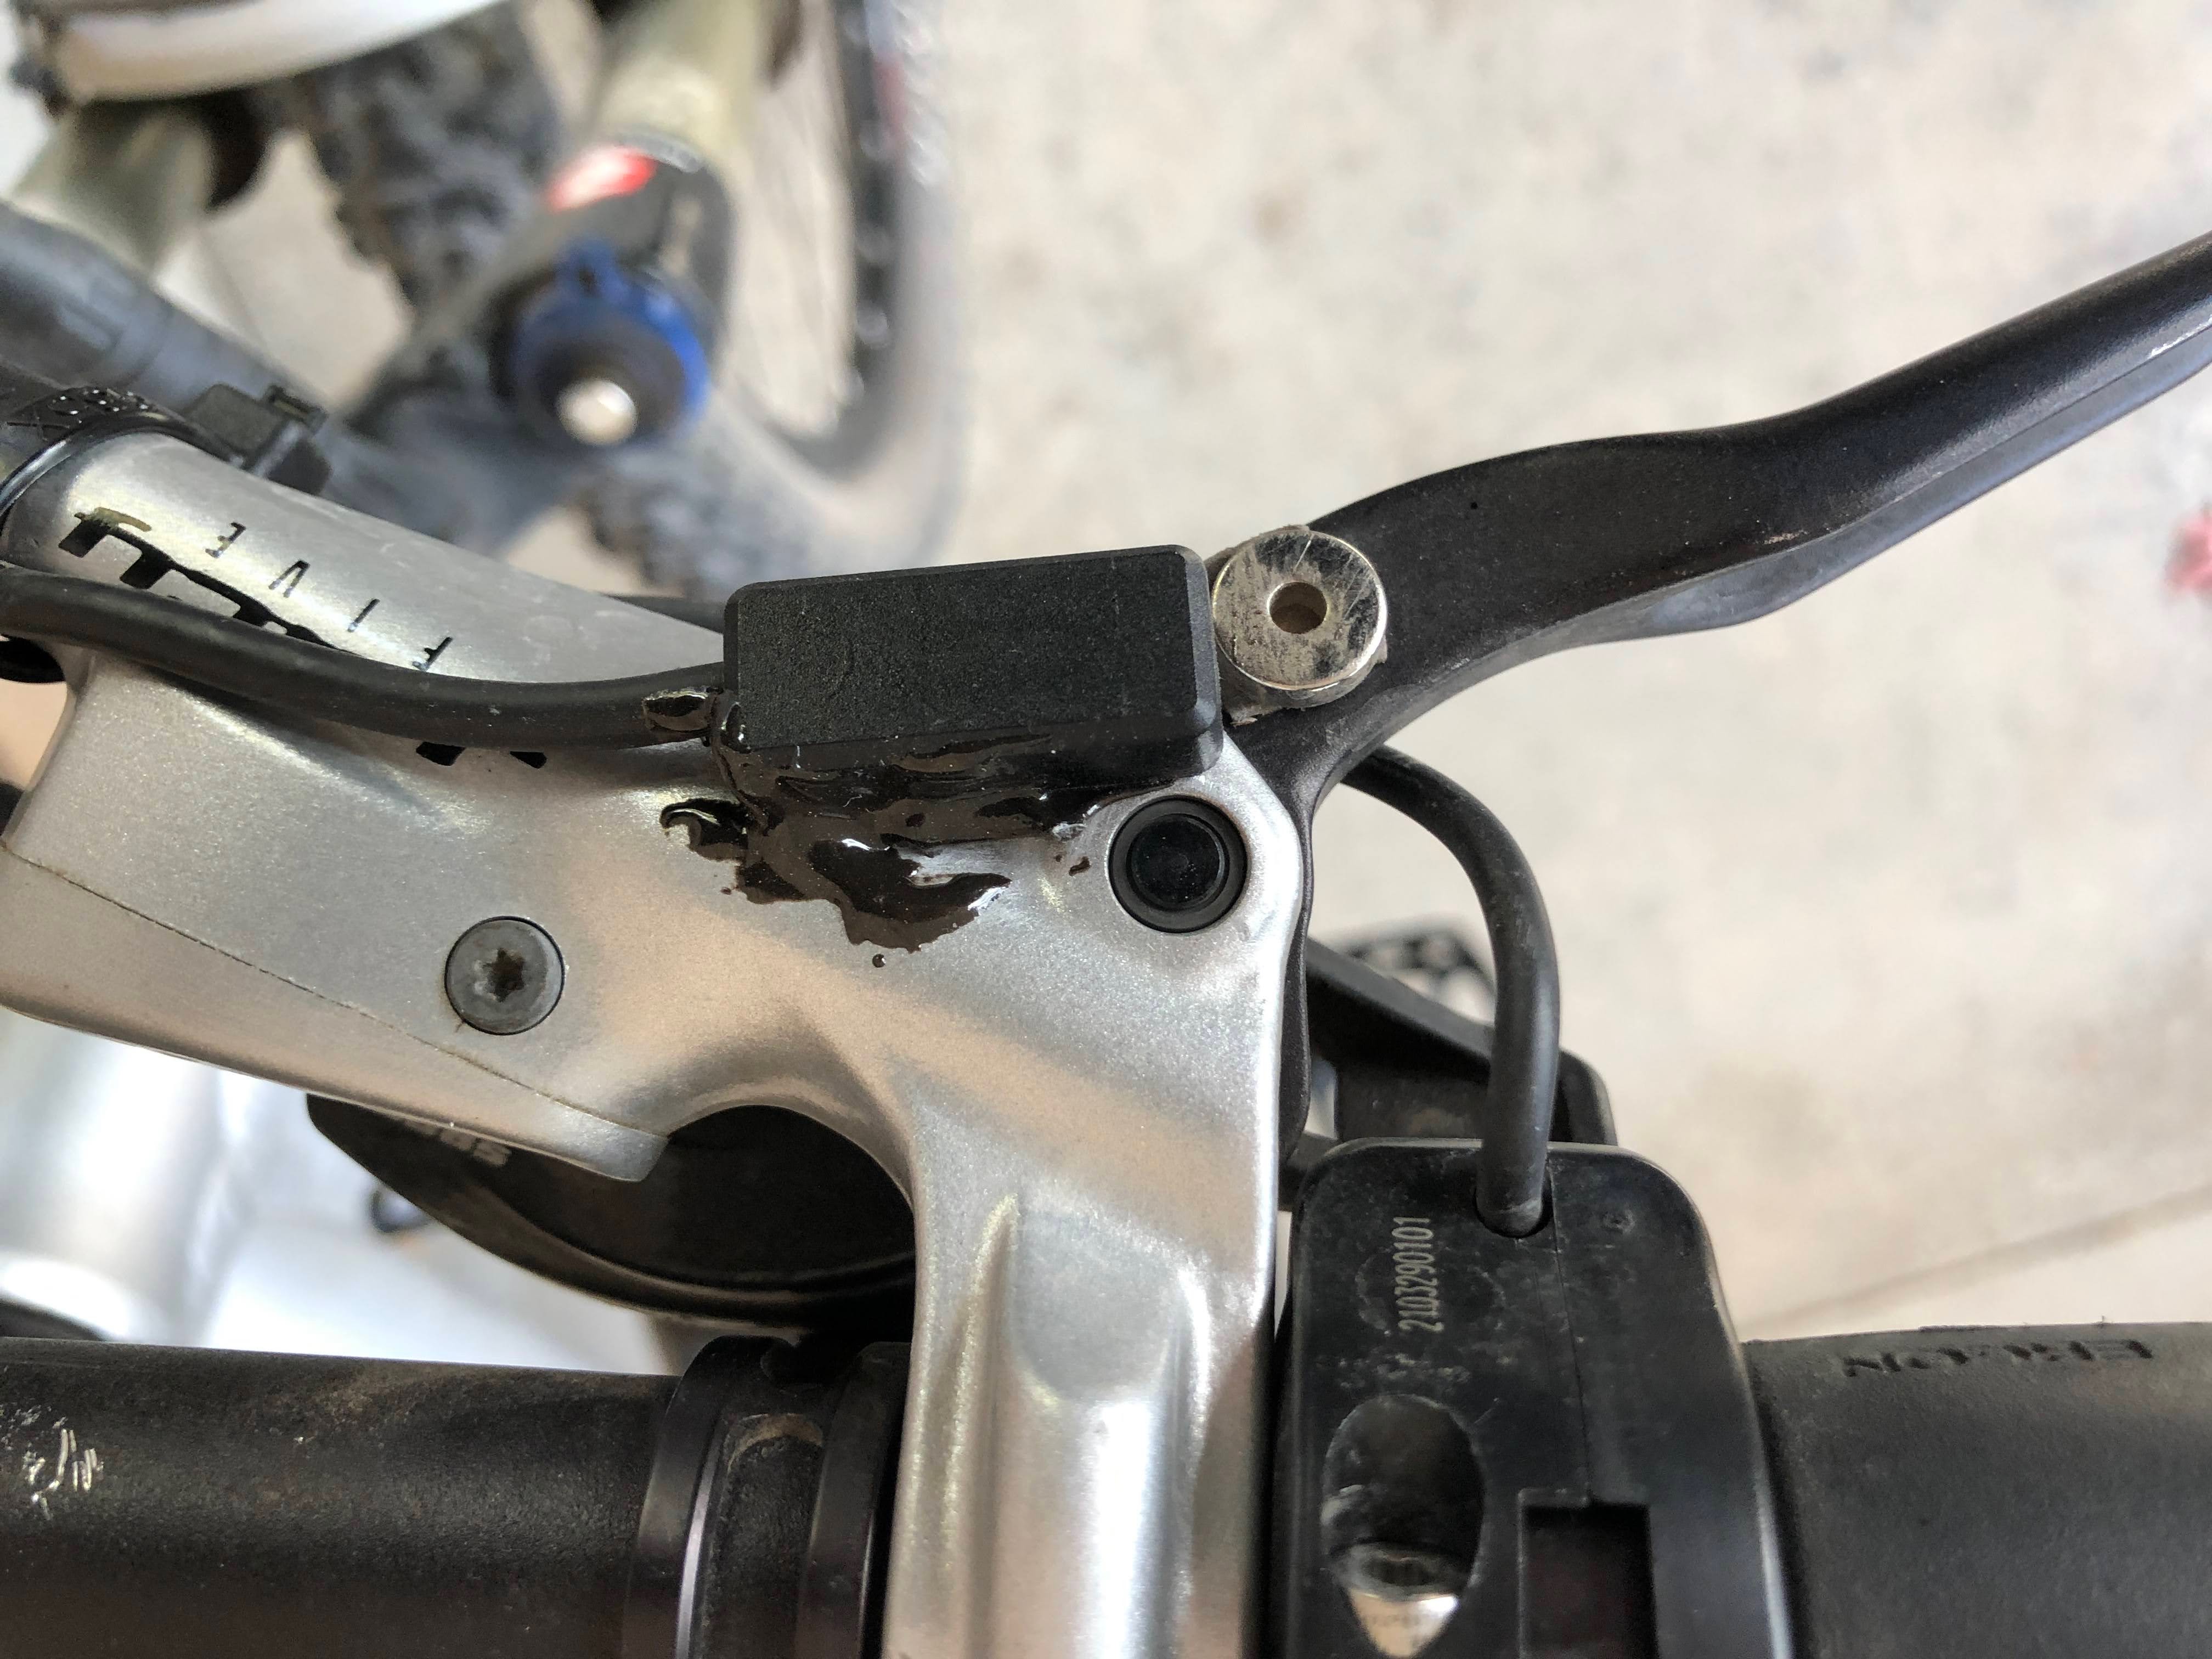
The first thing I noticed was that the motor would cut out when I rode with my fingers on the brake levers. On my mountain bike and my dirt bike I generally ride with one or two fingers on the brake levers. Having to remove my fingers was rather annoying. I also found that the double sided tape that holds on the hydraulic brake sensors would get soft on hot days and slide around, altering the sensitivity. I finally removed the tape and installed the sensors with 5-minute epoxy. I adjusted the alignment so the motor no longer disengages until I start to pull on the levers. Now I can ride with my fingers resting on the levers without issue.
Better alignment of the brake sensors
Another thing that took some getting used to was the sudden surge of power when the motor engages, and the sudden lack of power when it disengages. This made the bike lunge forward or slow down suddenly every time I started or stopped pedaling – such as trying to avoid a pedal strike. This surging was aggravated by the handlebar wobble, so it felt really unsafe riding through technical sections of trail. This effect was greatly minimized by reprogramming the motor controller, which will be discussed later.
Other Bike Tuning
Over the next few months I started to get used to riding the bike and dealing with the power management. I was also regaining confidence riding technical sections and tight switchbacks, since I haven’t ridden much in the past several years. But as I adapted, I also noticed finer points of tuning that I wanted to work on.
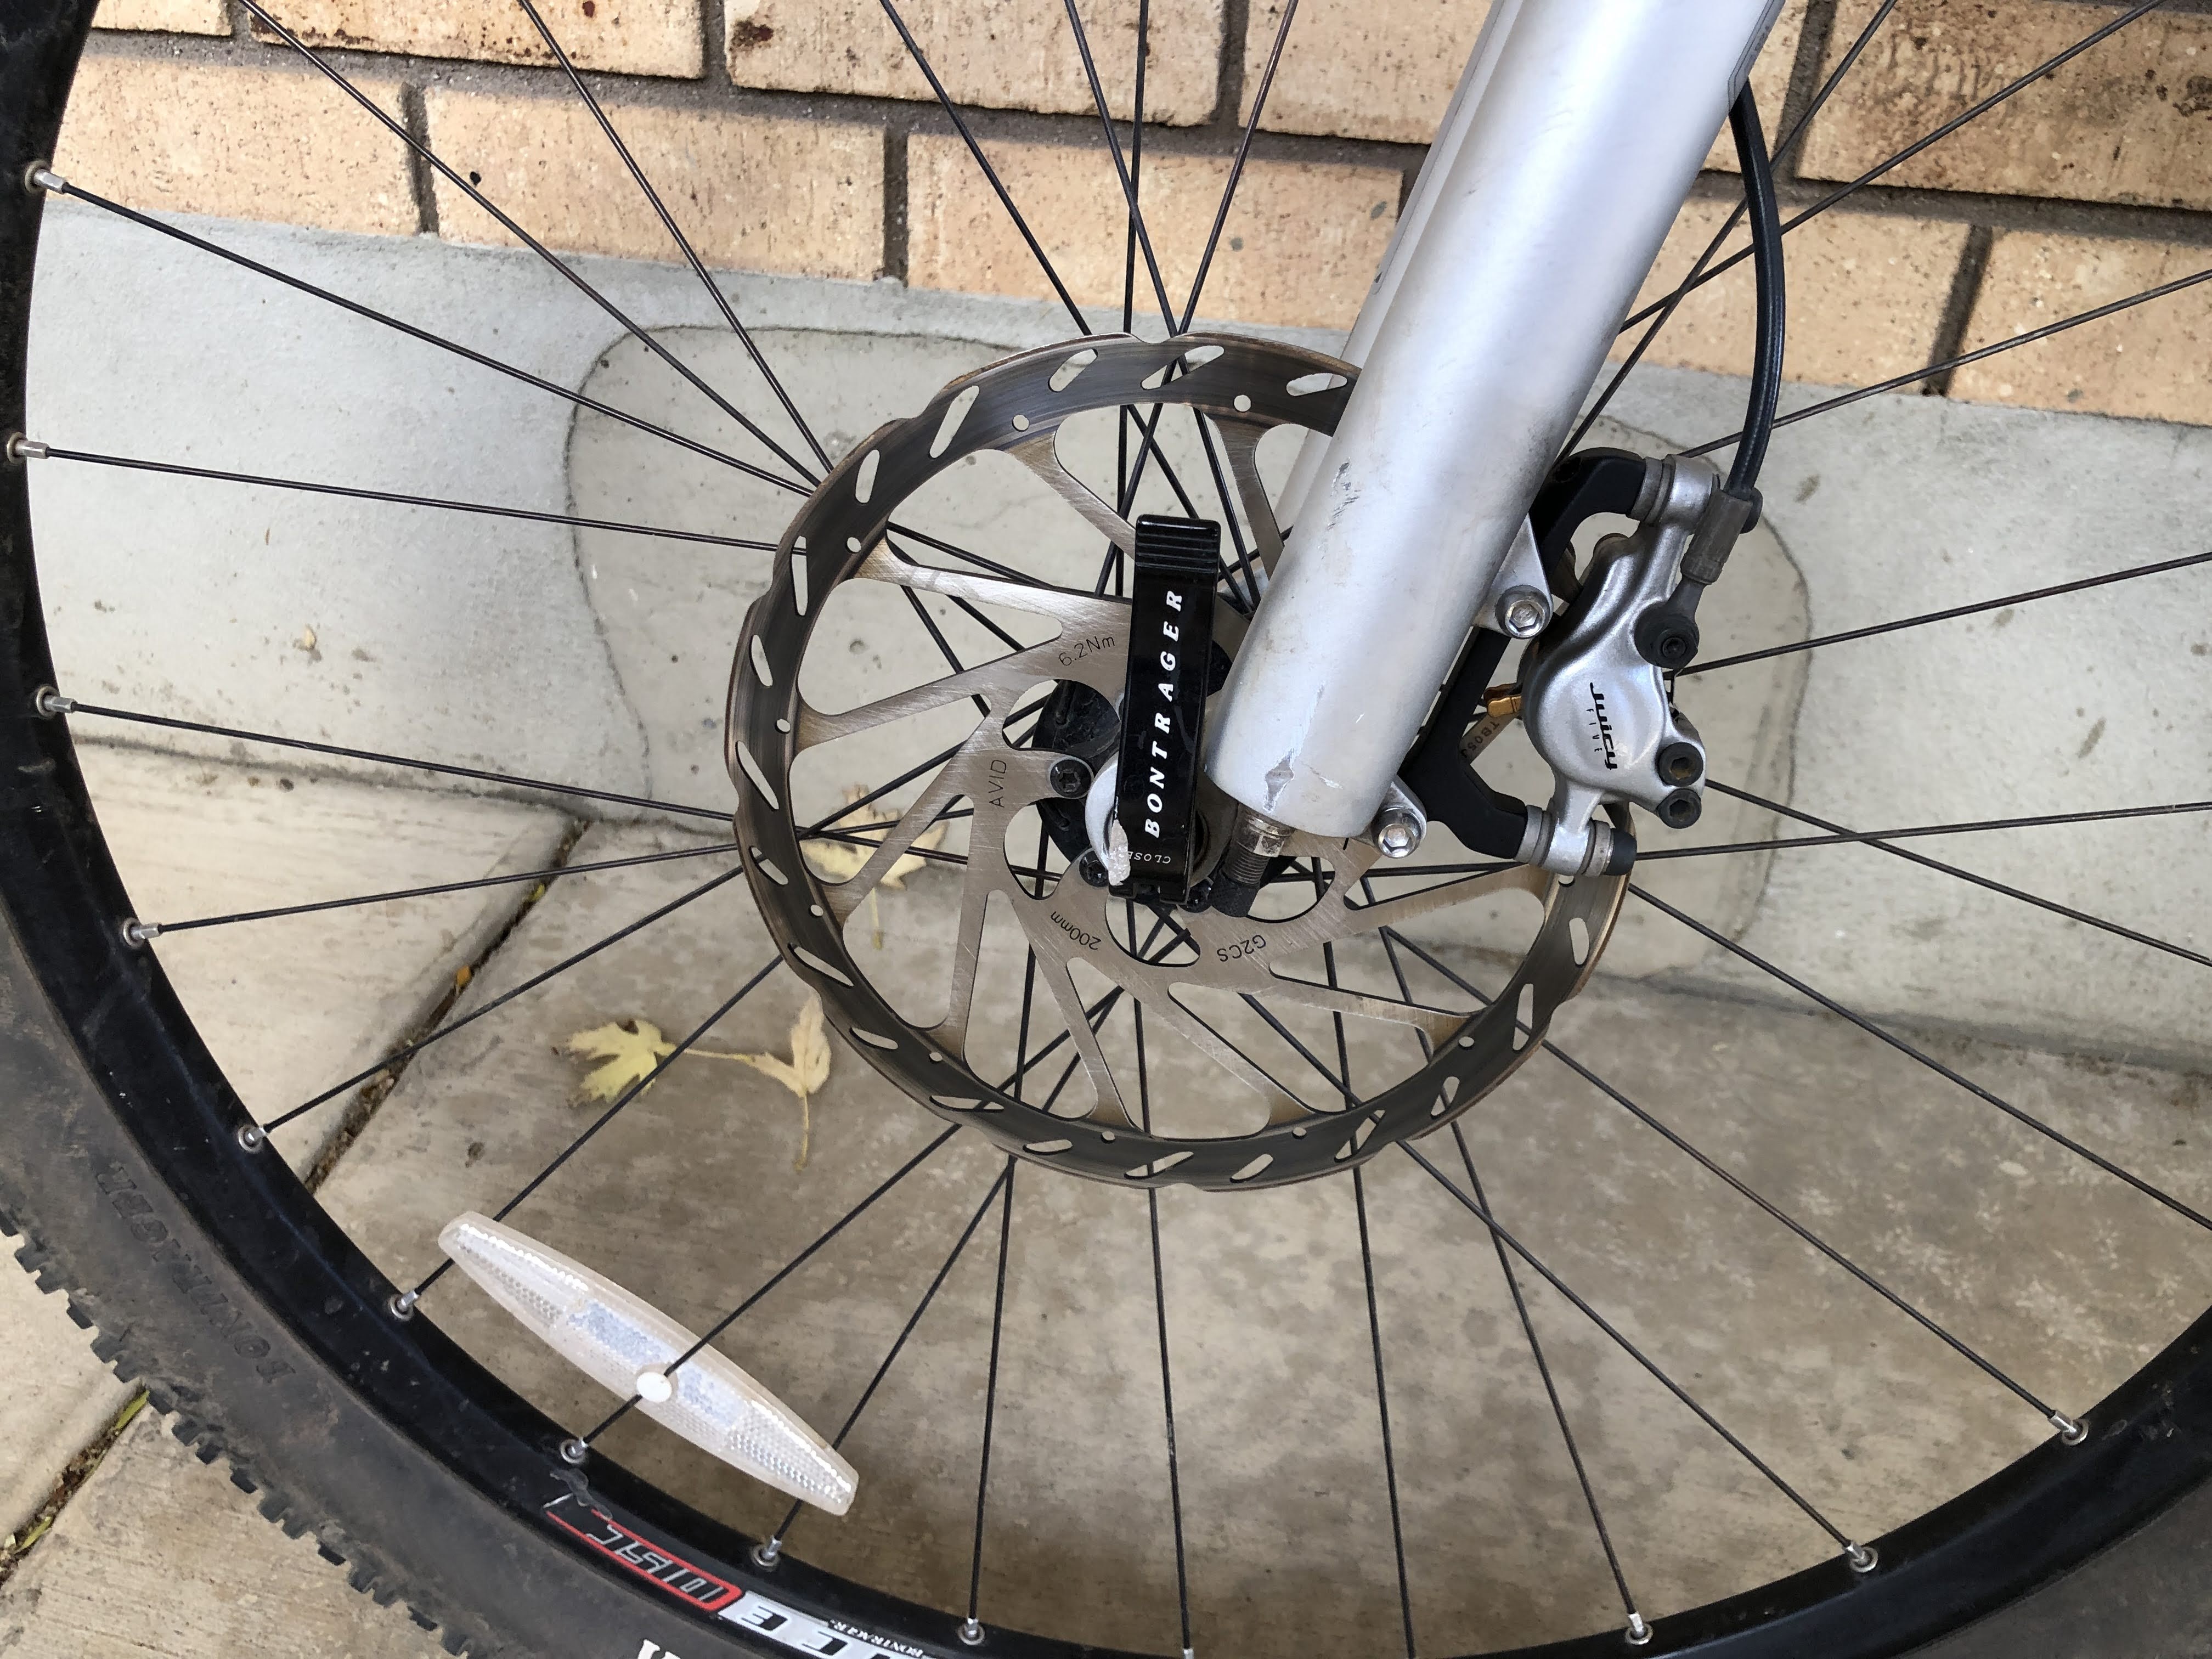
One of the first things that became obvious when riding my local trails was that the stock brakes were totally inadequate. Both wheels had stock 160mm brake rotors. I upgraded the front to a 200mm and the rear to a 180mm. I also moved from organic to sintered pads, greatly improving the stopping ability of the bike.
200mm front brake rotor
The default setting of my display unit has 9 levels of assist. The Bafang motor has tons of power, but it took way too many button clicks to move from level 1 to level 9. I changed the mode of the display to only provide 5 levels of assist, which makes it much easier to get from minimum to maximum levels of assist. In this mode, it uses the odd assists levels (1, 3, 5, 7, 9) so the step size is also larger.
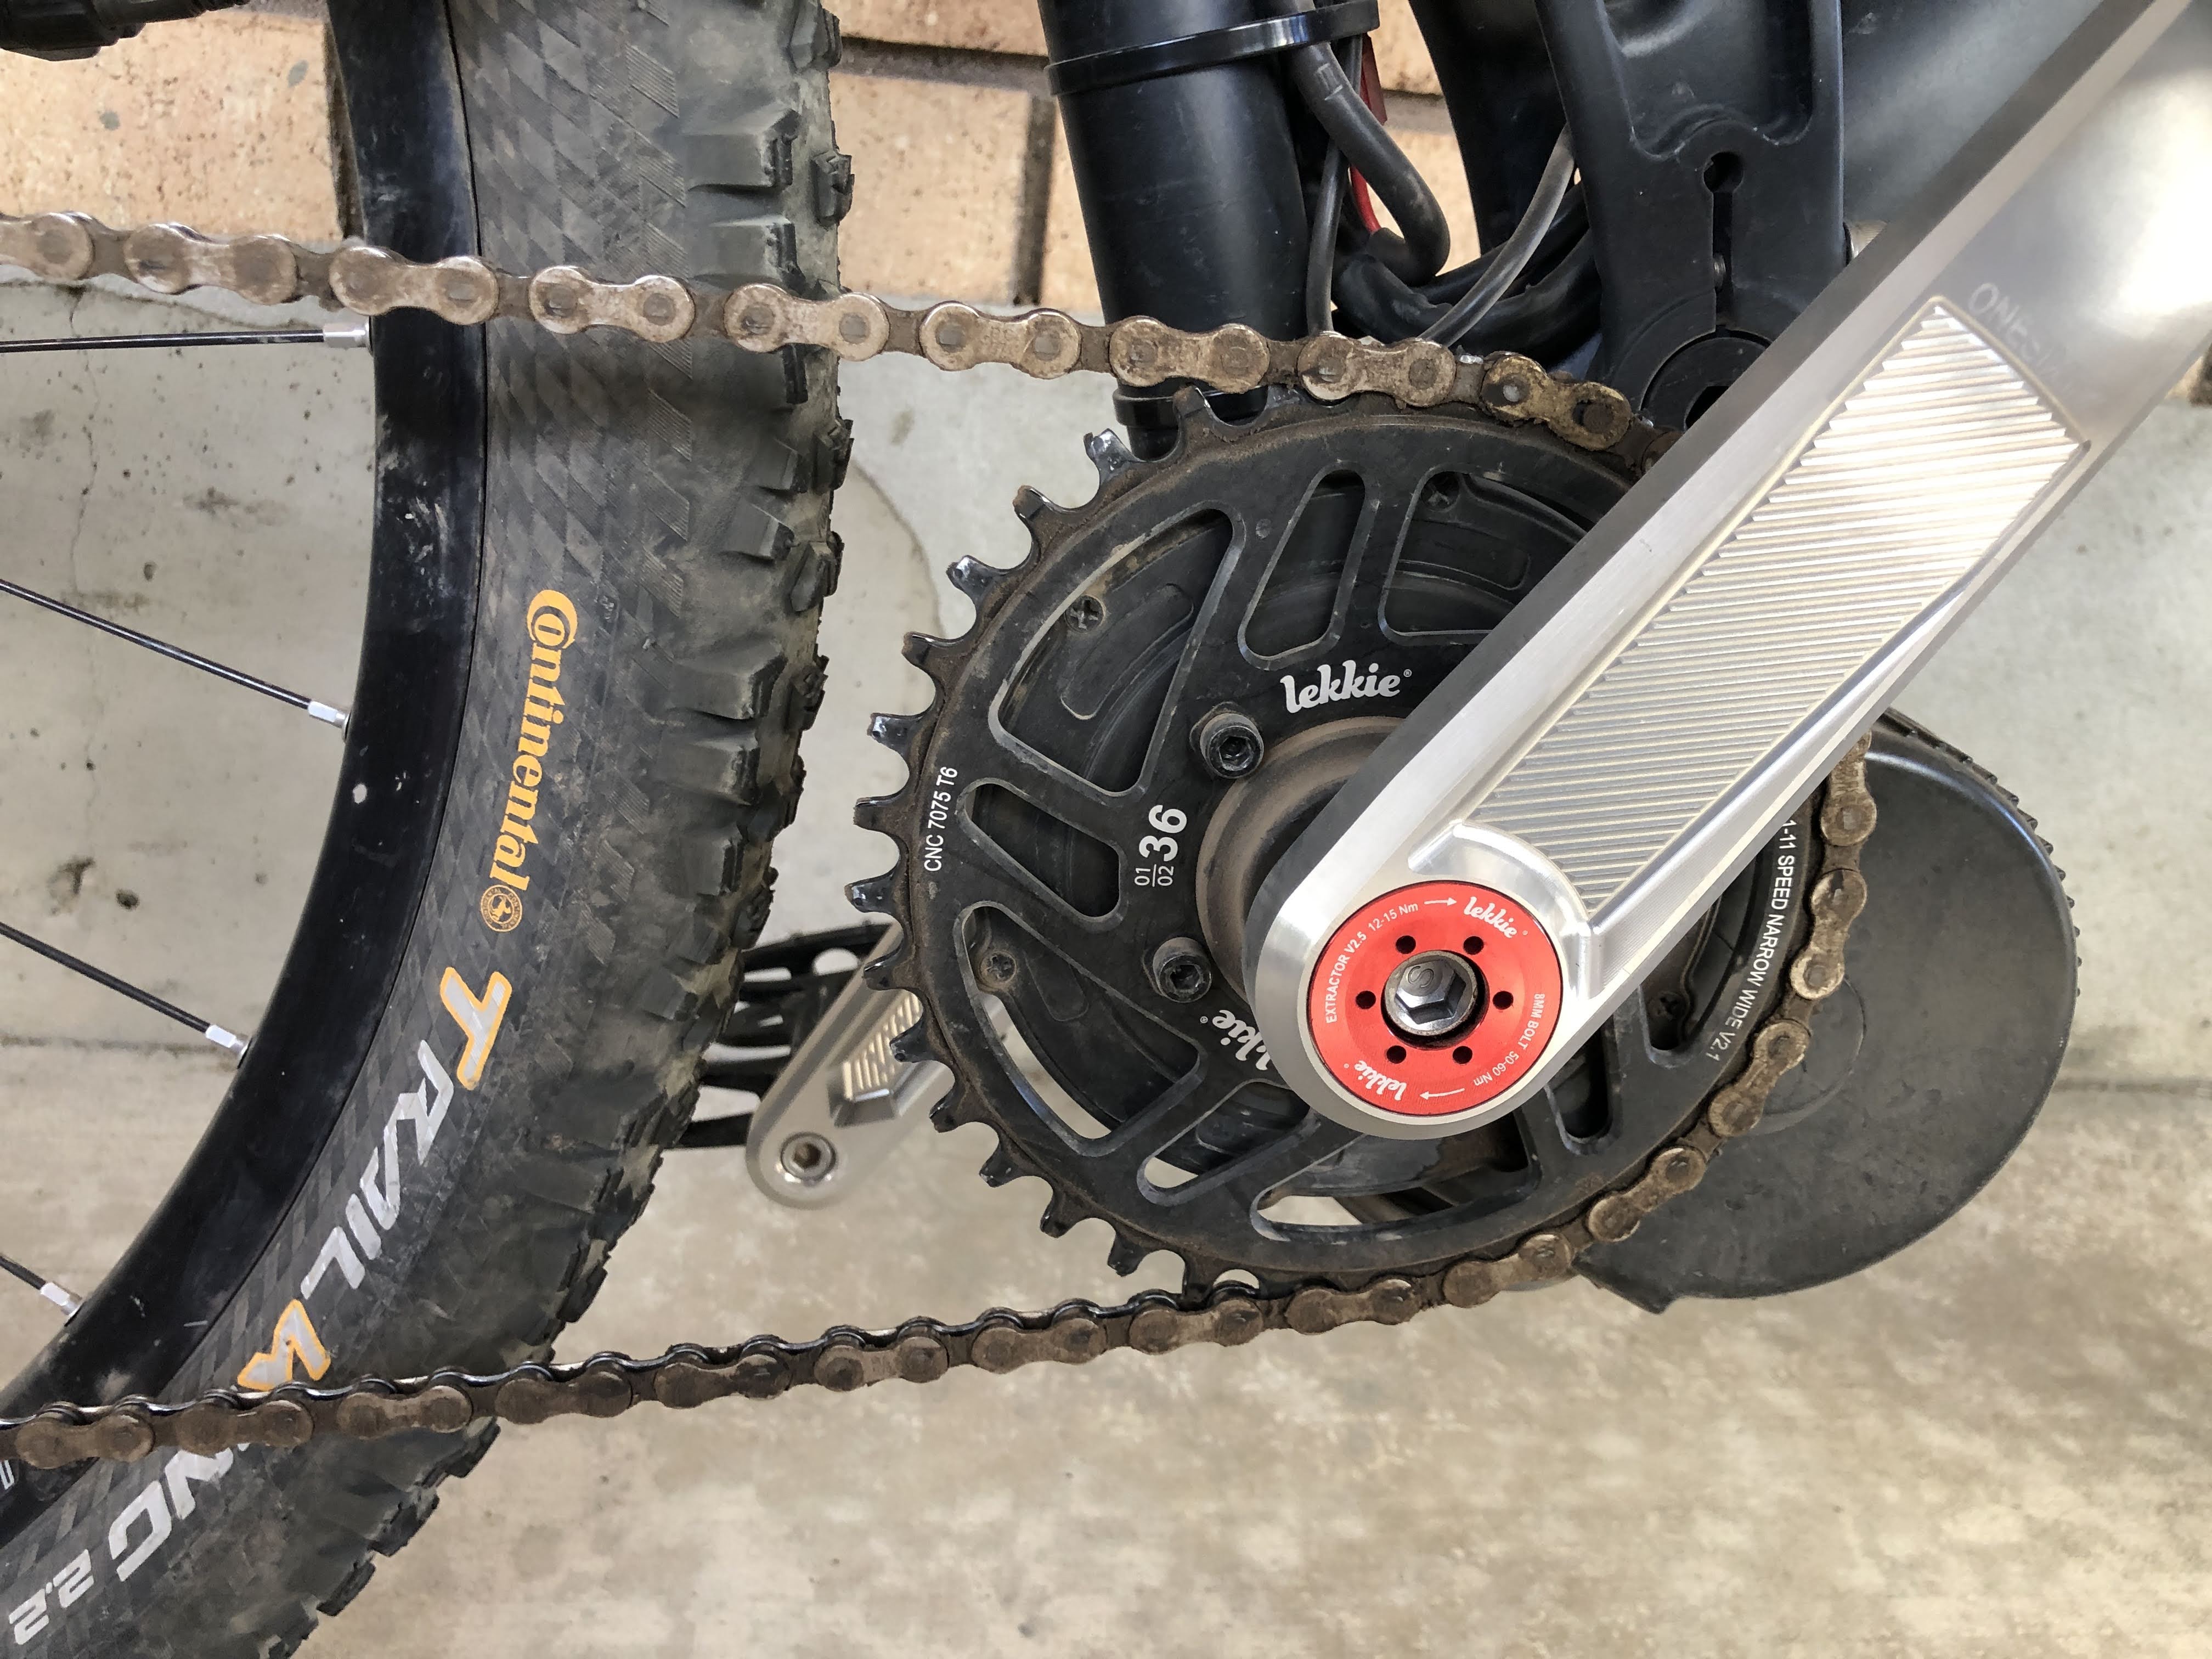
On steep hills I was unable to keep my pedal cadence up, so I had to sometimes walk my bike up the hill. The stock Bafang chainring is 44T. I swapped this out with a 36T Lekkie sprocket. This gave up some top speed, but since I mostly enjoy trail riding, the lower gearing helped a great deal.
36T chainring
I also noticed a lot of clunking noise and jerking stress on my chain. It turns out that my motor came loose and was banging back and forth. It is important to periodically inspect the nuts that secure the motor to the bottom bracket.
Periodically tighten the motor mounting nuts
Bafang Programming
After riding my daughter’s Fezzari, it was obvious that the stock programming of the Bafang motor was not to my liking. The sudden surge when the motor engaged was annoying, and assist level 1 seemed way too strong. On hill climbs I couldn’t ride slow enough to ride with others in my group, and I found that I hardly ever had to go to higher levels of assist.
You can customize the motor controller with a laptop and a USB adapter cable. Instructions can be found on-line, such as this guide.
I am now on my second custom program, but haven’t yet tested my new settings out on the trail. The motor behavior is now much more to my liking, but I will probably still make a few minor adjustments. Here is a short summary of the changes I made and why:
Start current: to reduce the surge when the motor engages I dropped the start current from 20% down to 12%. I like this setting much better.
Start degree: I wanted the motor to engage sooner, so I dropped this value from 4 to 2. I now have to pedal about 1/4 of a rotation for the motor to engage. This makes starting on a hill much easier (but the throttle makes it easier still).
Speed limit: I changed the speed limit for all assist levels to 100%. I don’t understand why you would want lower levels of assist to limit your speed. It doesn’t make sense to me – but maybe I am missing something. Please add comments below if you can explain this to me.
Current (I will only list the odd levels since I have the display set to 5 levels of assist):
1: 52% to 28%, giving a much softer level of assist.
3: 64% to 46%, almost like the original level 1.
5: 75% to 64%.
7: 88% to 82%.
9: 100% – no change. I can now get a much broader range of assist with the five levels.
What’s Next?
Ebikes are really fun. You can adjust the amount of exercise you get by adjusting the assist level. Since it is fun, you ride more often, getting more exercise than I typically have with a traditional bike. Even riding around the neighborhood, an ebike is more fun than a regular bike. Instead of cruising at 8 mph, I can easily cruise at 12 mph. The bike is more stable and more fun at that speed. But for me, the real value is out on the trail. I can now ride up the hills on my local trails, and I can keep up with my children.
As I mentioned earlier, my daughter’s Fezzari Wire Peak felt much safer and more stable than my bike. Now that I know I enjoy riding the ebike and I am getting out a few times each week to ride, I have decided to get a new emtb. I did a lot of research and finally decided to order to Fezzari Wire Peak Elite. I think there are better bikes out there, but I felt the Fezzari offered the best value. Plus, it is a local company so I can get support when needed.
Fezzari Wire Peak
As with many other things, bikes are hard to come by. I placed an order for my new bike and hope to get it very soon. Hopefully I can get out and ride it before winter sets in!
Update
I took one last ride on my old bike to test out the new programming. It seems almost ideal. The power level is about half of the stock settings, which is still plenty. Here is a video of that ride on some trails I hadn’t ridden before. Things went well until I hit a big thorn and got a flat tire.
And my new Wire Peak came in a few weeks early. So far I have only taken one ride on it. The geometry of the new mountain bikes is very, very different than my old bike, so it will take some getting used to. But right off the bat I could tell the bike is more stable – no more handlebar wobble. I need to do some fine tuning on the handlebar and control alignment, but I think this is going to be a really fun bike. The power delivery is much smoother than my old bike. It doesn’t have sensors to cut the power when you hit the brakes or shift gears, so it is much more natural to ride.
The Shimano EP8 motor has two user profile settings. I found that profile 1 (the default) was a little weak for my weight. I switched to profile 2 and that felt much better. It is, in fact, very close to my latest settings on my old motor.
I have been surprised at how much I enjoy moto-camping on my dirt bike. But it is a challenge because I like to be comfortable with a good tent, pad, chair and shoes. These things add weight and bulk. If I spent a lot of money I could get smaller and lighter gear, but I really like the gear I already have.
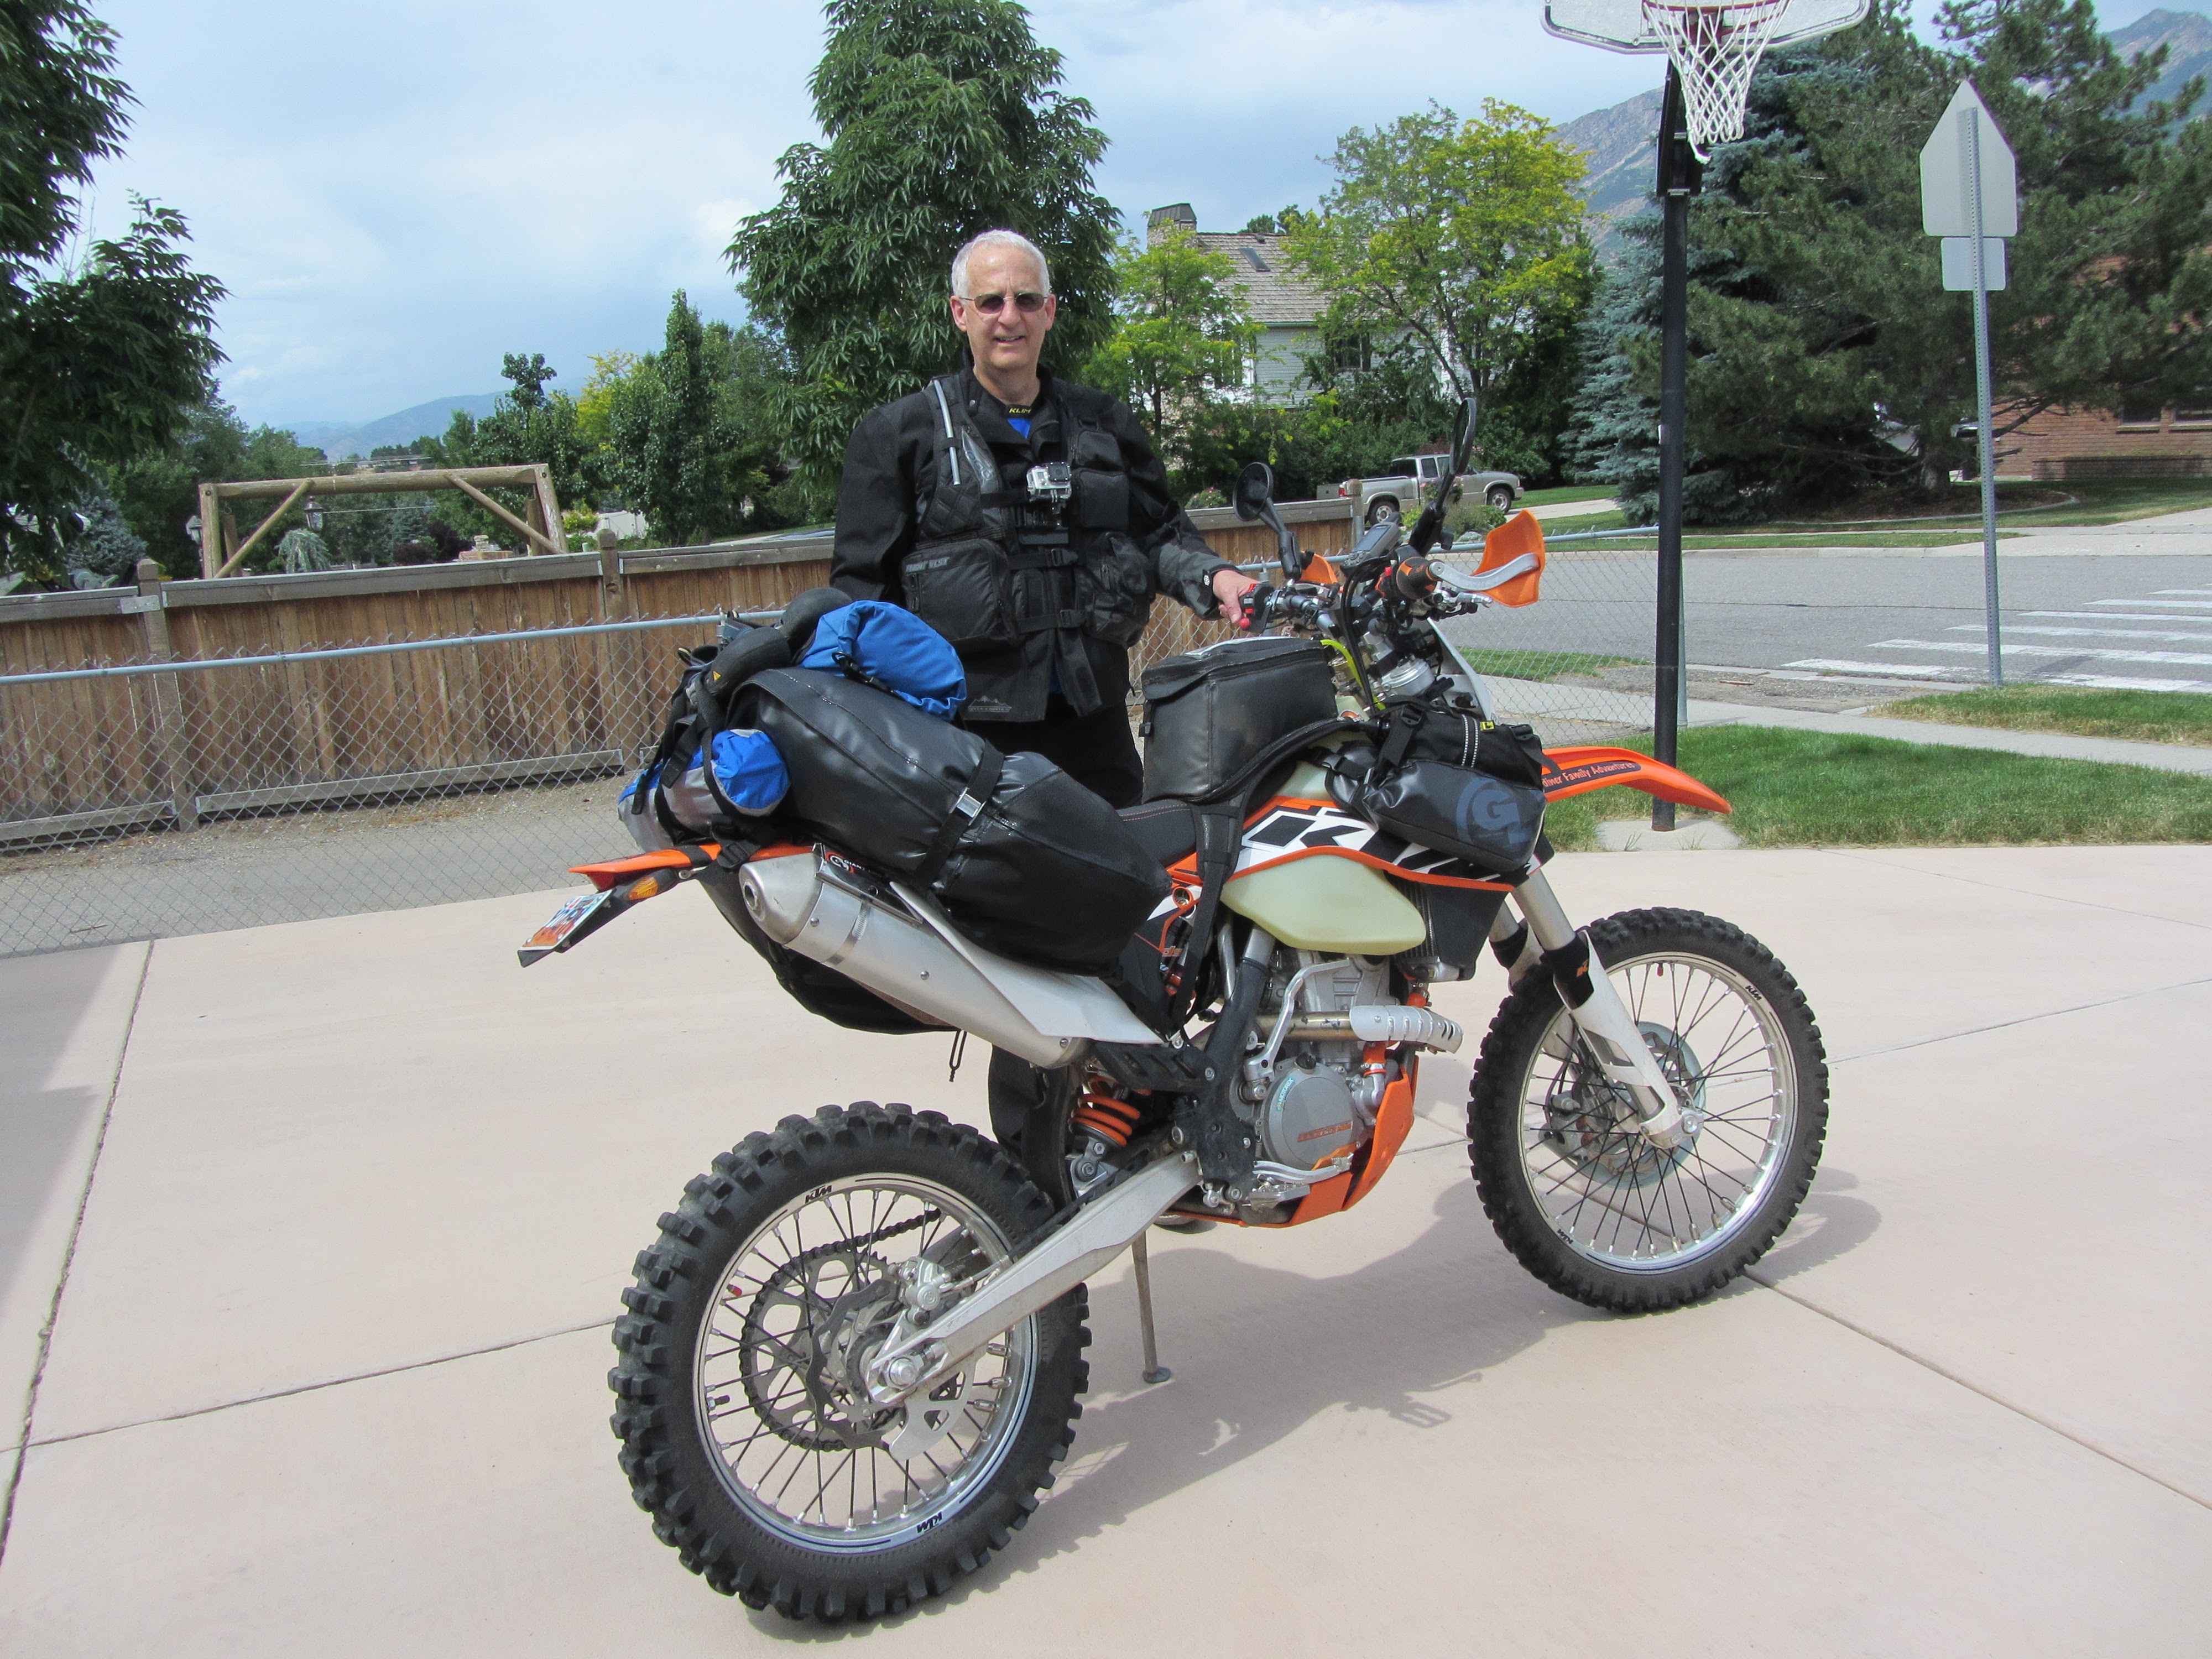
Here is a photo of me ready to set out on my very first moto-camping trip several years ago.
My first luggage setup
I got a good deal on a closeout sale on the older model Giant Loop Coyote bag. I found the zipper to be a real pain to deal with – especially when the bag was really full. I strapped my sandals on the top of the bag, and a 20L Sea To Summit dry bag to the front, containing my sleeping bag and air mattress. My chair is tucked neatly behind the Coyote bag.
A very tight fit
I didn’t get very far before I moved the 20L dry bag to the rear of the Coyote bag. The cockpit was way too tight and it interfered with my backpack. I also learned that sandals were pretty uncomfortable in the wet grass at camp due to the rain. I much prefer quality hiking shoes – but they are bulky.
In order to go moto-camping with my children, I needed two more sets of luggage, so that gave me the opportunity to experiment with other setups. I quite liked the AltRider Hemisphere bag because it eliminated the zipper struggles of the Coyote. For more information about my other luggage options, check out this report on my blog.
My AltRider Hemisphere bag
In addition to switching to the AltRider saddle bags, I moved up to a 35L Sea To Summit bag. For this particular trip I also used a 13L bag on the very back for my shoes, and two Pannier Pocket 2L bags for my lunches and first aid kit.
I found it easier to replace all of those top bags with a Tusk 33L dry duffle bag and not use the top portion of the AltRider bag. This allowed me to move much of the weight further forward on the bike, but it does make the top bag pretty tall. The small orange bag on the back is for increased visibility and it carries my garbage to be disposed of at the next fuel stop.
Using the Tusk duffle bag
As you can see, I tend to overpack with a small dirt bike. Surprisingly, the bike still handled fairly well with all of that gear, but I do want to find better approaches.
That brings me to my latest setup. I estimate that both the Coyote bag and the AltRider bag only carry about 15L in each leg of the bag. There is room for the bags to go lower, so it seemed that you could easily carry about 20L on each side of the bike. I decided to try the Green Chili Adventure Gear (GCAG) Scramble Rack.
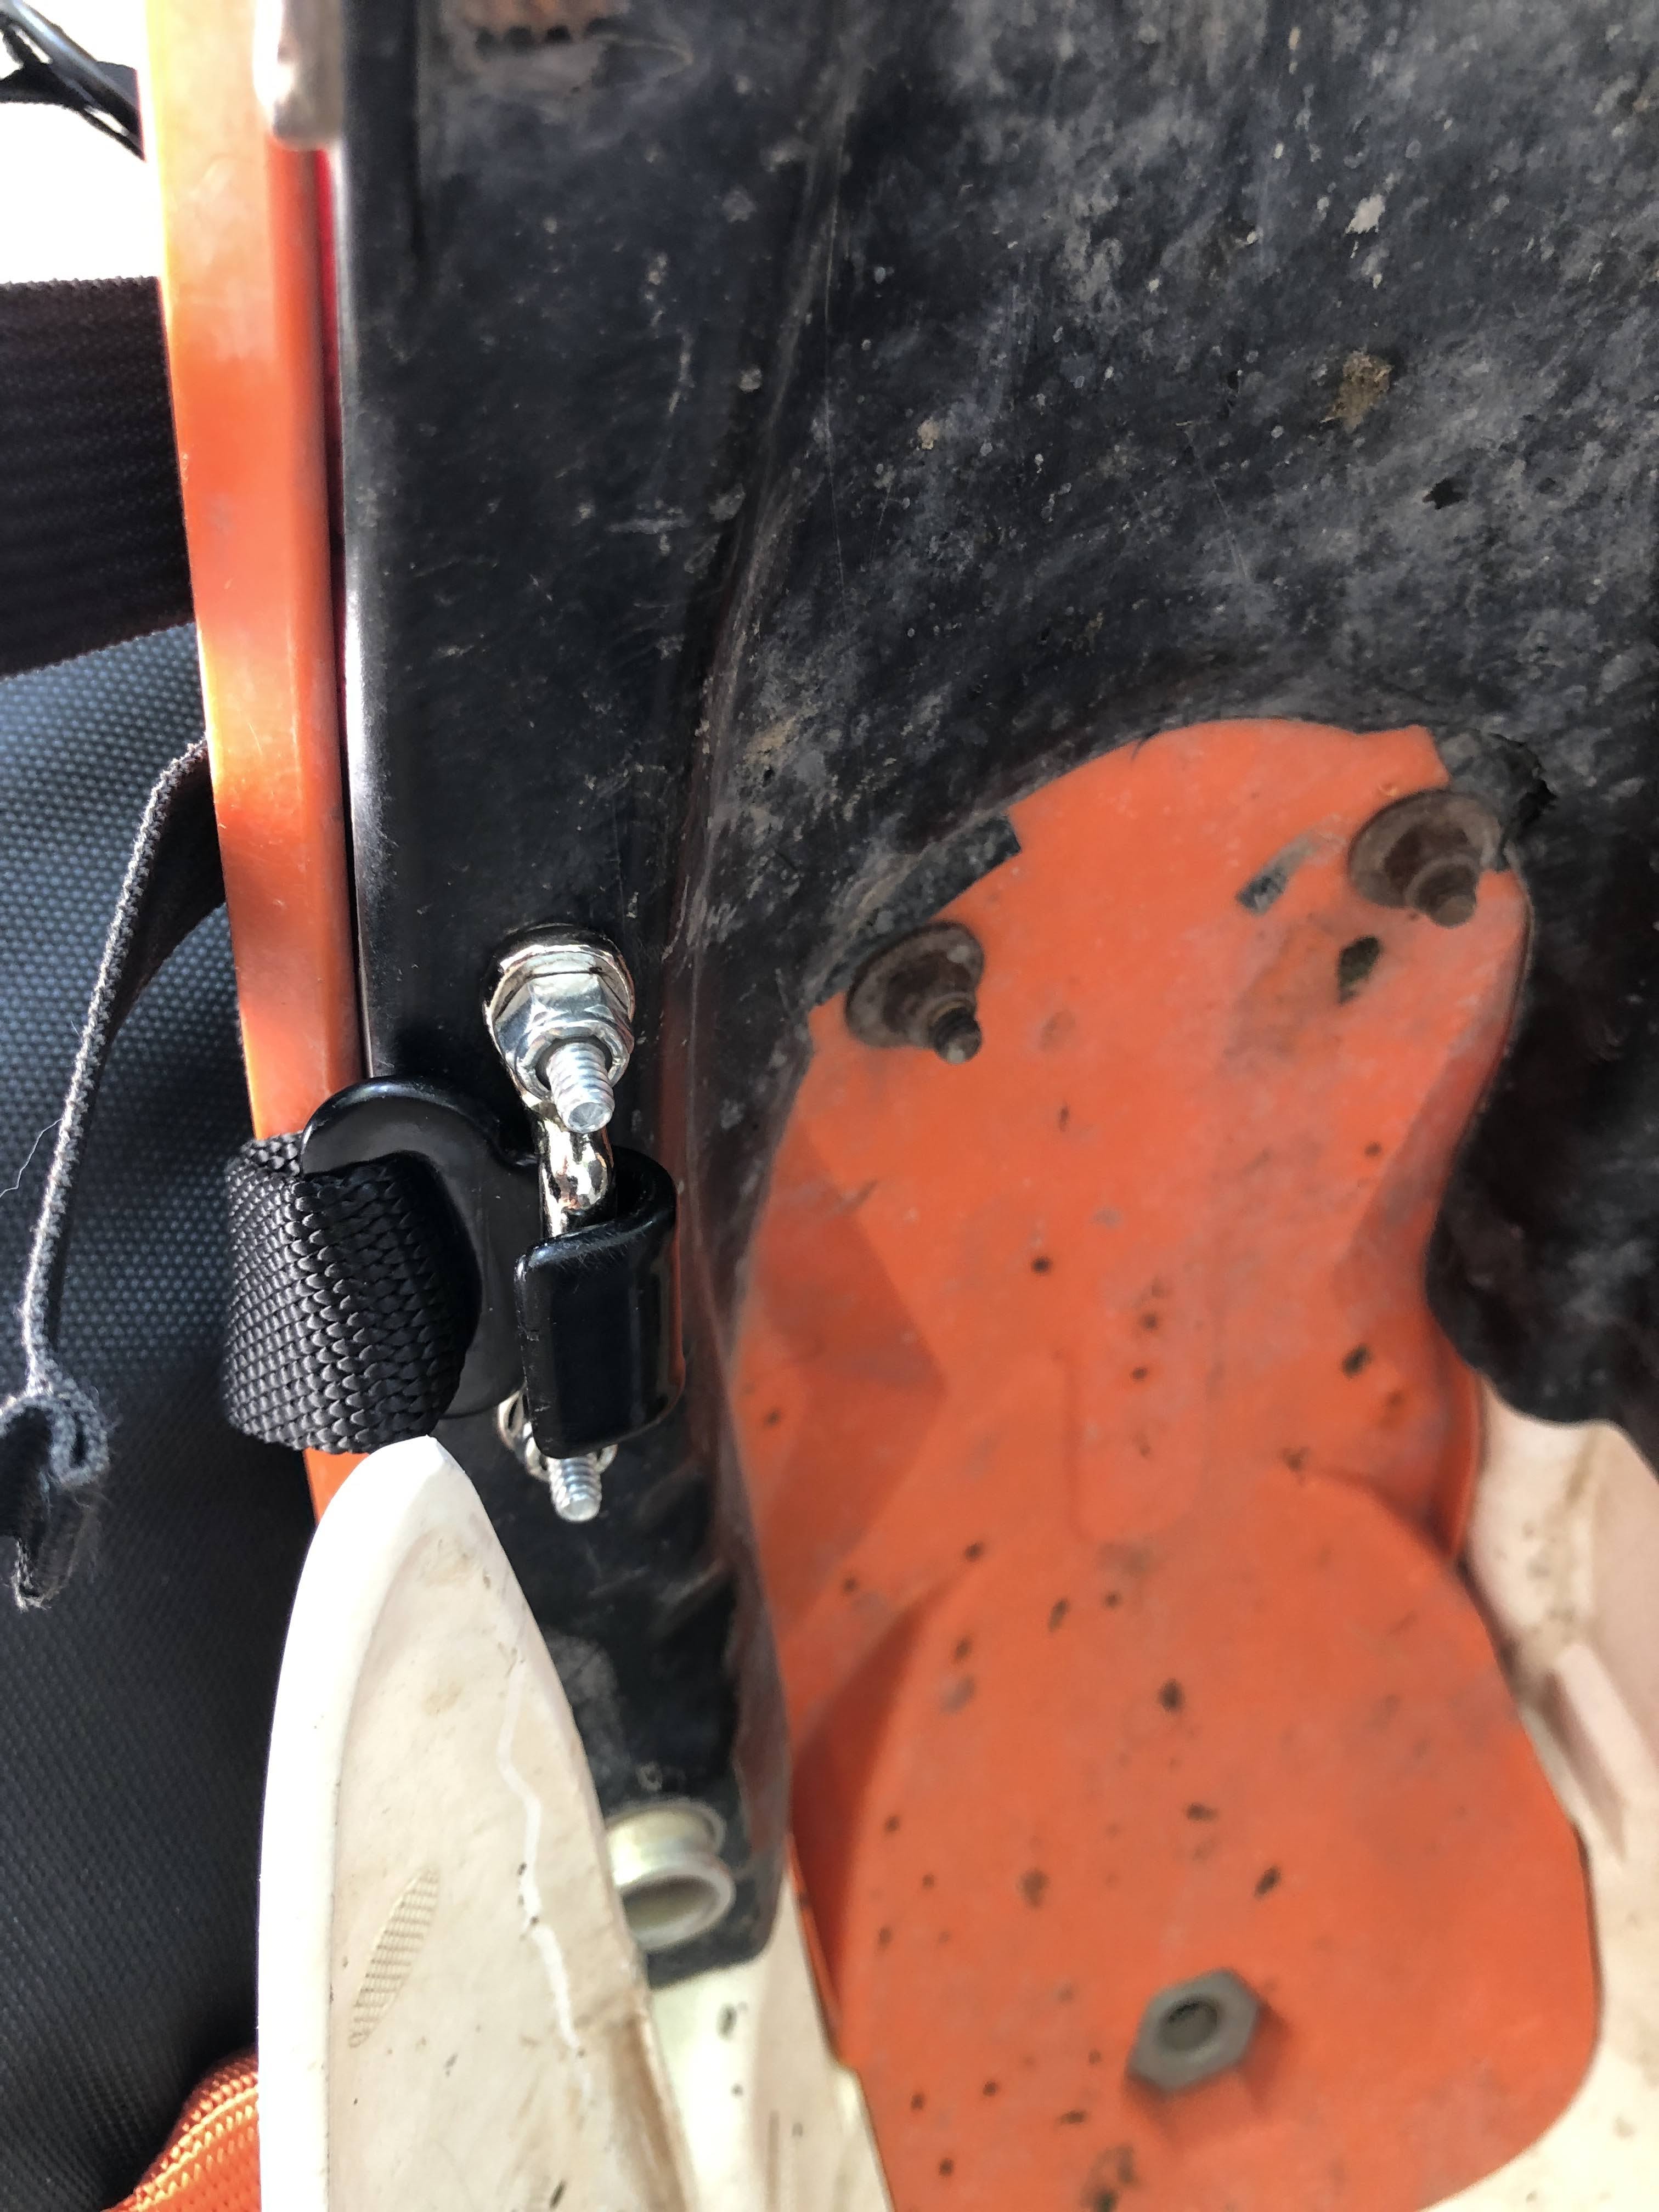
My first attempt at mounting the Scramble Rack didn’t go so well. I had a few lessons to learn. The first problem was finding a way to get the fender hooks to stay put. My KTM 350 has rounded fenders and the hooks just wouldn’t stay put. I finally solved this problem by mounting some footman loops on the bottom. Now the hooks are rock solid.
Footman loops mounted under the fender
The footman loop to the right of the photo is for my AltRider setup, while the new ones on the bottom are for the Scrambler Rack.
Fender hooks on the footman loop
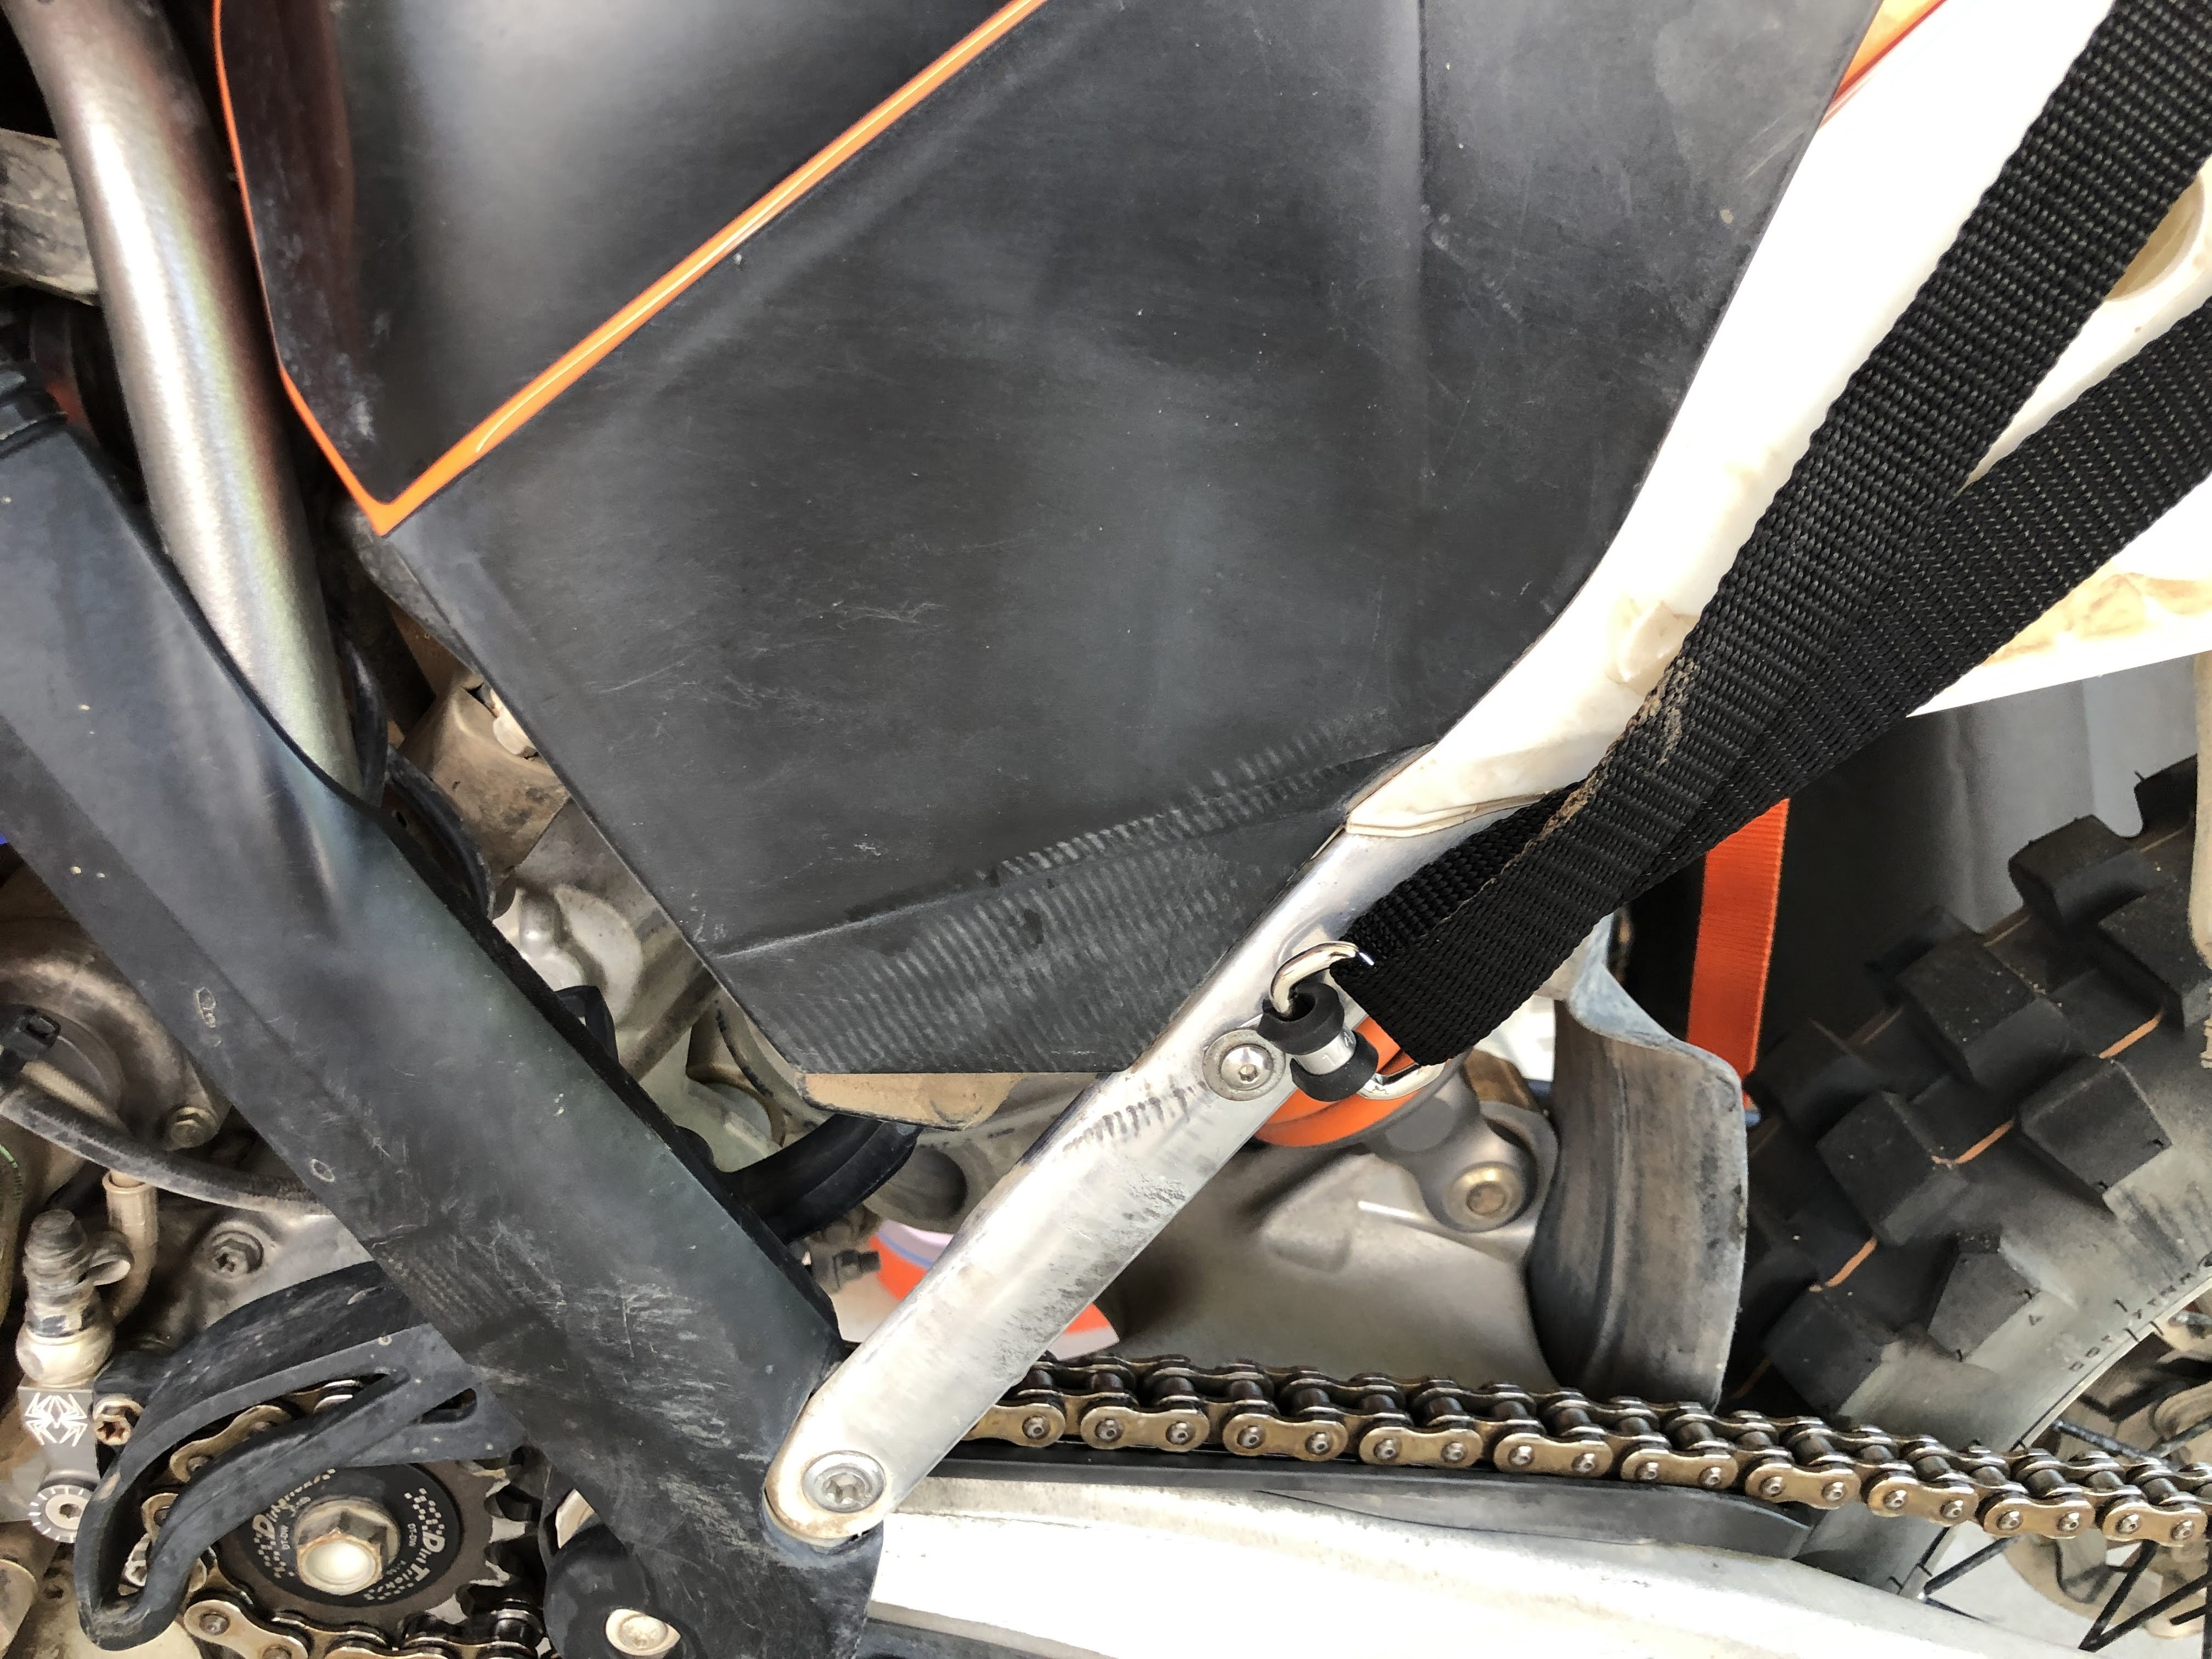
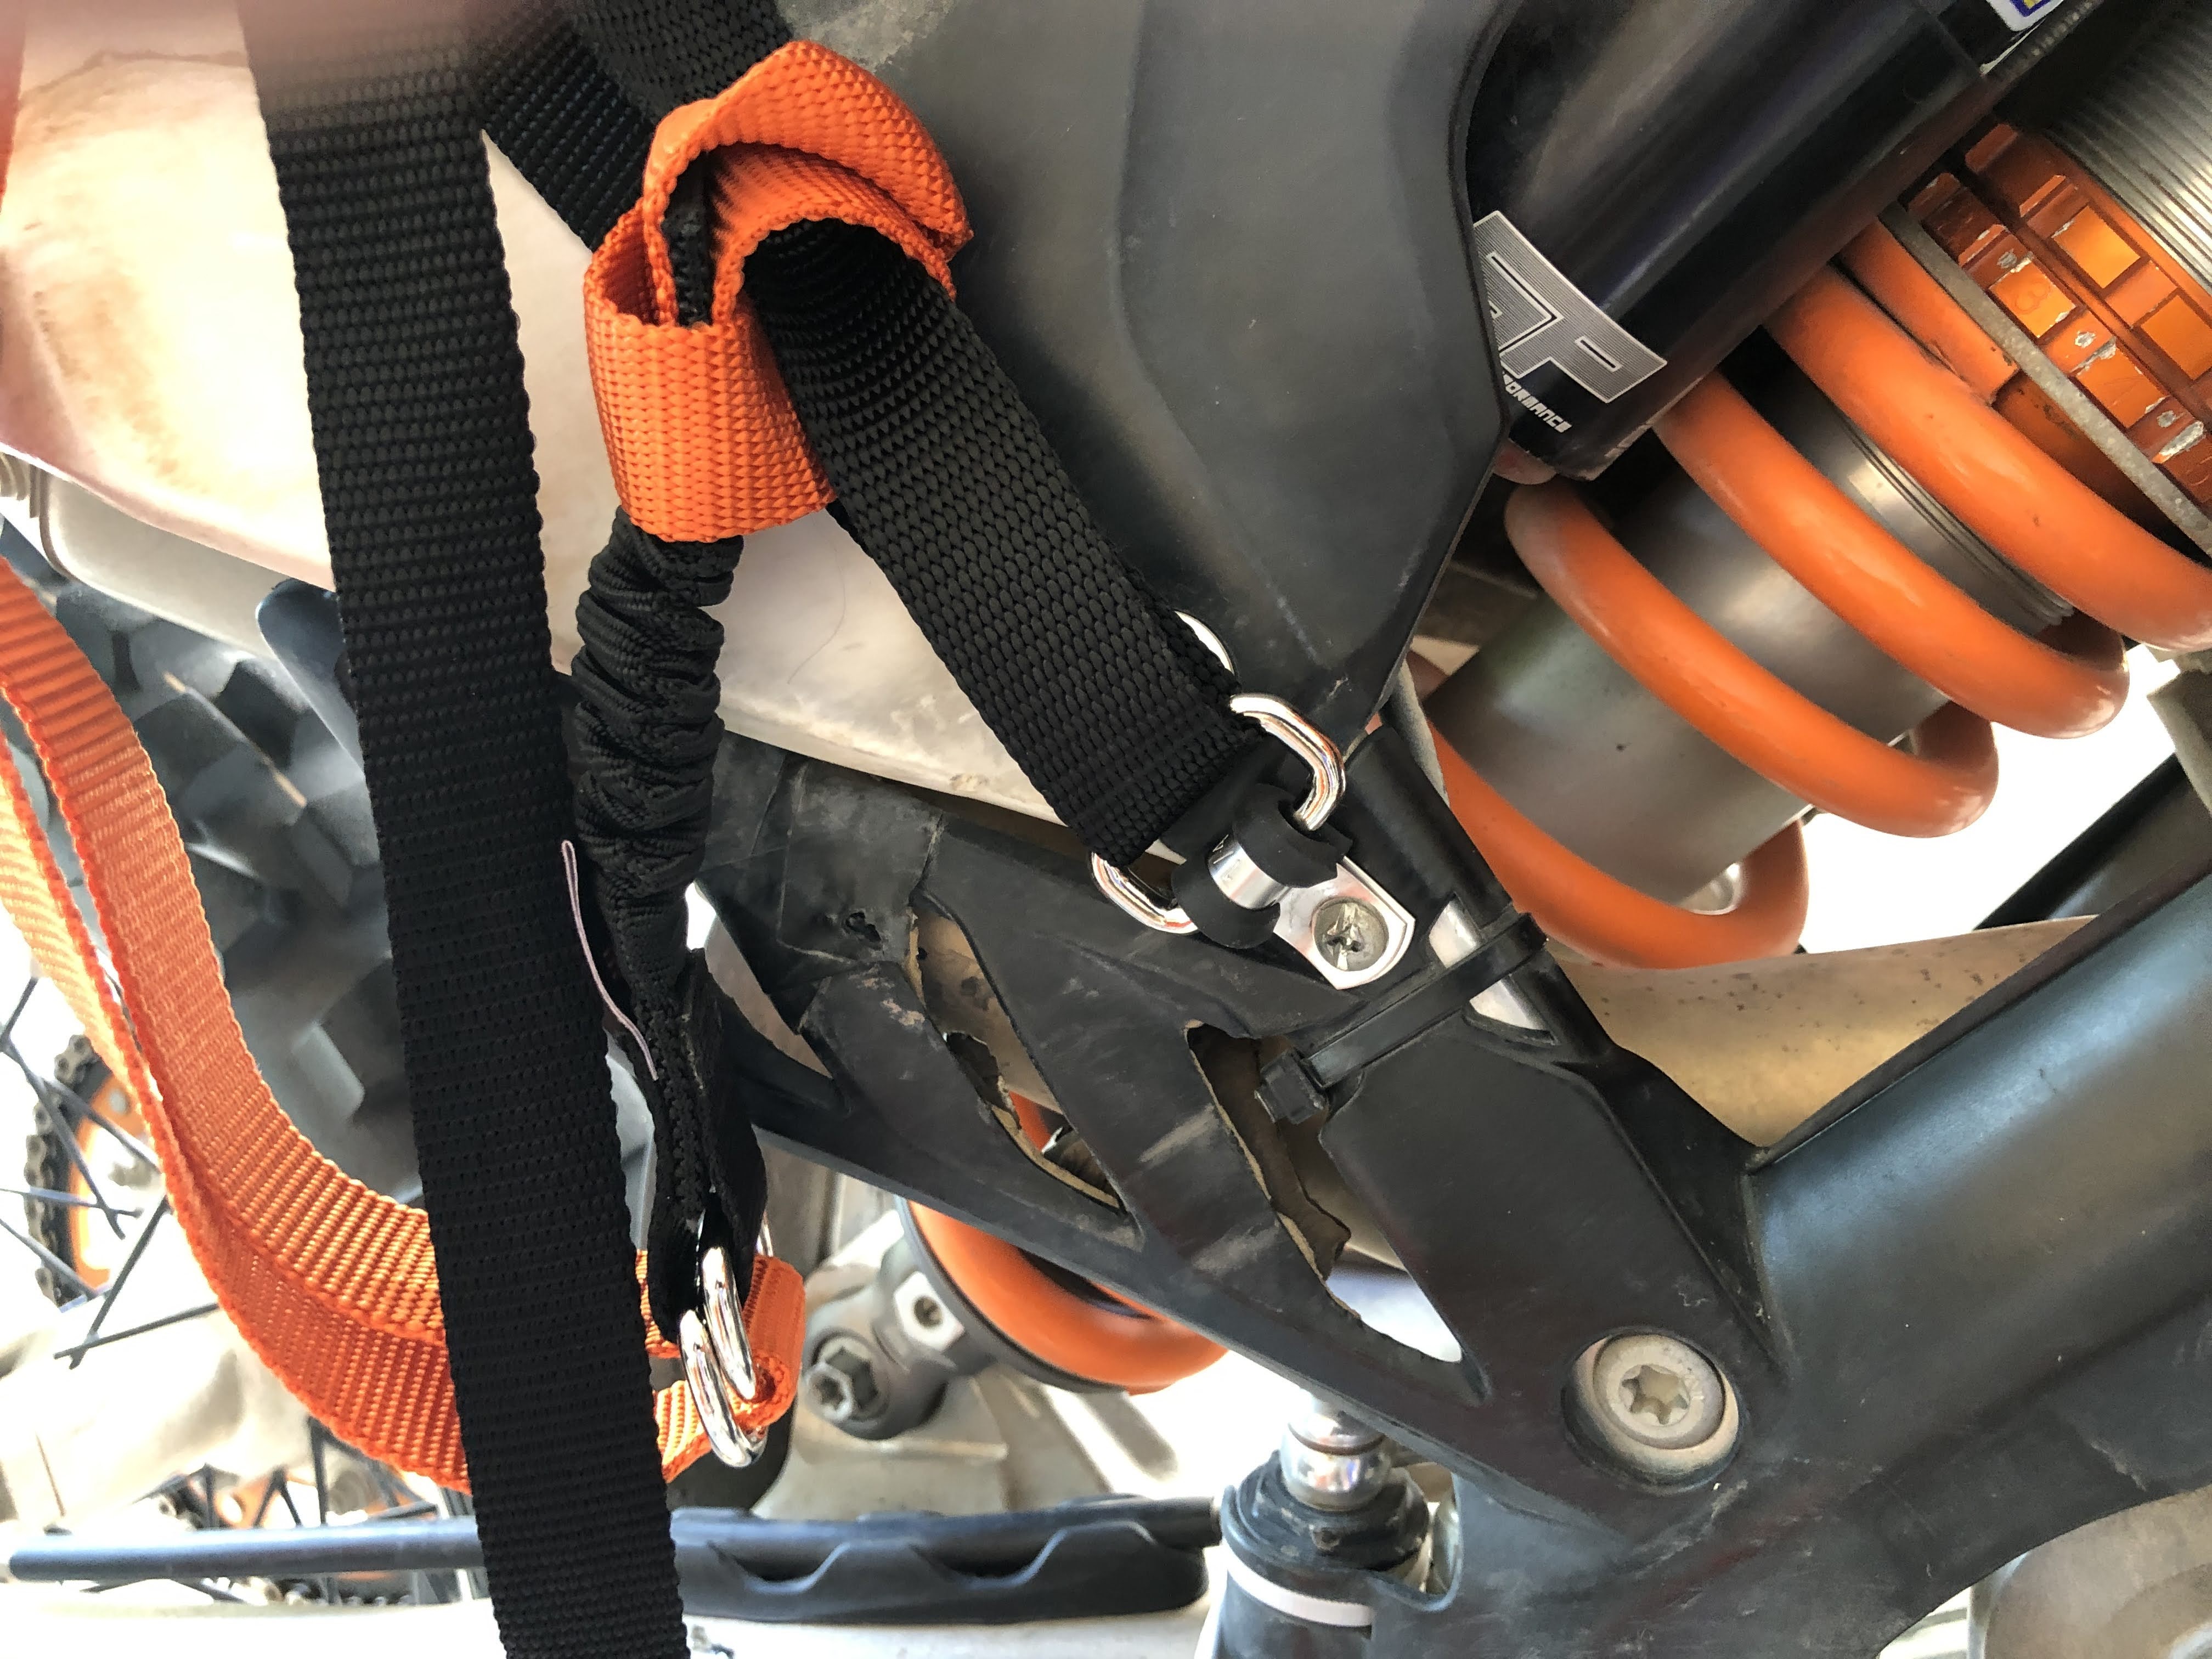
I have also tried multiple ways of attaching the front straps. I ended up going back to using D-rings which I first tried years ago. Back then I drilled holes in the subframe to mount these D-rings, but that undoubtedly weakens the subframe. Luckily it hasn’t been a problem so far.
Left side D-ringRight side D-ring
The next issue to resolve was finding the right dry bags. I first used the 20L Sea To Summit bags, but they were too wide and too short. The bags need to be fairly long or they are difficult to mount to the Scrambler Rack.
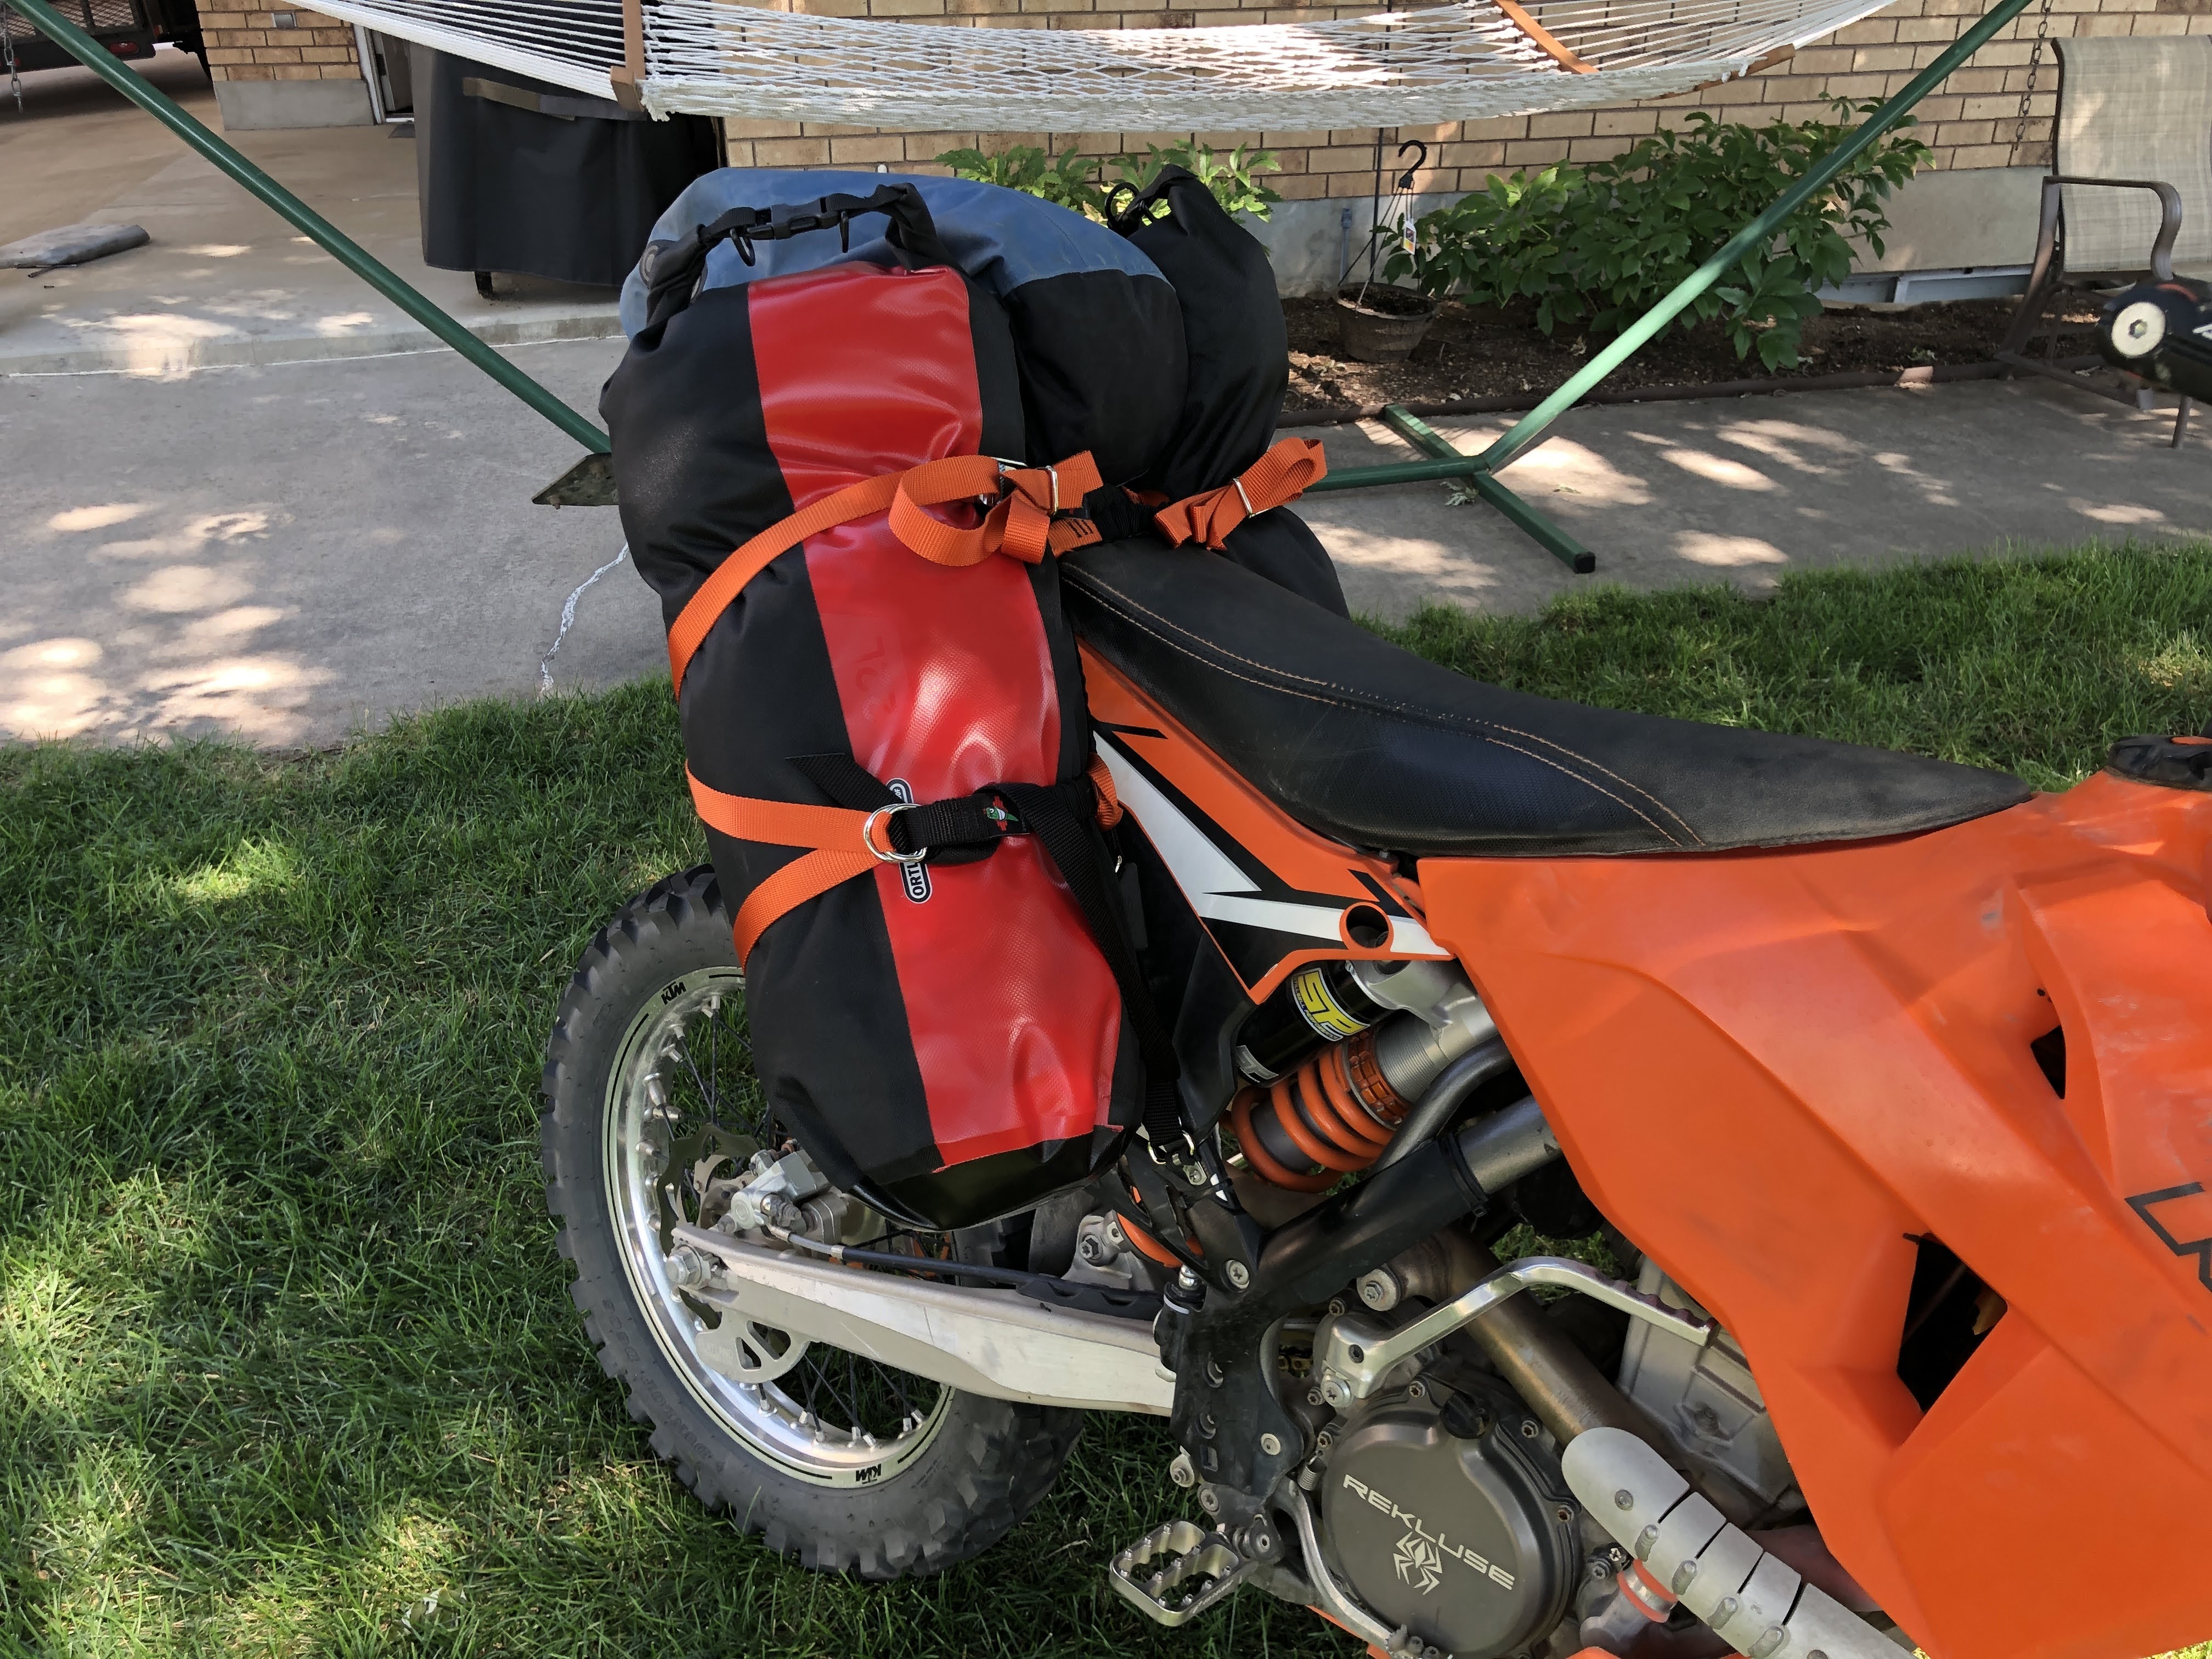
I decided to go with the Ortlieb 22L bags. These are 8.7″ in diameter by 20.5″ long. It might be possible to go with something like the NRS 25L Tuff Sack at 9.5″ by 21.5″, but I wouldn’t go any larger than that.
Ortlieb 22L side bags
I decided to use the GCAG Bag Snake straps for each side. I found it easiest to string the strap prior to inserting the dry bag. Otherwise you really need an extra pair of hands. With practice, you can install or remove a dry bag pretty quickly. I haven’t field tested this setup yet, but I think the bags will ride nice and secure without bouncing around very much. The elastic tension of the straps should keep things tight.
I haven’t actually packed for a trip yet, but I did do some test fitting of most of my gear. I am pretty sure I can fit my tent, chair, folding saw, cook set, and some food in one bag. I can put my air mattress, real hiking shoes, and all of my clothes in the other bag, with room for more food.
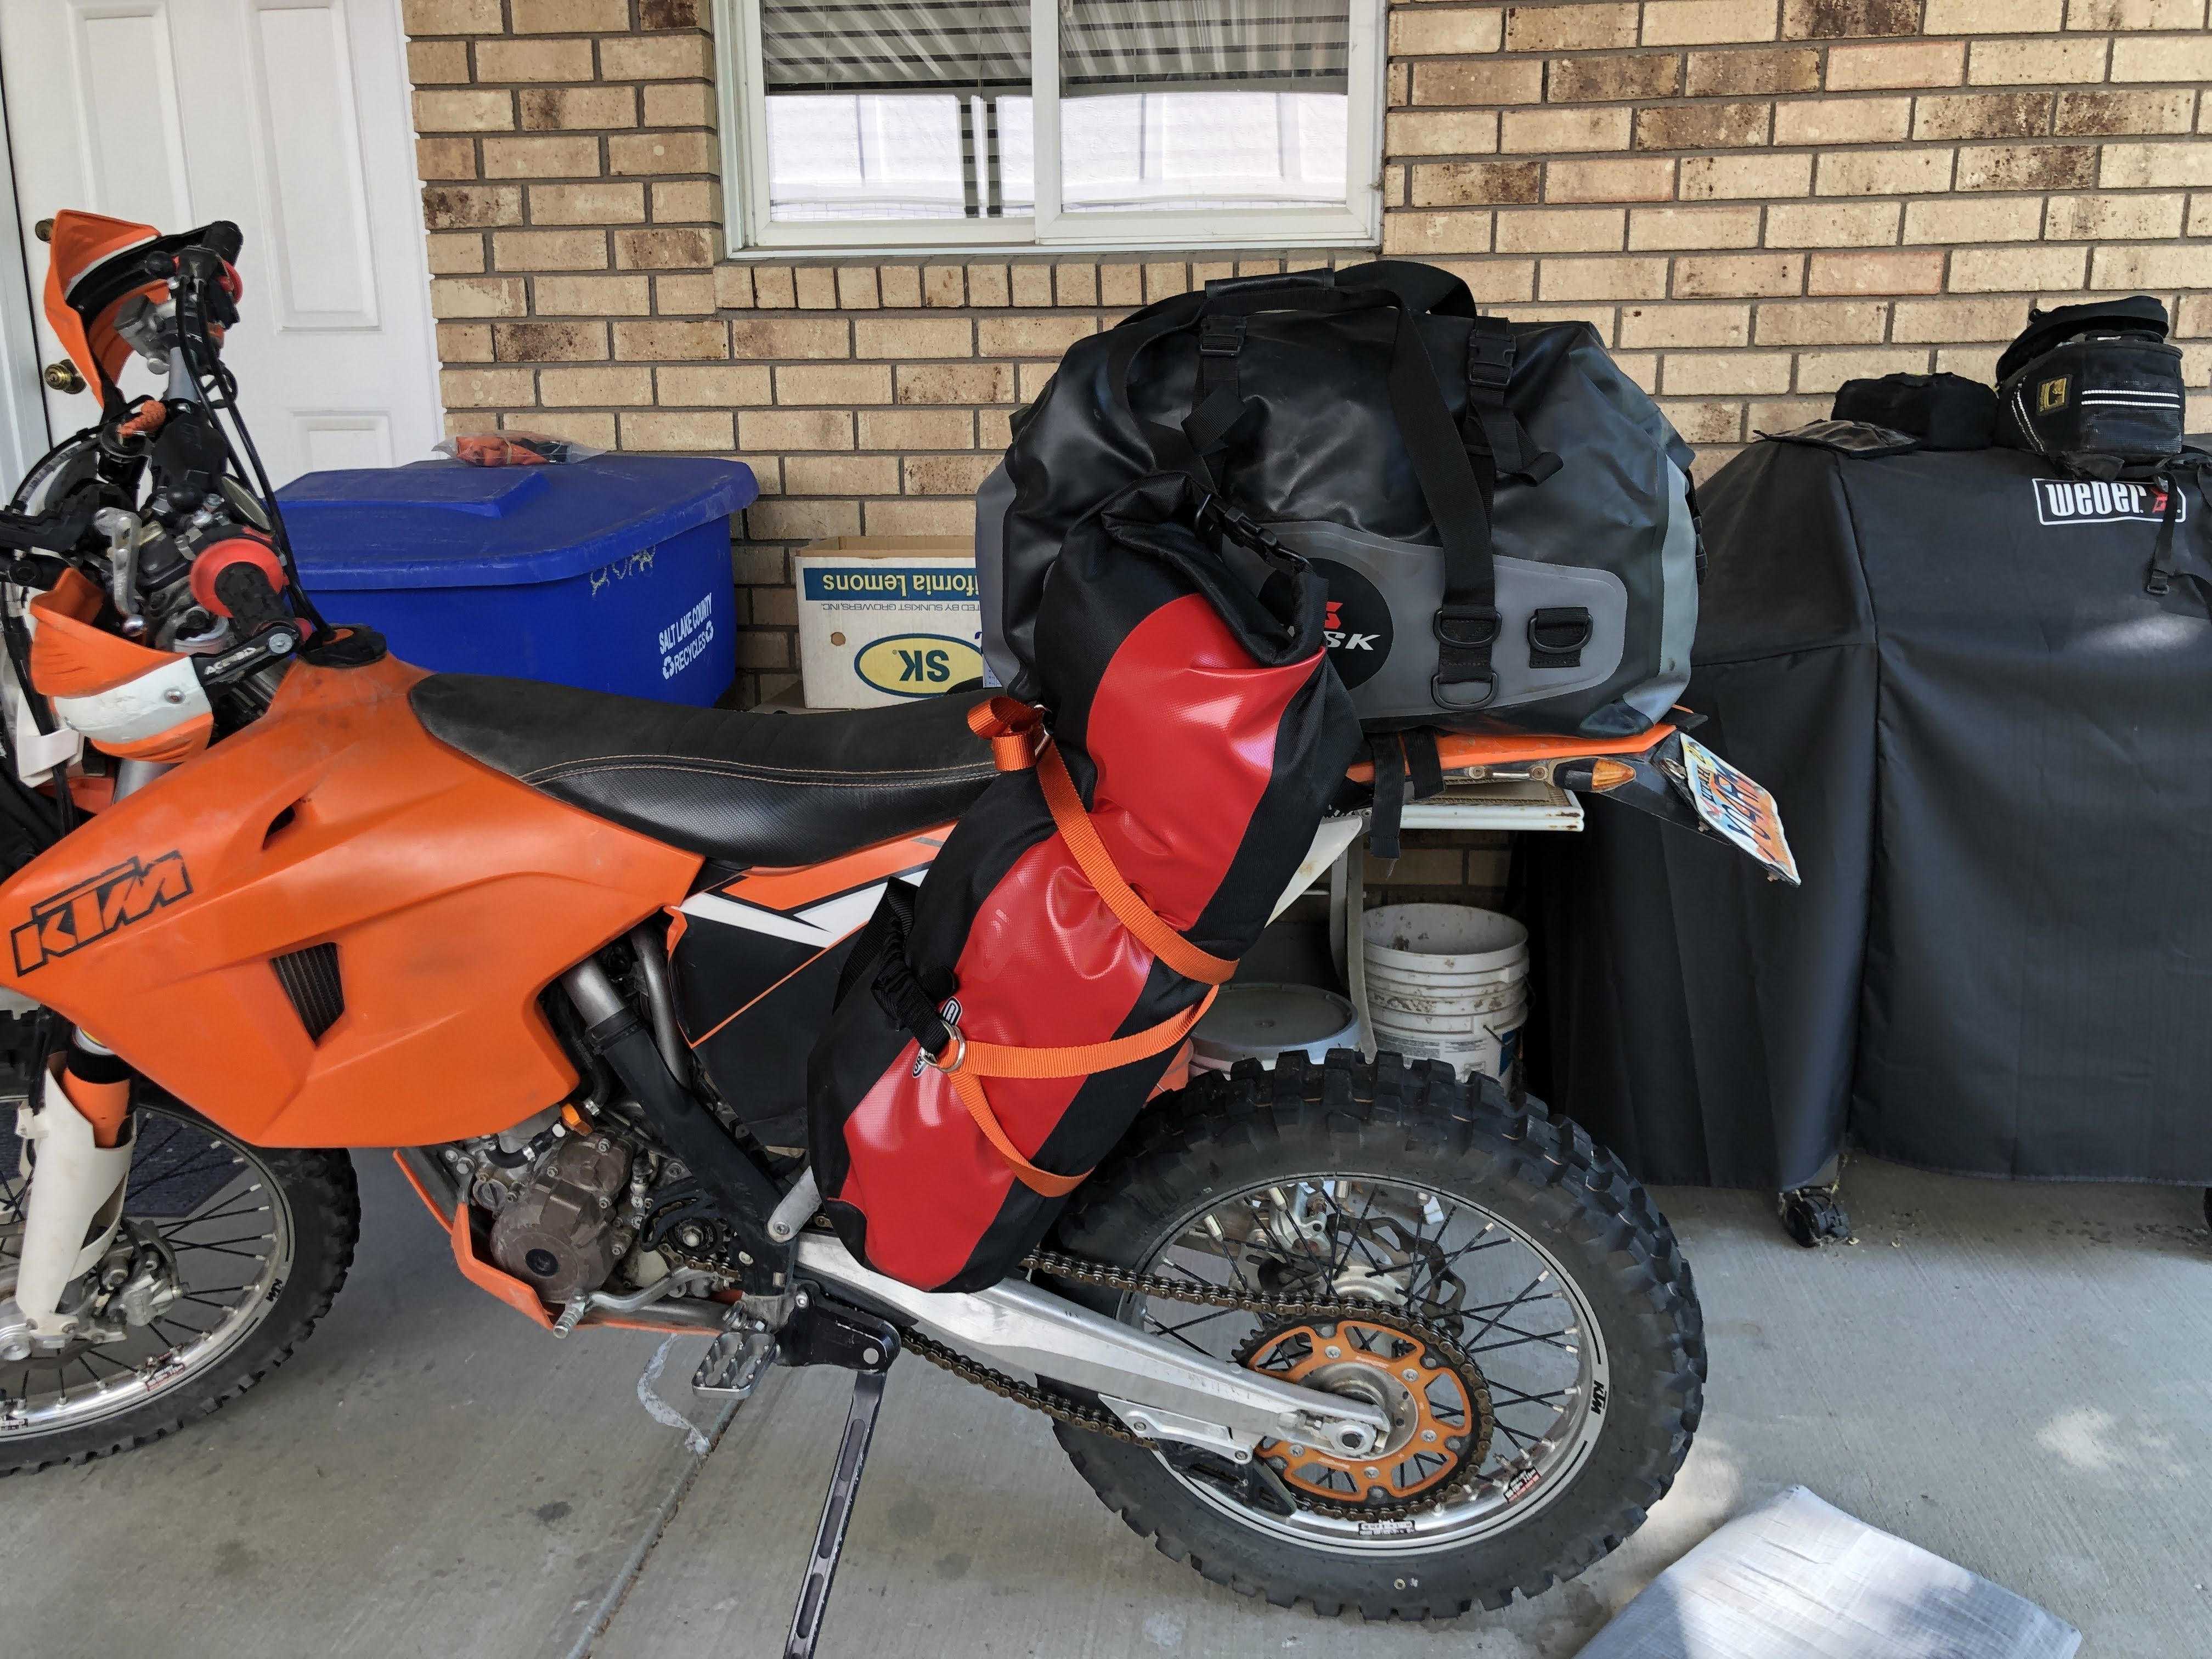
That leaves my sleeping bag, down jacket, and possibly more food in a top bag. It is a tight fit, but I can actually mount my Tusk 33L duffle on top if need be.
Tusk 33L top bag
Even though that is a large bag on top, it will be much lighter than my old setup. I now have all of my heaviest items in the side bags, whereas I used to carry the tent, air mattress, chair, and shoes all in the top bag. Now it will just be a down sleeping bag, down jacket, and some freeze dried food (which diminishes each day).
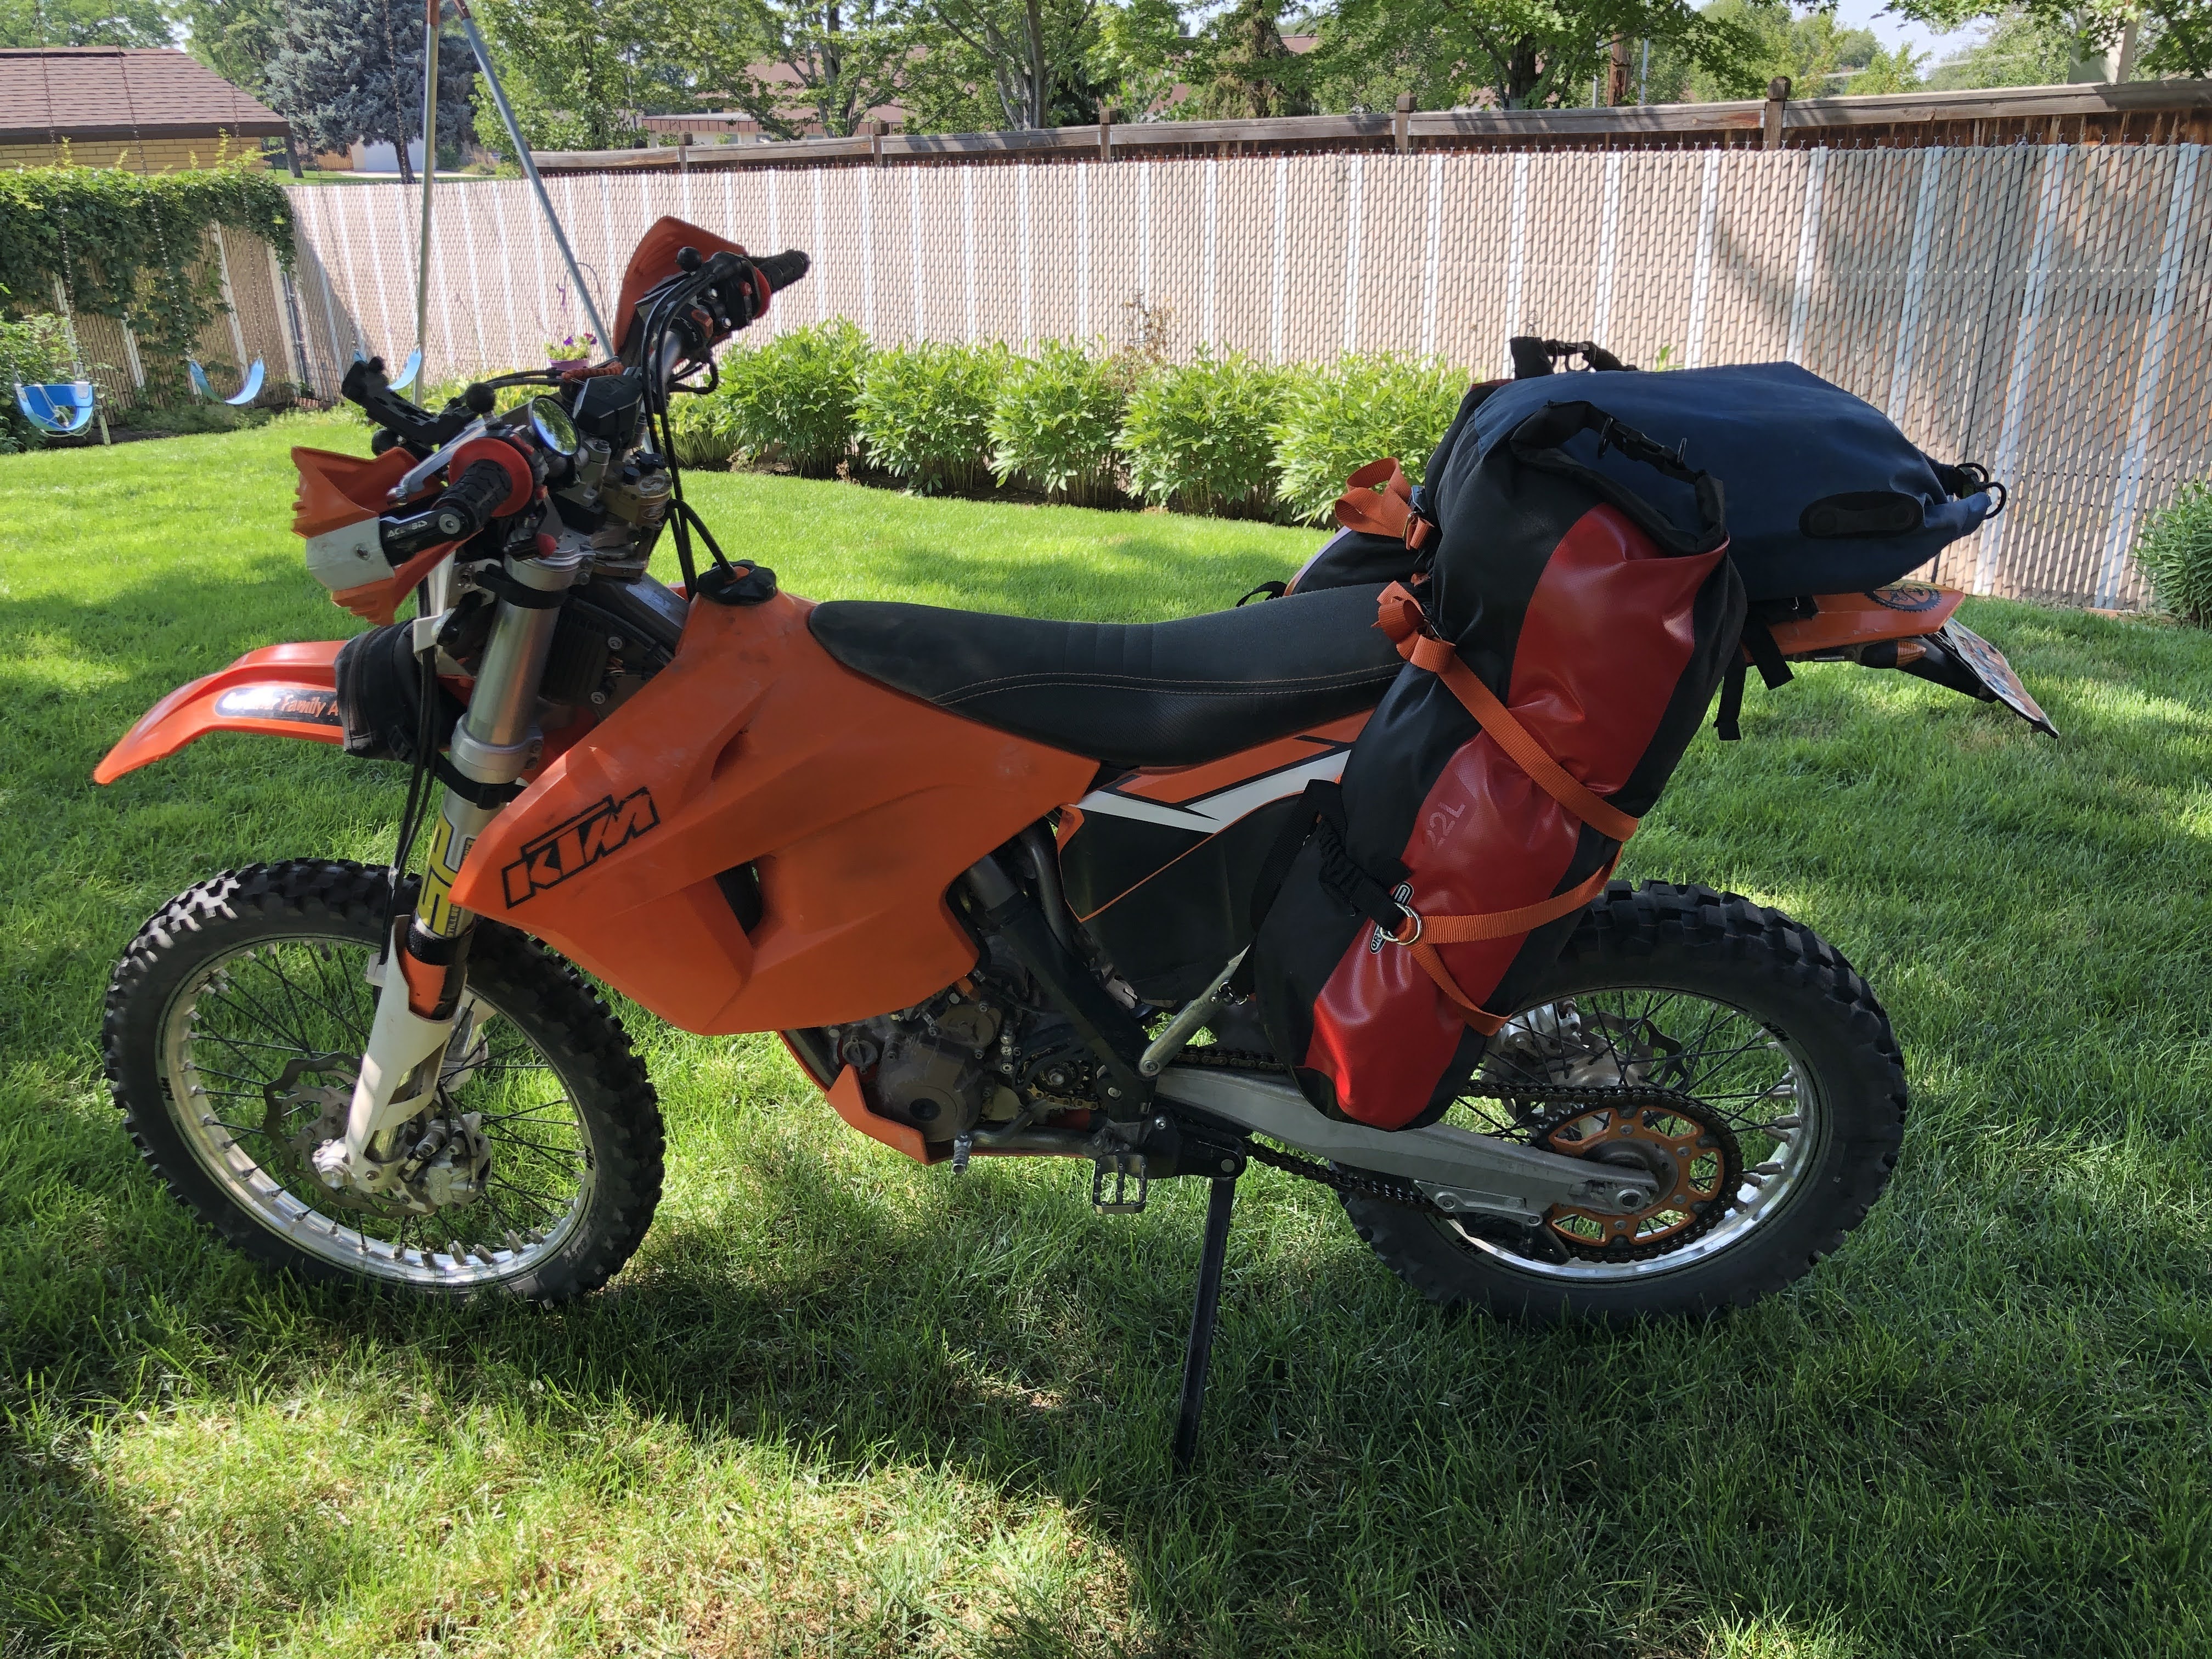
More likely I will be able to fit those items in my 20L Sea To Summit bag, which fits nicely and sits lower so it won’t interfere with my backpack as much.
20L top bagFront view
I will attach the top bag with the GCAG Mondo Straps. So far I am really impressed with their straps. They are essentially a heavy duty cross between a cam strap and a ROK strap. They are strong, but elastic so they keep your gear from coming loose as you bounce down the trails.
If you pack much lighter than I do, or for trips where I stay in a motel, it should be possible to fit everything in just the two side bags.
I should also mention that I carry my tools, spare tubes, etc up front in those tank side panniers shown in the early photos. That helps get some of the weight up front. Oh, I also need to figure out how to carry water. I am pretty sure I can strap a 1.5 or 2L water bottle holster to the back of each bag similar to how I carry water with the AltRider setup. I have some OBR AdvGear bottle wraps that should work nicely.
I am pretty impressed with this new system. Not only does it get my weight lower on the bike, it is by far the lowest cost option I have tried. Now to get out and test this new system on a multi-day camping trip.
UPDATE:
I planned a three-day trip for early October to enjoy the autumn leaves in Southern Utah and to test out this new luggage setup. I tried multiple ways of packing my gear and concluded that two 22L side bags were not large enough for my gear. This would be a great setup for those that pack smaller and lighter than I do, but at my age, I highly value my comfort. I could reduce the bulk and weight by spending a lot of money on more compact gear, but I am pretty happy with my tent, sleeping bag, sleeping pad, chair, and camp shoes. I considered buying two NRS 25L bags, but decided they would be too small as well. I also tried some larger dry bags from my river collection, but they were just too bulky and got in the way of my feet. So, I ended up going back to my AltRider/Tusk combination that I have been using recently.
In general the weight of my gear hasn’t been much of an issue. I quickly get used to that. But the height of the top bag gets in the way on steep descents. My latest idea is to strap a small drybag with my shoes and food onto the back of my KLIM Arsenal vest. Those items are bulky, but not too heavy, so I don’t think it would be much of an issue to have that on my back. Plus, the food diminishes as the trip goes on. The search for the ideal setup continues…
Moab was packed. With road construction, traffic was backed up almost to Arches – and this was on a Wednesday afternoon. Most of the Utah universities canceled classes to reduce the spread of COVID-19, so naturally everyone went to Moab.
The Beef Basin road, where we planned to start our adventure ride, was also packed. Luckily, Dave arrived early and found us a place to park and spend the night. He sent me his location via his inReach just before I lost cell service. Most of those camping in the area were there to climb the nearby sandstone cliffs.
We had six in our group; me (KTM 350), Dave McIntire (KTM 450), Scott Barton (DR-Z400E), Danny Lunt (DR-Z400S), Scott Connors (KTM 690), and Boyd Berry (KLR 650).
Beef Basin – Thursday, Oct 8
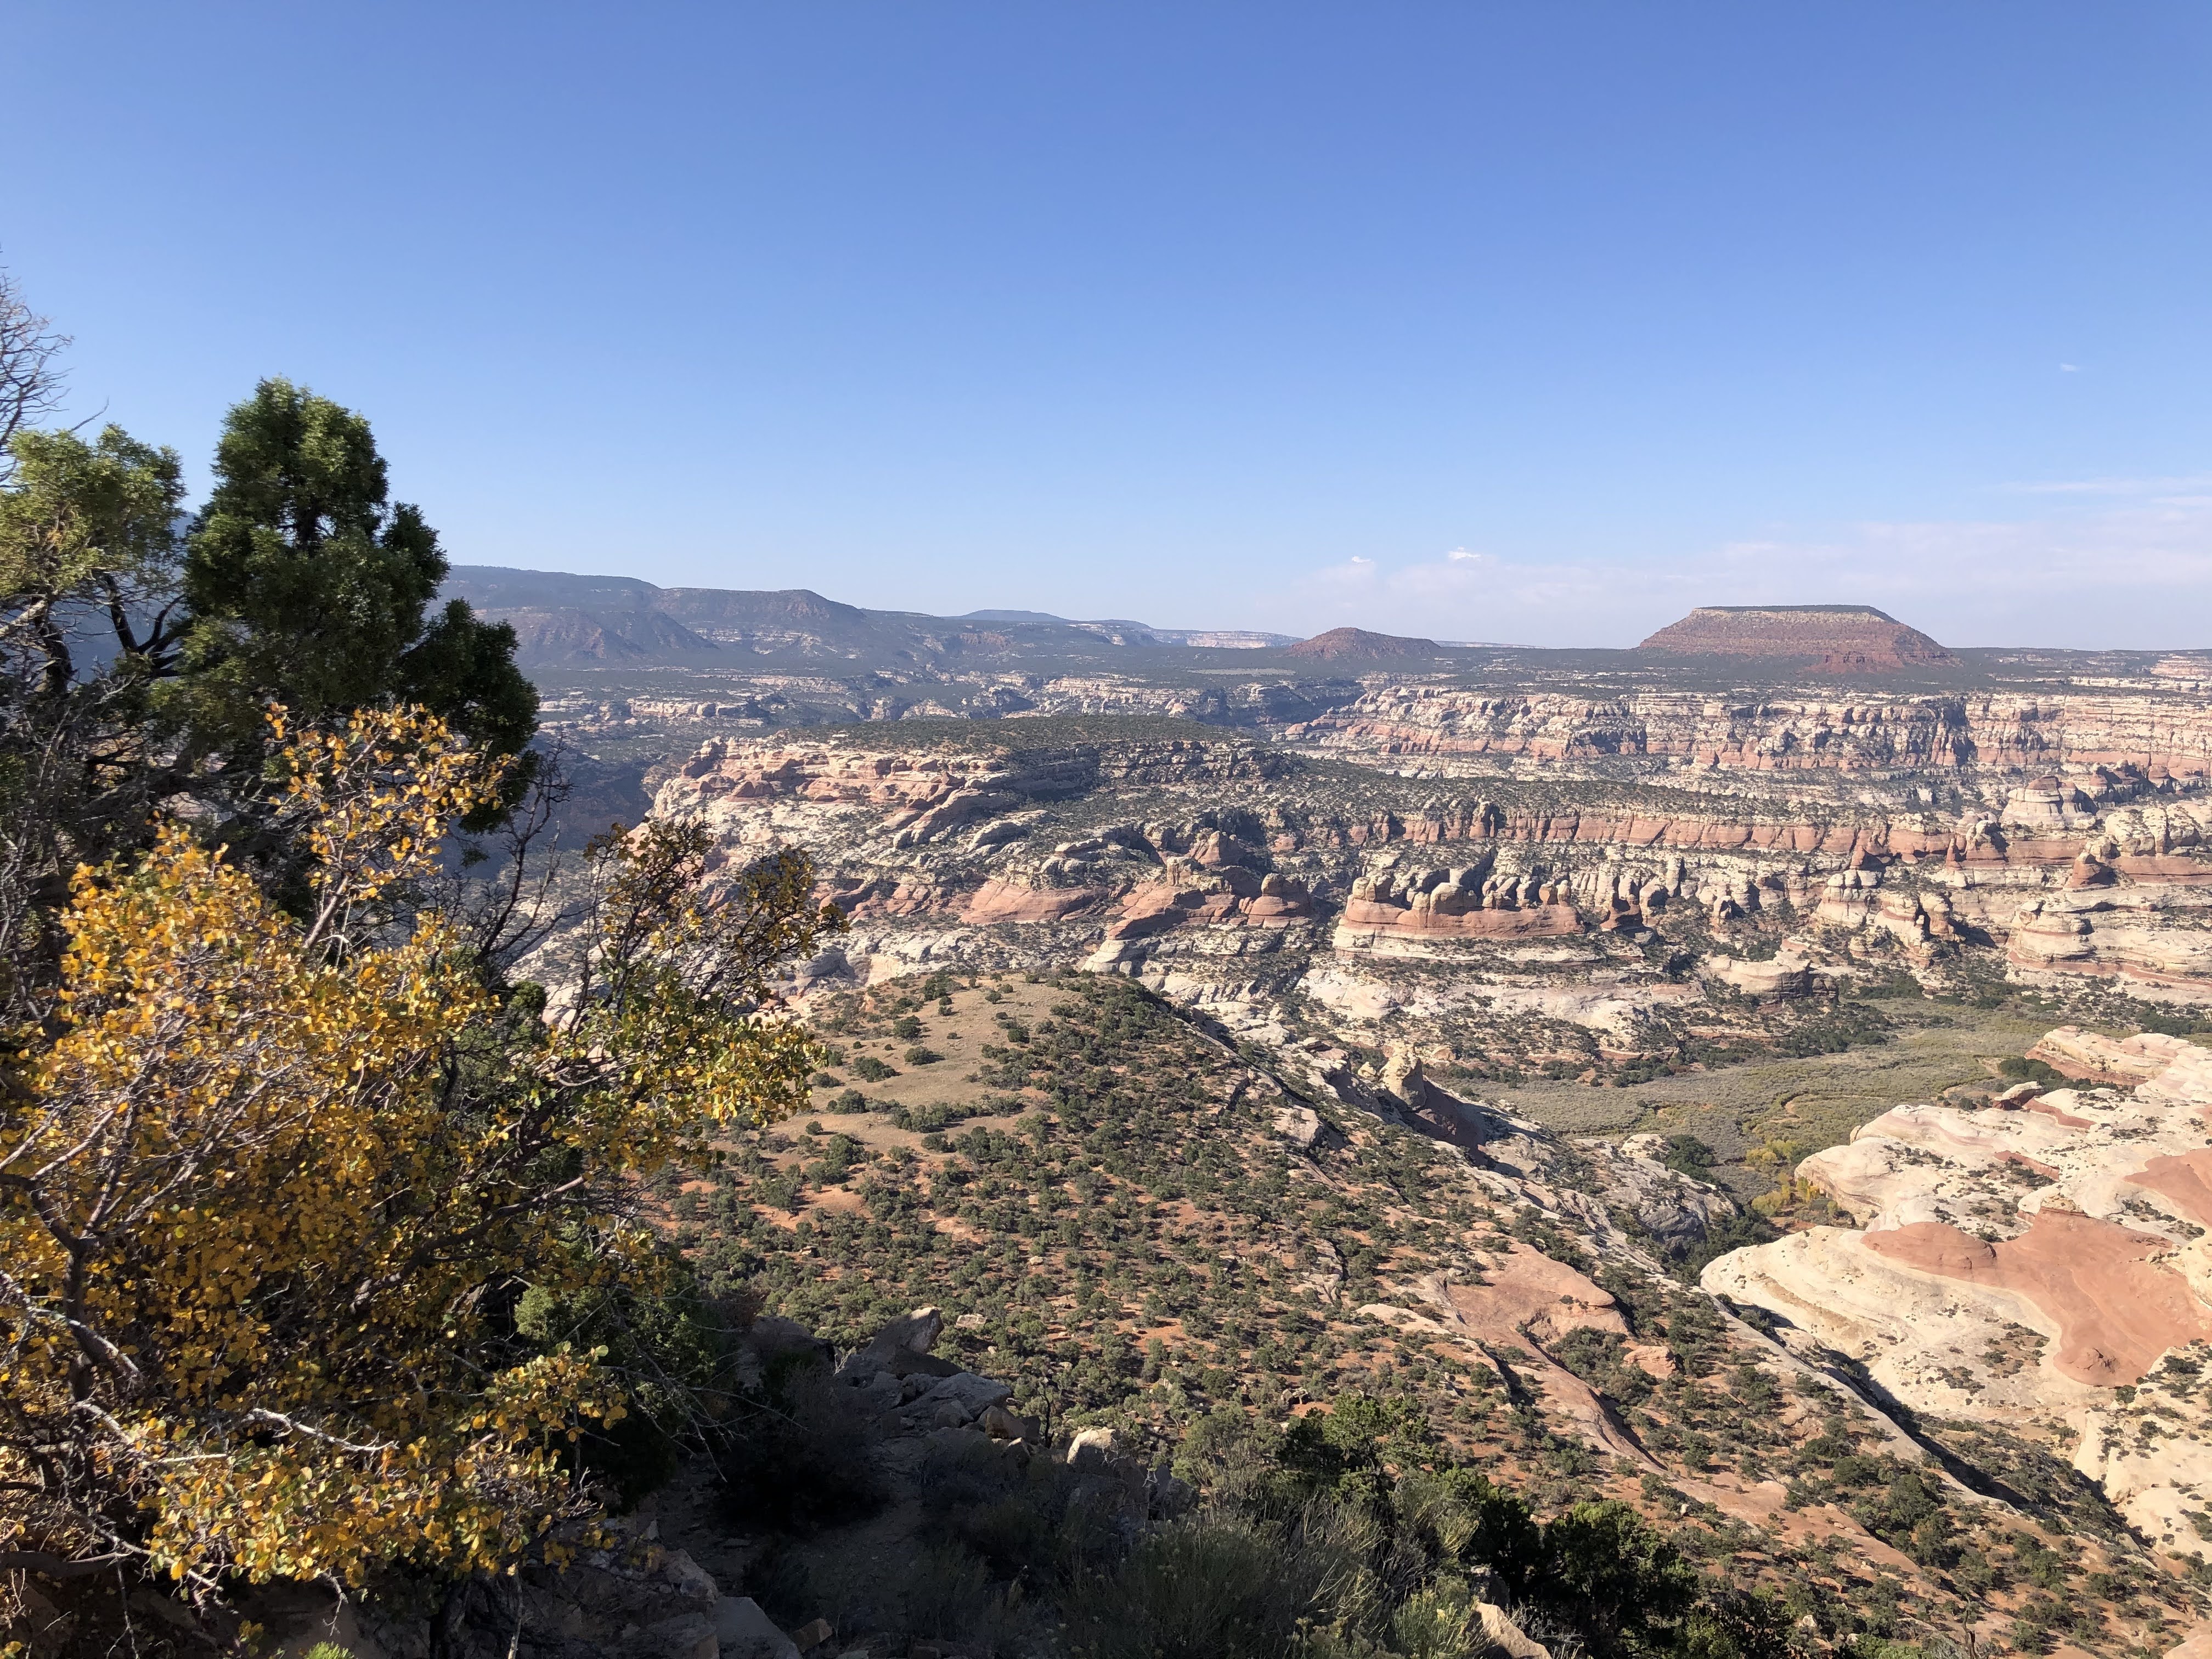
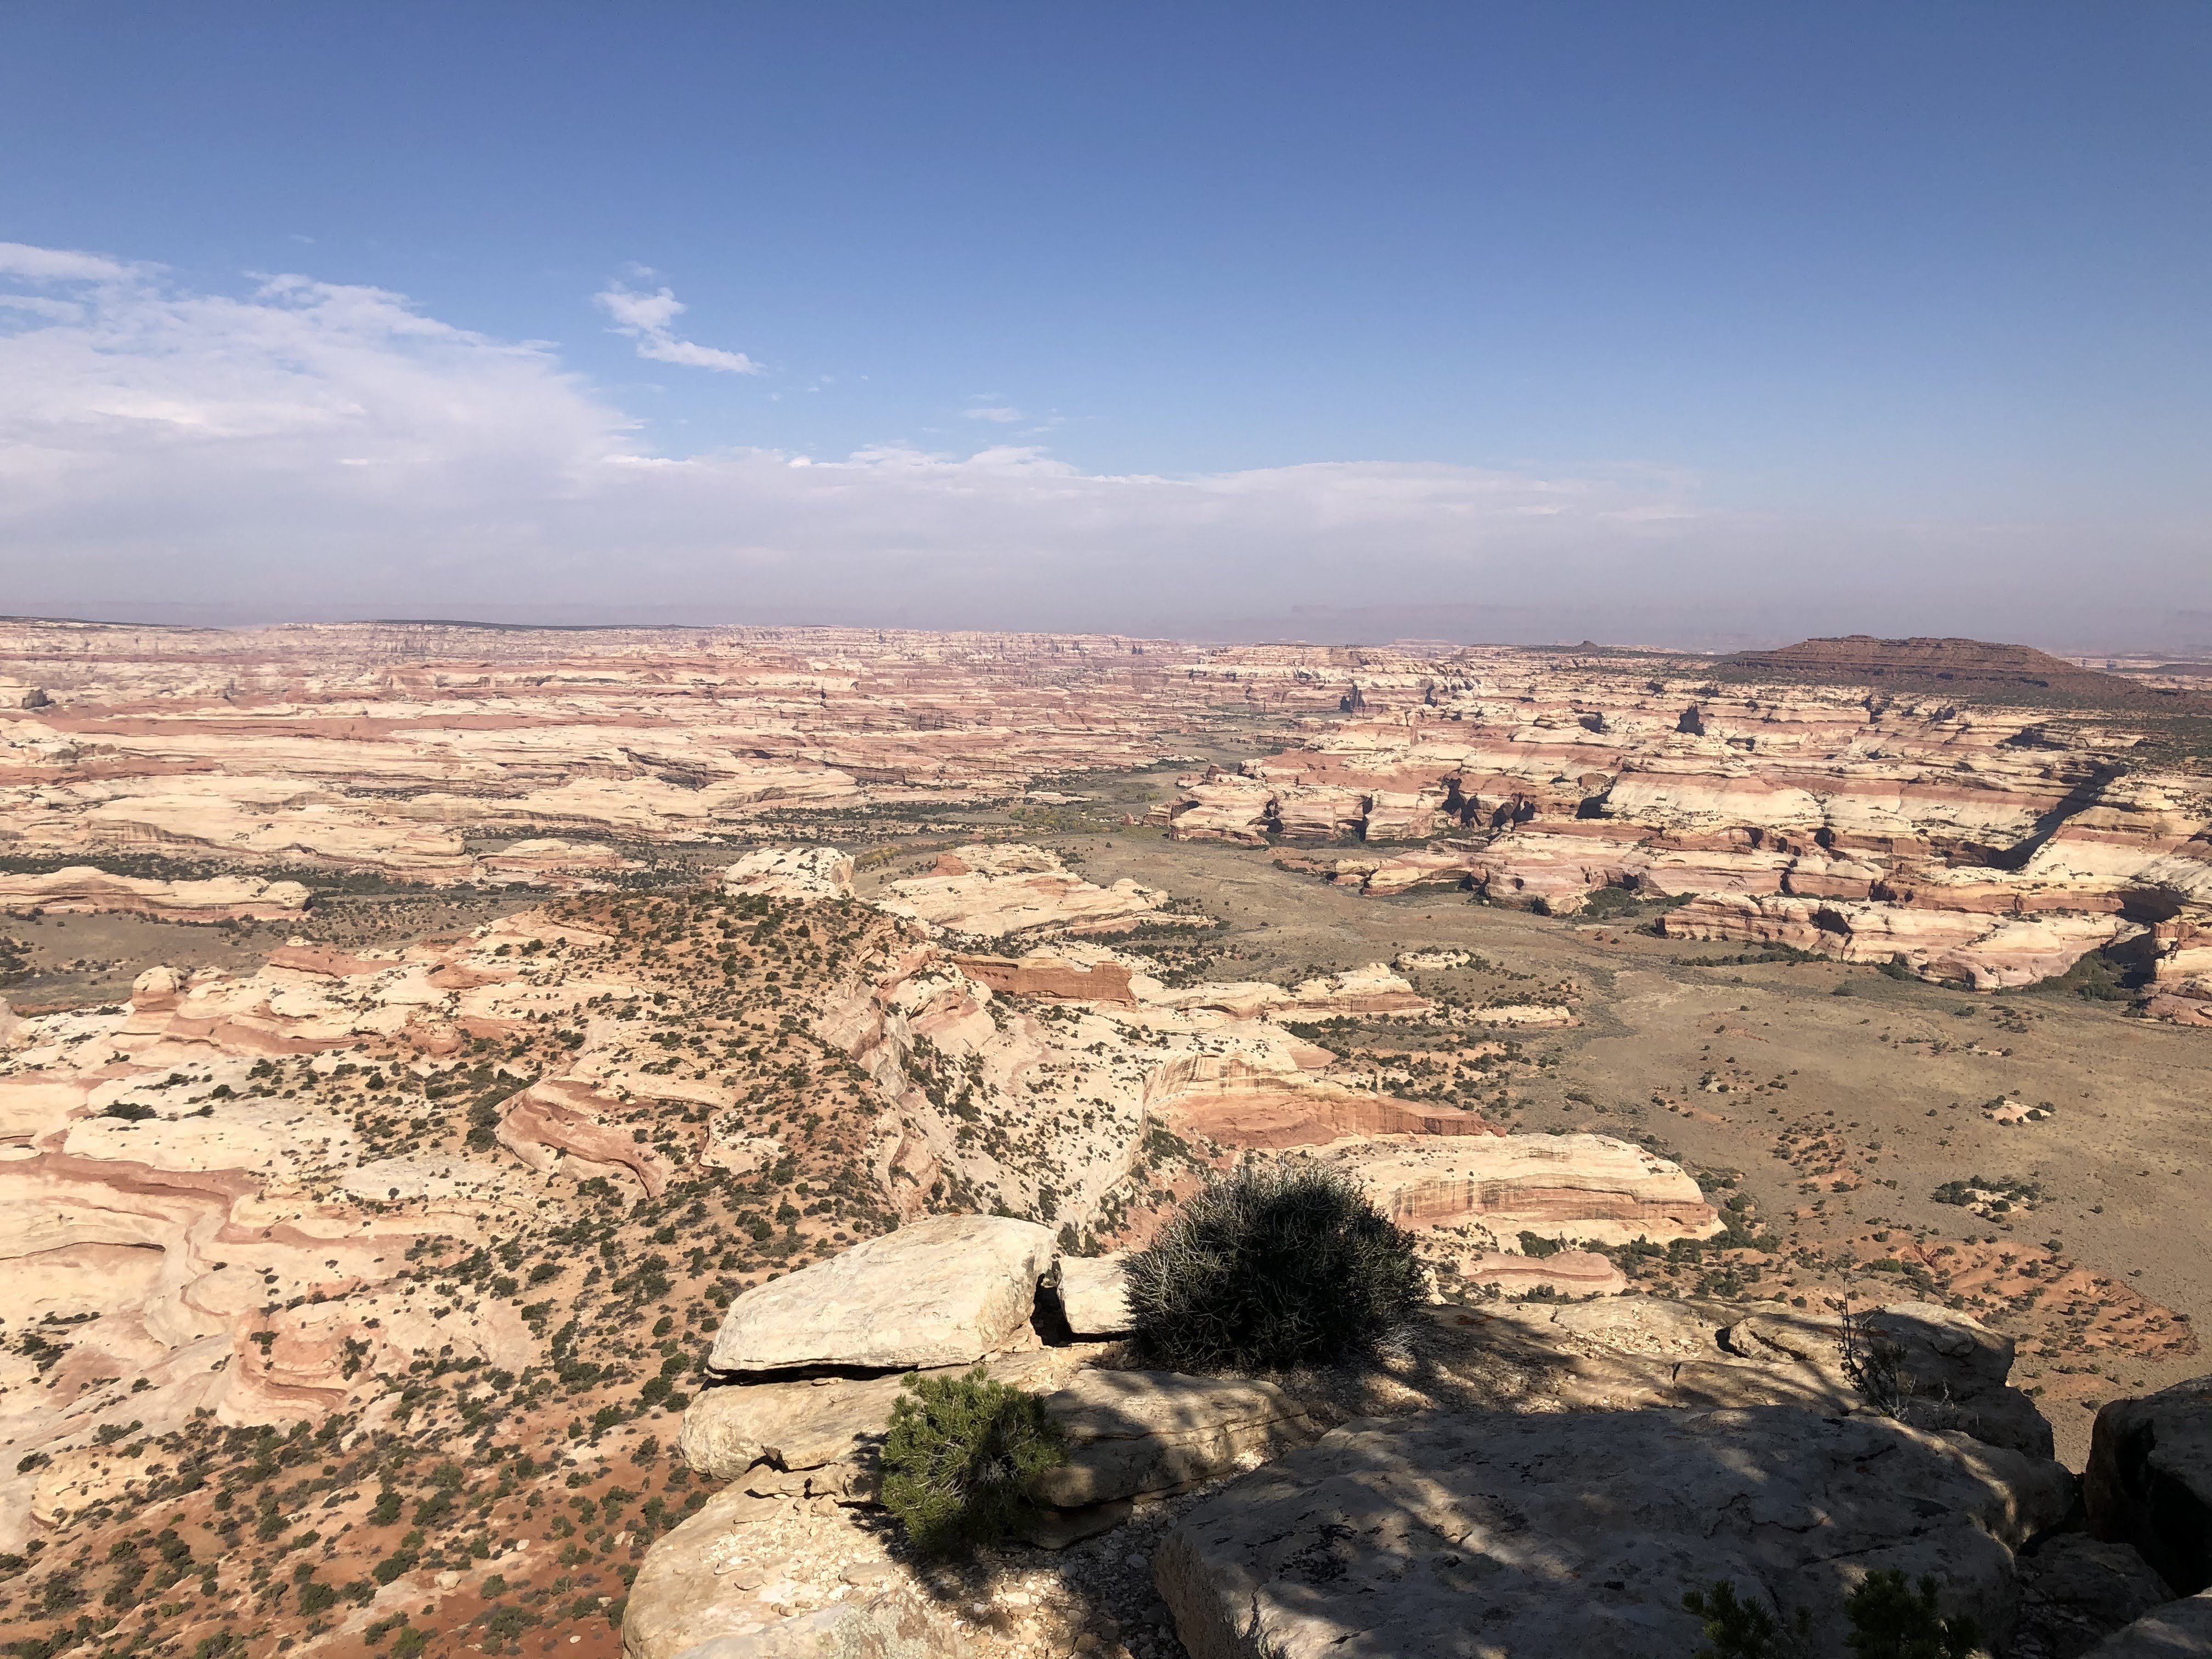
We soon left the mountain climber crowd behind as we headed south on Beef Basin Road. The road was fairly fast and scenic as we steadily climbed in elevation. We took a side spur out to Salt Creek Overlook. This was a fun, but rugged trail. There were numerous rocky sections, with lots of 6” steps – both up and down. It would have been a pretty easy ride without luggage, but fully loaded required paying close attention to every move.
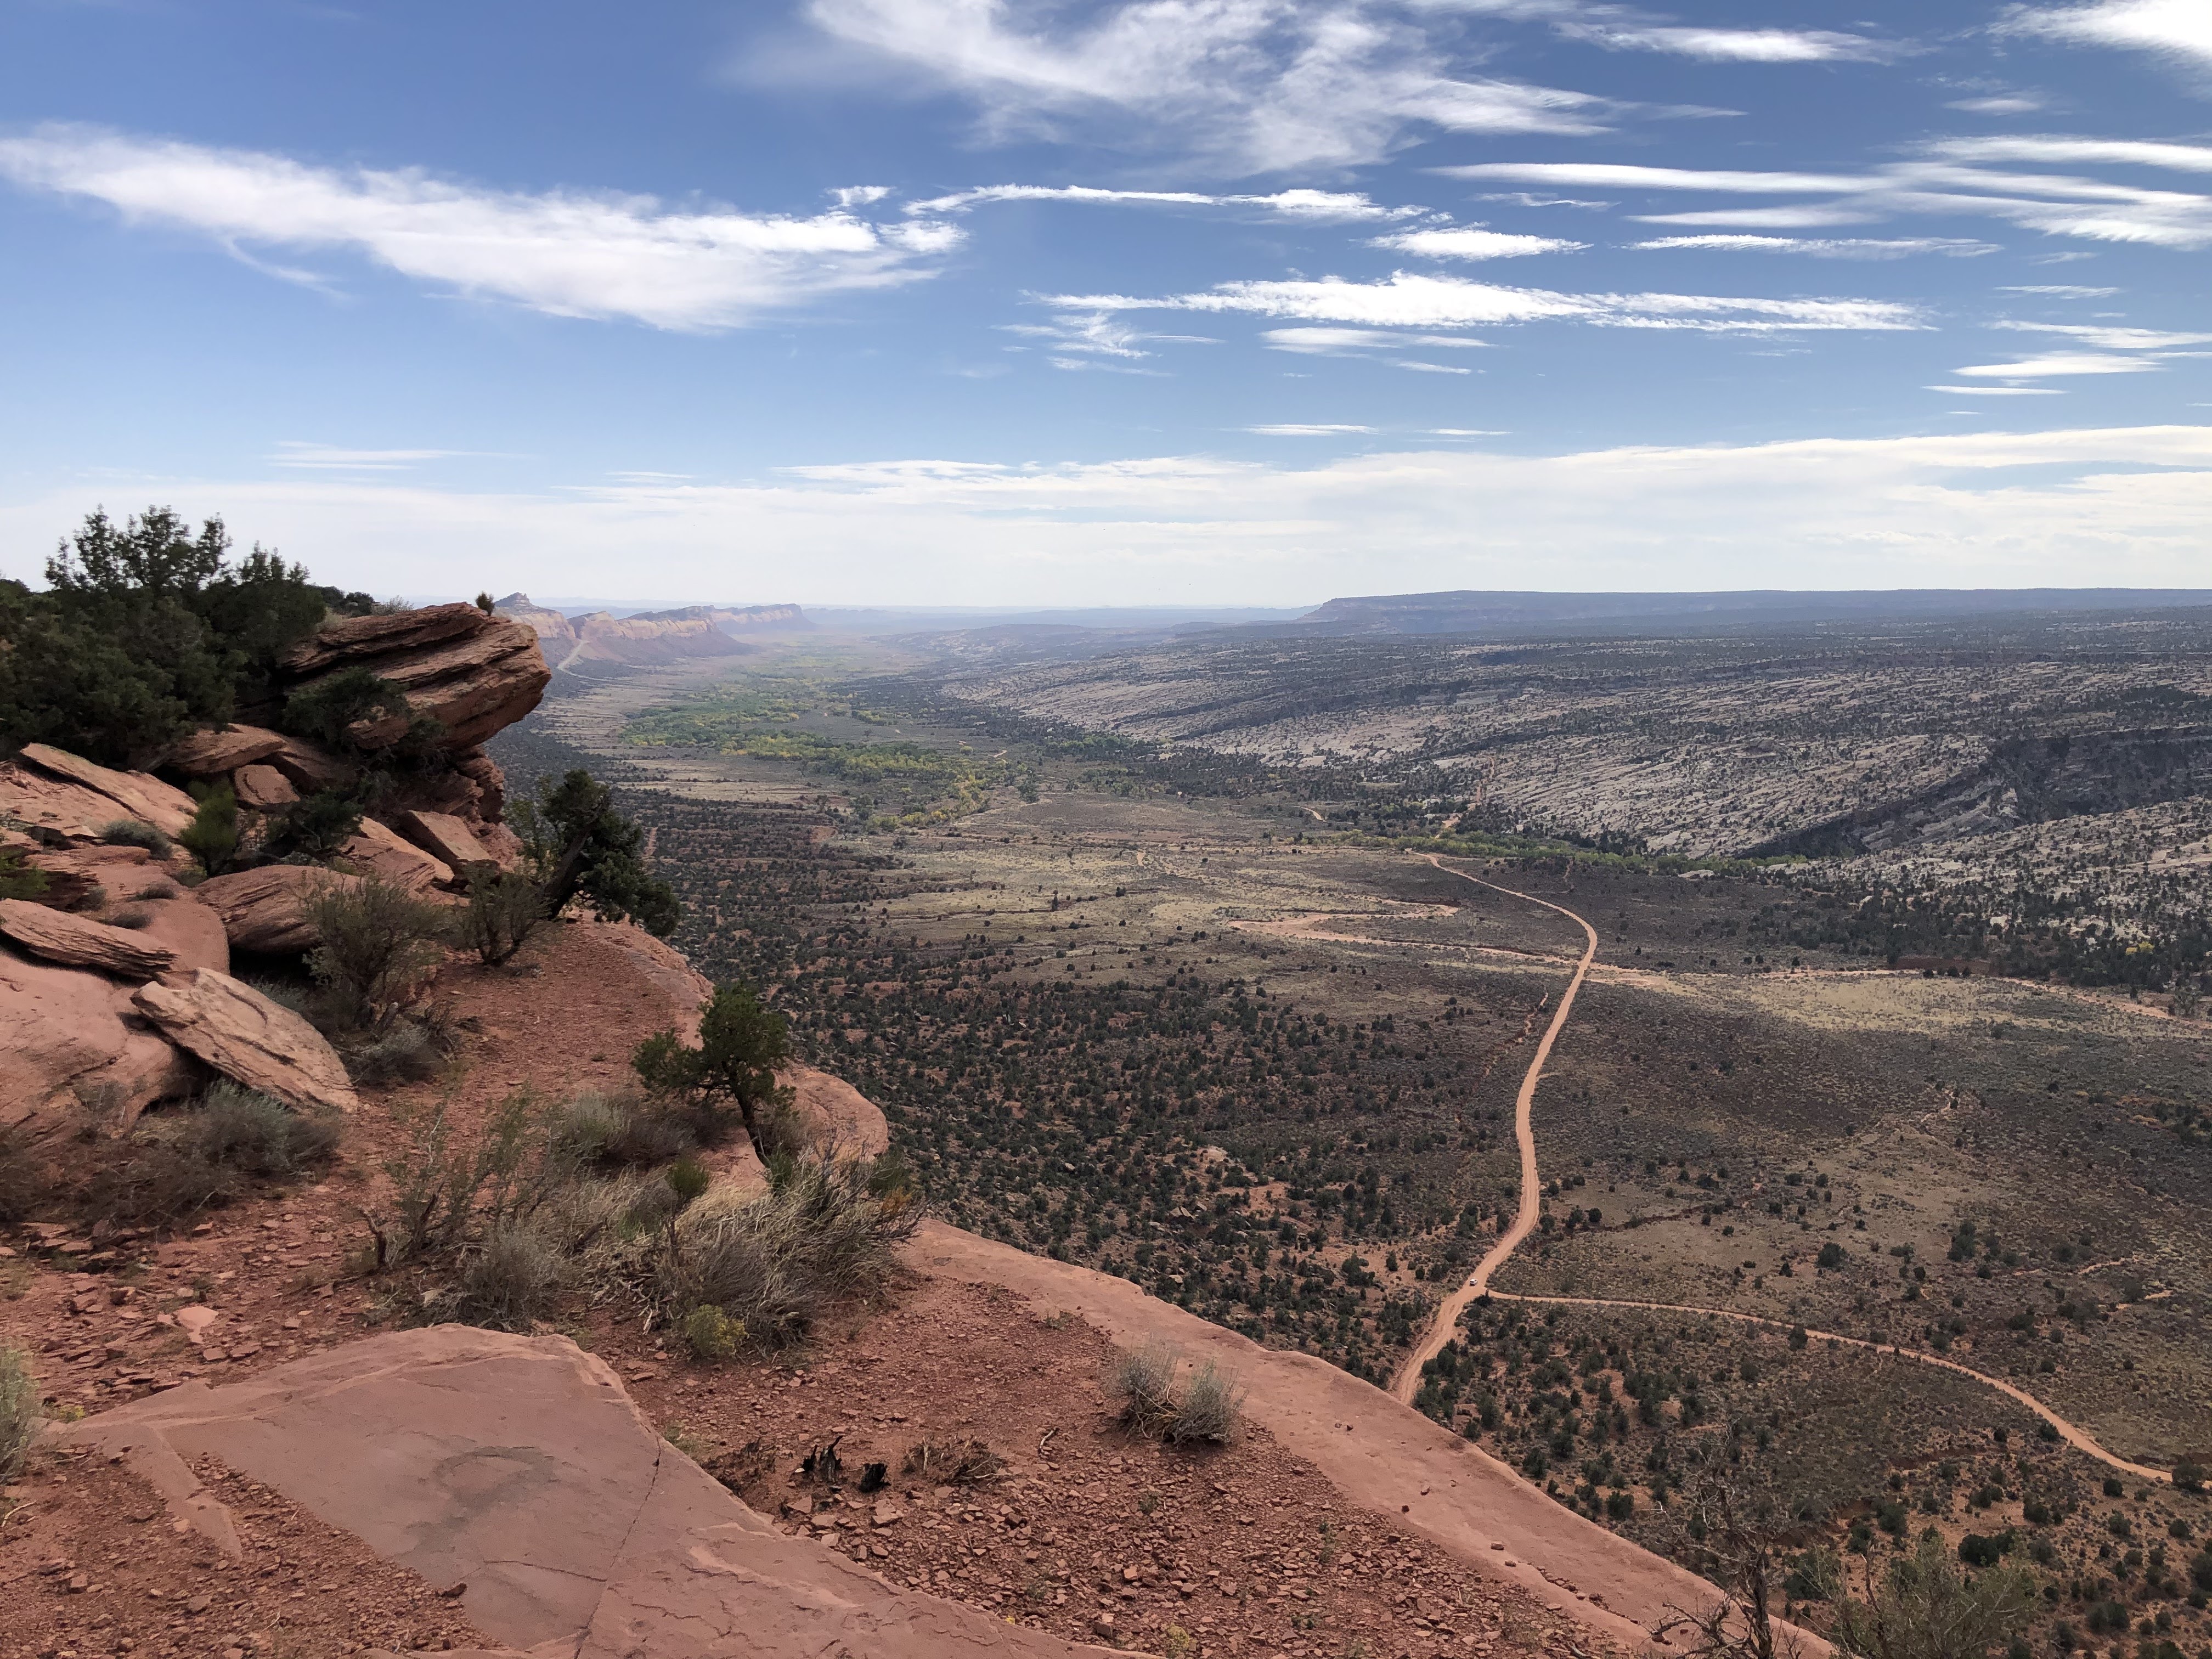
Looking west from Salt Creek OverlookLooking north from Salt Creek Overlook
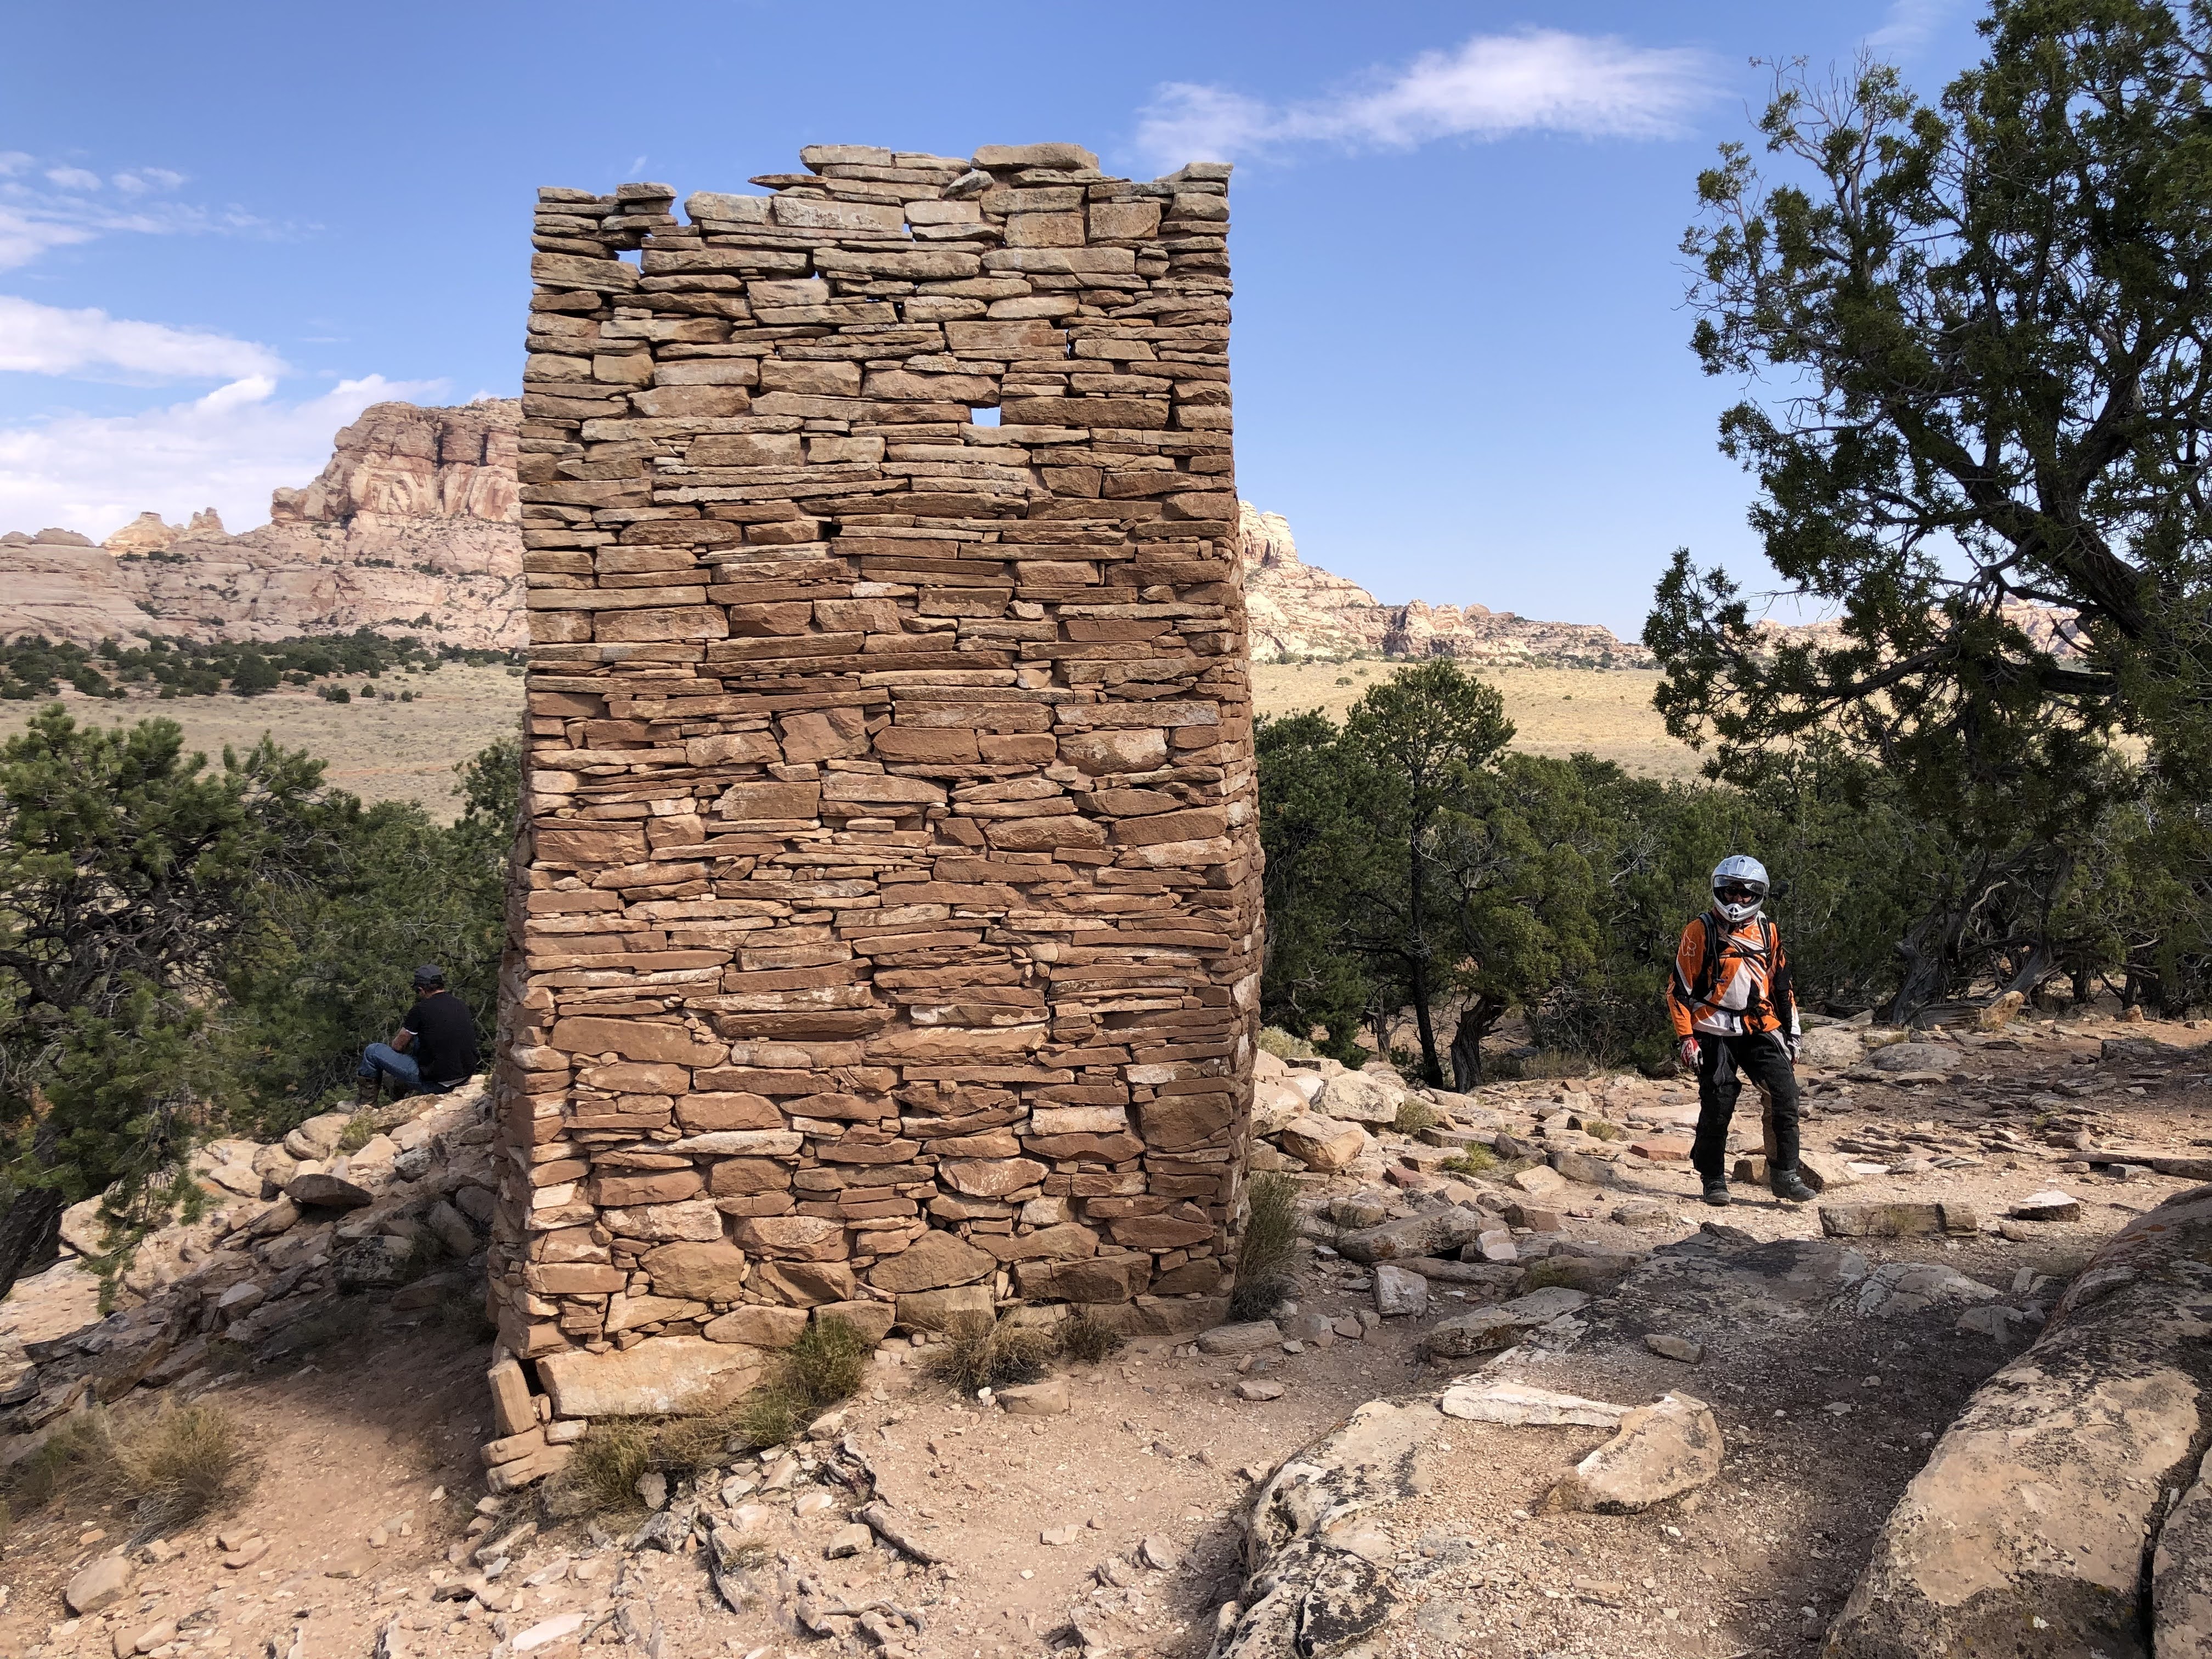
We climbed from about 5600’ in elevation to around 8200’, where we stopped for lunch at the turn-off for Beef Basin. The road into Beef Basin descends quickly, and the temperature steadily rose. The soft sand also increased as we entered Beef Basin. Those on the larger bikes had the hardest time in the sand, but everyone struggled to some degree. We visited a few of the ancient Anasazi ruins, but then opted to abide by my family’s mantra; “if you’ve seen one Indian ruin, you have seen them all”. We were anxious to climb back up to cooler temperatures and get out of the sand.
Dave by one of the ruinsCircle Ruin (I think)
Unfortunately, on our climb back out, Scott Connors tipped over on one of the switchbacks and may have cracked some ribs. I think this was his first adventure ride on his new KTM 690, and he hasn’t yet sorted out ideal luggage arrangements, and the bike is much taller than his old KLR.
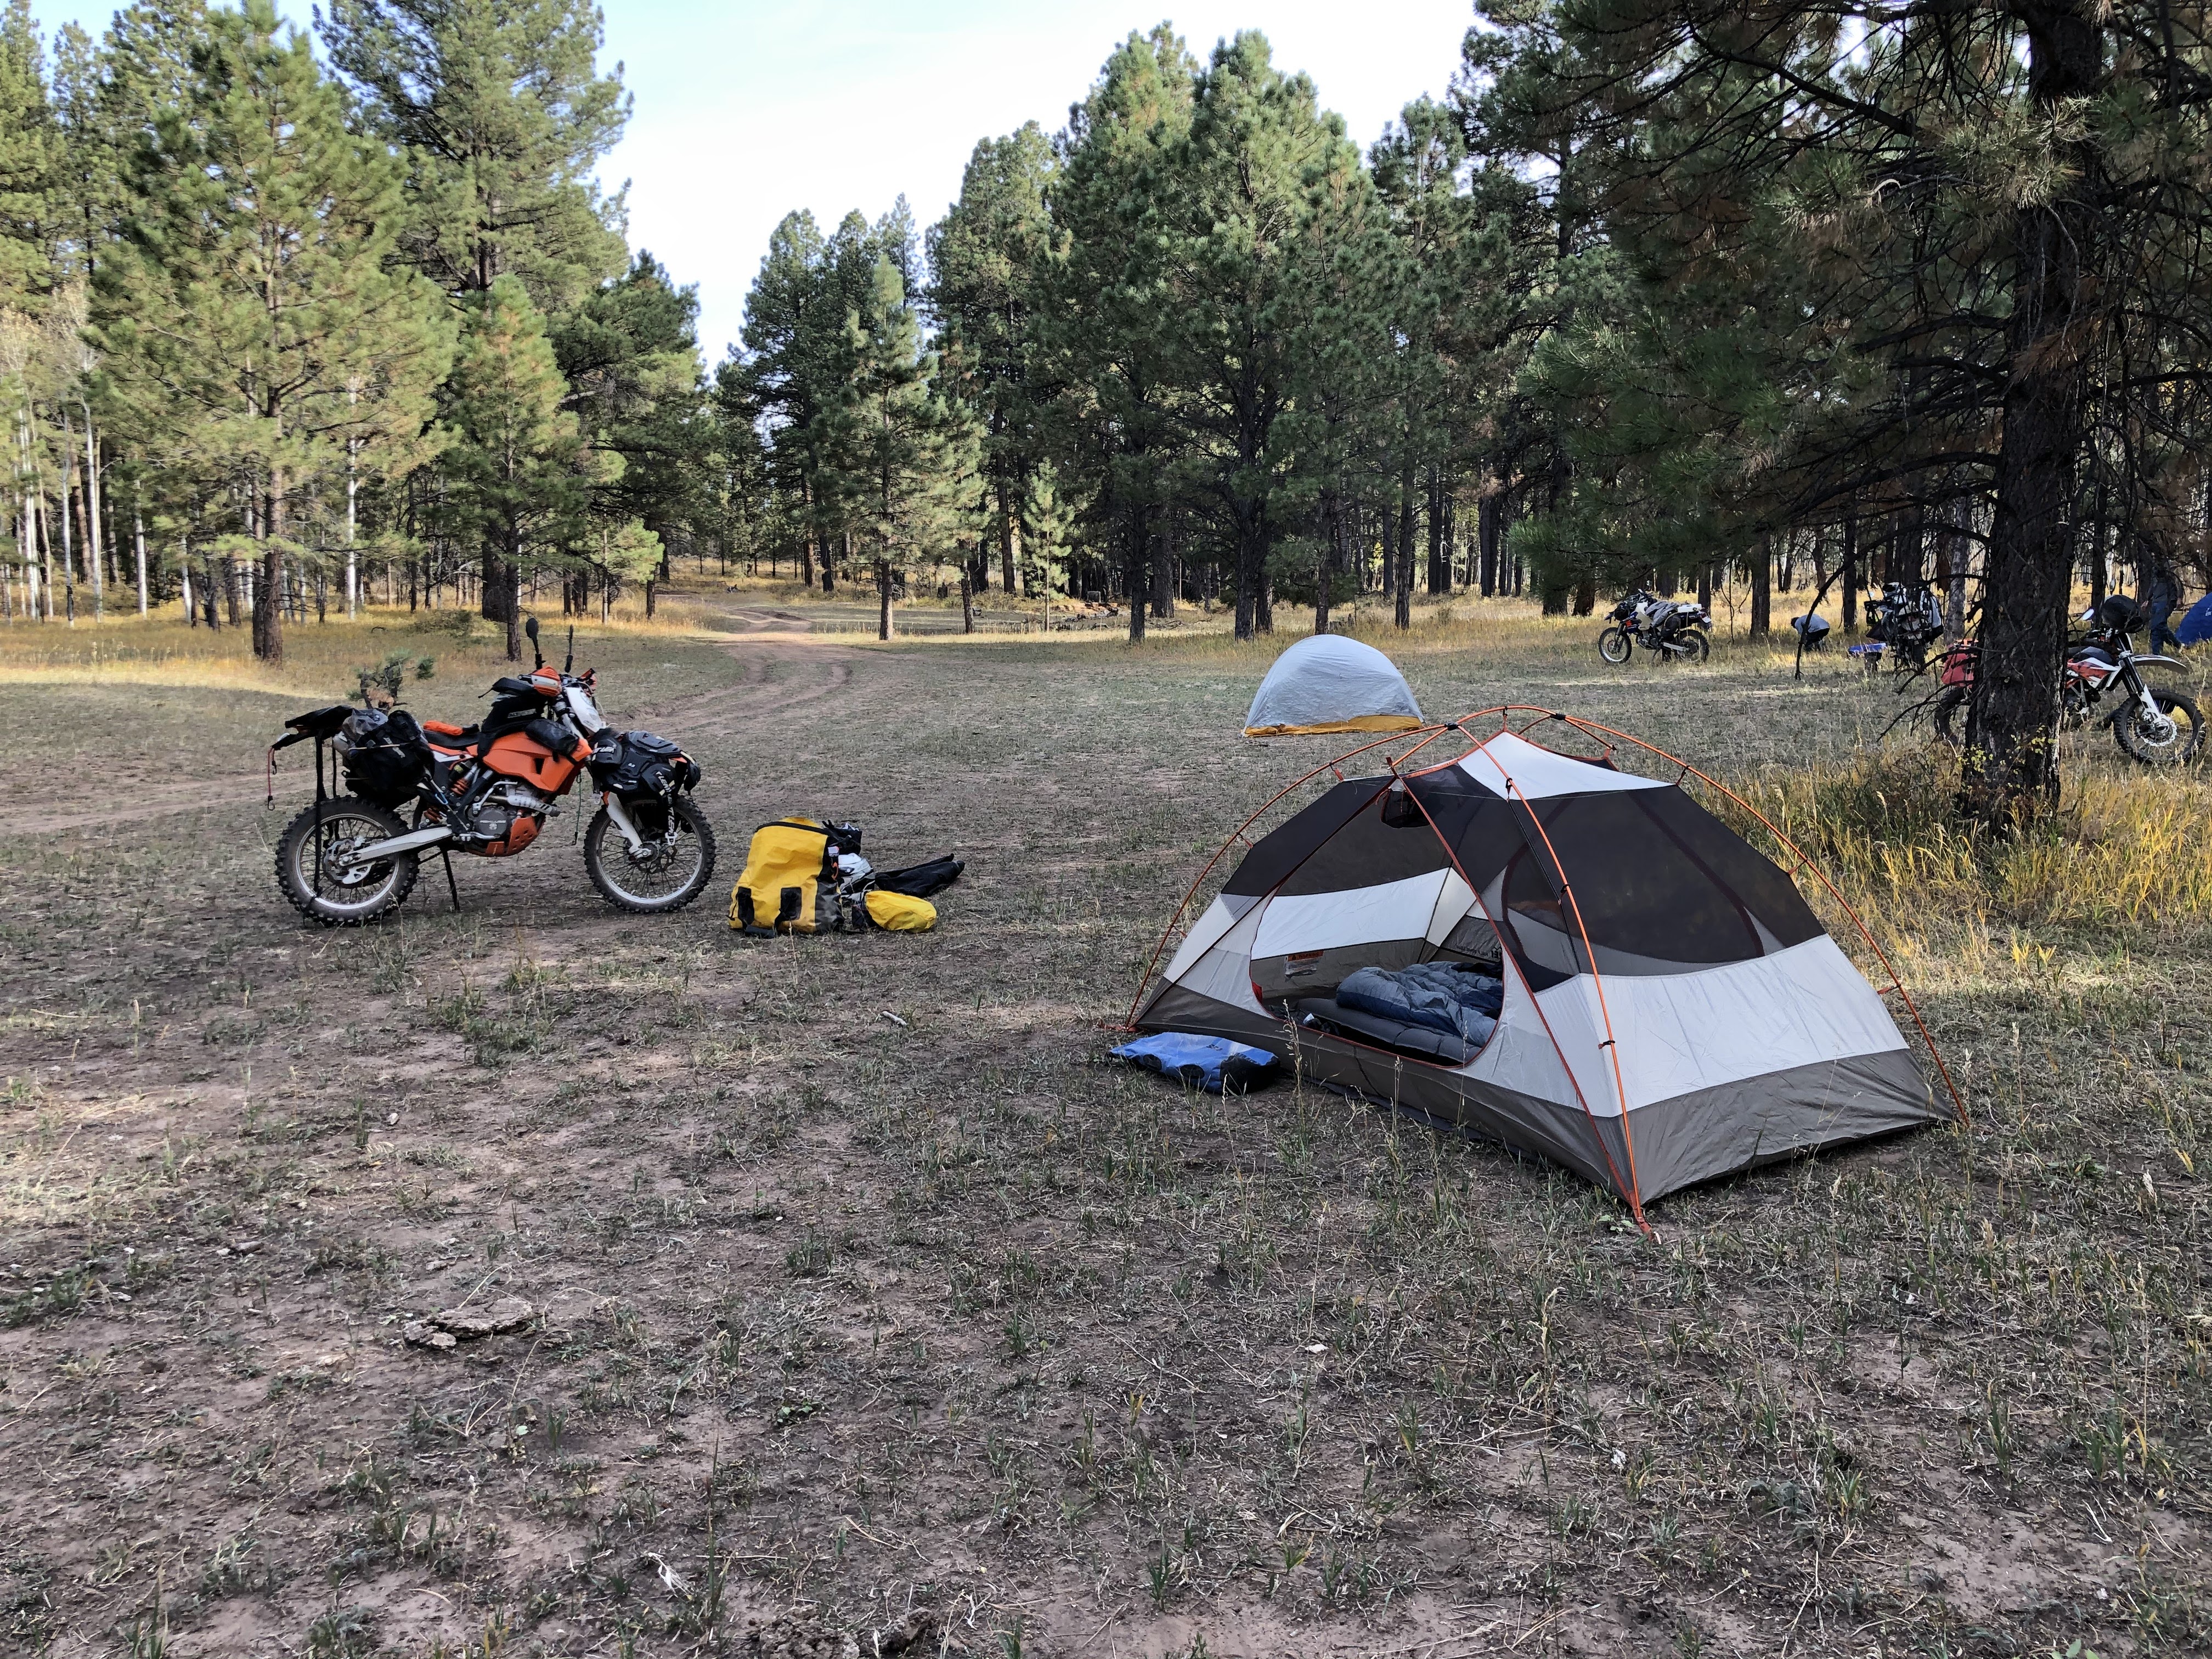
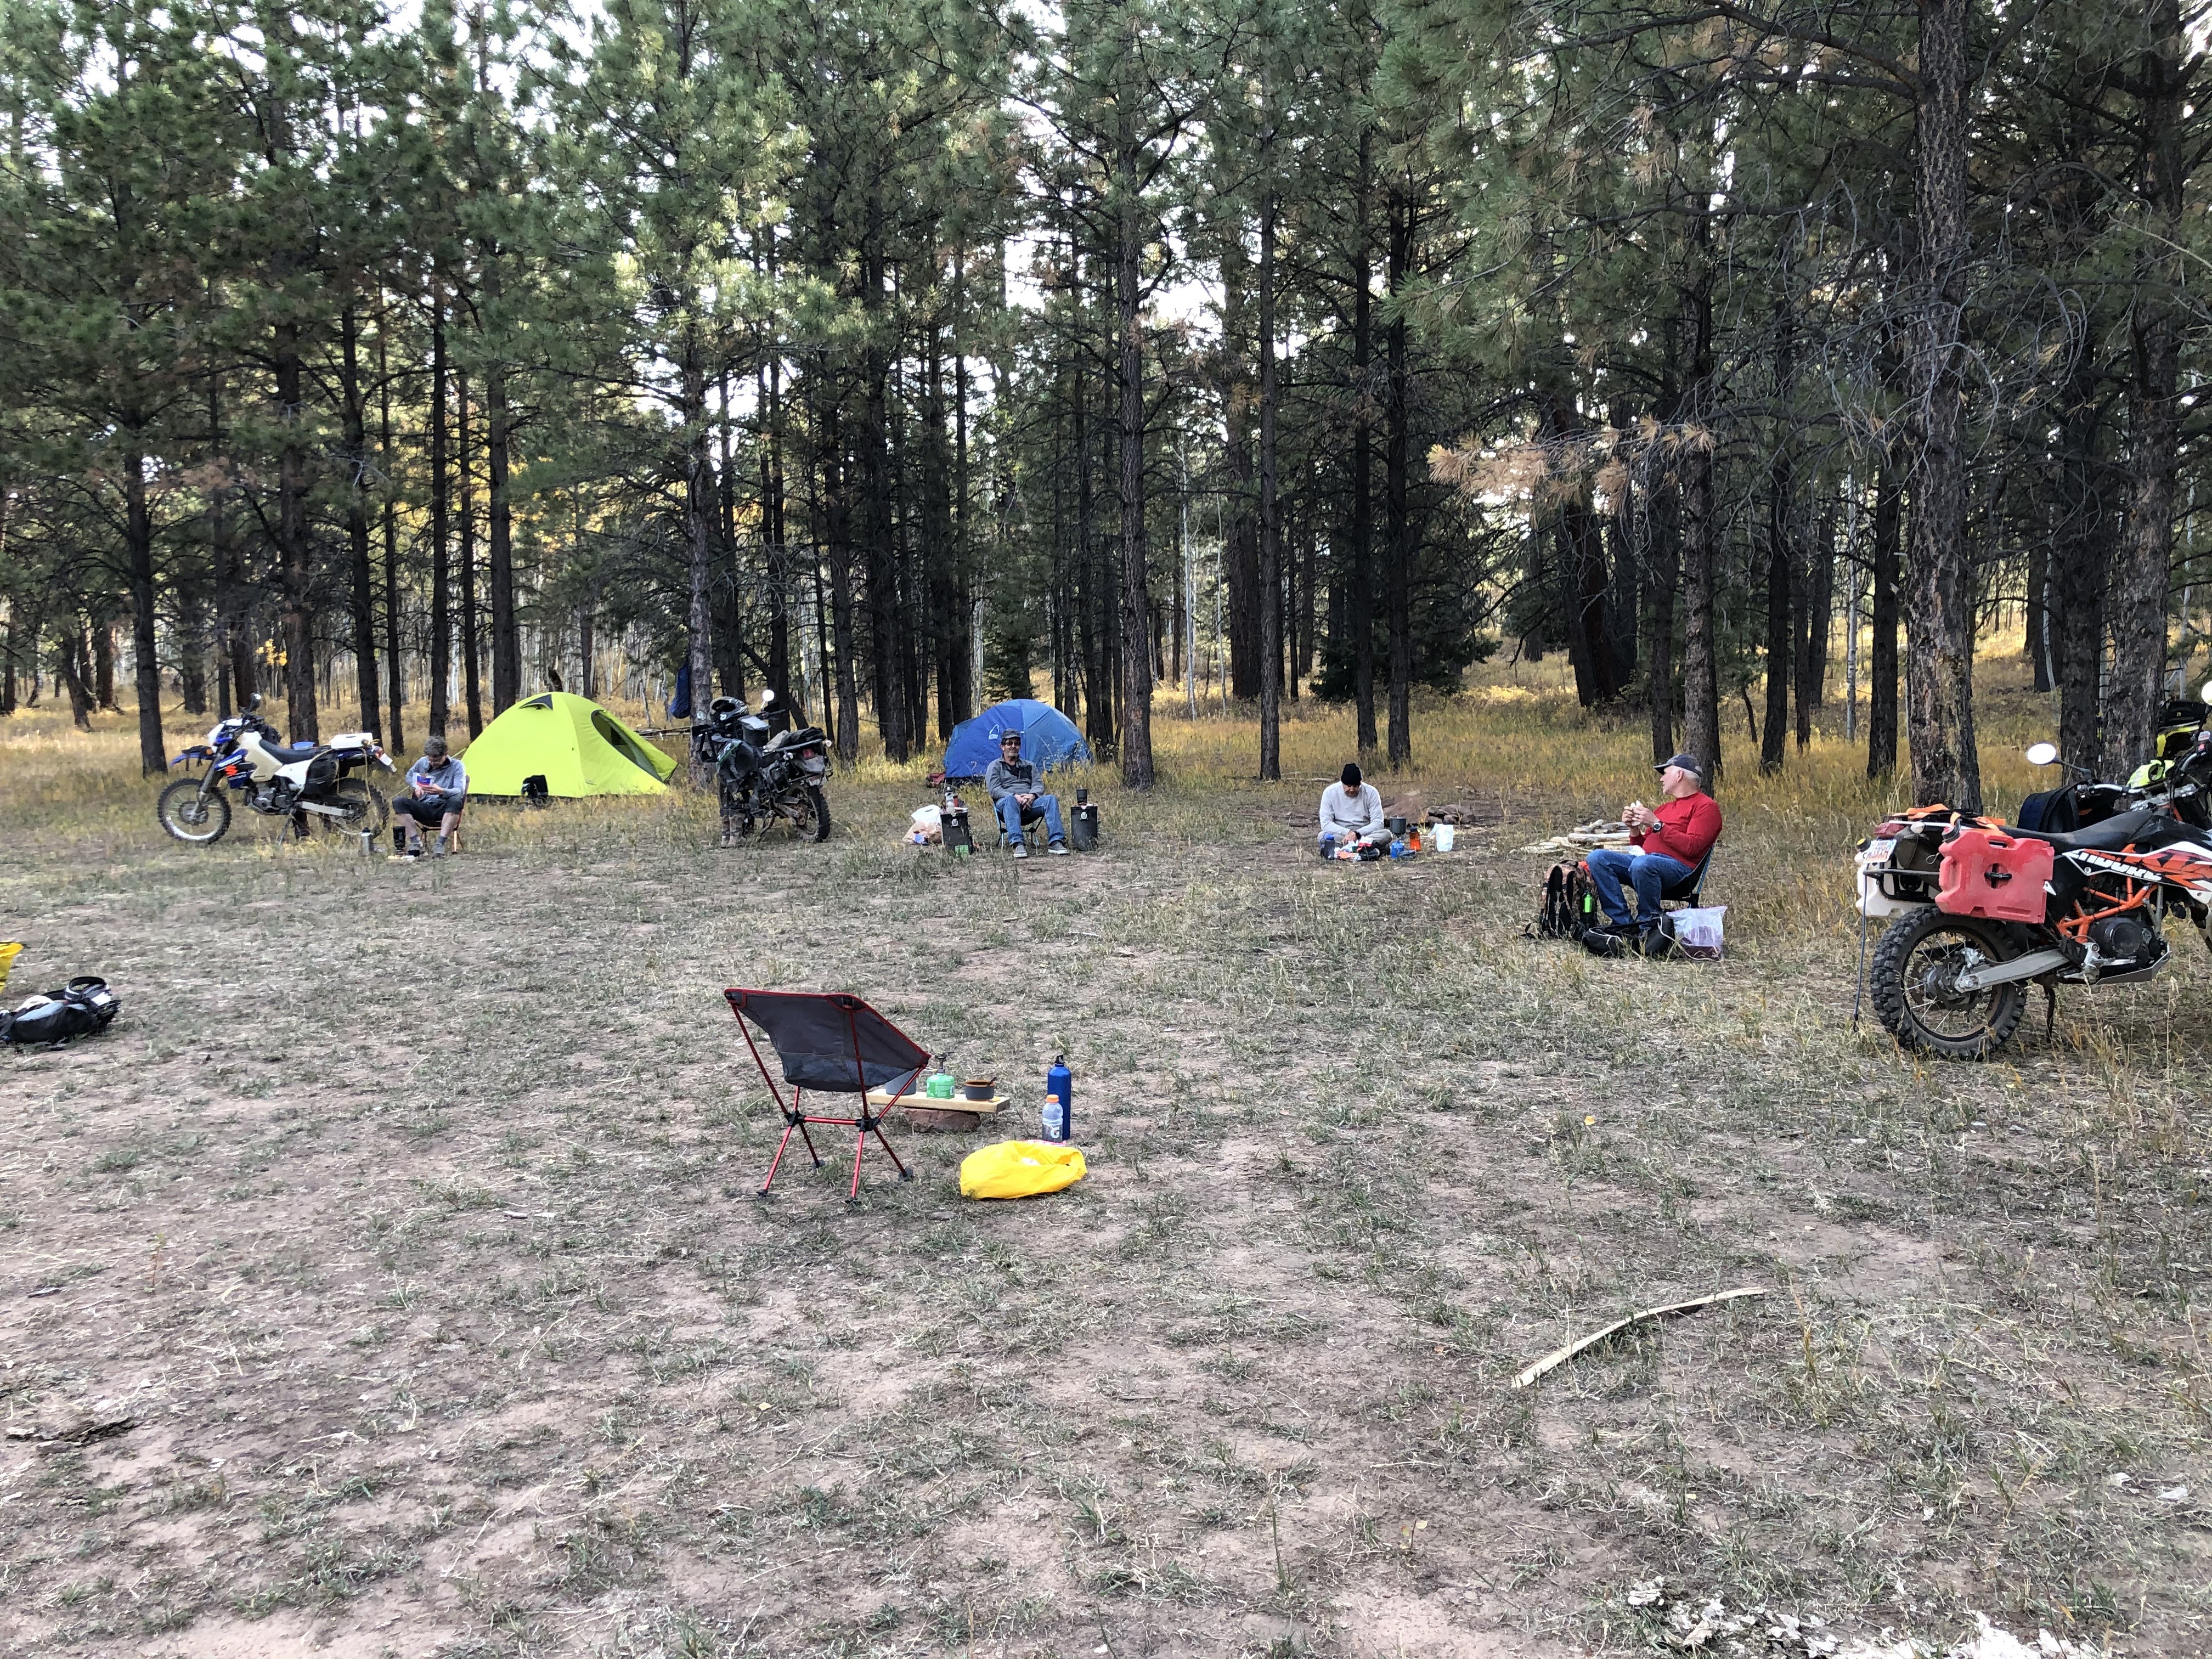
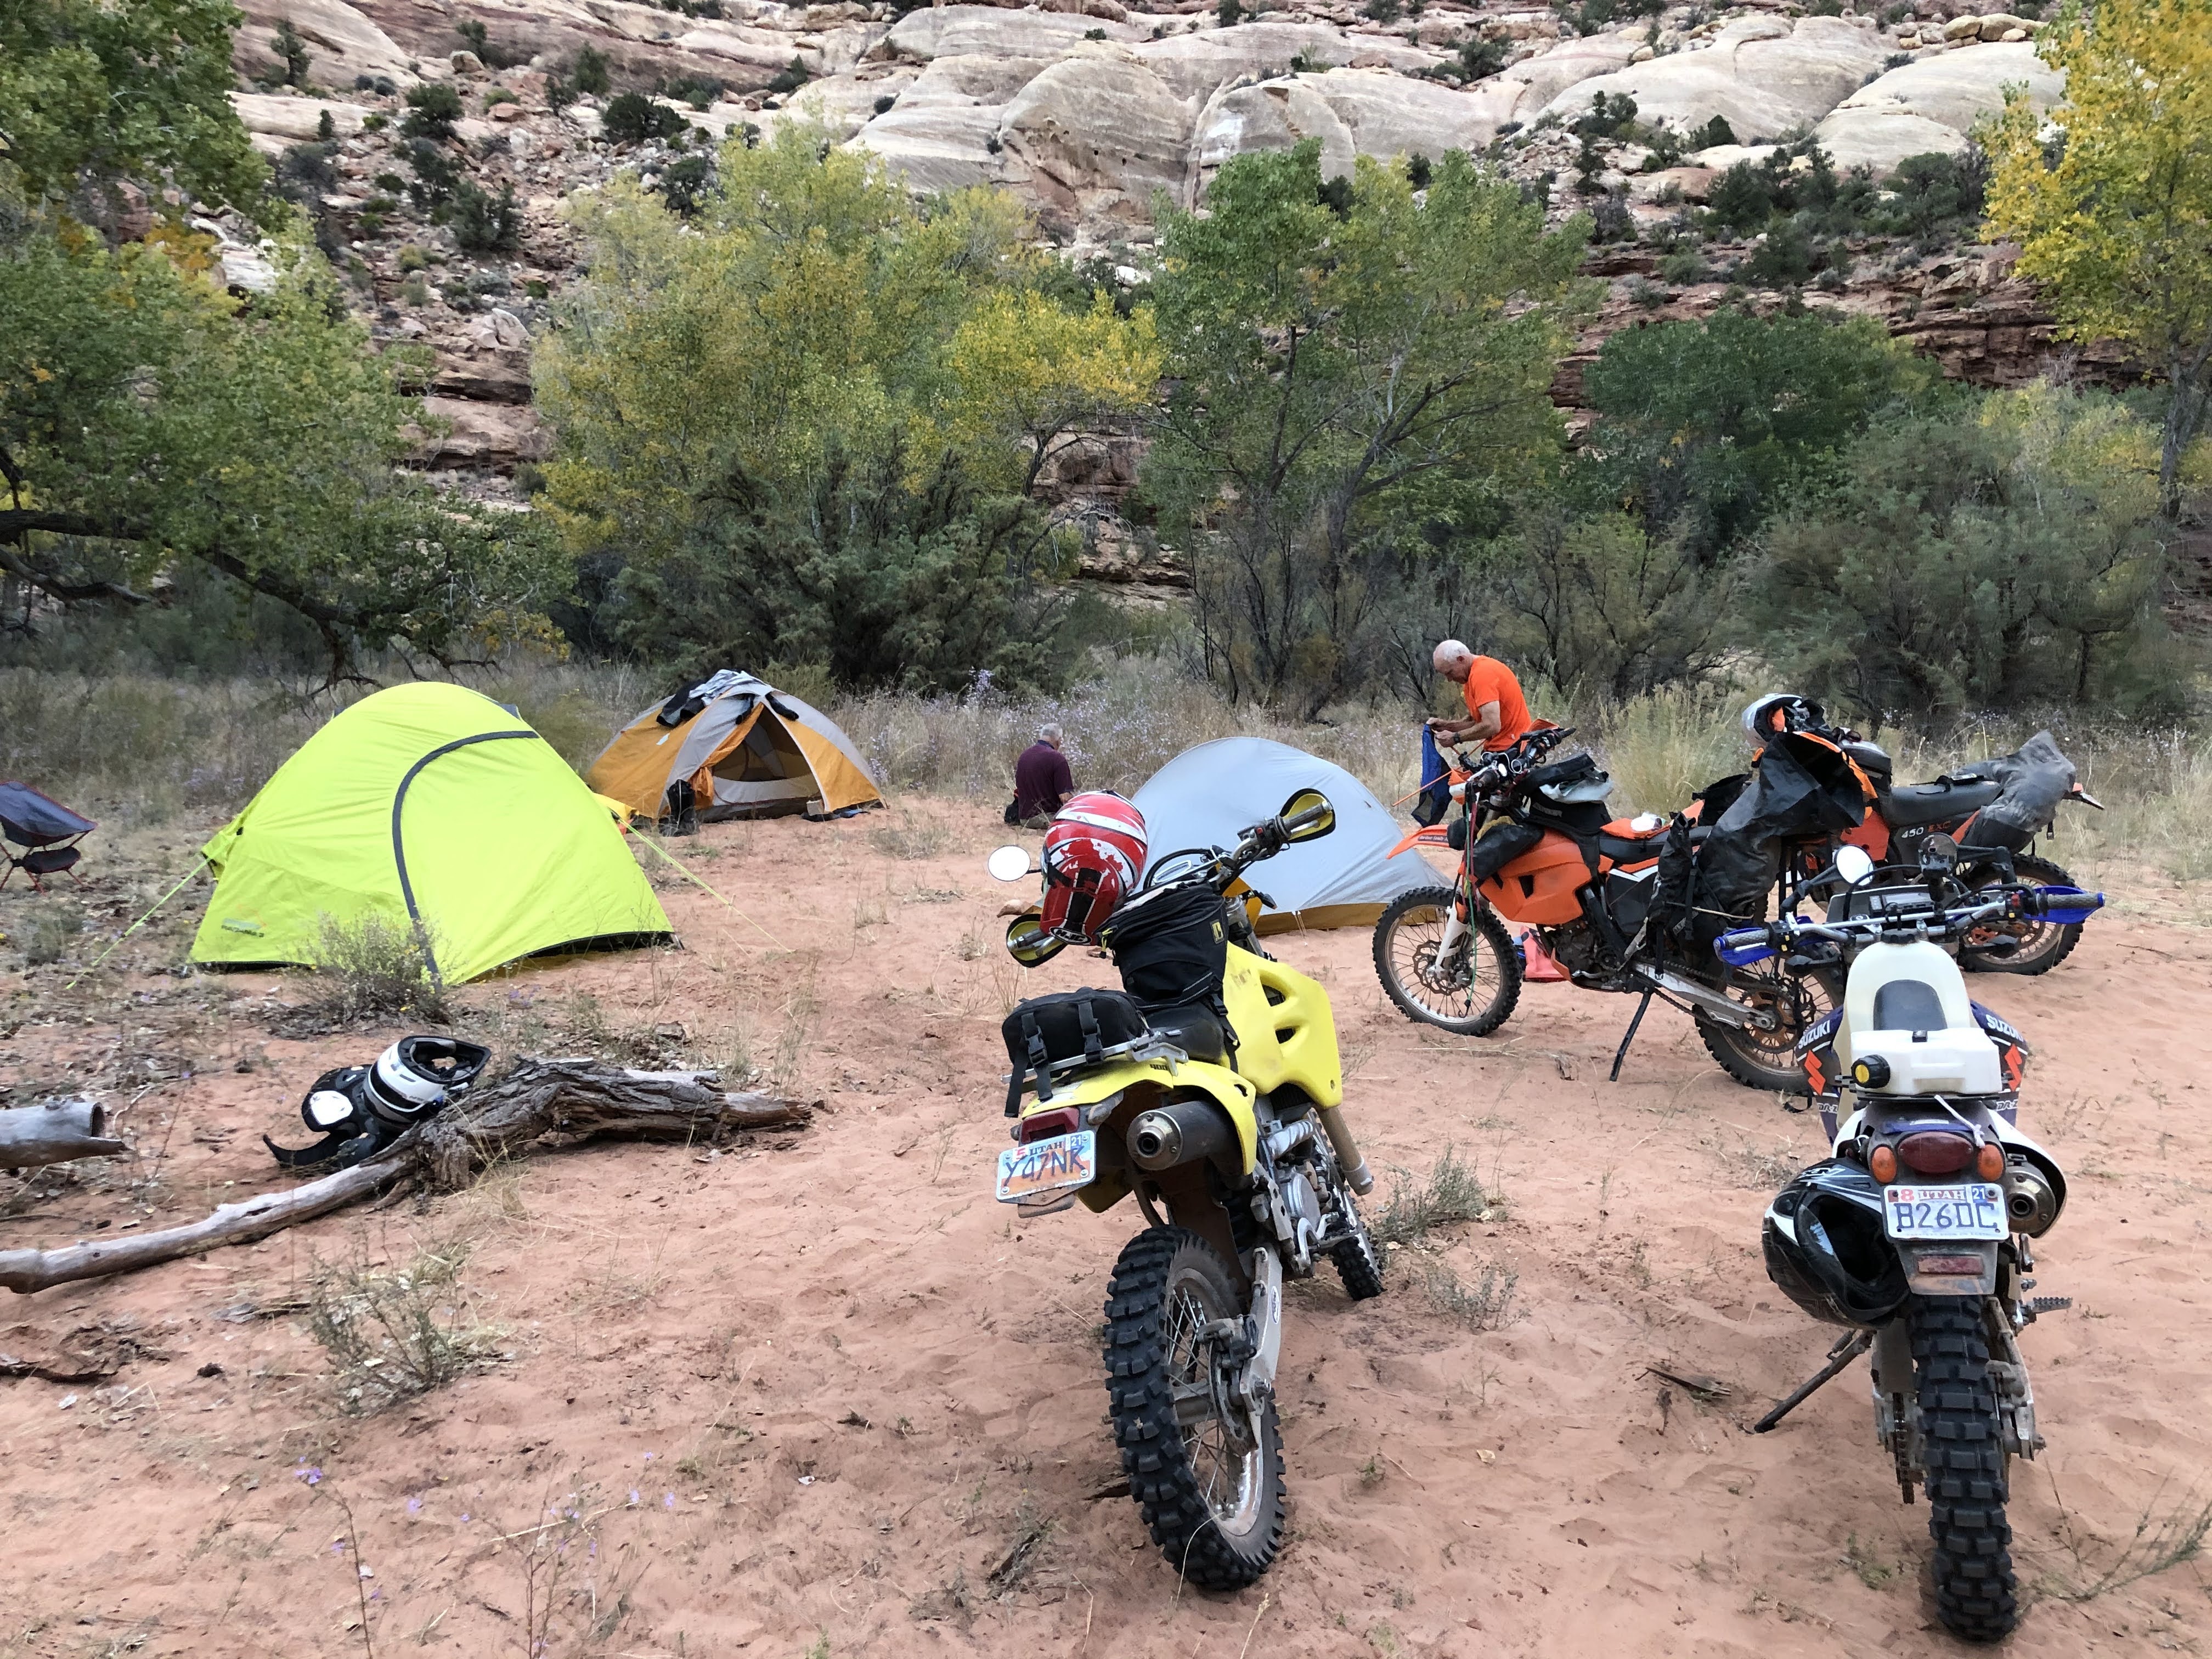
Our friend Ross suggested a nice place to camp out on North Long Point. The spot was very dry and exposed to the wind, so we back tracked about a mile to a great campsite in the pines. We were at about 8600’ elevation, so we expected a cold night. It turned out to be a great place to camp. It got cool at night, but not overly cold. We enjoyed star gazing until everyone headed to their tents. I think everyone but Scott had a nice night’s sleep. Scott was very uncomfortable from his injury.
Camp #1Social distance camping
The Causeway & Arch Canyon – Friday, Oct 9
After breaking camp, we headed east towards “The Causeway”. Most of the road was very nice, but there were a few places with deep silt because of the long dry summer. Boyd went down on his KLR in one deep patch of silt.
The CausewayView from the Causeway
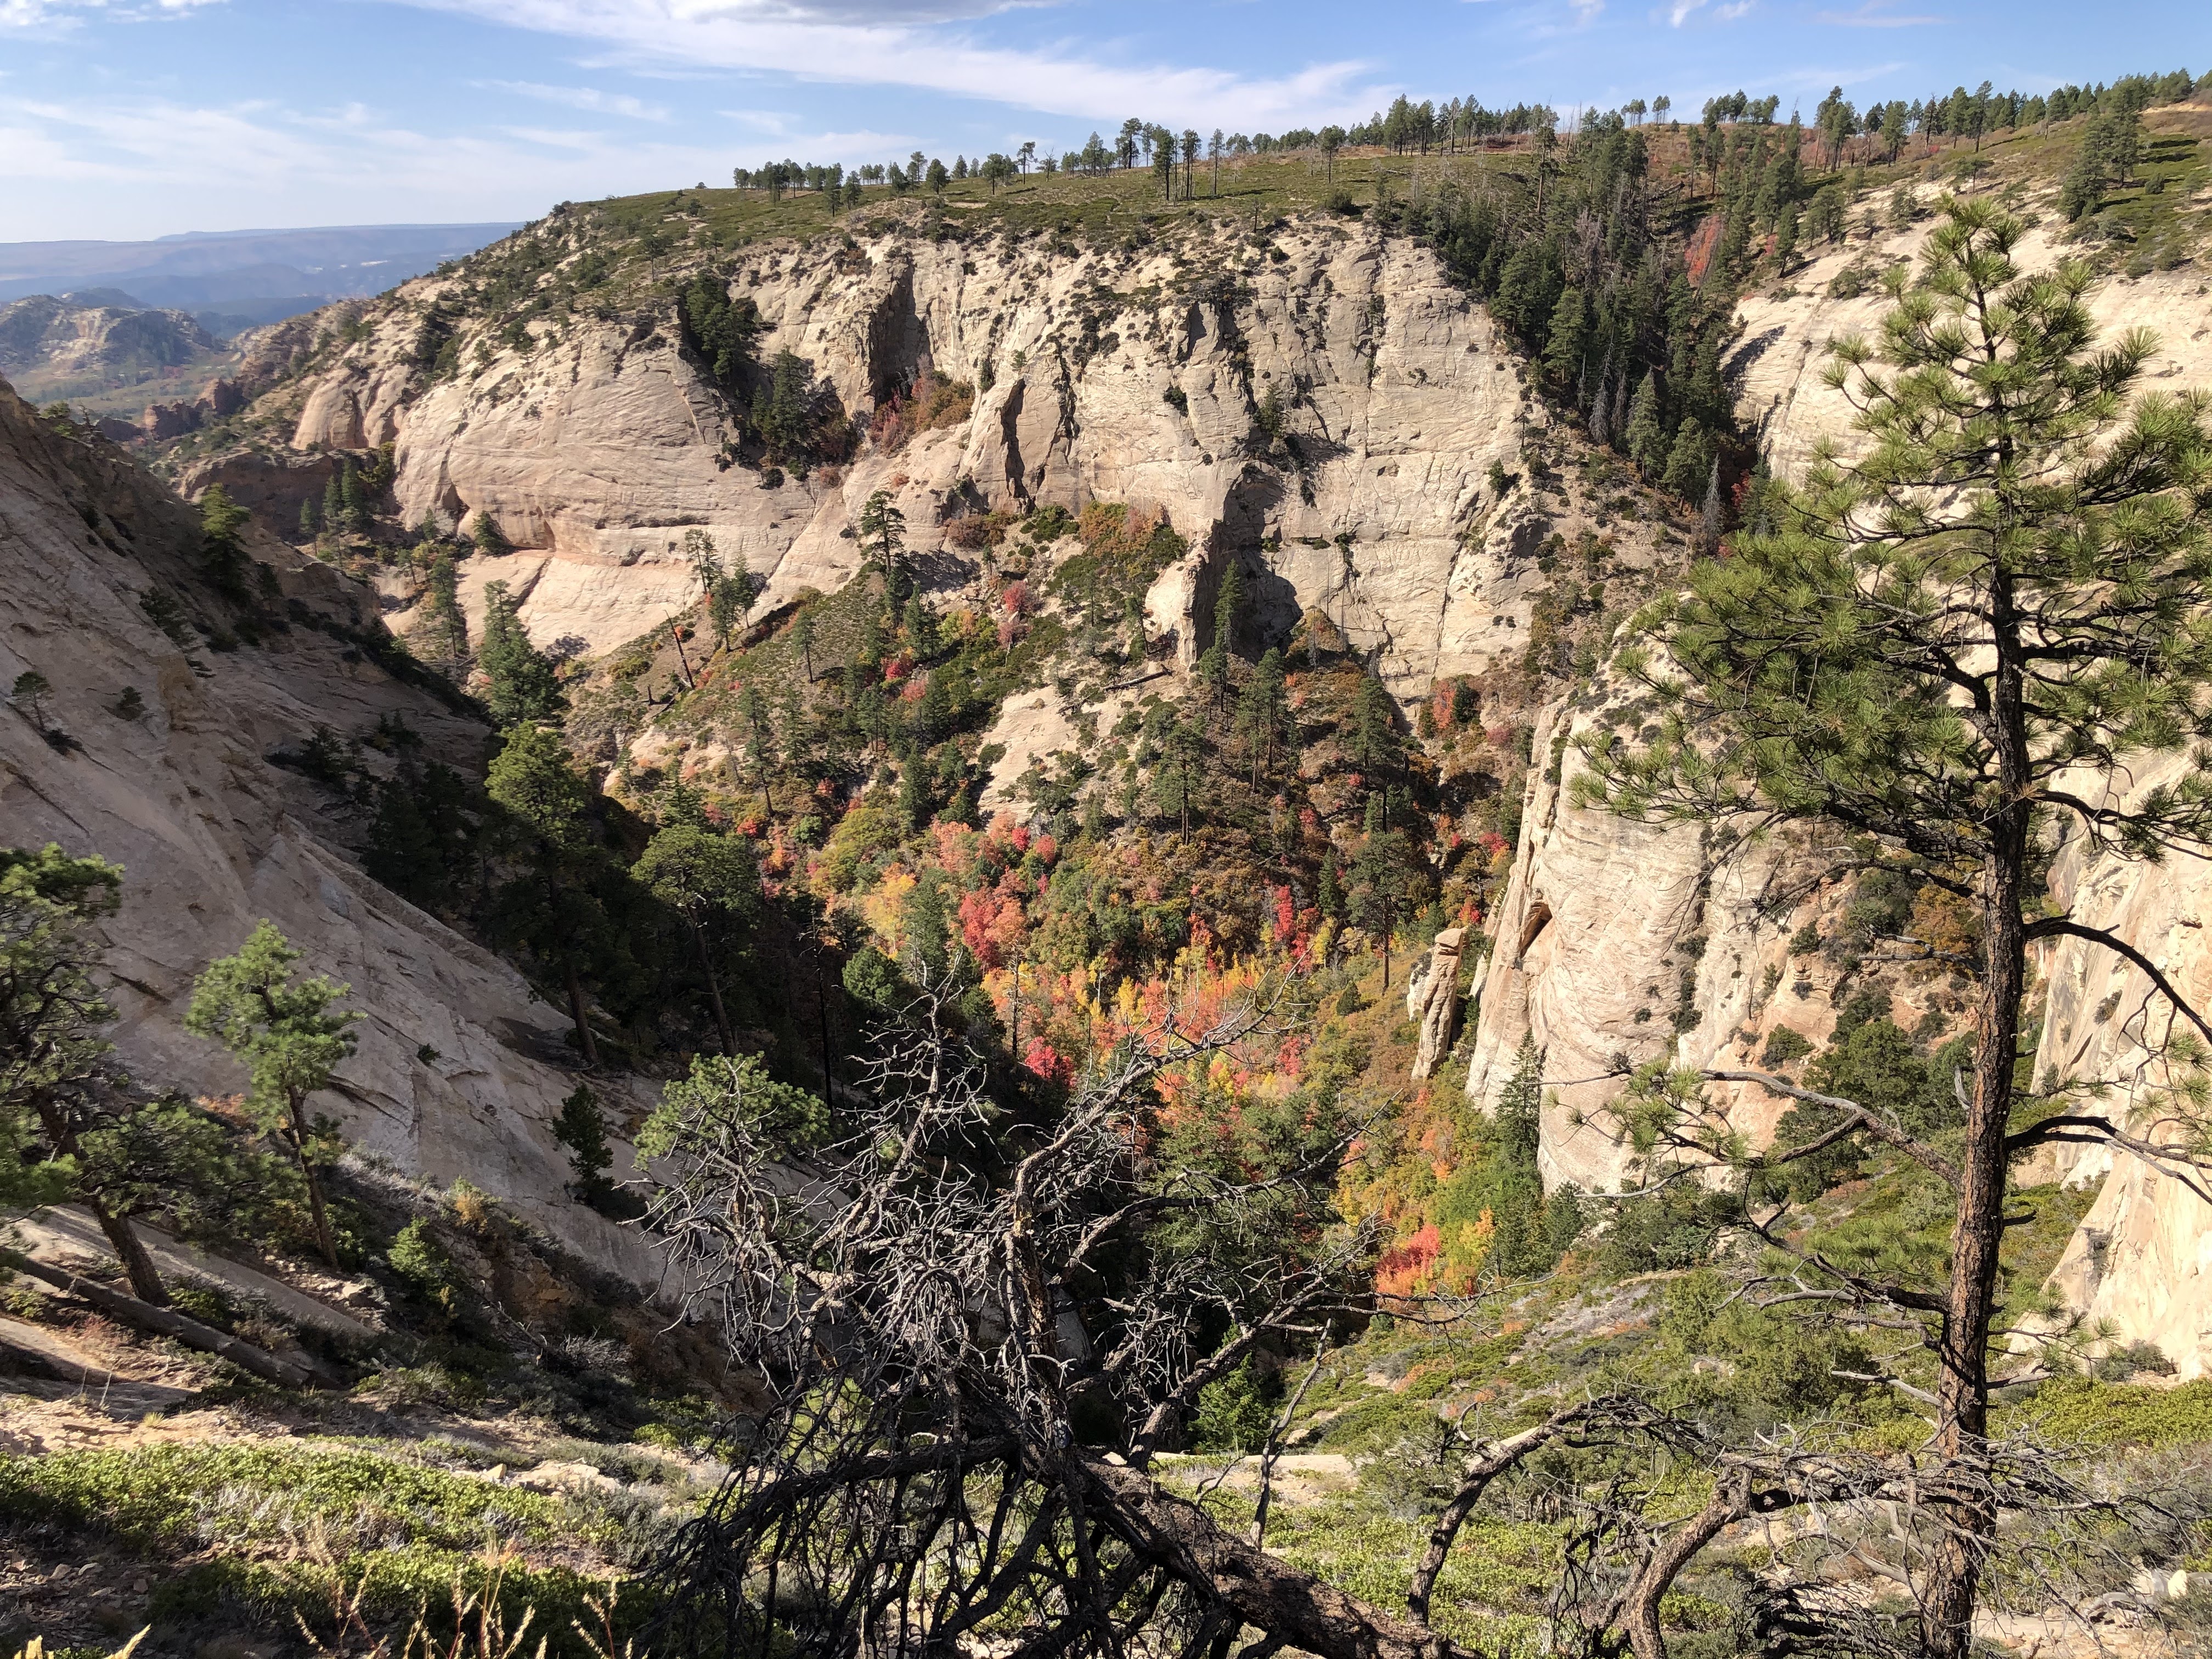
The scenery was spectacular along this road. I don’t think any of us had been there before, so we were thrilled to enjoy the ride and the scenery.
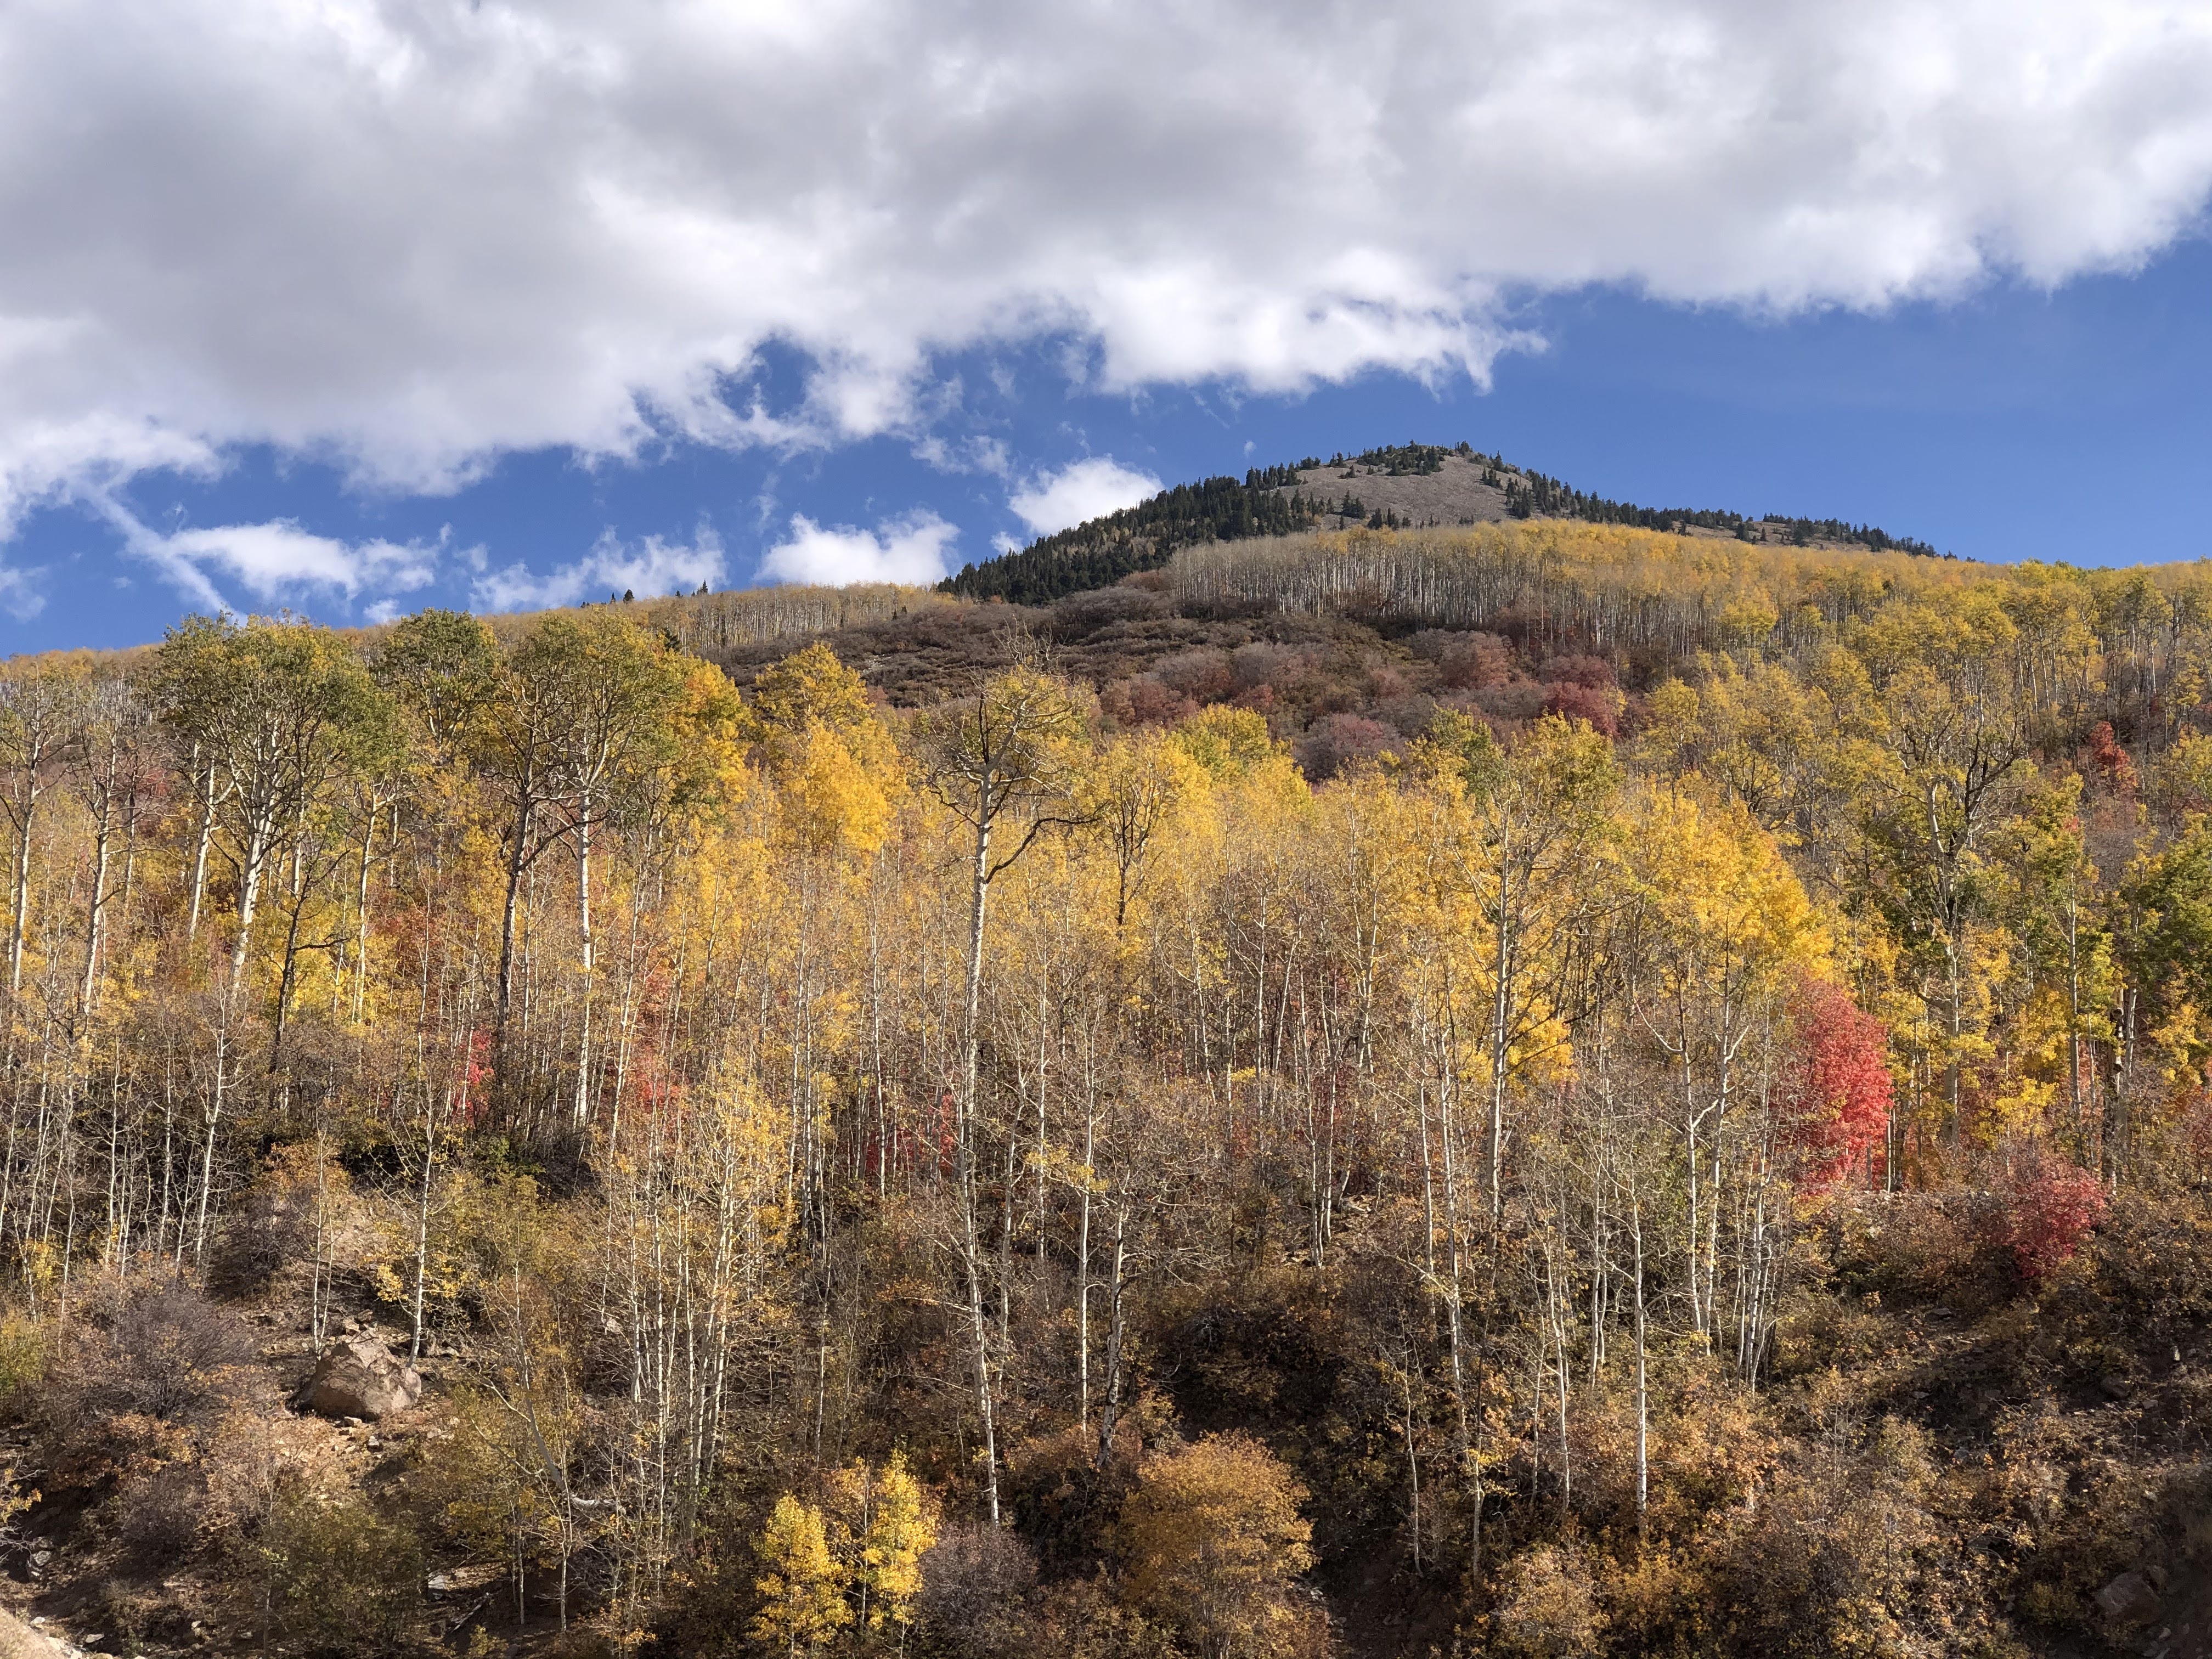
Autumn leaves
We then buzzed down into the town of Blanding and a nice burger at the Patio Diner. They had a sign on the door suggesting social distancing. It read something like; “Please stay six feet apart. Our floor tiles are 18” square. Do the math.”
Boyd and Scott decided to ride up over the Abajo Mountains and head for home due to Scott’s injury. They said that road was the highlight of the trip for them. I will have to check that out some day.
The rest of us continued our journey by riding west towards Comb Ridge. We rode a small ATV trail that we enjoyed several years ago called “Whiskers Draw”. It was very tight and twisty. Our mirrors took a beating, but it was a really fun ride.
We then stopped on top of Comb Ridge and enjoyed the view overlooking Comb Wash. To our surprise, there were no other campers up there, so we considered camping there to enjoy the view, but decided to press on and explore Arch Canyon before camping.
Overlooking Comb Wash
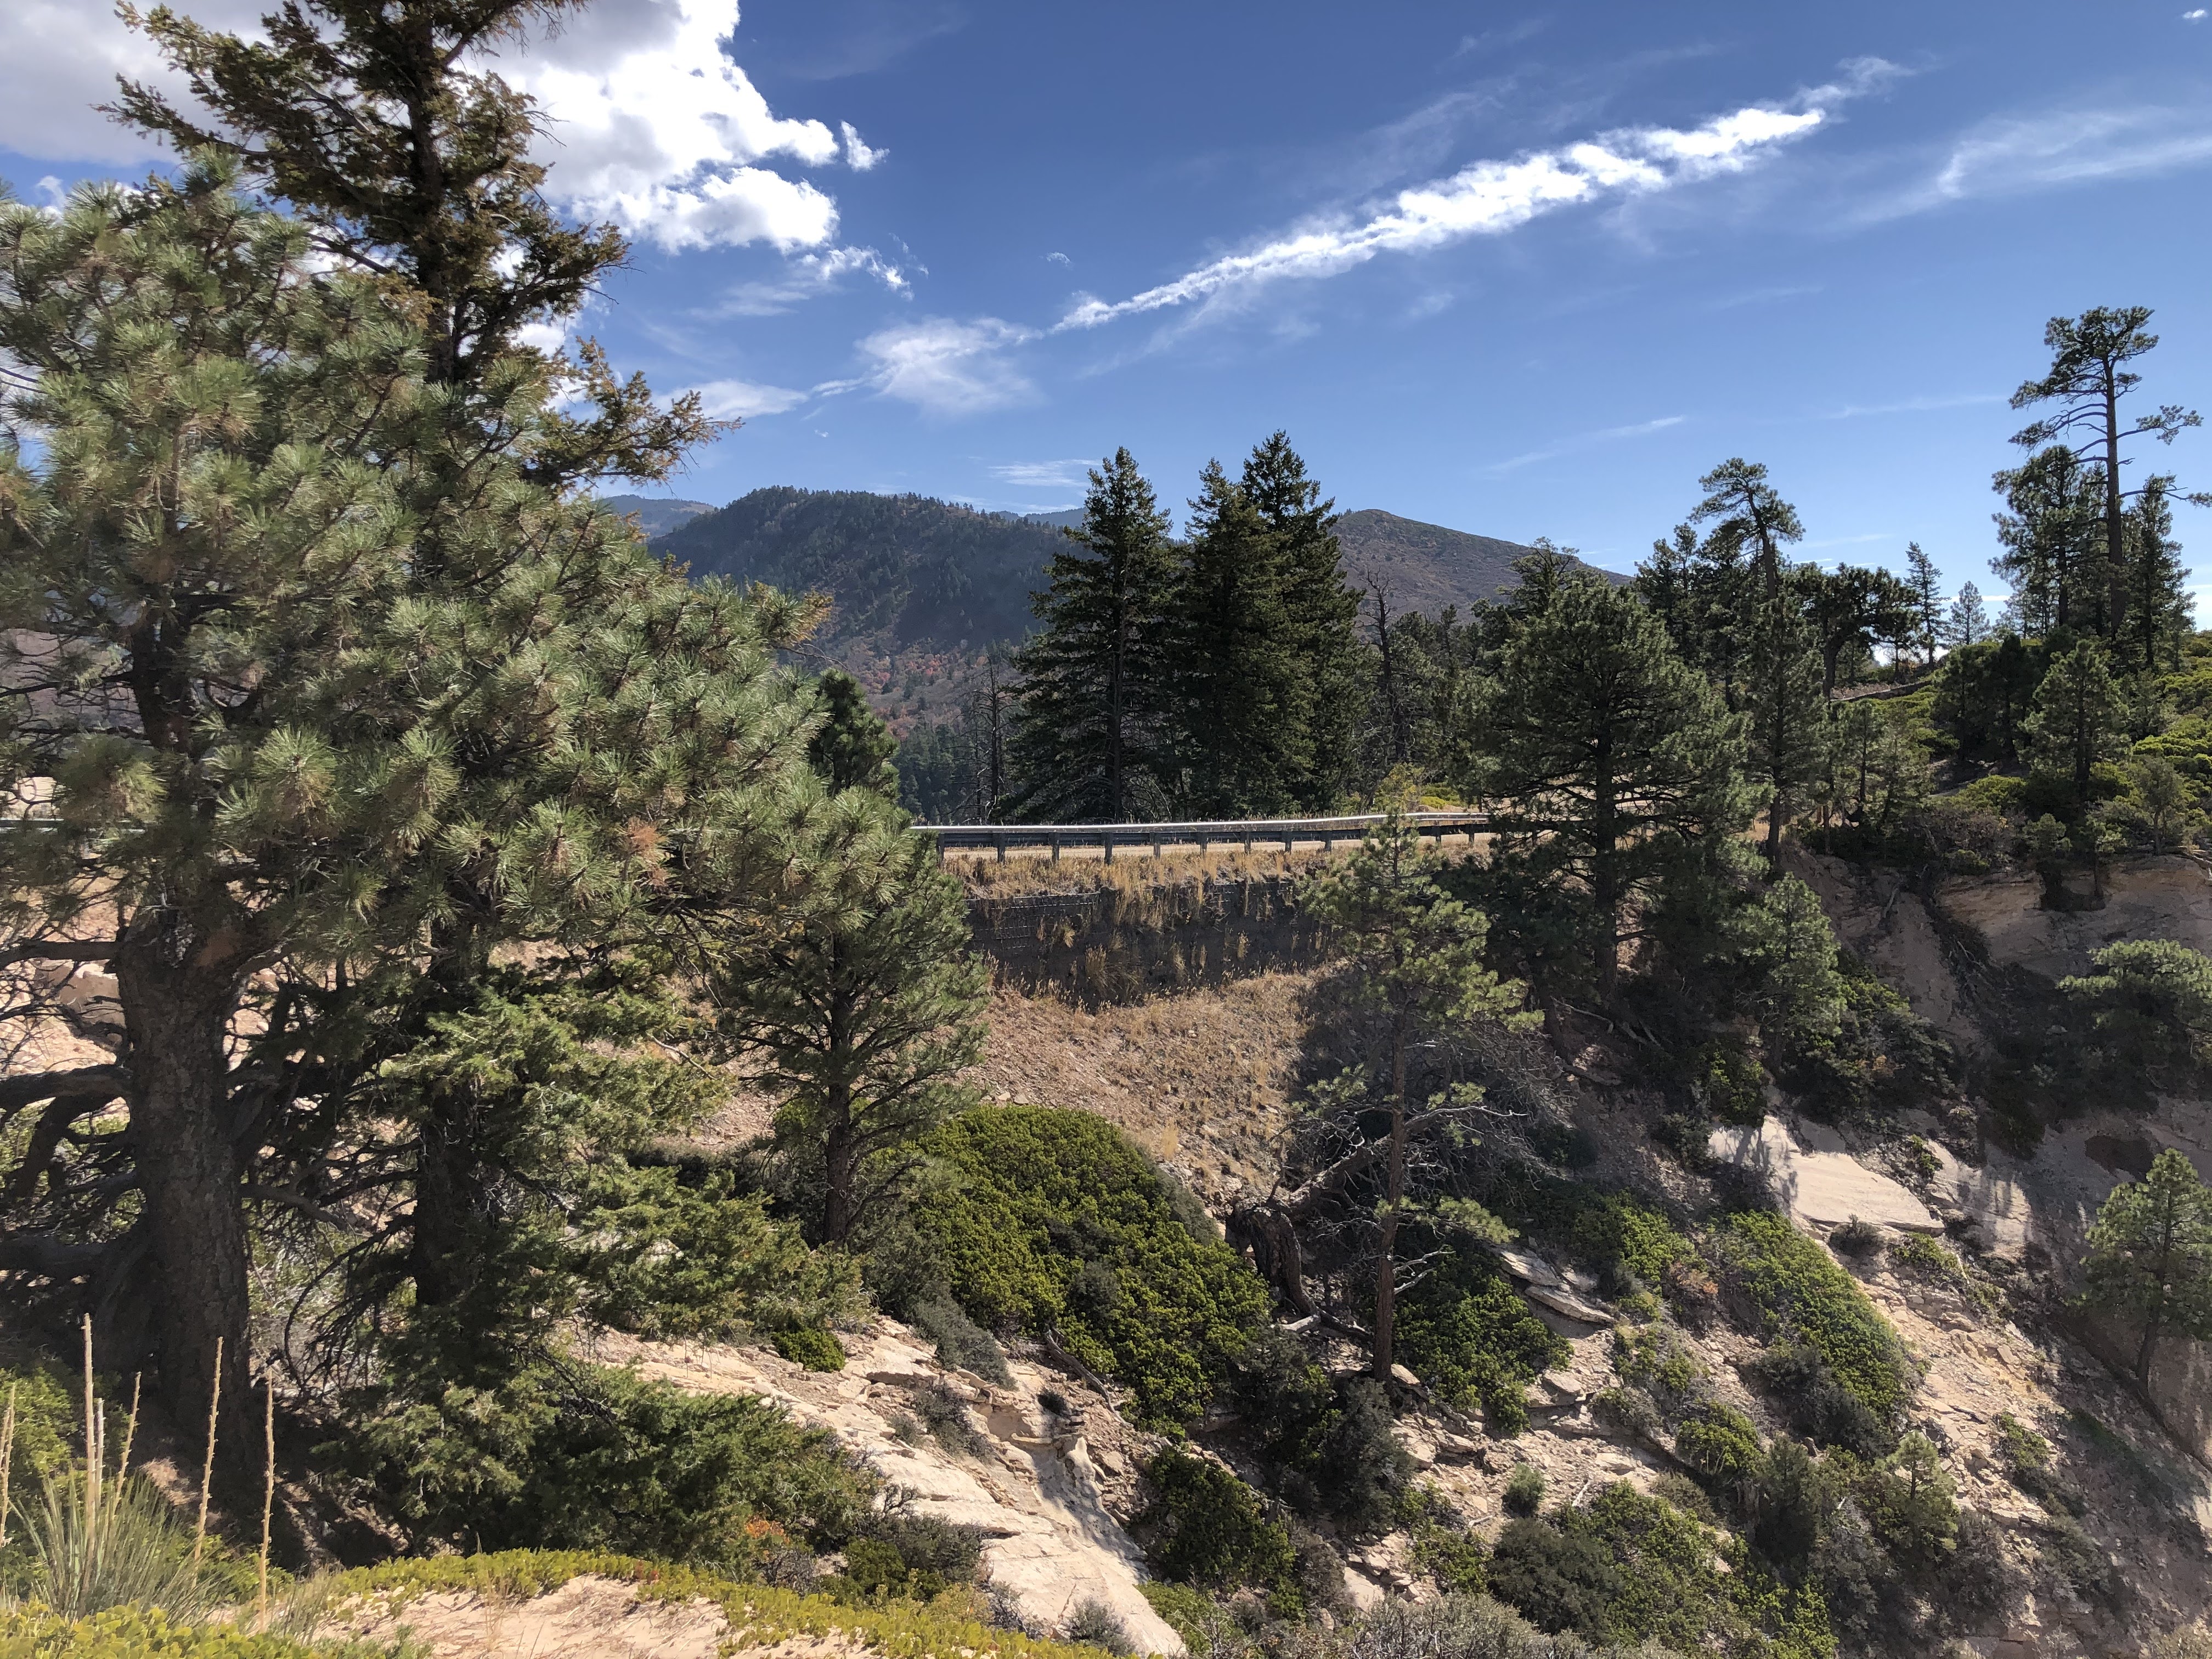
Dave and I rode down the old highway 95 dugway that was cut into the side of the cliff. It is a technical ride, with extreme exposure – so you want to pay close attention as you ride this trail. Scott Barton and Danny took the bypass route around to the new highway, with the plan to meet at the mouth of Arch Canyon.
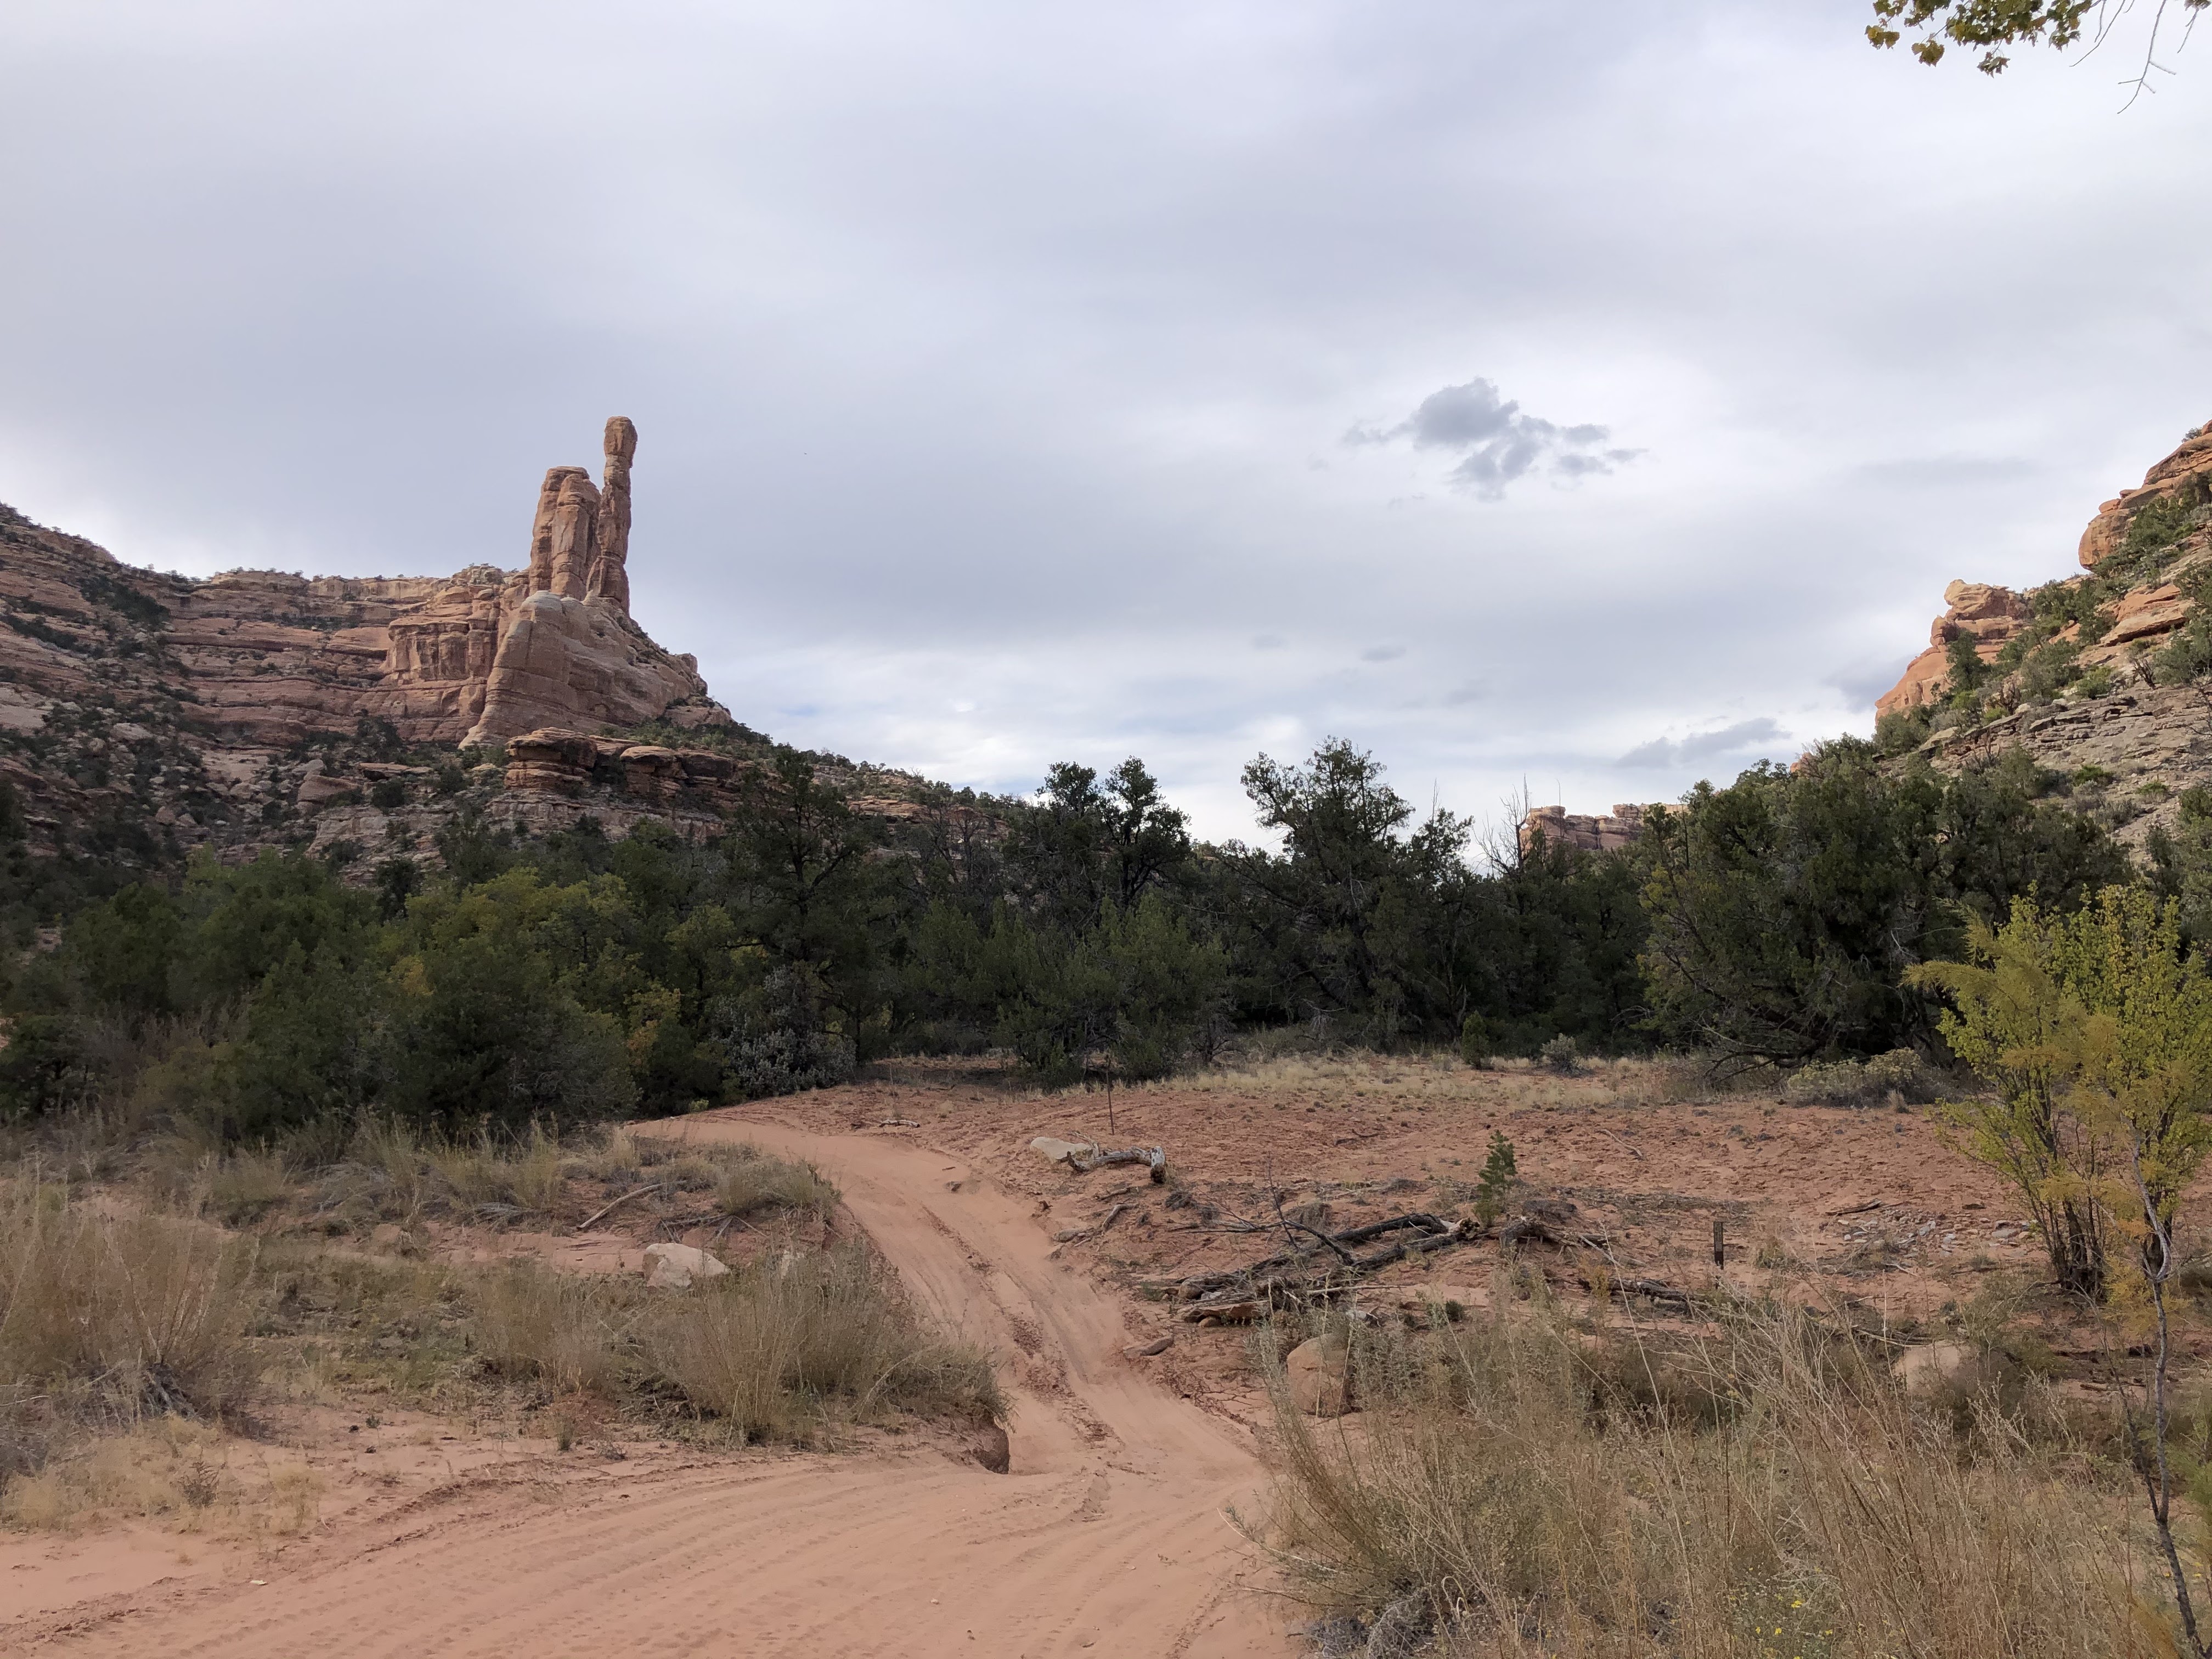
Dave and I got to the canyon first, so we rode up Arch Canyon a few miles to a nice campsite I found while exploring the area on GoogleEarth. I set up my tent while Dave went back to meet Scott and Danny. We stashed our gear in my tent so we could ride up Arch Canyon without all of our heavy luggage. That was good decision. The ride was an absolute blast, with tight, twisting banked turns. It was fairly sandy and rocky in spots, so it wouldn’t have been nearly as much fun with our luggage.
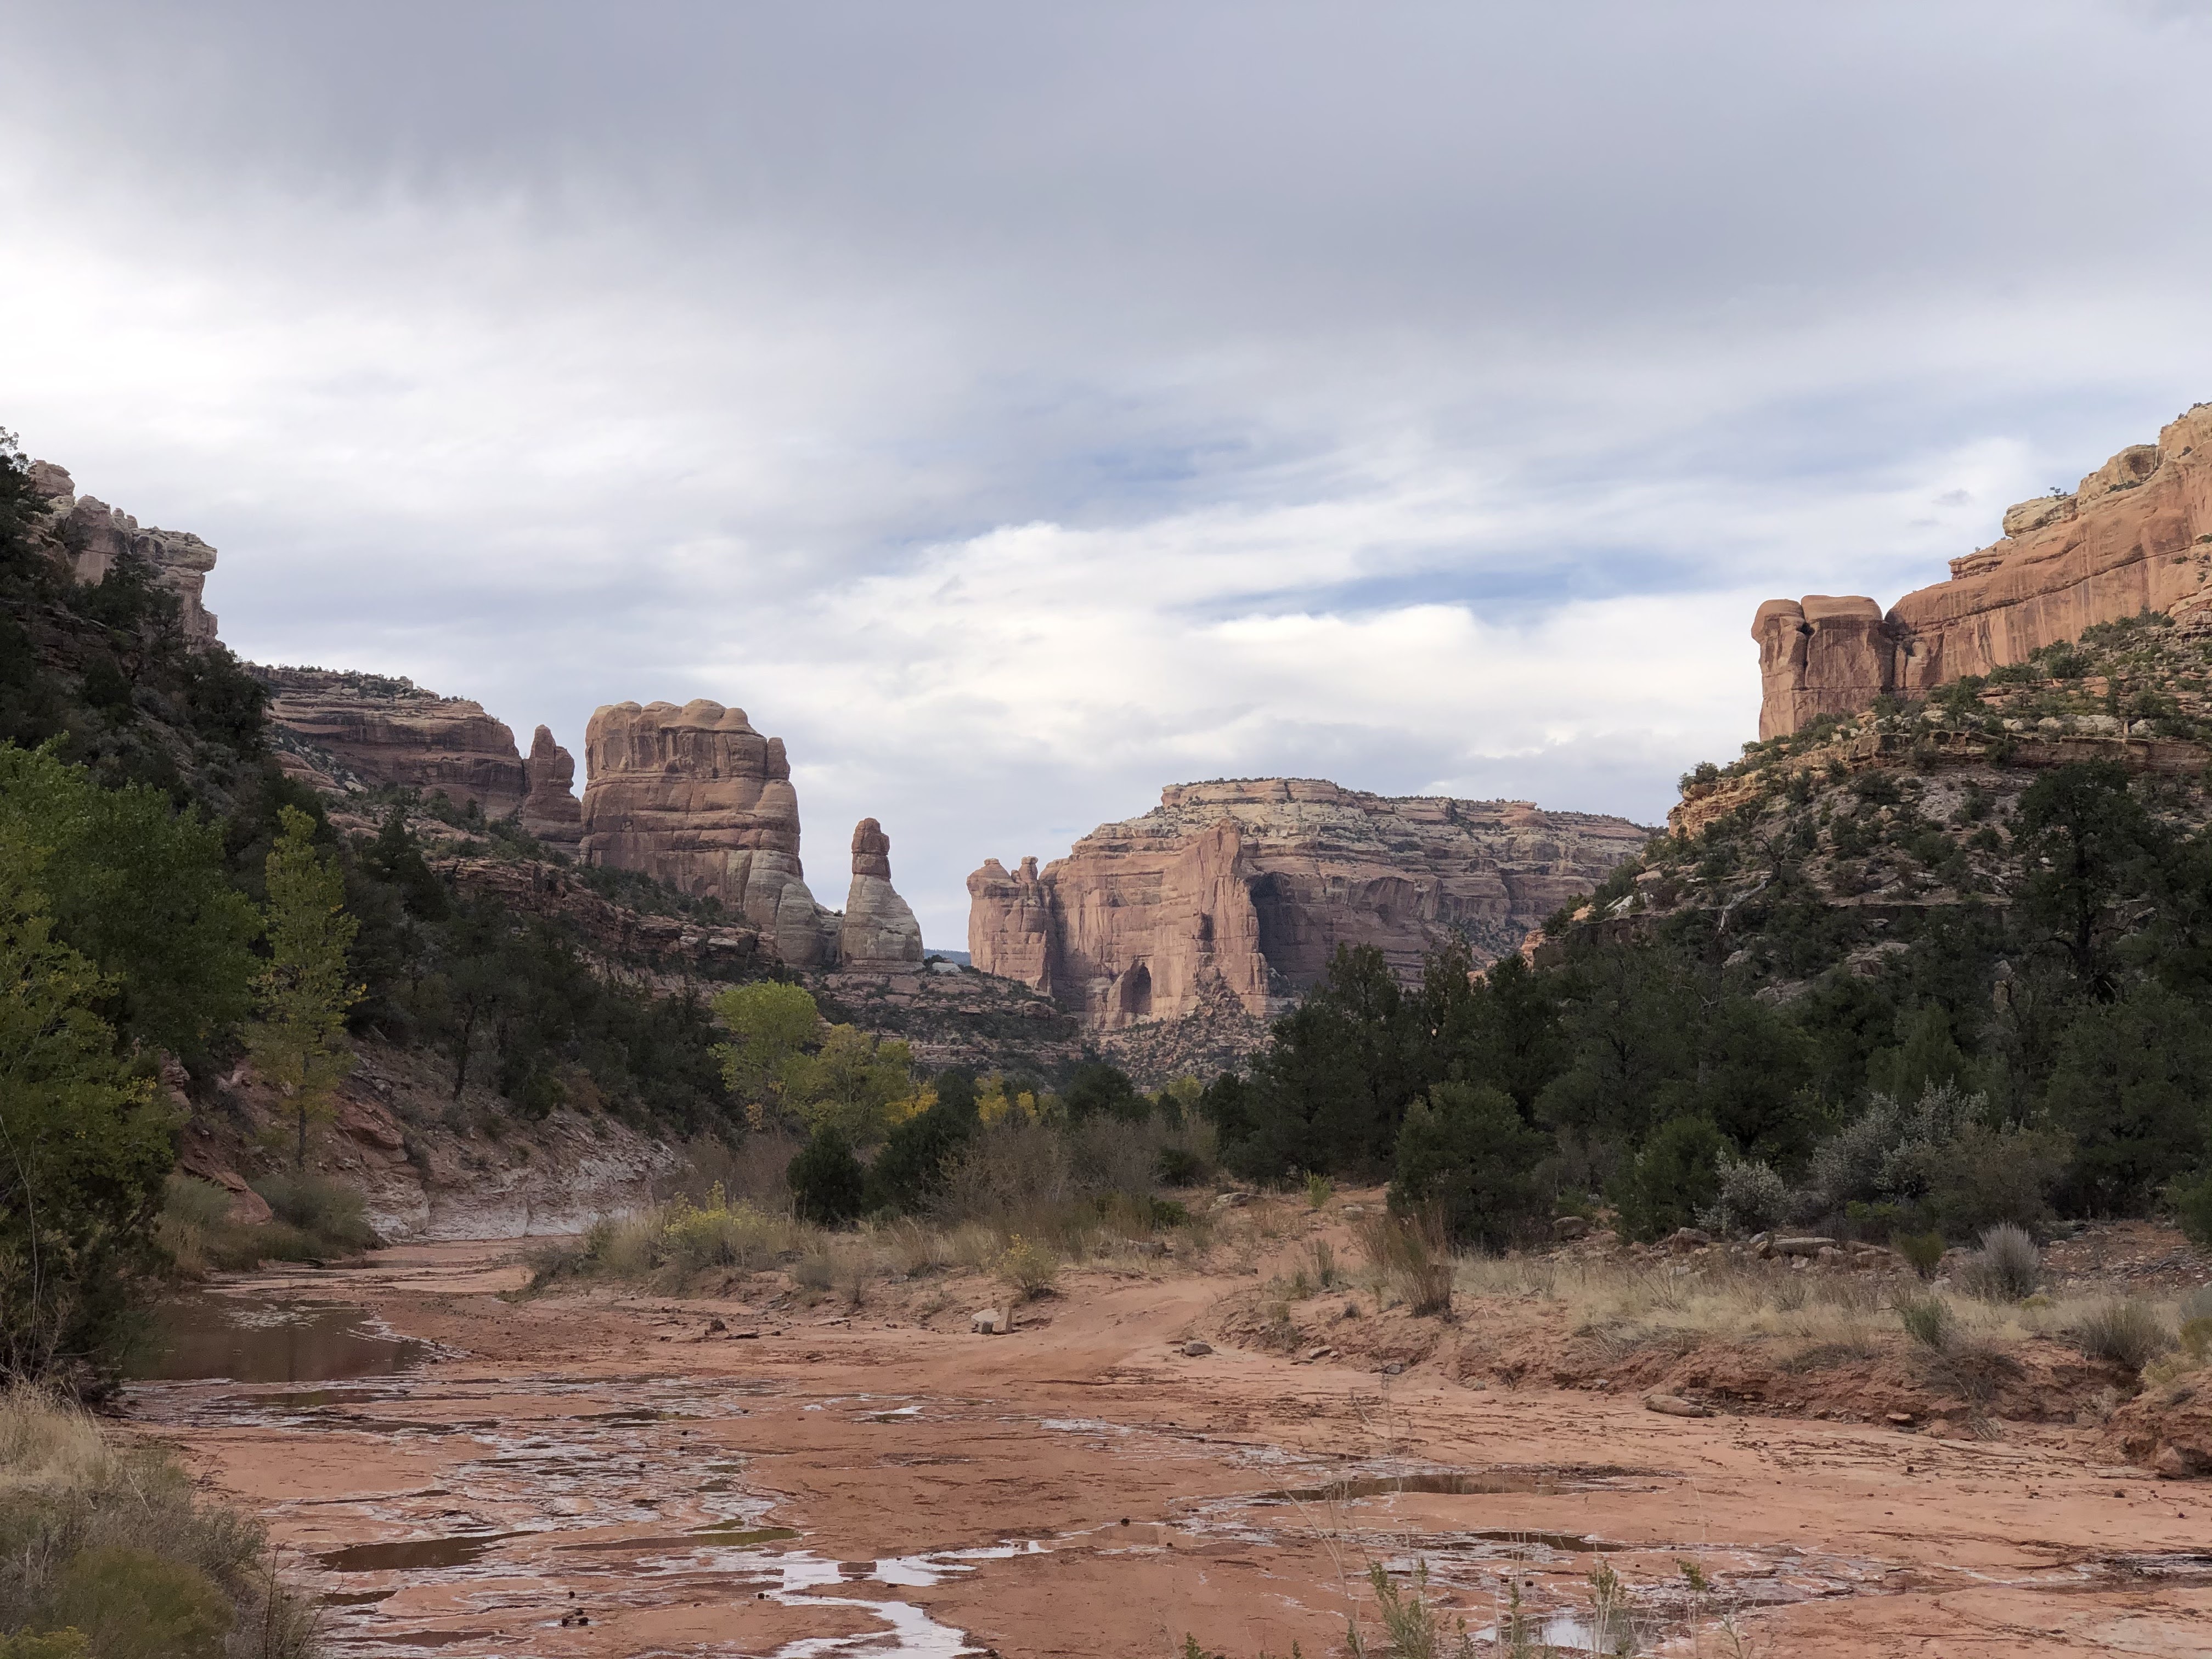
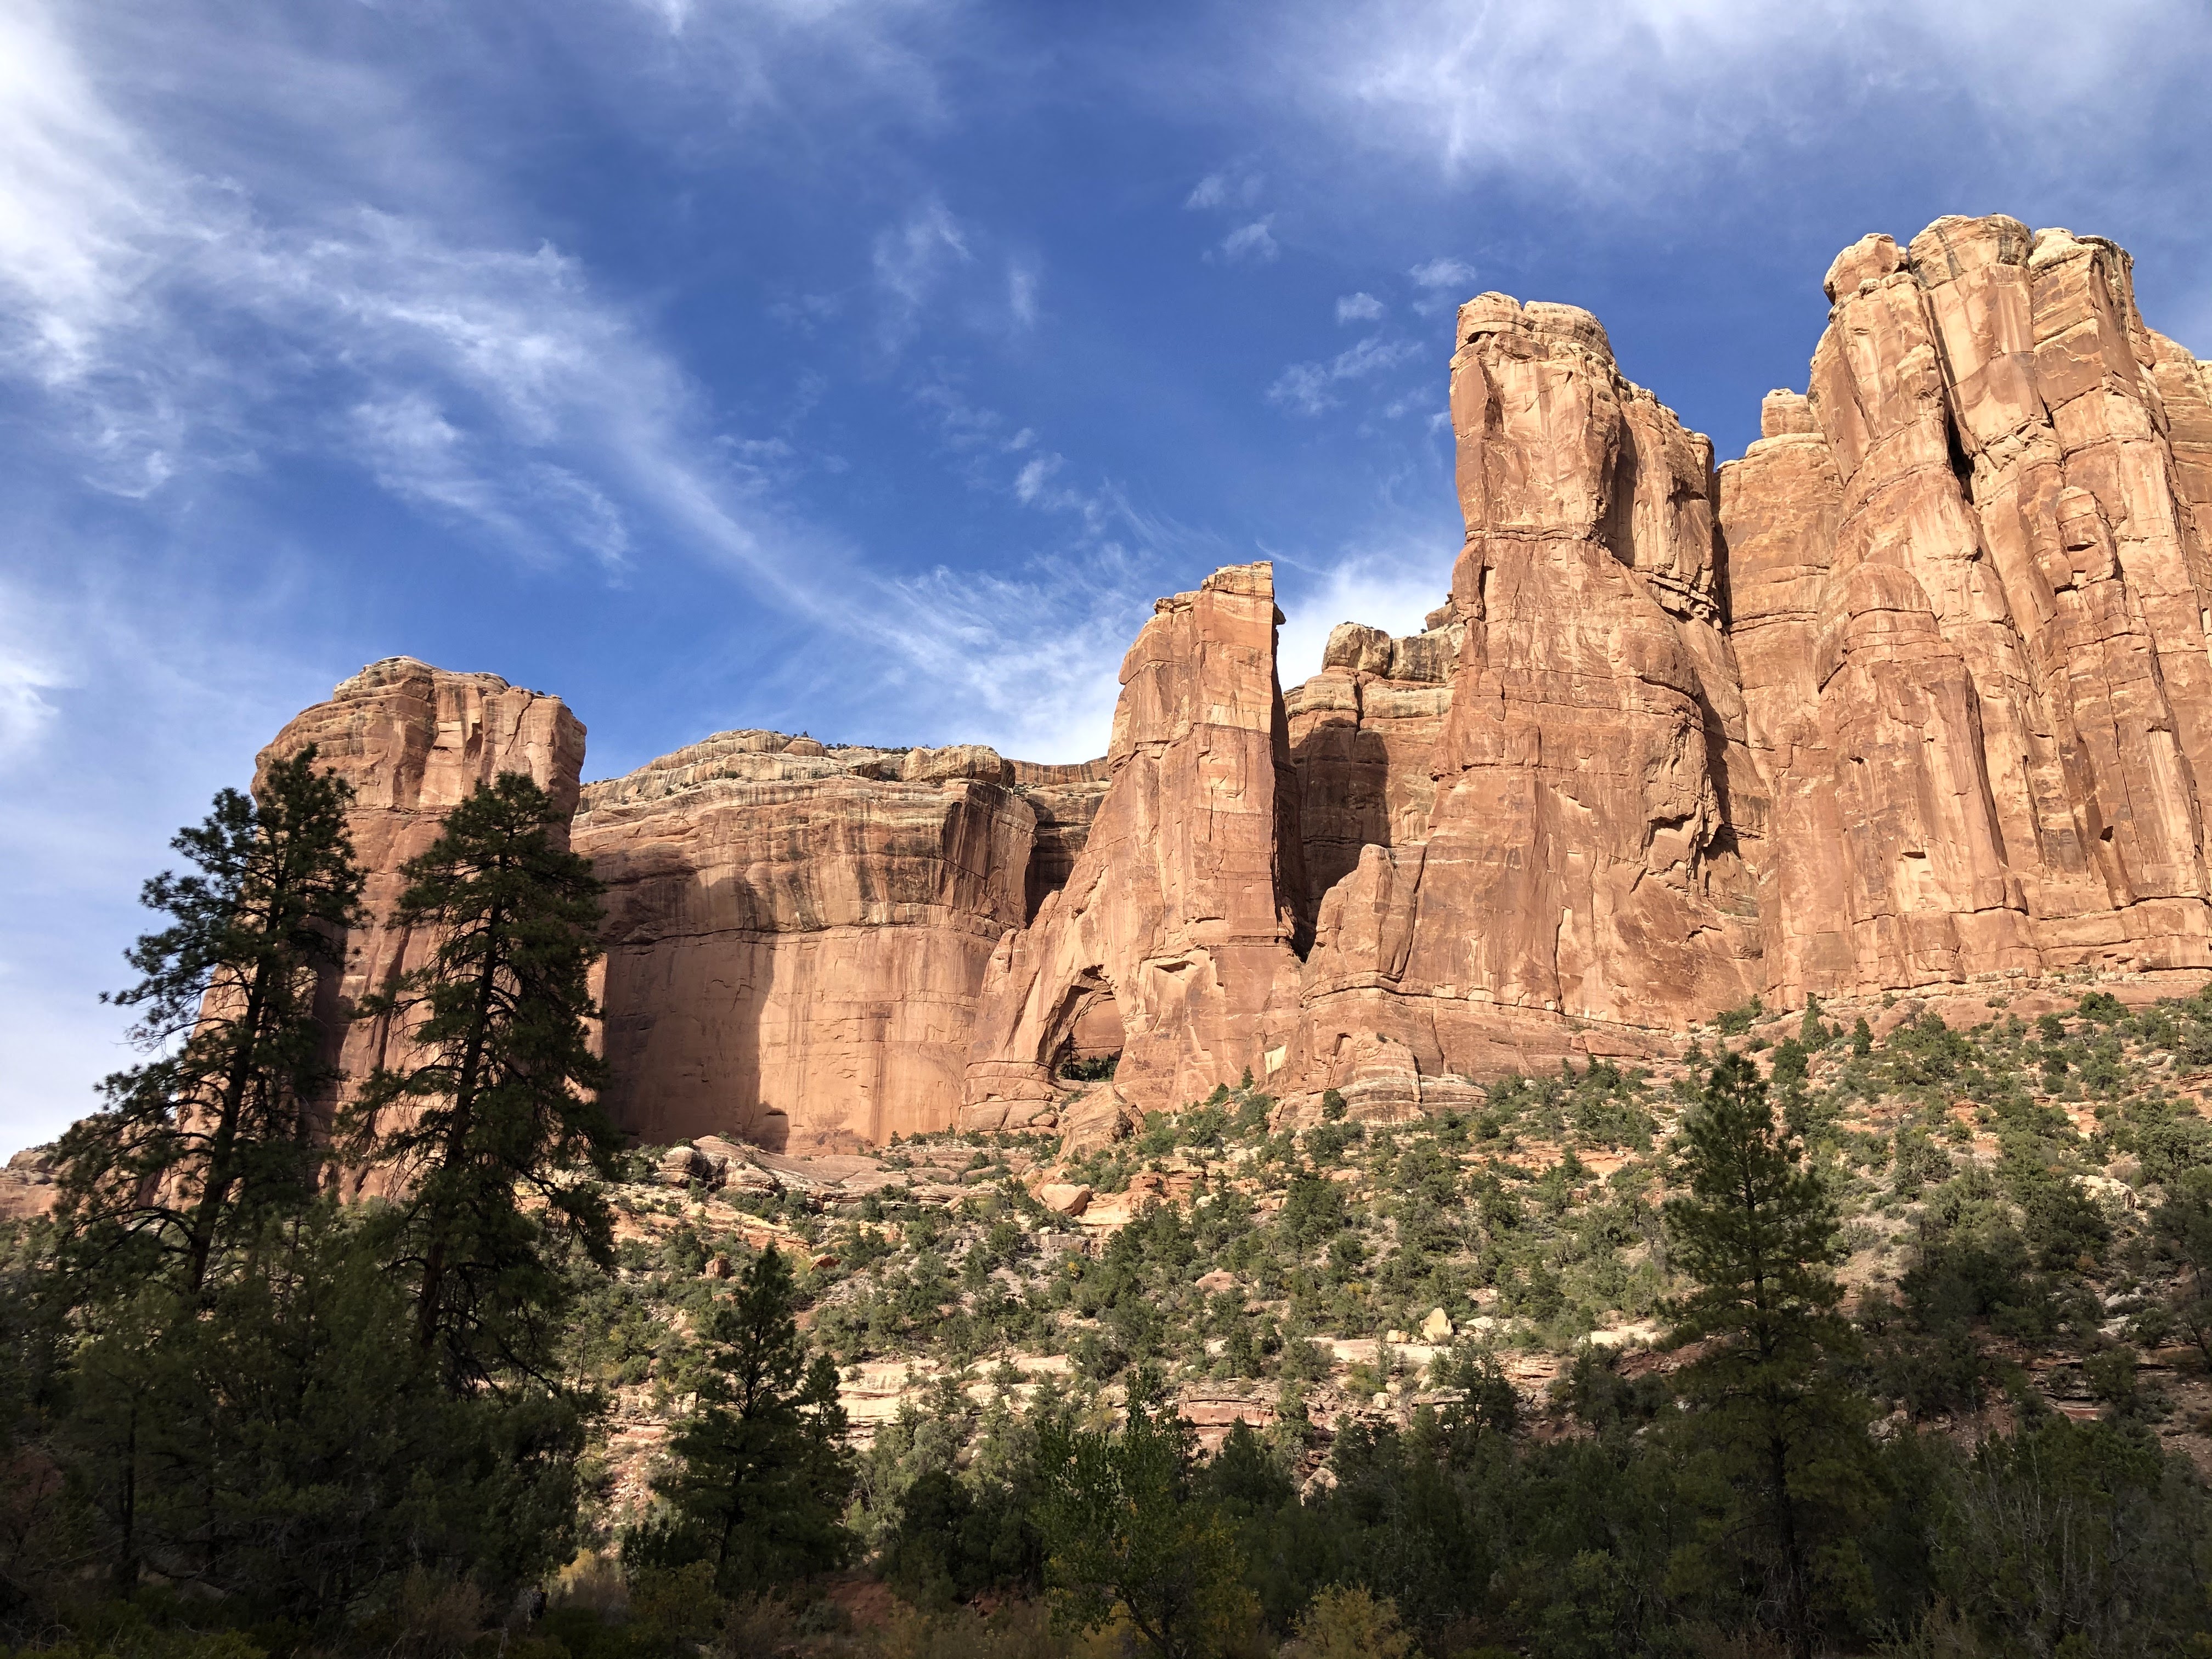
The trail in Arch CanyonScenic Arch Canyon
We took a break at the top and enjoyed the scenery, including Cathedral Arch. We then returned to camp and had a late dinner. It was a spectacular day!
Cathedral ArchCamp #2
Elk Mountain & Stevens Canyon – Saturday, Oct 10
We had to ride about 15 miles along highway 95. On a small bike, this is my least favorite type of riding. Luckily, there was very little traffic.
We then rode up the Elk Mountain Road, right between the two “Bear’s Ears”. We climbed quickly, and it was rather chilly up on top, so everyone pulled out their jackets.
The ride along Elk Mountain and Gooseberry Road was beautiful, but we had to watch out for hunters driving way too fast in their pickup trucks.
We returned to our car via Stevens Canyon, which may have been the old road that came through Dugout Ranch. We didn’t encounter any traffic on this road, and it was a really fun ride. It was fast and twisty and we got to watch the scenery change from high mountain forest back to desert and red rock as we descended. It was really fun.
We finished up our ride by following the wash for a few miles. The wash was wet and muddy, but luckily, we didn’t sink in far enough to be an issue. We did have to chase a few cows out of the wash in order to get through. This was fun, but got our bikes and luggage pretty dirty.
We loaded up the trailer and headed for home. On the drive home we reminisced about our adventure and talked about options for next year…
Rafting the Colorado River through the Grand Canyon on a private permit is a major undertaking. I was not the permit holder, but I still spent months doing research and preparing for this epic adventure. While this report will cover some of what we did, I hope to focus on how to prepare for such a trip. During my research, I found information sparse and hard to come by. I will let my videos and my daughter’s blog tell the rest of the story. For more information about the trip itself, check out Jamie’s blog.
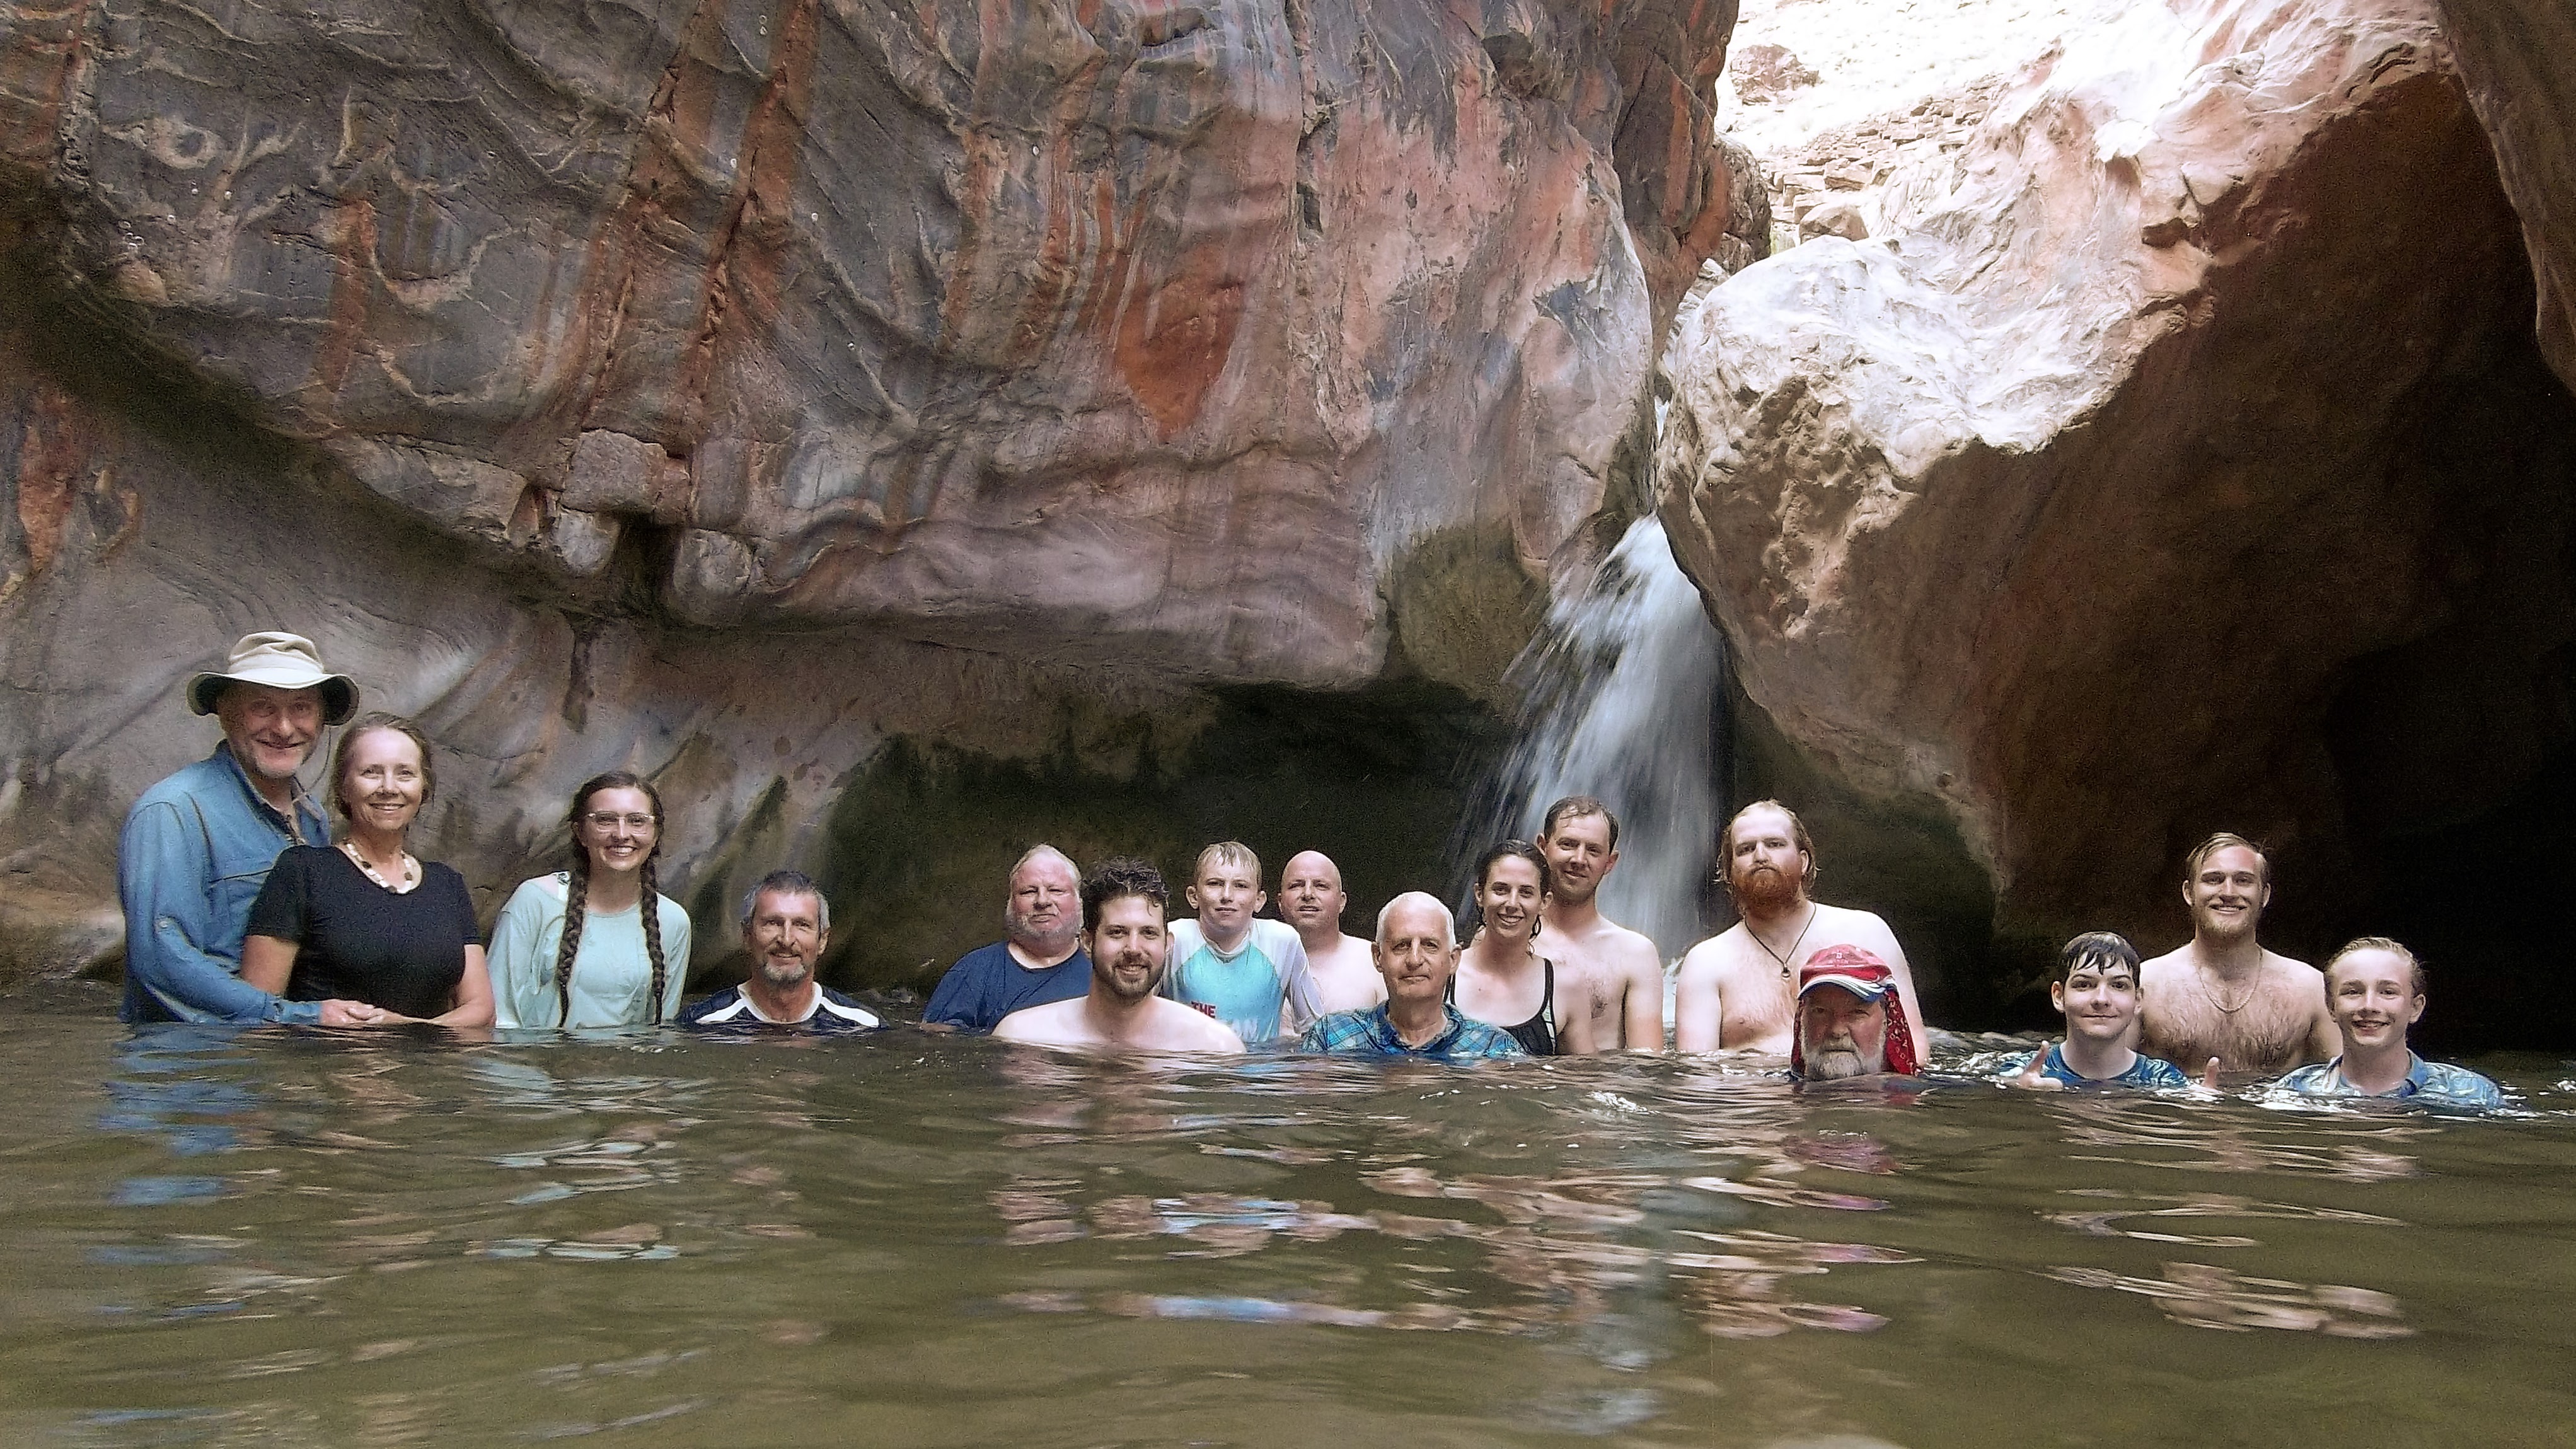
We had twenty people in our group, sixteen at a time, with six boats. Four people hiked out at Phantom Ranch while four others hiked in to replace them. All boat captains other than my daughter and myself have run the Grand previously. It was all new to our family. Our permit holder has run the Grand six or seven times, and one captain used to be a river guide on the Grand. Their knowledge of the river and their advice was greatly appreciated. They knew how to run each rapid, where to stop for cool side hikes, and which camps got early shade.
Group shot for the second half of the trip
Videos
Check out my YouTube channel for videos and slideshows.
Rafts & River Equipment
Many people use 18’ rafts for a private trip. There are outfitters from which you can rent the boats. You can even rent a fully rigged and loaded boat, complete with 18 days of food.
All of the boat captains in our group own their own gear, so most of us used 16’ rafts. We had four 16’ rafts, one 15’ raft, and one 16’ cataraft. It is a challenge to fit all of your food and gear in the smaller boats, but with only two or three people per boat, it worked out well. It was, however, a challenge to find things in the dry boxes because they were so full – at least until you ate up some of your food supplies.
In addition to a quality raft, you certainly need a good repair kit and first aid kit. You also need two spare oars, a spare PFD for every ten people, and enough toilet tanks for such a long trip. It is good to have a spare stove and multiple propane tanks.
We used electric water filters to refill our water jugs every other day or so. Each boat needed to carry between five and ten gallons of water. Since our trip was during the heat of the summer, everyone had to drink a lot of water to stay hydrated.
Umbrellas or a Bimini provide much desired shade while on the river.
Enjoying the shade of our umbrellas before the afternoon winds hit
We arranged to have motors dropped off at Separation Canyon to help push through those last 40 miles to Pearce Ferry. Rowing through that section would not be enjoyable – especially with an afternoon wind.
Rig to Flip, Dress to Swim
There are plenty of holes and lateral waves that are powerful enough to flip a raft. It isn’t just the ‘big’ rapids. Many people flip in lesser known rapids simply because they aren’t paying attention. As the old saying goes; “there are two types of rafters – those that have flipped, and those that will.” So always secure all of your gear in the boat – including your cooler lid.
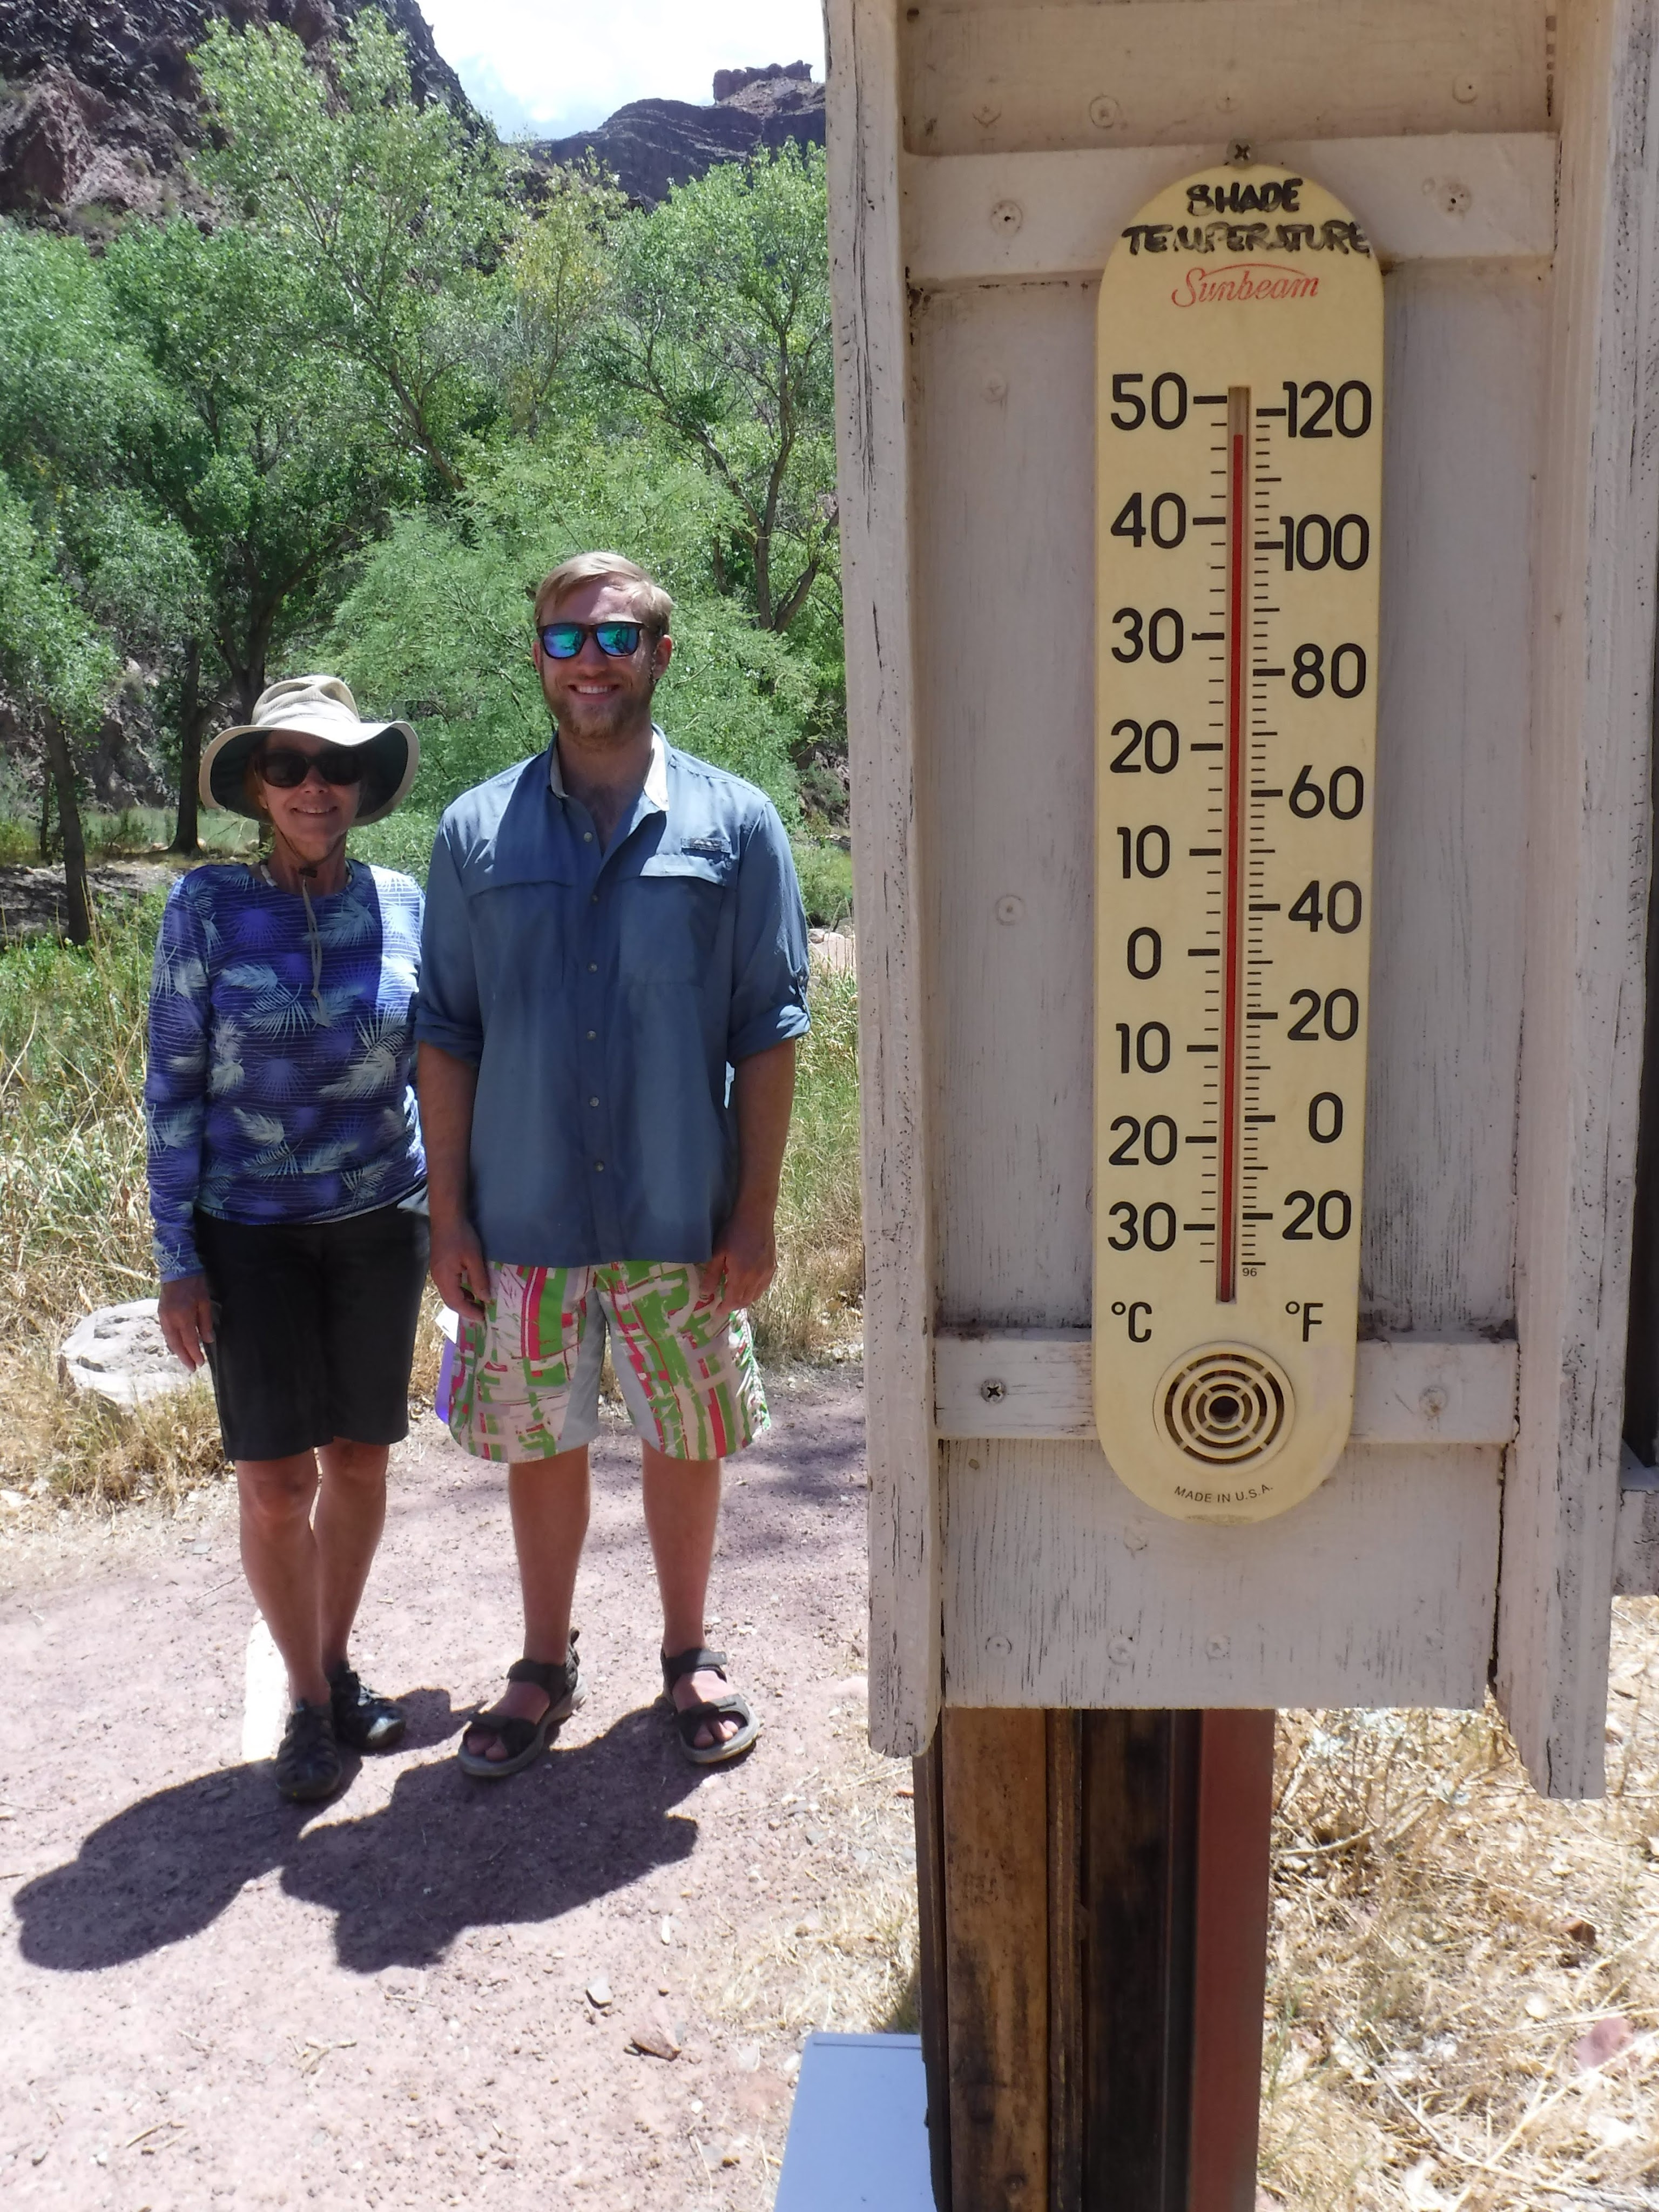
During the summer, the heat can be brutal, but the water is very cold – somewhere around 46° at Lee’s Ferry. 46° is bitterly cold – it hurts to get in the water. Hypothermia can set in within a few minutes in the cold water. So, if someone does go overboard, try to recover them as quickly as possible.
The ranger recommended splashing cold water in our faces prior to all major rapids to minimize the shock should you fall in. This may also help prevent heart attacks. For the larger rapids, I put on my hydroskin top and a helmet – just in case.
During the summer, the water warms up as you move down river – maybe by 5° by Phantom Ranch. By the time we arrived at Pearce Ferry, the temperature was quite tolerable.
Fitness
I have had a few opportunities in the past to raft the Grand Canyon, but for various reasons never made it happen. I decided I should do it before I got too old – but since that was probably ten years ago, I decided to go anyway 😉
The global pandemic provided me opportunity to work from home, so I decided to spend the time I saved in commuting to and from work on exercising. I wanted to loose weight and get in better shape to handle long days on the oars.
Just prior to the trip I finished an eight week weight lifting program. The routines included a lot of squats, which really helped prepare me for the side canyon hikes. Many of the hikes were basically like climbing many flights of stairs. The arm, shoulder, and back exercises also helped with my rowing – in particular, forward rowing, which has always been a challenge for me.
Even after long days on the oars, my muscles never fatigued too severely. My primary issue was arthritis in my wrists and elbows. So I welcomed help from Jason, Steve, and Eric – especially during the windy afternoons.
Coolers & Ice
Keeping refrigerated foods fresh is a major challenge. Each boat was assigned approximately three days of meals, all in a row. Those with late assignments needed to keep their coolers closed and sealed until the day they started their food assignment. A quality cooler with about 1/3 ice, 1/3 frozen foods, and 1/3 produce can keep ice for about 12 days in the heat of summer – assuming you cover the cooler with a wet towel and keep it in the shade as much as possible.
Crushed ice won’t last, and store-bought block ice has a lot of air in it, so it isn’t the best. If you don’t have access to a good source of ice, it is best to make your own. I used a 12.5” x 14” x 7” plastic tub to make large blocks of ice for my cooler. I used two of those blocks, and froze all of my pre-cooked meat in smaller tubs. I hoped to also take two one-gallon jugs of ice, but had to leave those home (along with some food) due to limited space. It is tough to estimate how much ice you need, and how much space you will have left for food.
Normally I freeze water in a 3-gallon jug. As the water melts, I have extra water for drinking, and it doesn’t get my food all soggy. But for the Grand, I couldn’t spare the space used up by the jug. I put all of the food in zip lock bags to keep it dry as the ice melted. This did not work out so well. Some of my food got damaged because the zip lock bags leak. Even double bagging didn’t always work. Perhaps a vacuum pack sealer would be worth getting for such a trip.
Do not drain the water from your cooler until your food assignments are complete. The cold water will preserve your food much longer than letting in warm outside air.
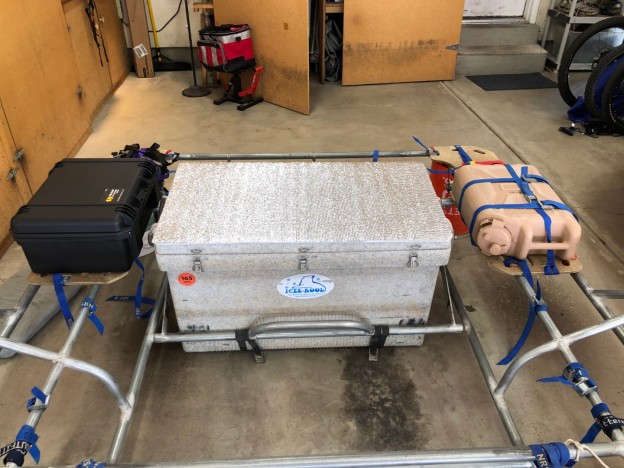
A quality cooler is also a must for those later days in the trip. Layne has a Yeti cooler and is able to freeze his entire cooler inside a chest freezer – so he took the last food assignment. I have an Icee-Kool cooler (now obsolete) which is similar to a Yeti, so I took the second to last food slot. I augmented the insulation with foil-lined closed-cell foam about 3/8” thick. I lined the entire inside of the cooler with this foam, and an extra layer on top of the lid. I covered this with an old towel which we tried to keep wet, and covered it with my sleeping pad for additional insulation and shade during the day.
My 165 qt cooler
I had to open my cooler early in order to store some of my daughter’s left-over items such as Mayonnaise. This was a mistake. It would have been better to have a second bottle that could remain unopened until needed. When I opened my cooler for my first food assignment on day 12, I only had one small chunk of ice remaining. The water was still cold for another two days, so we barely finished our meal assignments without food spoiling (other than that damaged by water). Layne got similar results. His ice was gone by the time he started his food assignment.
In the future, I would suggest planning non refrigerated foods for the last few days.
This video provides some great advice on packing a cooler:
Food
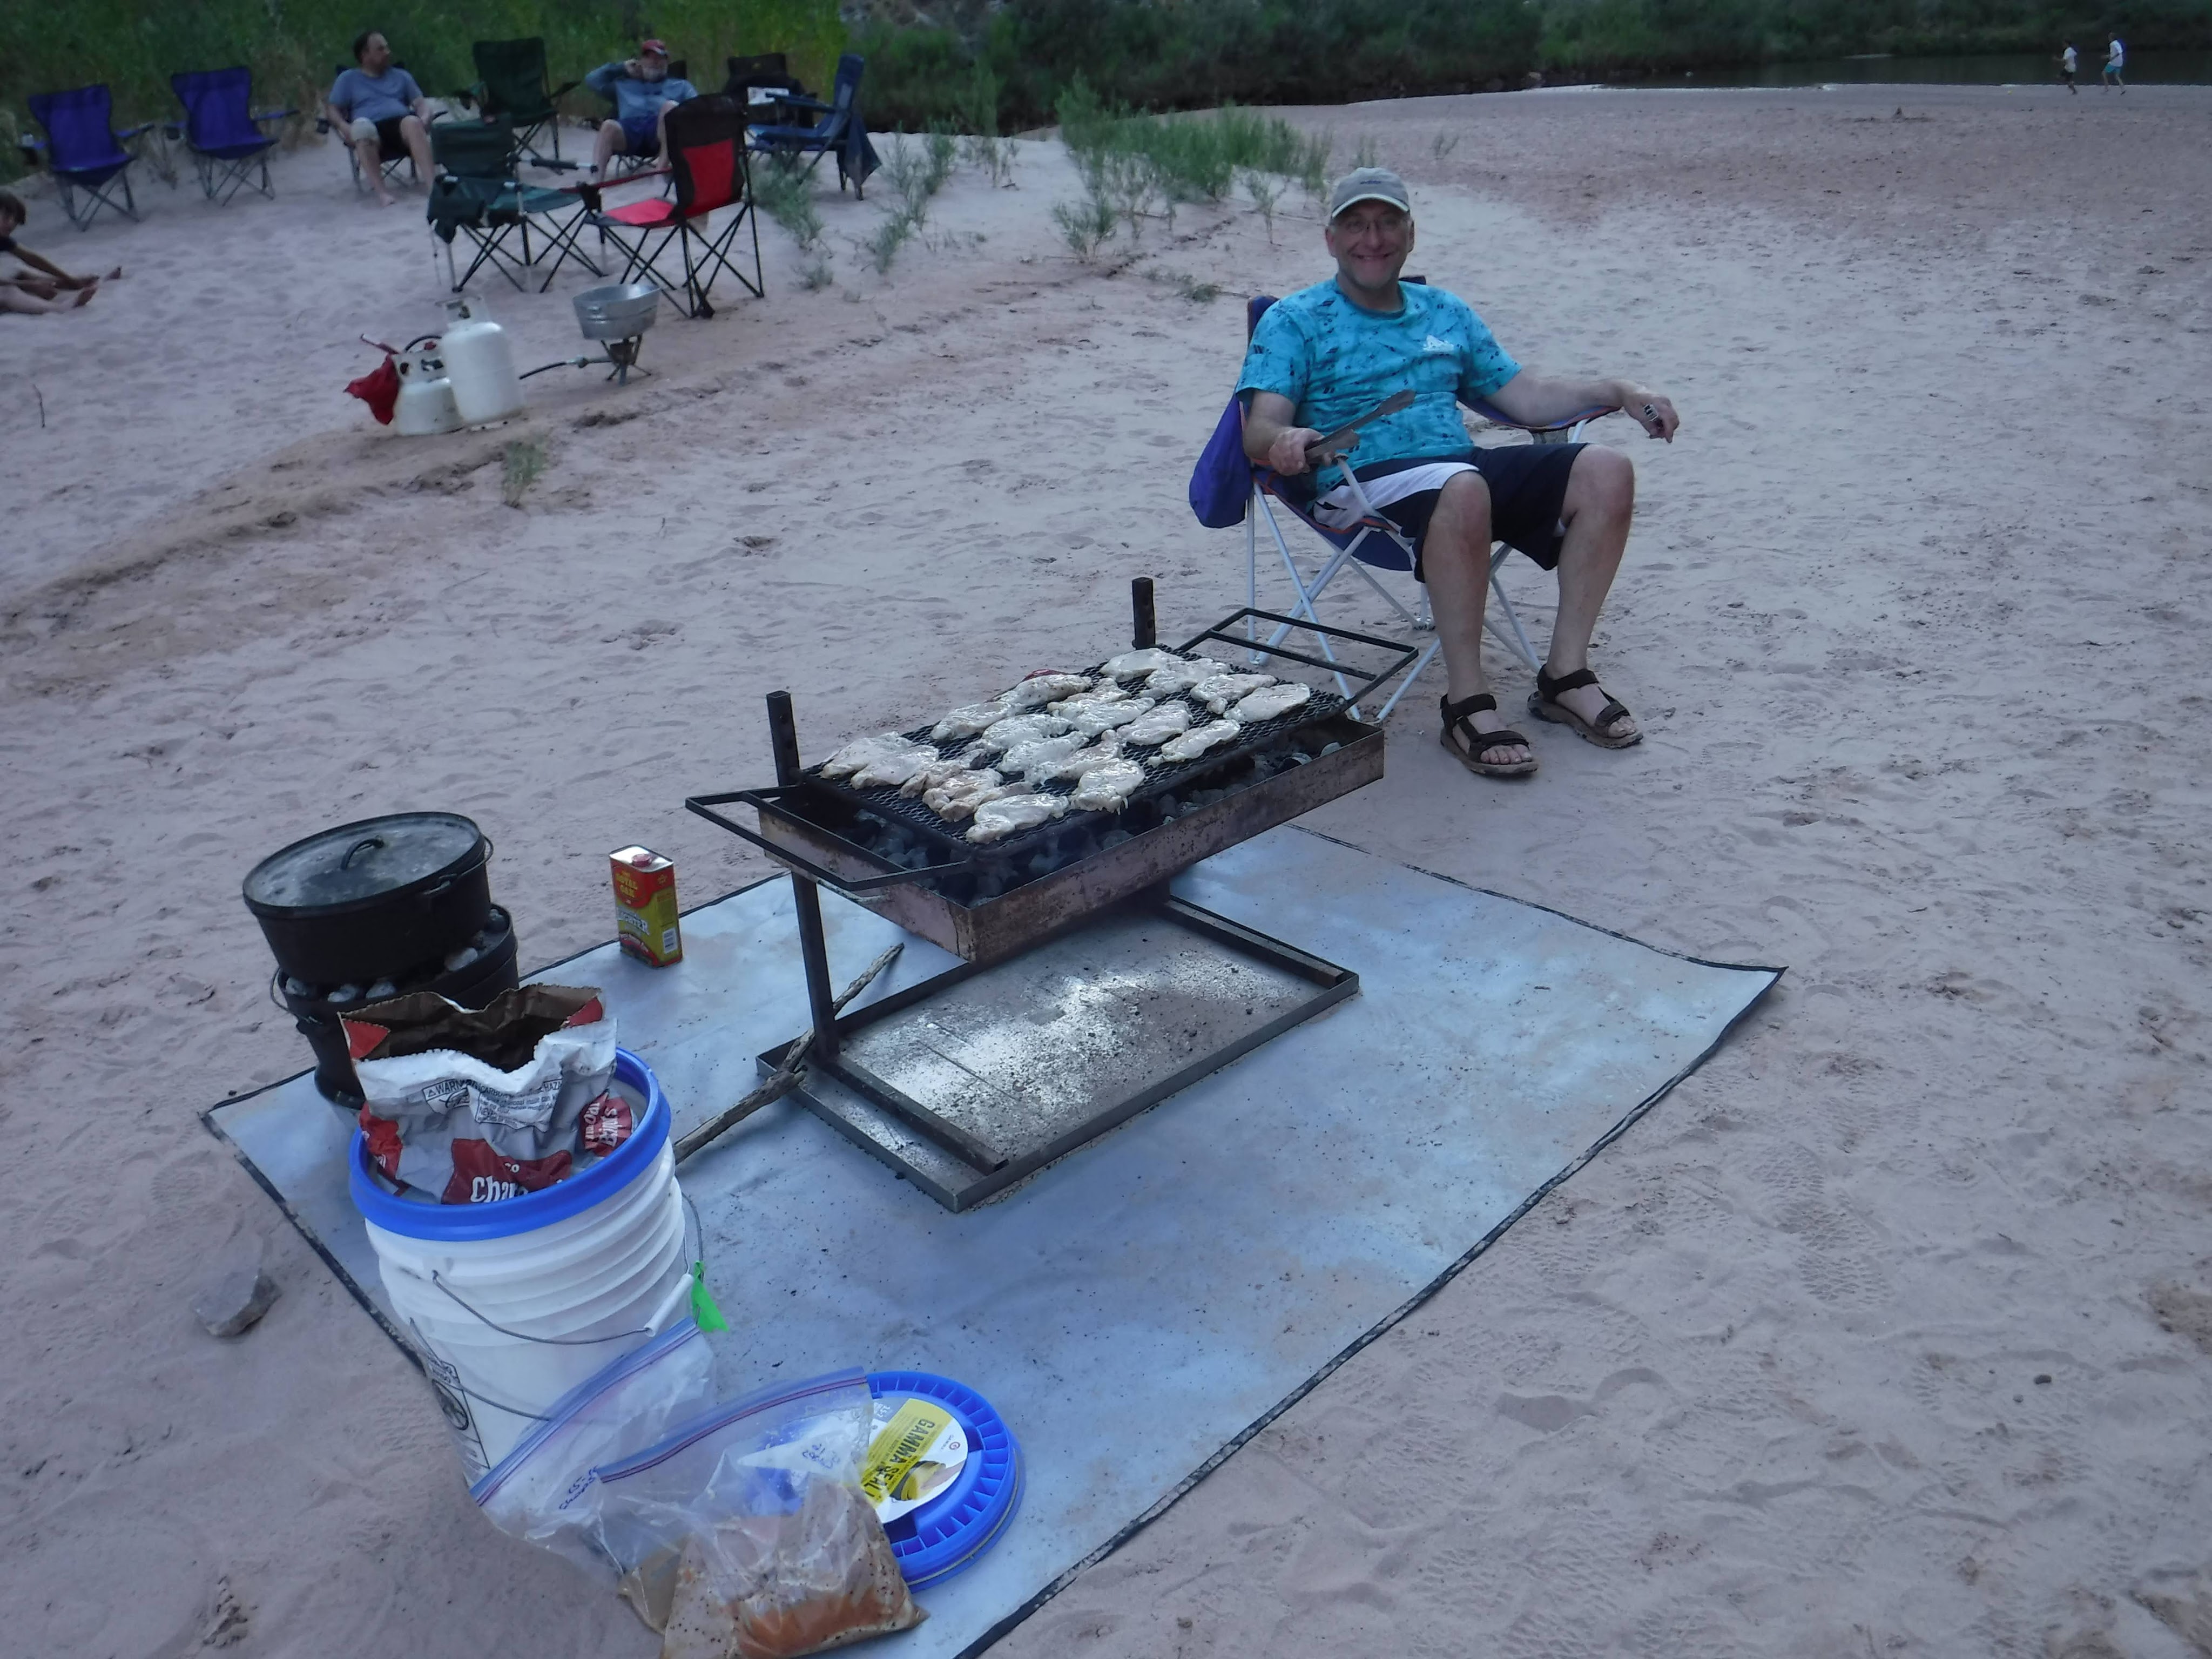
I often tell people that river trips are like backpacking, except we eat good. Since weight isn’t a major issue, we take Dutch Ovens and firepans and have some wonderful meals.
Russ barbecuing pork chops
No one likes to waste food, so there is a natural tendency to pull out your leftovers for meals provided by others. The downside is that we ended up eating lunch meat and cheese that had been opened for three or four days even though we had unopened packages in a cooler that was still cold. In the end all leftover food will go into the garbage – so eat the fresh food while you can and just discard the older stuff.
Things like melons taste wonderful on a hot summer day, but they generate a lot of trash that someone has to haul out. Be mindful of how much trash your meals generate. Sometimes the trash ends up bulkier than the pre-cooked food. Leave as much food packaging, such as cardboard boxes, home. It just generates garbage and bulk.
Garbage Management
I prefer to have a small garbage bag for each meal rather than one large one for a day or two of meals. It is easier to find a place to tuck a small bag than a very large one.
Once someone’s meal assignments are over, they can turn their cooler into a large garbage bin.
Each boat provided a five-gallon bucket with a screw top lid. We called this the “icky trash”. Food scraps went in there to help control the stink. These buckets filled up really fast – especially for meals that included melons.
Staying Healthy
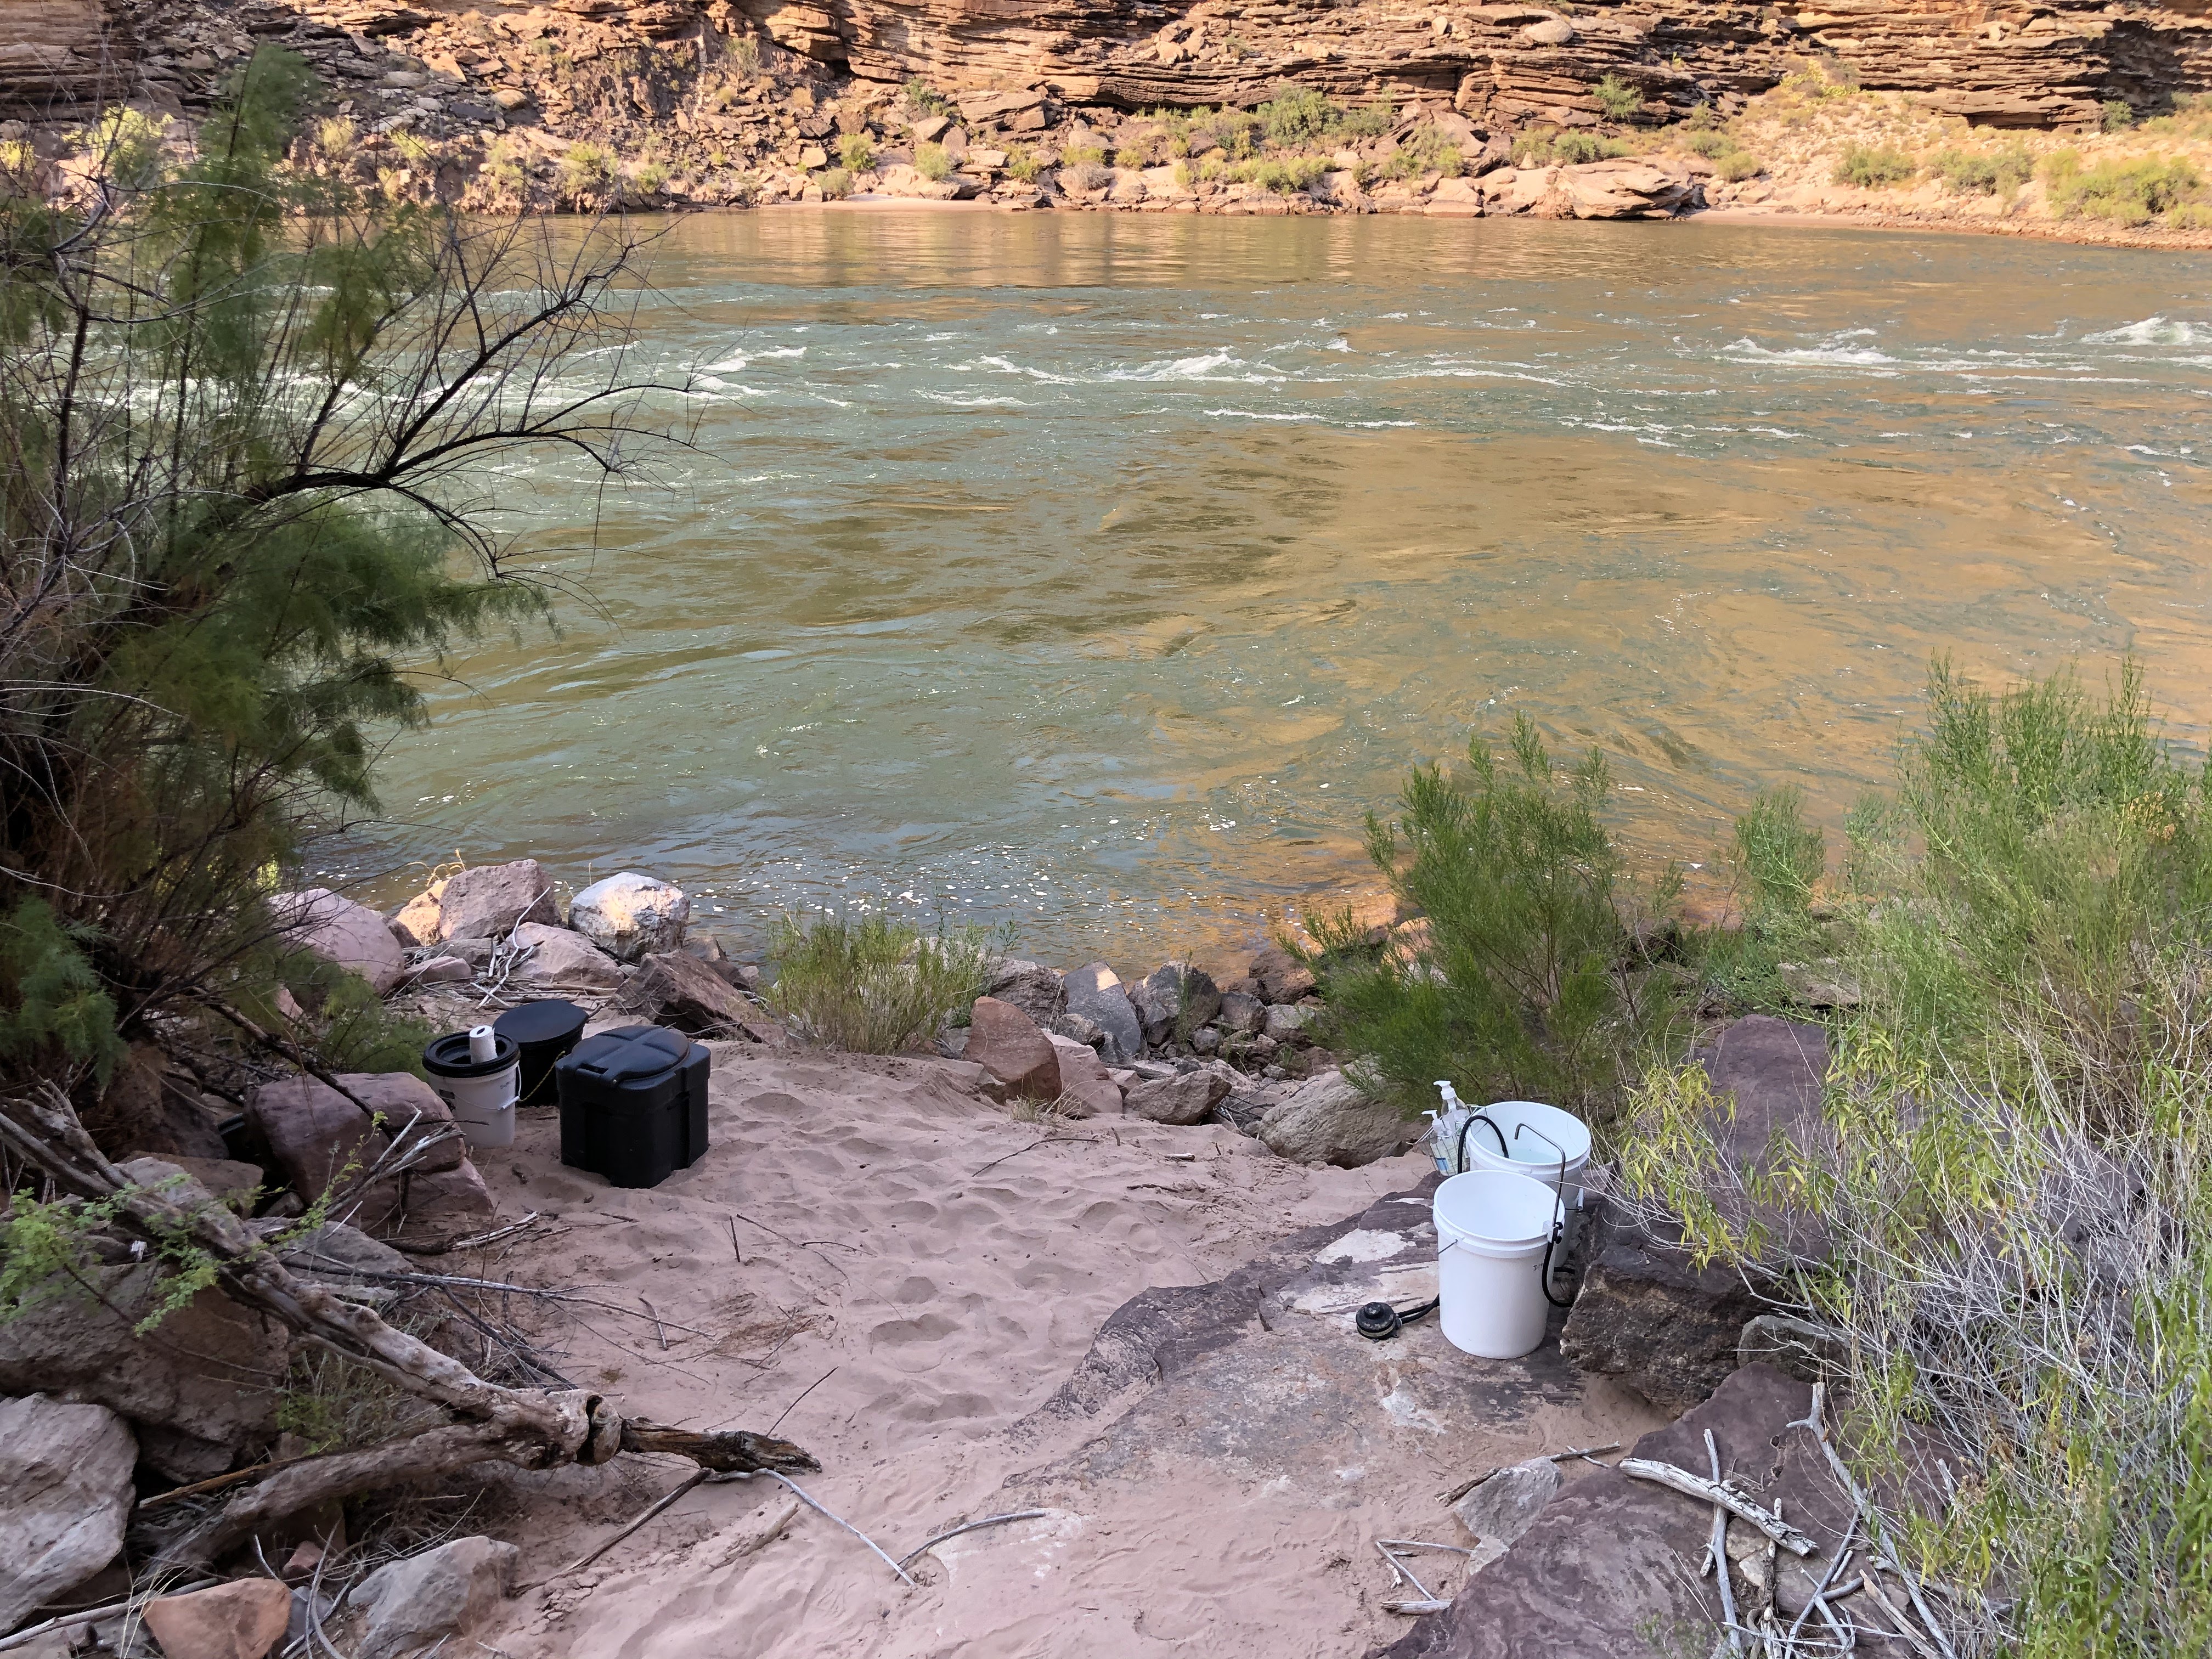
Staying healthy is critical. If someone gets sick, it can easily spread to the entire group. Thus, it is important to thoroughly wash your hands regularly and use hand sanitizer. We had a hand wash station near the toilet, and a second near the kitchen.
Toilet setup with a view and hand washing station
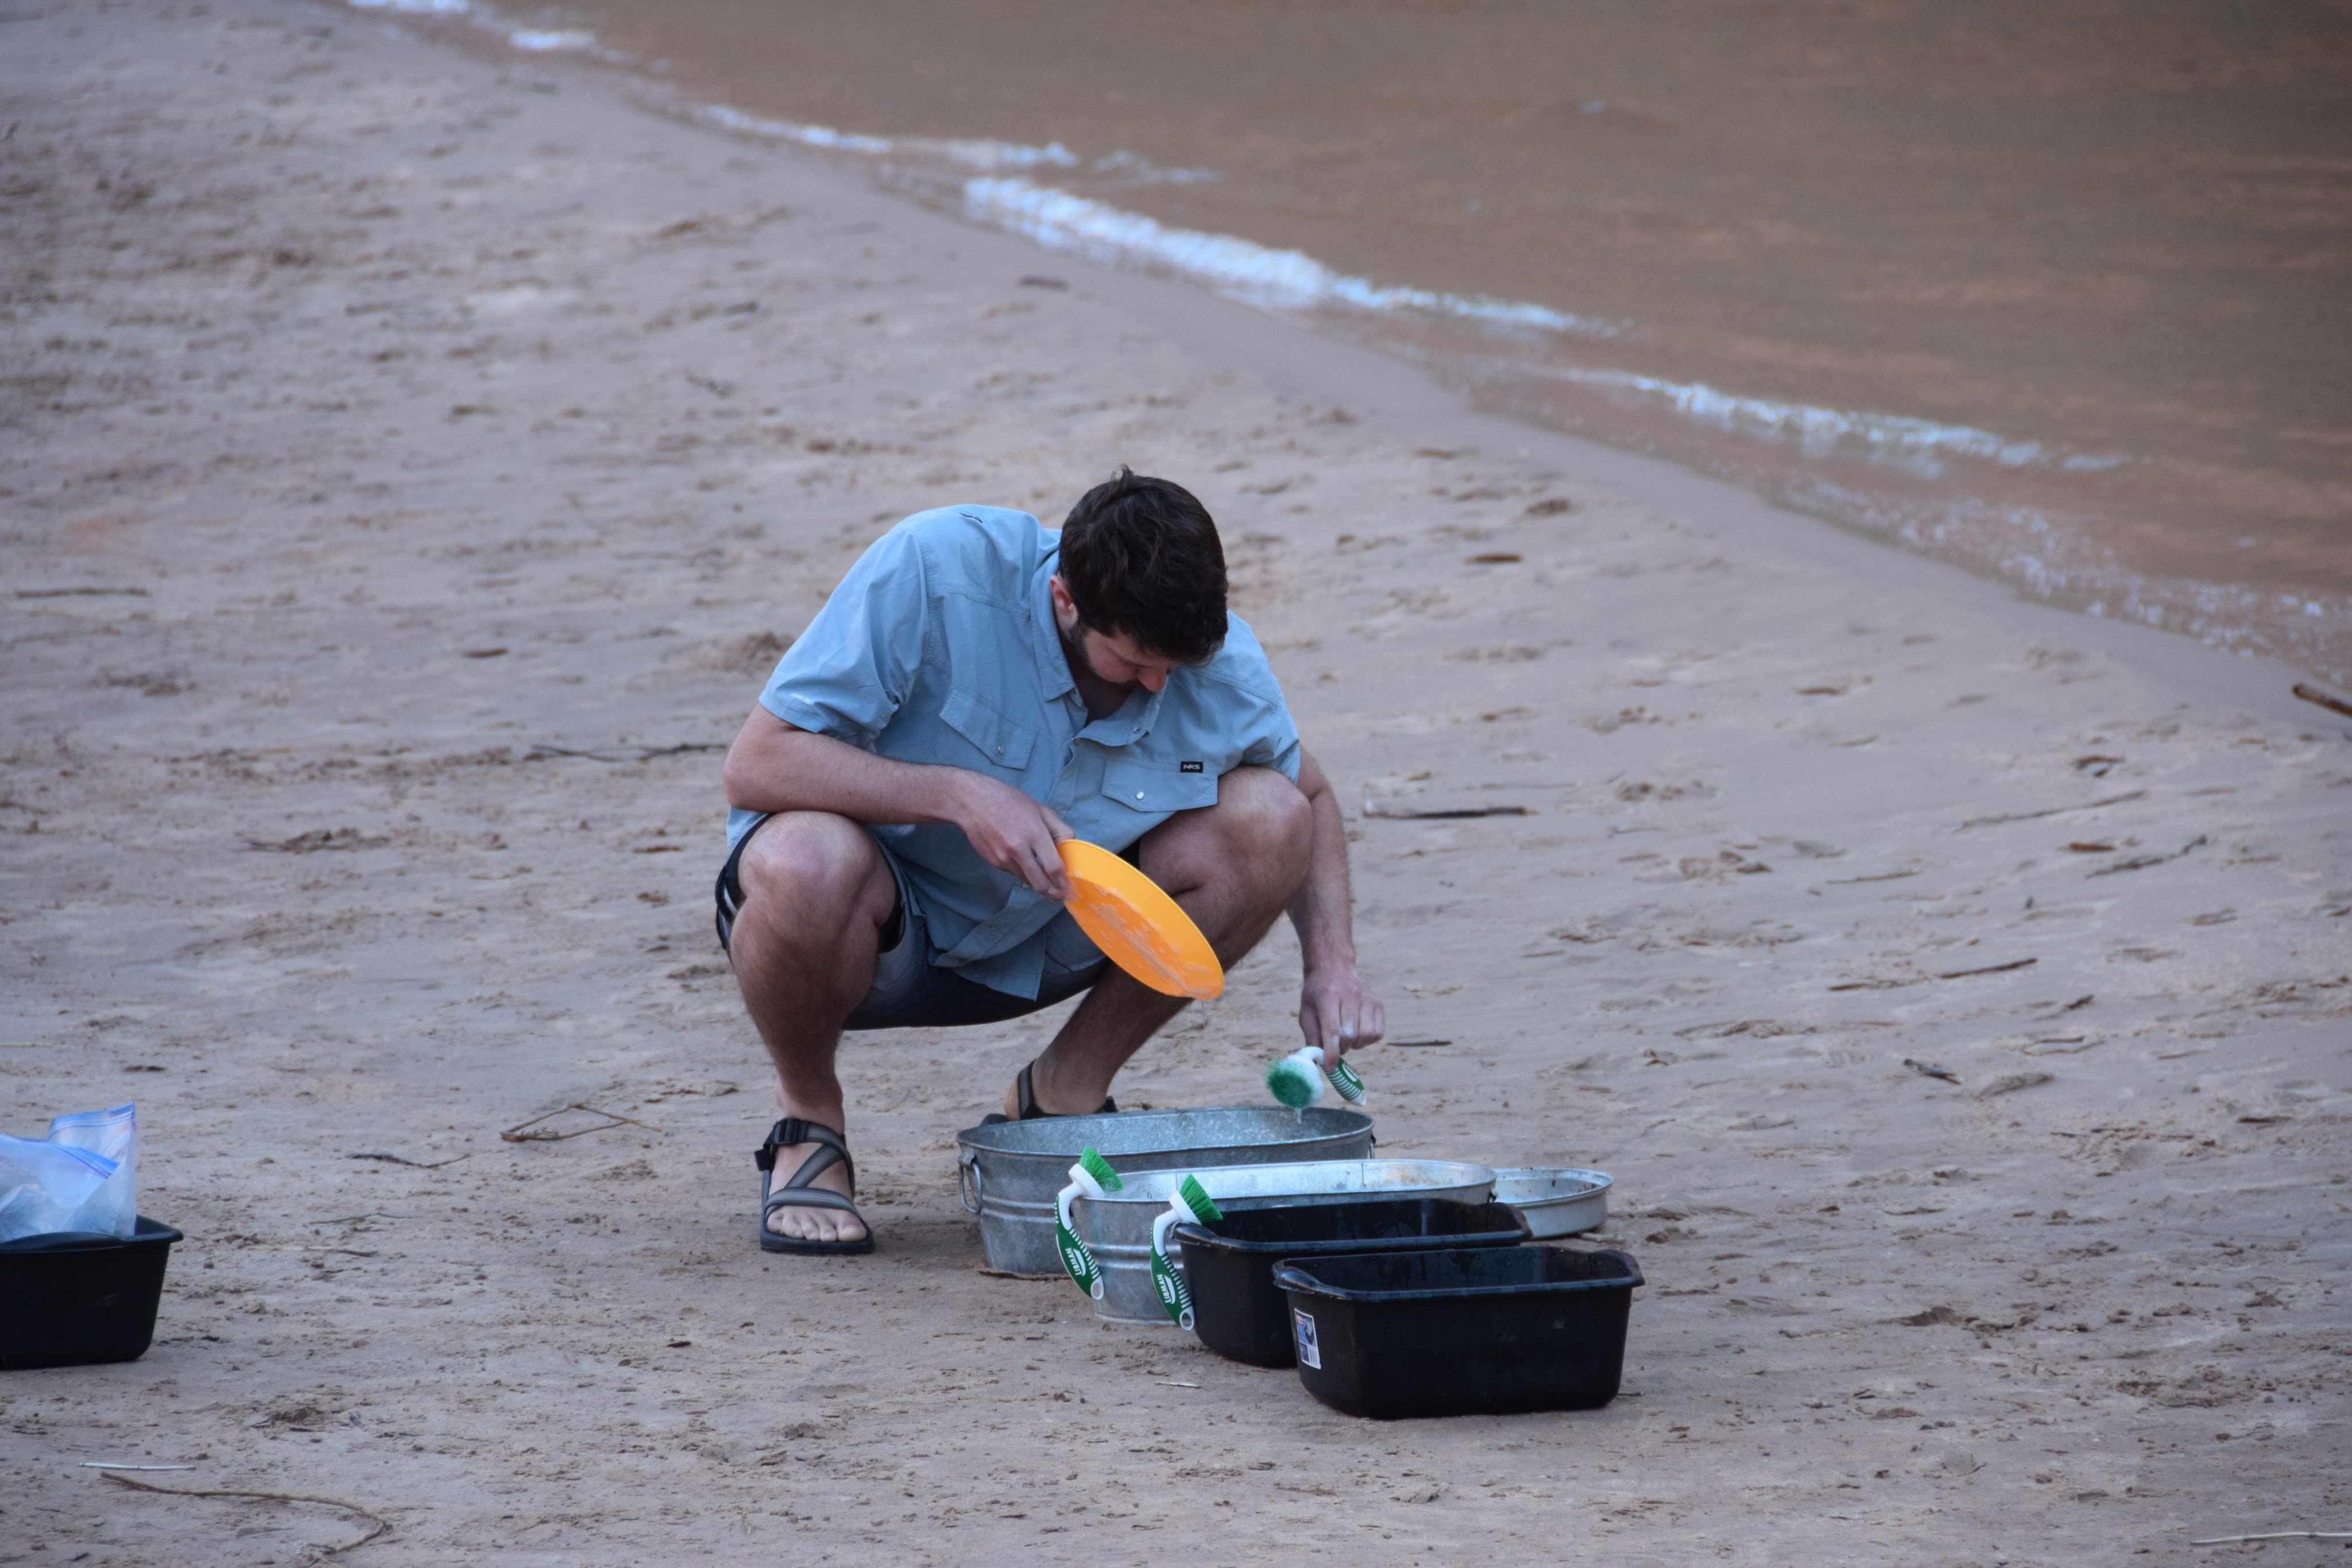
We used a four-bucket dish washing system. Previously I have used a three-bucket system, but the addition of the first pre-wash bucket really helped get our dishes clean. The buckets included; 1) hot pre-wash with soap, 2) hot wash with soap, 3) hot rinse, and 4) cold bleach dip. The icky trash bucket was usually placed near tub #1 so you could scrape your scraps into the bucket.
Four bucket dish washing system
Camping Equipment
During the hot summer, most people prefer to sleep out under the stars. The bugs aren’t too bad, so a tent is generally not needed unless it is stormy. A cot works great to keep you off the hot sand and/or rough ground. A damp sheet or micro-fiber towel work great to keep you cool when you first go to bed. As the sheet dries, the air temperature usually drops, so you can be quite comfortable all night long. On the few nights it got a little chilly, I used a fleece sleeping bag liner. I never had to pull out my sleeping bag.
All the comforts of home
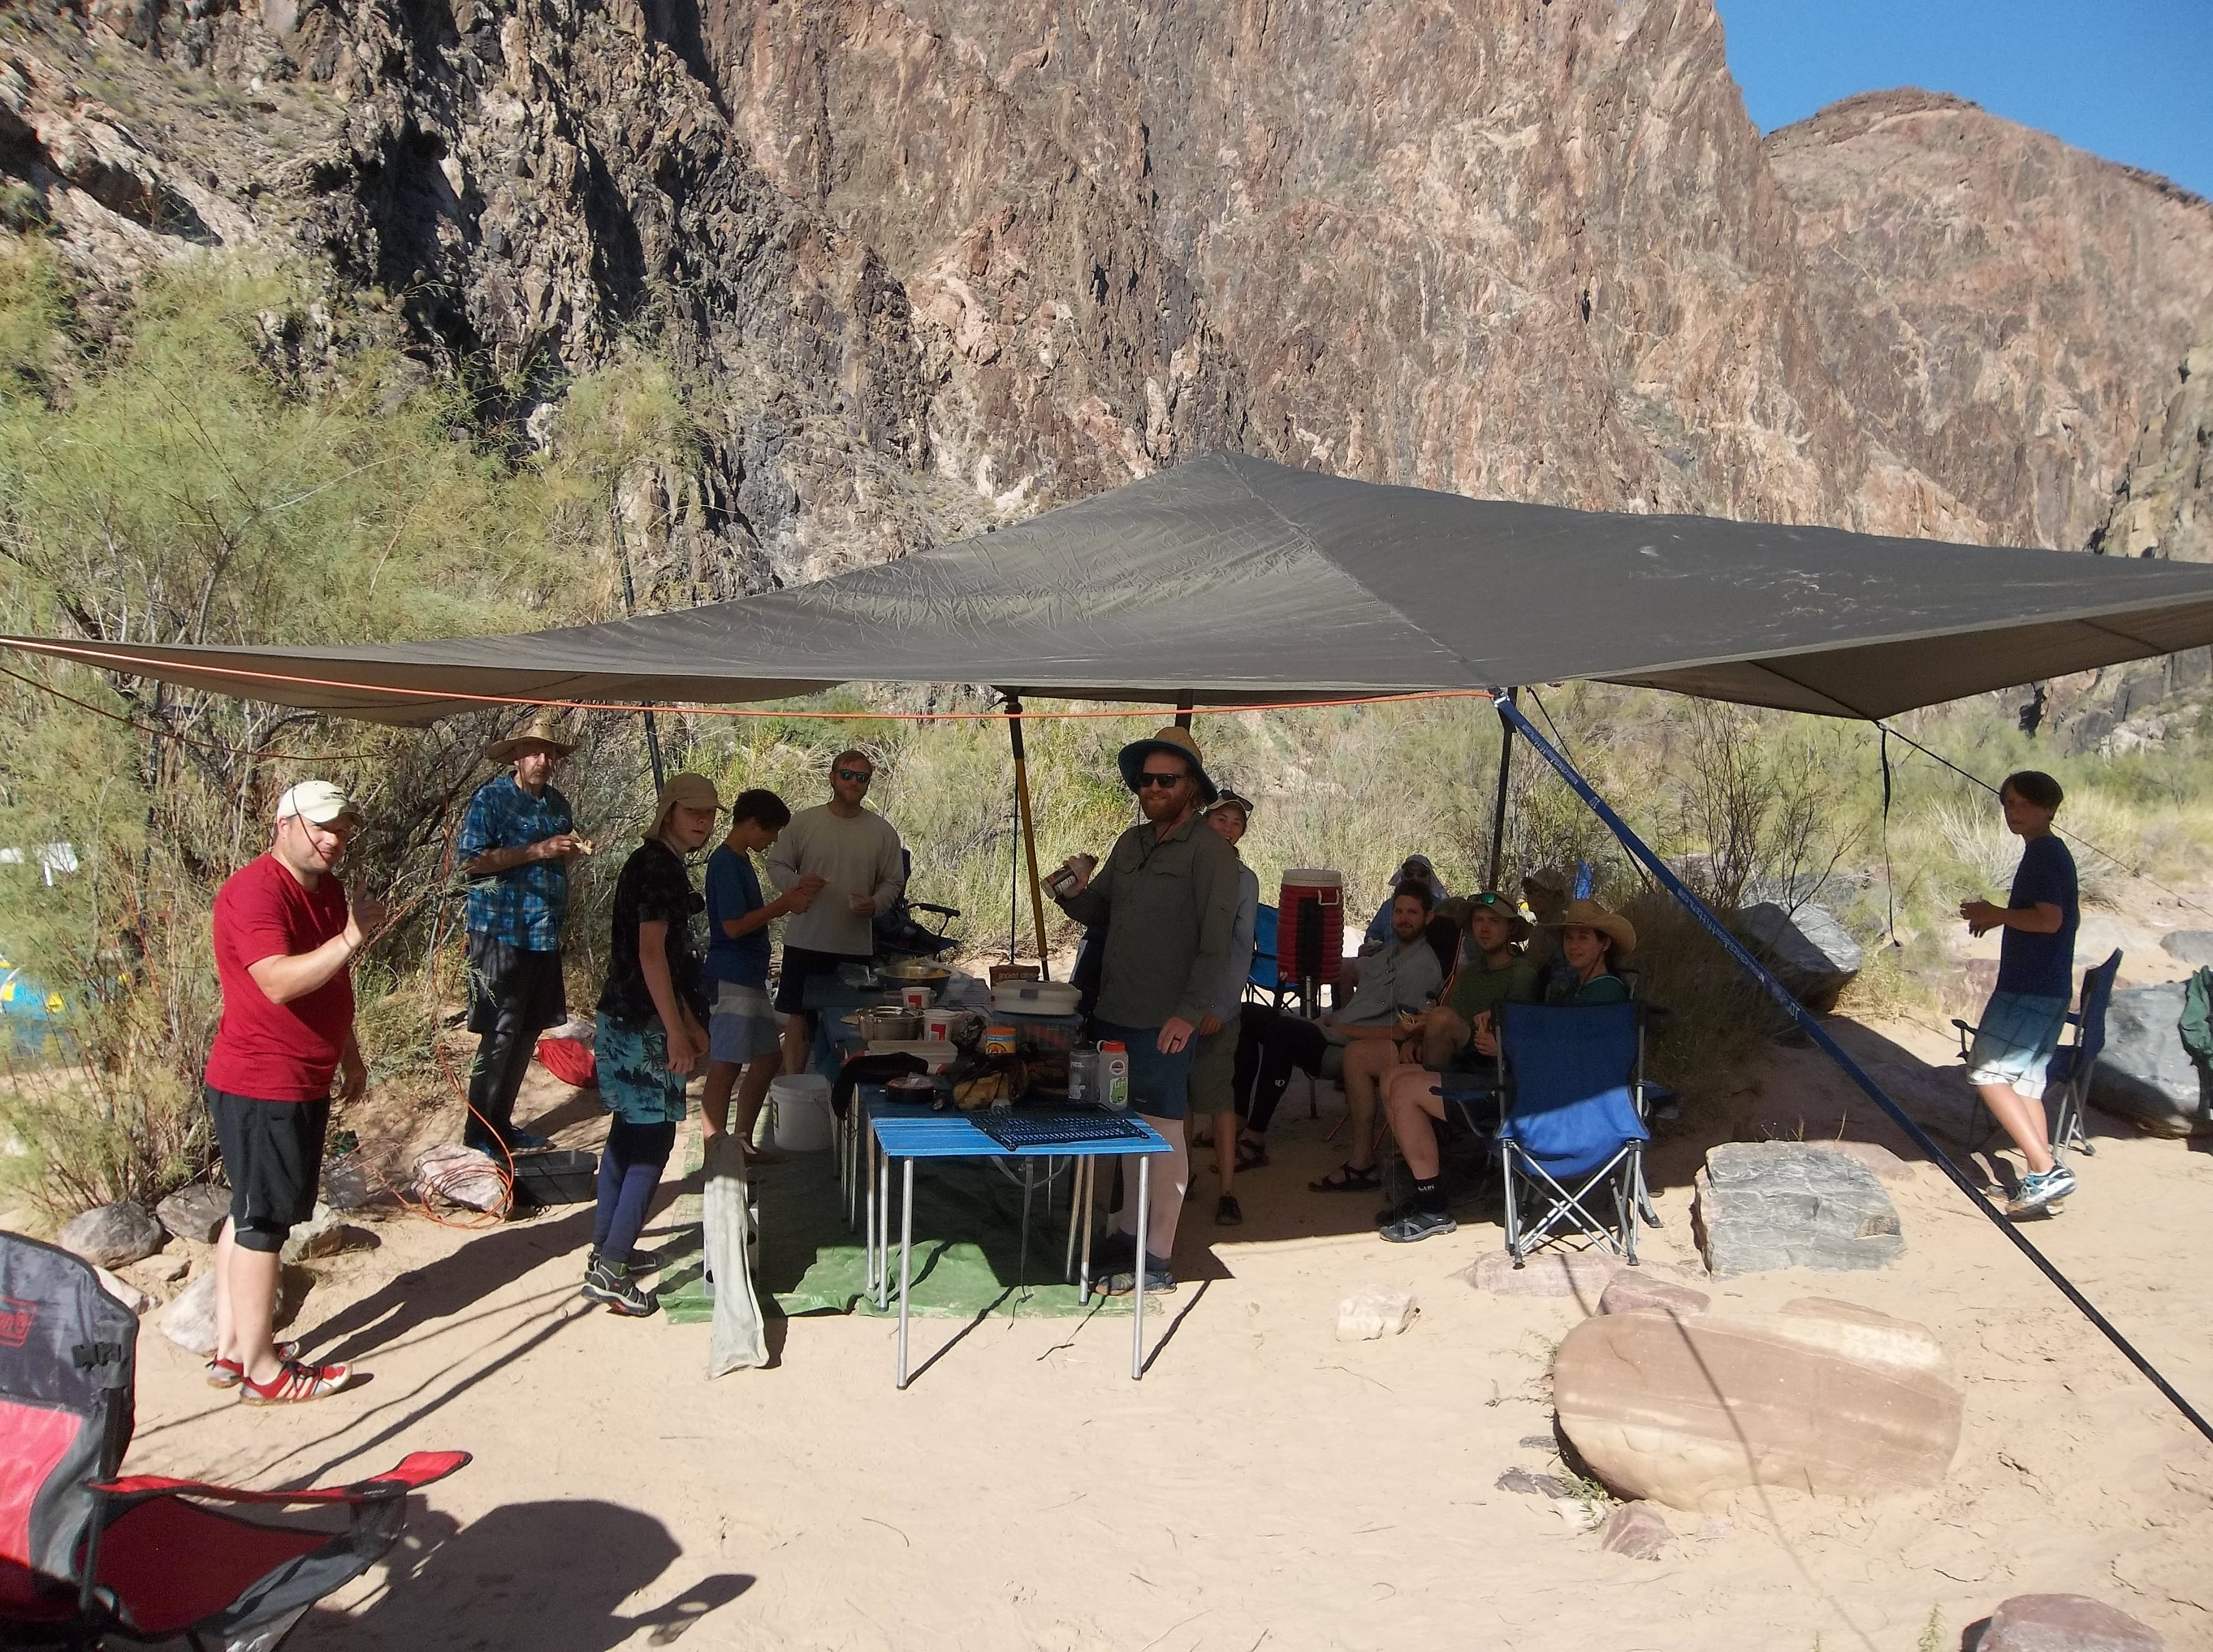
We also used a large rain fly for shade when we had a camp that didn’t get early shade. The heat can be brutal.
Hanging out in the shade
We were also prepared to set up our tent rainfly if needed for personal shade or shelter from the weather. Some people slept in tents, but I found the heat too unbearable to be confined to a tent.
My tent rain-fly set up for partial shade or wind protectionThe heat in the shade
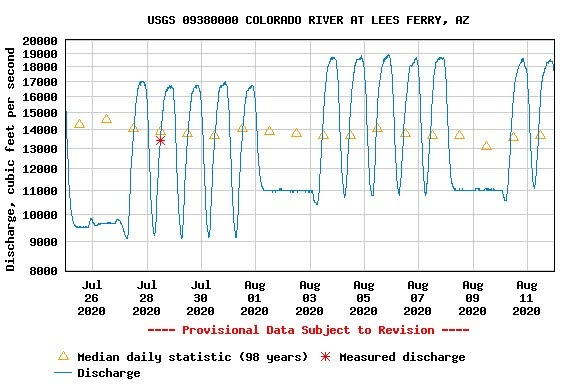
Water Level
One challenge on the Colorado River below Glen Canyon Dam is the vast daily change in water level. I think we had a pretty forgiving water level, but it ranged from about 9,000 cfs to almost 19,000.
Water flow
The water was high when we rigged our boats at Lee’s Ferry, but when we woke up in the morning, the boats were all high and dry – about 15’ from the river. At each camp we would have to assess what the river would do during the night. Would it come up? Or would it go down? We would have to secure our boats so that they were hopefully still in the water in the morning. It takes roughly three days for the water to flow through the canyon, so you can estimate what the water will do based on where your camp’s river mileage. Peak flows occur on weekday afternoons when electrical demand is highest.
Boat high and dry at Lee’s Ferry
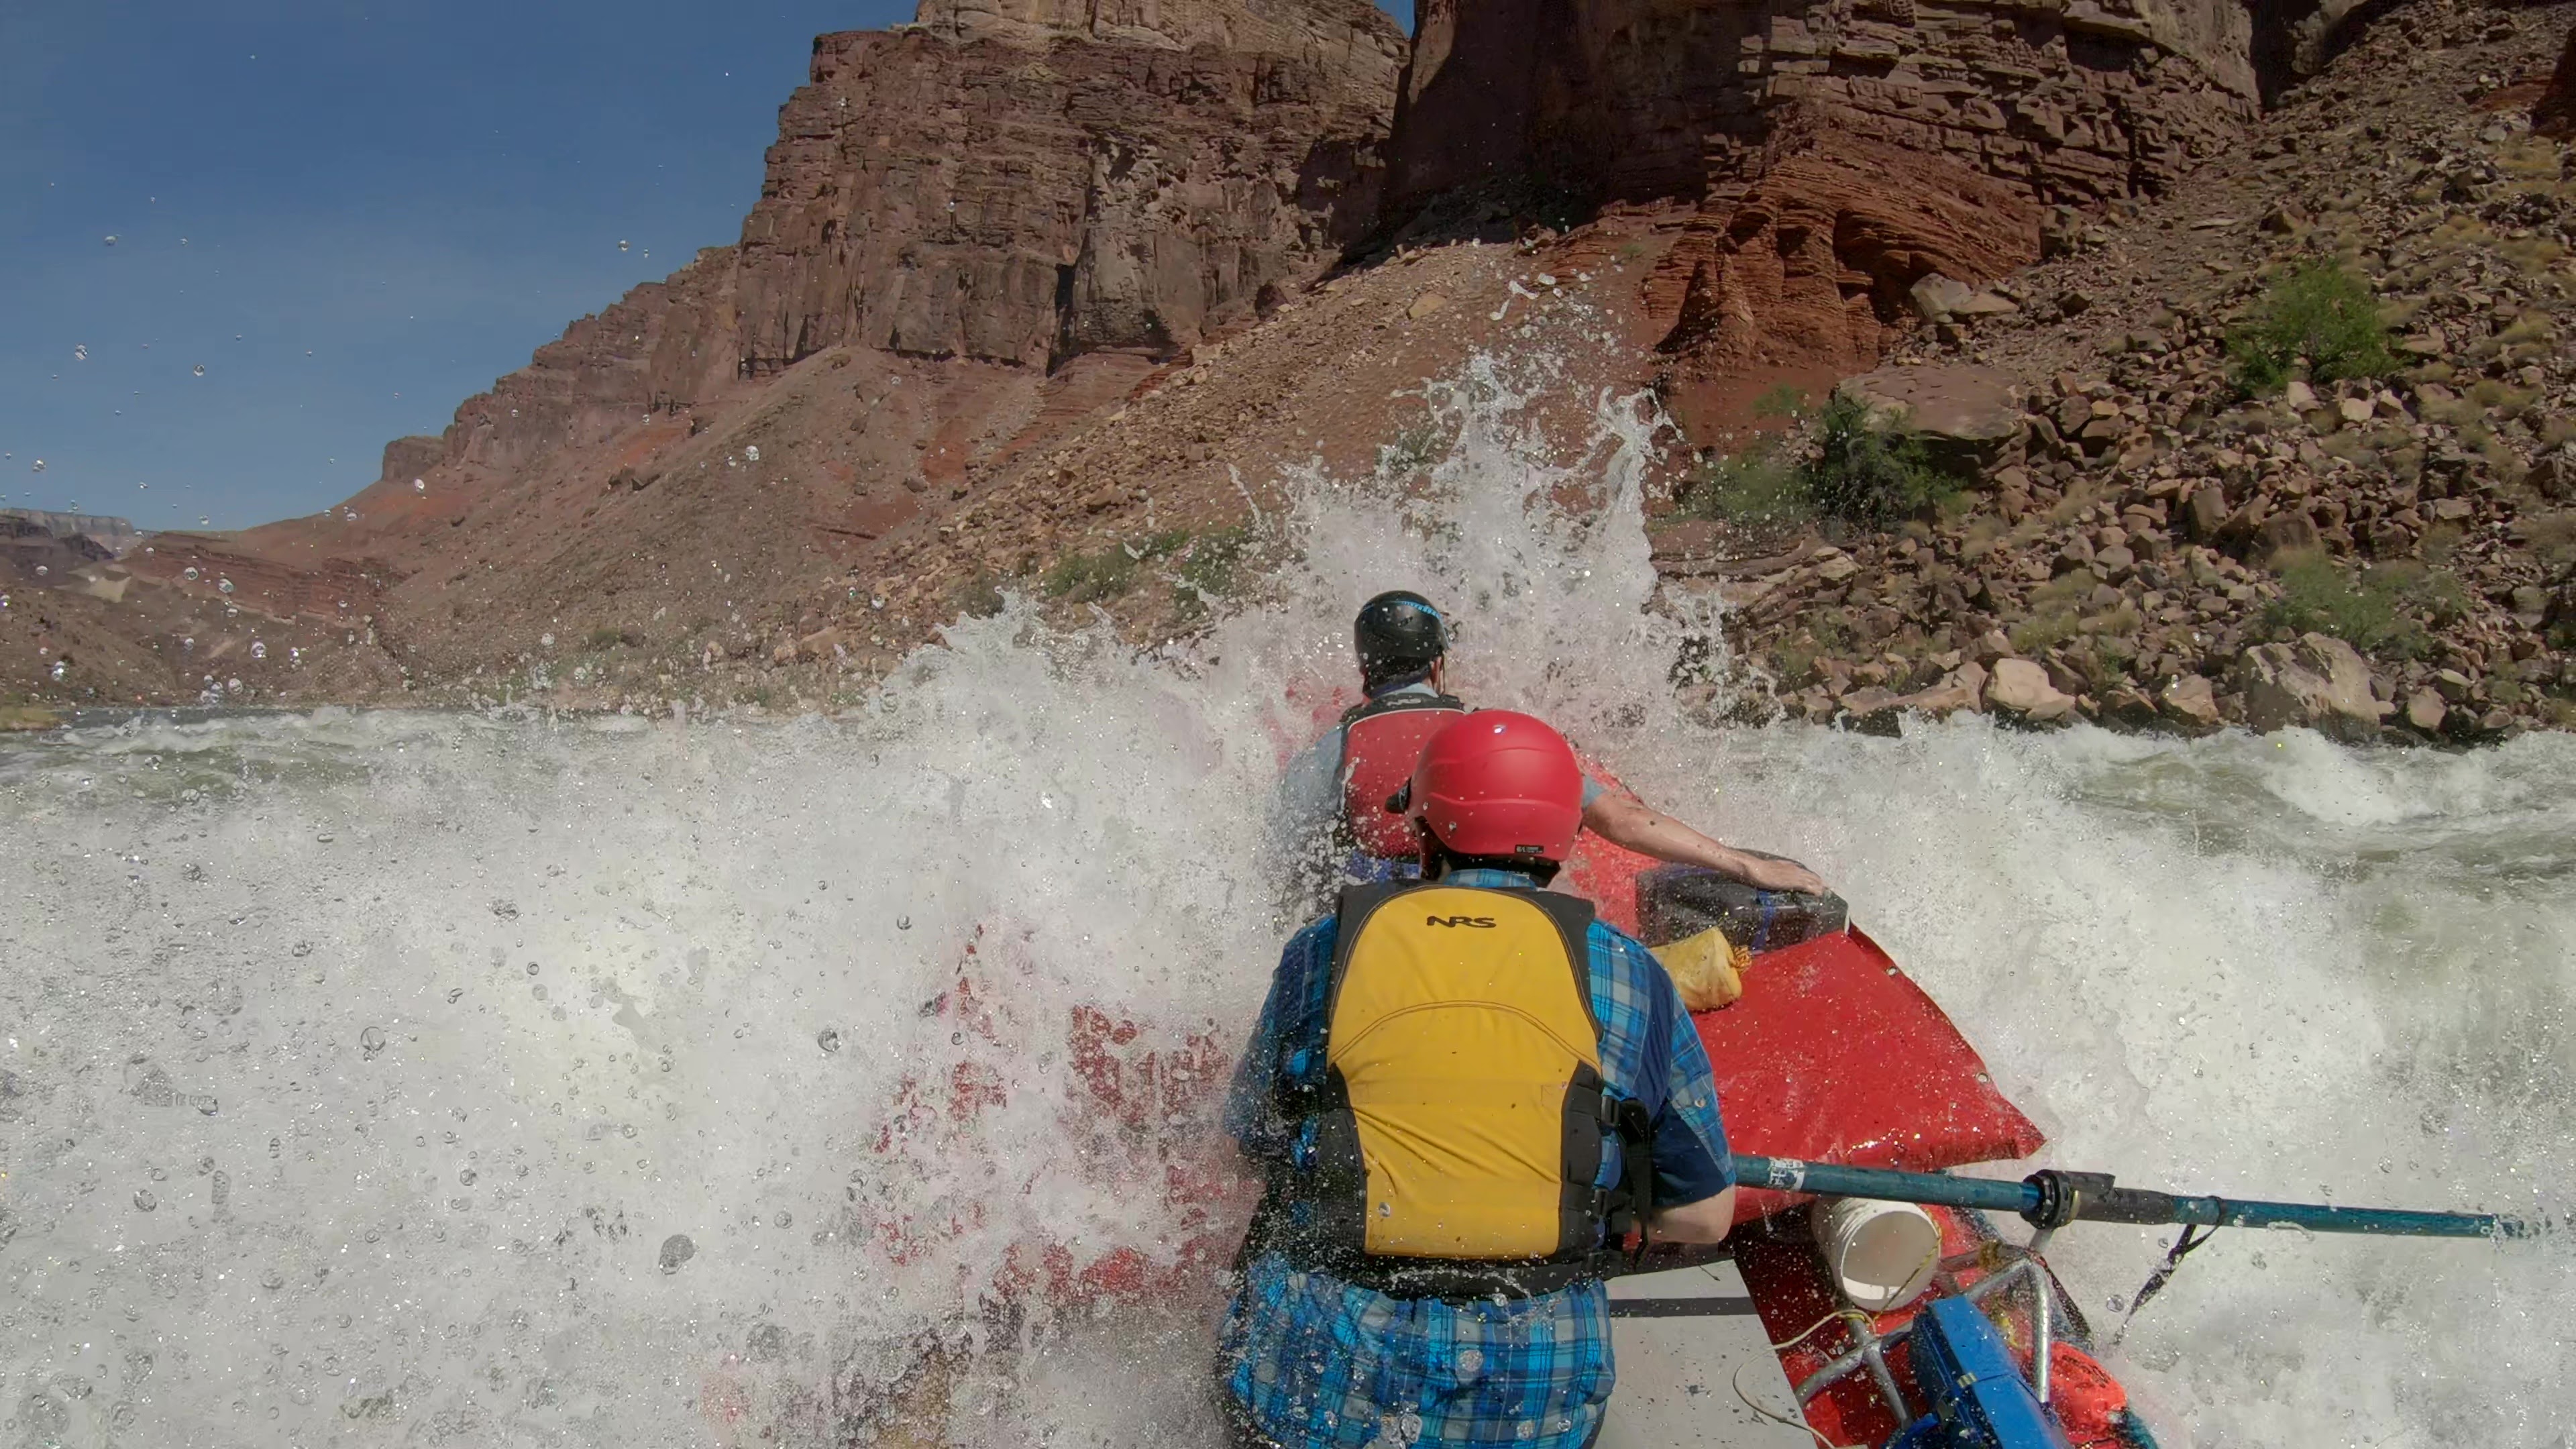
Rapids
There are hundreds of rapids in the canyon. Most of them are small “read and run” type rapids. Many of them are really fun, but it is a shock when that cold-water hits you.
There are, however, a handful of highly technical rapids that require critical moves within the rapid. These rapids are extremely fast, and extremely powerful. Since I have never before rowed through rapids of this magnitude, it was difficult to time my moves and have sufficient power to move the heavily loaded boat where I wanted to go. I did well on some rapids, but poorly on others. Luckily, no one in our group ever flipped – but we did have some close calls.
Many of the rapids in the Grand Canyon have a lot of strong lateral waves that bounce off the cliff. It is important to hit them square on, or your 16’ boat turns into a 7’ boat, which is much more likely to flip.
There are also a lot of strong Eddies throughout the canyon. It takes great skill to thread your way through without getting stuck for a time.
House Rock
House Rock has two very deep holes at the bottom on the far left. The current pushes into the cliff on the left side, so you have to continually pull right. It is okay to just skirt the right edge of these holes. This will be your first exposure to the speed and power of the big rapids – and the water is super cold here since you are probably only on day two.
Hance
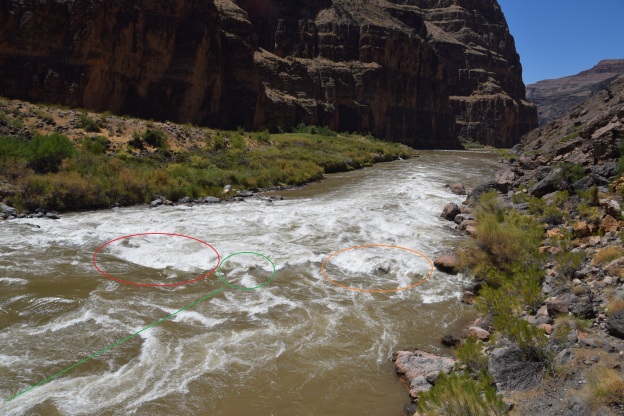
Hance is long and full of holes and rocks. The worst is along the right side – where most of the current goes. The typical run is to enter just right of center, but ferrying left throughout the rapid. I completely misjudged the entrance and ended up having a wild ride down the right side through massive waves and holes. Since I didn’t flip, it was really a run ride.
Dee & Jason punching through a hole in Hance RapidFollow the green route for the safest run
Sockdolager
Sockdolager may have been everyone’s favorite rapid. At this water level, it was just big, fun waves.
Horn Creek
Horn Creek has some nasty lateral waves on the right side that can flip boats. I entered just right of the right horn and had a great ride through massive waves. Super fun.
Granite
Granite also has large lateral waves coming off the cliff on the right. At our water level it was a pretty easy run, but those lateral waves can flip boats.
Hermit
Hermit isn’t as big as it used to be (so I am told), but it still has some really big waves. Wave #5 is the largest, and sometimes has a curler on top that can flip boats – so you may want to stop and scout (and take photos).
Crystal
Crystal has a huge and powerful hole just right of center. There is another hole on the far left, and the left side piles into the cliff – making a left sneak risky. Most people opt for a right sneak bumbling along the shallow waters near shore. But be warned – the current sucks you right back towards the hole.
James decided to just run straight down the tongue. I think he had the easiest run – and the best ride. The current took him just left of the big hole for a good ride through the wave train. I should have taken that route.
Ian went down the far-left side. He was able to pull away from the cliff at the bottom in his cataraft.
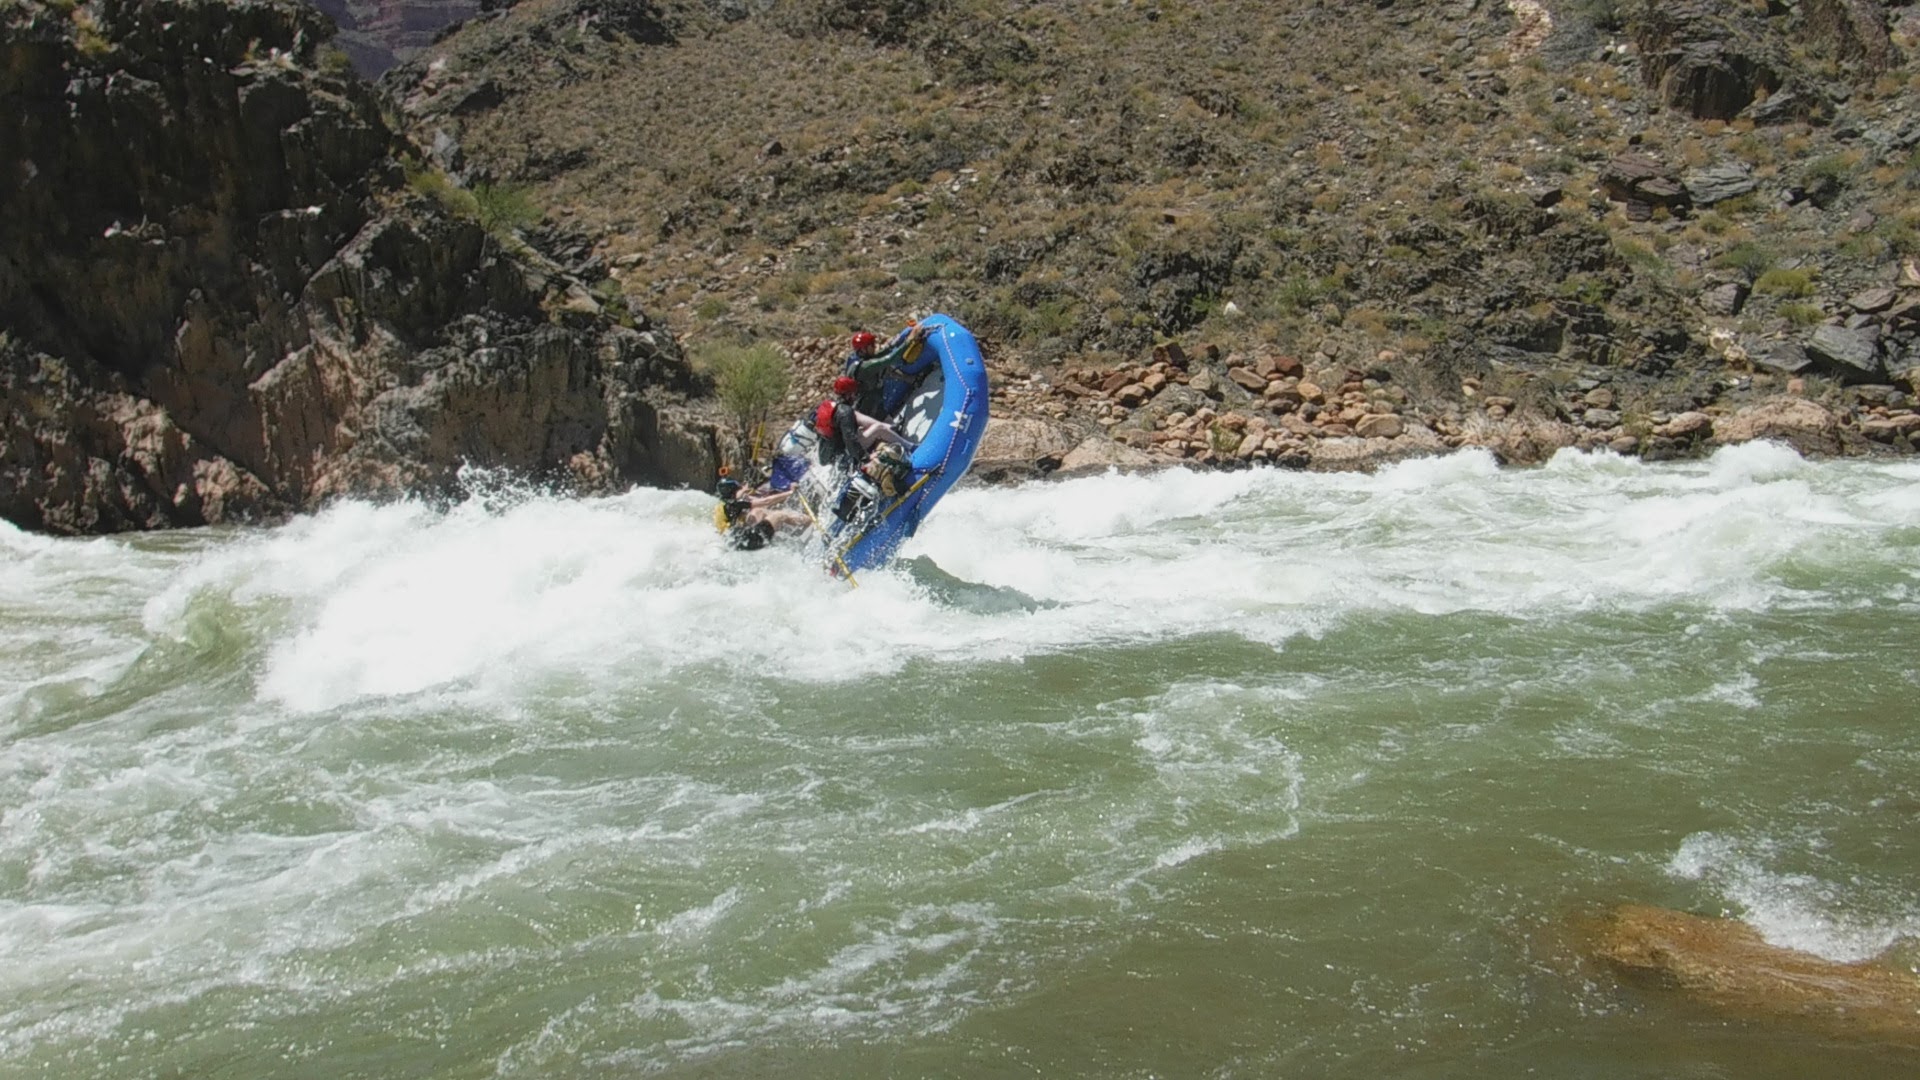
The rest of use took the right sneak – or tried to. I barely made it right of the hole. The nose of my boat skirted the hole, but we were far enough right to not be at risk of flipping. Jamie thought she was far enough right until the last second when she realized that she was heading straight into the deepest part of the hole. She barely had time to spin the boat head on, and Steve managed to move to the very front of the boat. They got a wild ride and almost flipped end over end. This may have been the highlight of the trip – at least the most exciting moment.
Jamie almost flipping in Crystal
Just below the main rapid is a rock garden and island. It is generally easiest to go right, but the current looks deceiving and may entice you to try and go left. It is easy to get stuck on the rocks if you don’t pull far enough left.
Bedrock
Bedrock has a massive rock in the river with most of the current going to the left – but you want to go right. It is a hard pull to go right, but that is the safest run. If you don’t pull hard enough, you could pin or flip on the rock, or you may get washed down the left side for a nasty ride and a good chance of pinning or flipping. This rapid doesn’t have fun waves like the others – you just don’t want to miss the right slot.
Upset
Upset has a large and wide hole near the bottom. The typical run is down the left edge where the waves are powerful and turbulent as they bounce off the cliff. There is a possible right sneak, but it is hard to make. I ended up hitting the hole, but it collapsed just as we hit it – so the hole ended up being the smallest wave in the rapid. Jamie hit the hole backwards and was able to punch through okay.
Lava Falls
Lava Falls brings fear into the hearts of river runners – even those that have run it multiple times. But I found it was actually a pretty easy run. You just have to trust the bubble line. If you line the tail of your boat on the left edge of the bubble line approaching the rapid, it will take you right into the “tea cup”, which is the safest entry for the rapid. From there just try to work left and keep your boat straight when you hit the big waves – especially Kahuna near the bottom.
Follow the bubble line for the safest route
If you enter too far right, you are in for a wild ride through several massive waves and holes, and the really big kahuna near the bottom. You also risk getting stuck in the small Eddy just right of “cheese grater rock”.
If you enter too far left, you will hit the “ledge hole”. This is one mean and nasty hole that you don’t want to mess with. It can totally destroy your boat, and I suspect there is a high risk of drowning. I ended up catching the right edge of the ledge hole. It spun our boat around and started pulling us back in, but we were able to break free. I think the wind blew us left as we came down the tongue. If you look closely in my video you can see my boat move left while everyone else’s moved right with the current. That was a scary moment.
232 (Killer Fang Falls)
Killer Fan Falls has some nasty rock spires near the bottom of the wave train. You really need to move left of the wave train or risk getting pinned. At many water levels you can’t see the rocks until it is too late. We couldn’t see them at all.
Side Hikes
It is amazing how many wonderful side hikes, slot canyons, and waterfalls there are to explore in the canyon. We explored many of them. The only one I would suggest skipping in the heat of the summer is the 3.5-mile hike to Thunder River. It is brutal in the heat. If you do go, be sure to take a water filter to refill your water bottle.
Dee & Jason at the Little Colorado River (LCR)
Trip Notes
Day
Date
River Mile
Comments
Miles Traveled
0
July 24, 2020
0.0
Breakfast at home
Nail in trailer tire
Ice cream cones
Rig rafts
Navajo Bridge
Dinner at Marble Canyon Lodge
Rain storm & rainbow
0.0
Slept in long term parking lot
0.0
1
July 25, 2020
0.0
RM breakfast – bagels,
Ranger lecture
Launch
4.5
Navajo Bridge
RM lunch
8.0
Badger Creek Rapid (5) 12′ drop – first class 5
11.3
Soap Creek camp
11.3
RM dinner – Fajitas
2
July 26, 2020
11.3
RM breakfast – crepes
11.4
Soap Creek Rapid (5) 17′ drop
17.1
House Rock Rapid (7) 8′ drop – first major rapid, scouted from right
RM lunch – Mexican Salad Disaster
Roaring 20s Rapids
20.7
North Canyon Rapid (5) 12′ drop
24.4
Georgie (24 mile) Rapid (6) 4′ drop – strong lateral on left of tongue
24.7
Twentyfour and Half Mile Rapid (6) 8′ drop
26.9
Twentyseven Mile Rapid (5) 7′ drop
29.5
Silver Grotto
29.5
Shinumo Wash camp
18.2
RM dinner – Teriyaki chicken
3
July 27, 2020
29.5
RM breakfast – French toast
32.0
Stanton’s Cave
32.2
Vasey’s Paradise
33.3
Redwall Cavern – spike ball, Frisbee, lawn darts
35.0
Nautiloid Creek
RM lunch – sandwiches
39.7
Marble Canyon Dam Site
47.6
Lower Saddle camp
18.1
RM dinner – pork chops
4
July 28, 2020
47.6
SH breakfast – yogurt parfait
Hike up Saddle Canyon to a nice waterfall
SH lunch – Ceasar wraps
53.4
Nankoweap Graneries hike
56.3
Kwagunt Rapid (5) 12′ drop
56.6
Kwagunt camp
9.0
SH dinner – BBQ chicken salad
5
July 29, 2020
56.6
JK breakfast – yogurt parfait
61.7
Little Colorado River (LCR)
SH lunch – finger foods
69.0
Tanner Rapid (6) 12′ drop
69.9
Basalt Rapid (6)
72.4
Upper Unkar
15.8
Unkar Indian ruin hike
SH dinner – taco salad
6
July 30, 2020
72.4
JK breakfast – Kodiak pancakes
75.8
Nevills Rapid (6) 16′ drop
77.2
Hance Rapid (8) 30′ drop – scout on right
79.1
Sockdolager Rapid (7) 19′ drop – fun
JK lunch – chicken, chips & salsa
82.1
Grapevine Rapid (7) 18′ drop
84.7
Clear Creek hike
85.3
Zoroaster Rapid (5) 7′ drop
87.7
Lower Cremation camp
15.3
JK dinner – sweet & sour meatballs
7
July 31, 2020
87.7
SH breakfast – breakfast burrito
88.1
Phantom Ranch Boat Beach
Kearl exchange
JMK lunch – sandwiches
90.8
Horn Creek Rapid (8) 9′ drop – huge waves
93.8
Granite camp
6.1
JMK dinner – beef stroganoff
8
August 1, 2020
93.8
JMK breakfast – eggs, bacon, & sausage
93.9
Granite Rapid (8) 17′ drop
95.5
Hermit Rapid (8) 15′ drop – fun waves
98.9
Crystal Rapid (8) 15′ drop – scout right
99.7
Tuna Creek Rapid (6) 10′ drop
101.8
Sapphire Rapid (6) 7′ drop
104.5
Emerald Rapid (5) 4′ drop
105.2
Ruby Rapid (5) 9′ drop
106.5
Serpentine Rapid (7) 11′ drop
JMK lunch – sandwiches
109.2
Shinumo Creek
110.0
110 mile camp
16.2
JMK dinner – meatballs & rice
9
August 2, 2020
110.0
IM breakfast – hash brown mash
112.8
Walthenberg Rapid (6) 14′ drop
IM lunch – sandwiches
117.2
Elves Chasm
120.0
Blacktail Canyon
120.8
Below Blacktail
10.8
IM dinner – Lasagna
10
August 3, 2020
120.8
IM breakfast – blueberry pancakes
123.3
Forster Rapid (5) 7′ drop
125.5
Fossil Rapid (5)
IM lunch – chicken salad
129.7
Specter Rapid
131.1
Bedrock Rapid (7) 7′ drop – hard pull right
132.3
Deubendorff Rapid (7) 15′ drop – rocky
132.5
Stone Creek camp & waterfall
11.7
IM dinner – Tikka Masala
11
August 4, 2020
132.5
IM breakfast – sausage McMuffins
134.3
Thunder River hike – death march in heat
134.3
Tapeats Rapid (5) 15′ drop
IM lunch – bagels
135.2
Owl Eyes
2.7
IM dinner – spaghetti
12
August 5, 2020
135.2
DG breakfast – muffins & yogurt
135.6
Granite Narrows – 76′ wide
135.9
Christmas Tree Cave
136.9
Deer Creek Falls & hike
DG lunch – pita sandwiches
148.4
Matkatamiba Canyon
148.9
Matkat Hotel
13.7
DG dinner – Teriyaki chicken & caulaflower rice
13
August 6, 2020
148.9
DG breakfast – super scrambled eggs
150.2
Upset Rapid (8) 15′ drop – huge hole at bottom
157.3
Havasu Creek hike
DG lunch – torilla wraps
167.0
Upper National camp & hike – rocky camp
18.1
DG dinner – Mississippi chicken
14
August 7, 2020
167.0
DG breakfast – pancakes
178.1
Vulcan’s Anvil
179.7
Lava Falls Rapid (9) 13′ drop – scary big
DG lunch – finger foods
187.4
Witmore Helipad
190.2
190.2 camp
23.2
DG dinner – Dora’s beans
15
August 8, 2020
190.2
DG breakfast – oatmeal
205.5
Two Hundred and Five Mile Rapid (6) 13′ drop
209.2
Two Hundred and Nine Mile Rapid (5) 8′ drop
DG lunch – finger foods
213.3
Pumkin Springs camp
23.1
LL dinner – Goodwood BBQ pork sandwiches
16
August 9, 2020
213.3
LL breakfast – English muffins, sausage & gravy
217,8
Two Hundred and Seventeen Mile Rapid (5) 16′ drop – fun ride down the middle
LL lunch – Mexican disaster
225.9
Diamond Creek Take-out
230.7
Travertine Falls hike
231.2
Two Hundred and Thirtyone Mile Rapid (5) 12′ drop – “Flip Kearl”
232.5
Two Hundred and Thirtytwo Mile Rapid (6) 7′ drop – “Killer Fang Falls”