
For years I have wanted an electric mountain bike (emtb). I have always enjoyed mountain biking, but I have never been fit enough to ride most of the local trails. That is partially why I got into dirt biking – with a motor, going up hill can be just as fun, or more fun, than going downhill. But a good emtb is really expensive, and I haven’t been getting out riding enough to justify the cost.
Earlier this summer I noticed my neighbor riding an old mountain bike with a motor and battery. I stopped him to ask about his electric conversion story. He pointed me to JohnnyNerdOut, who has a shop not far from my home. Johnny also has YouTube videos covering all aspects of building an ebike, so I thought I would give it a try.
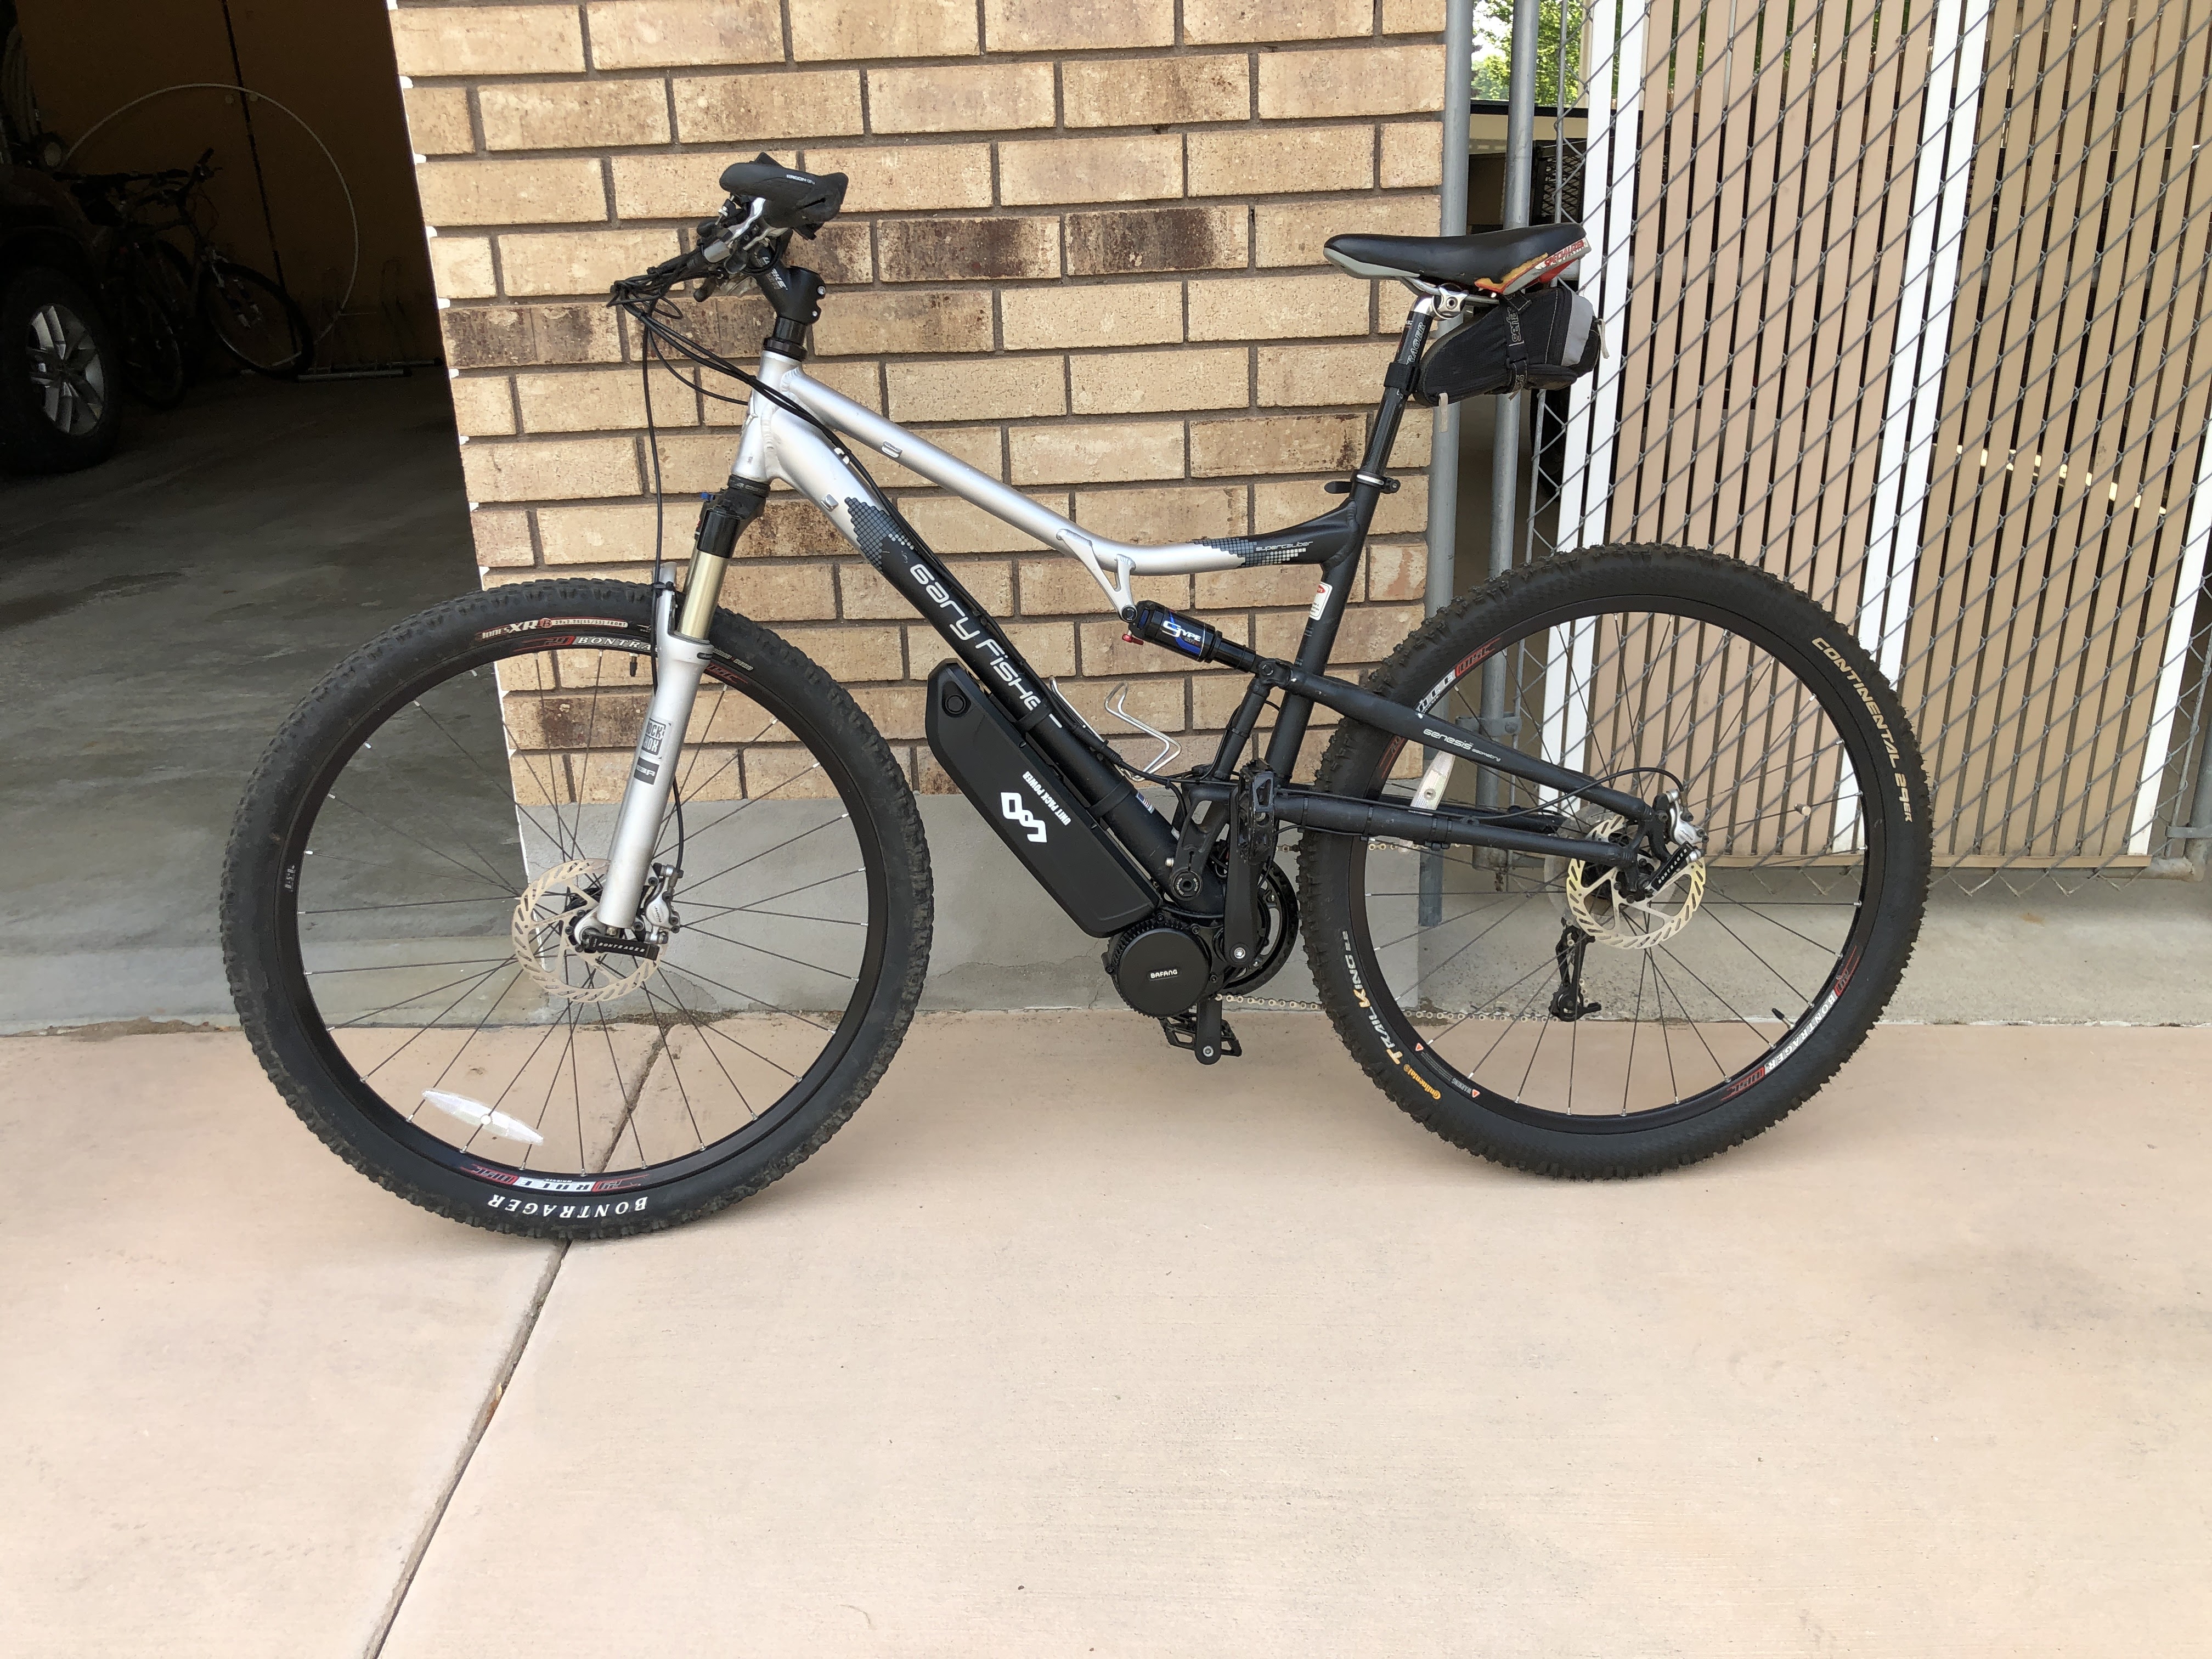
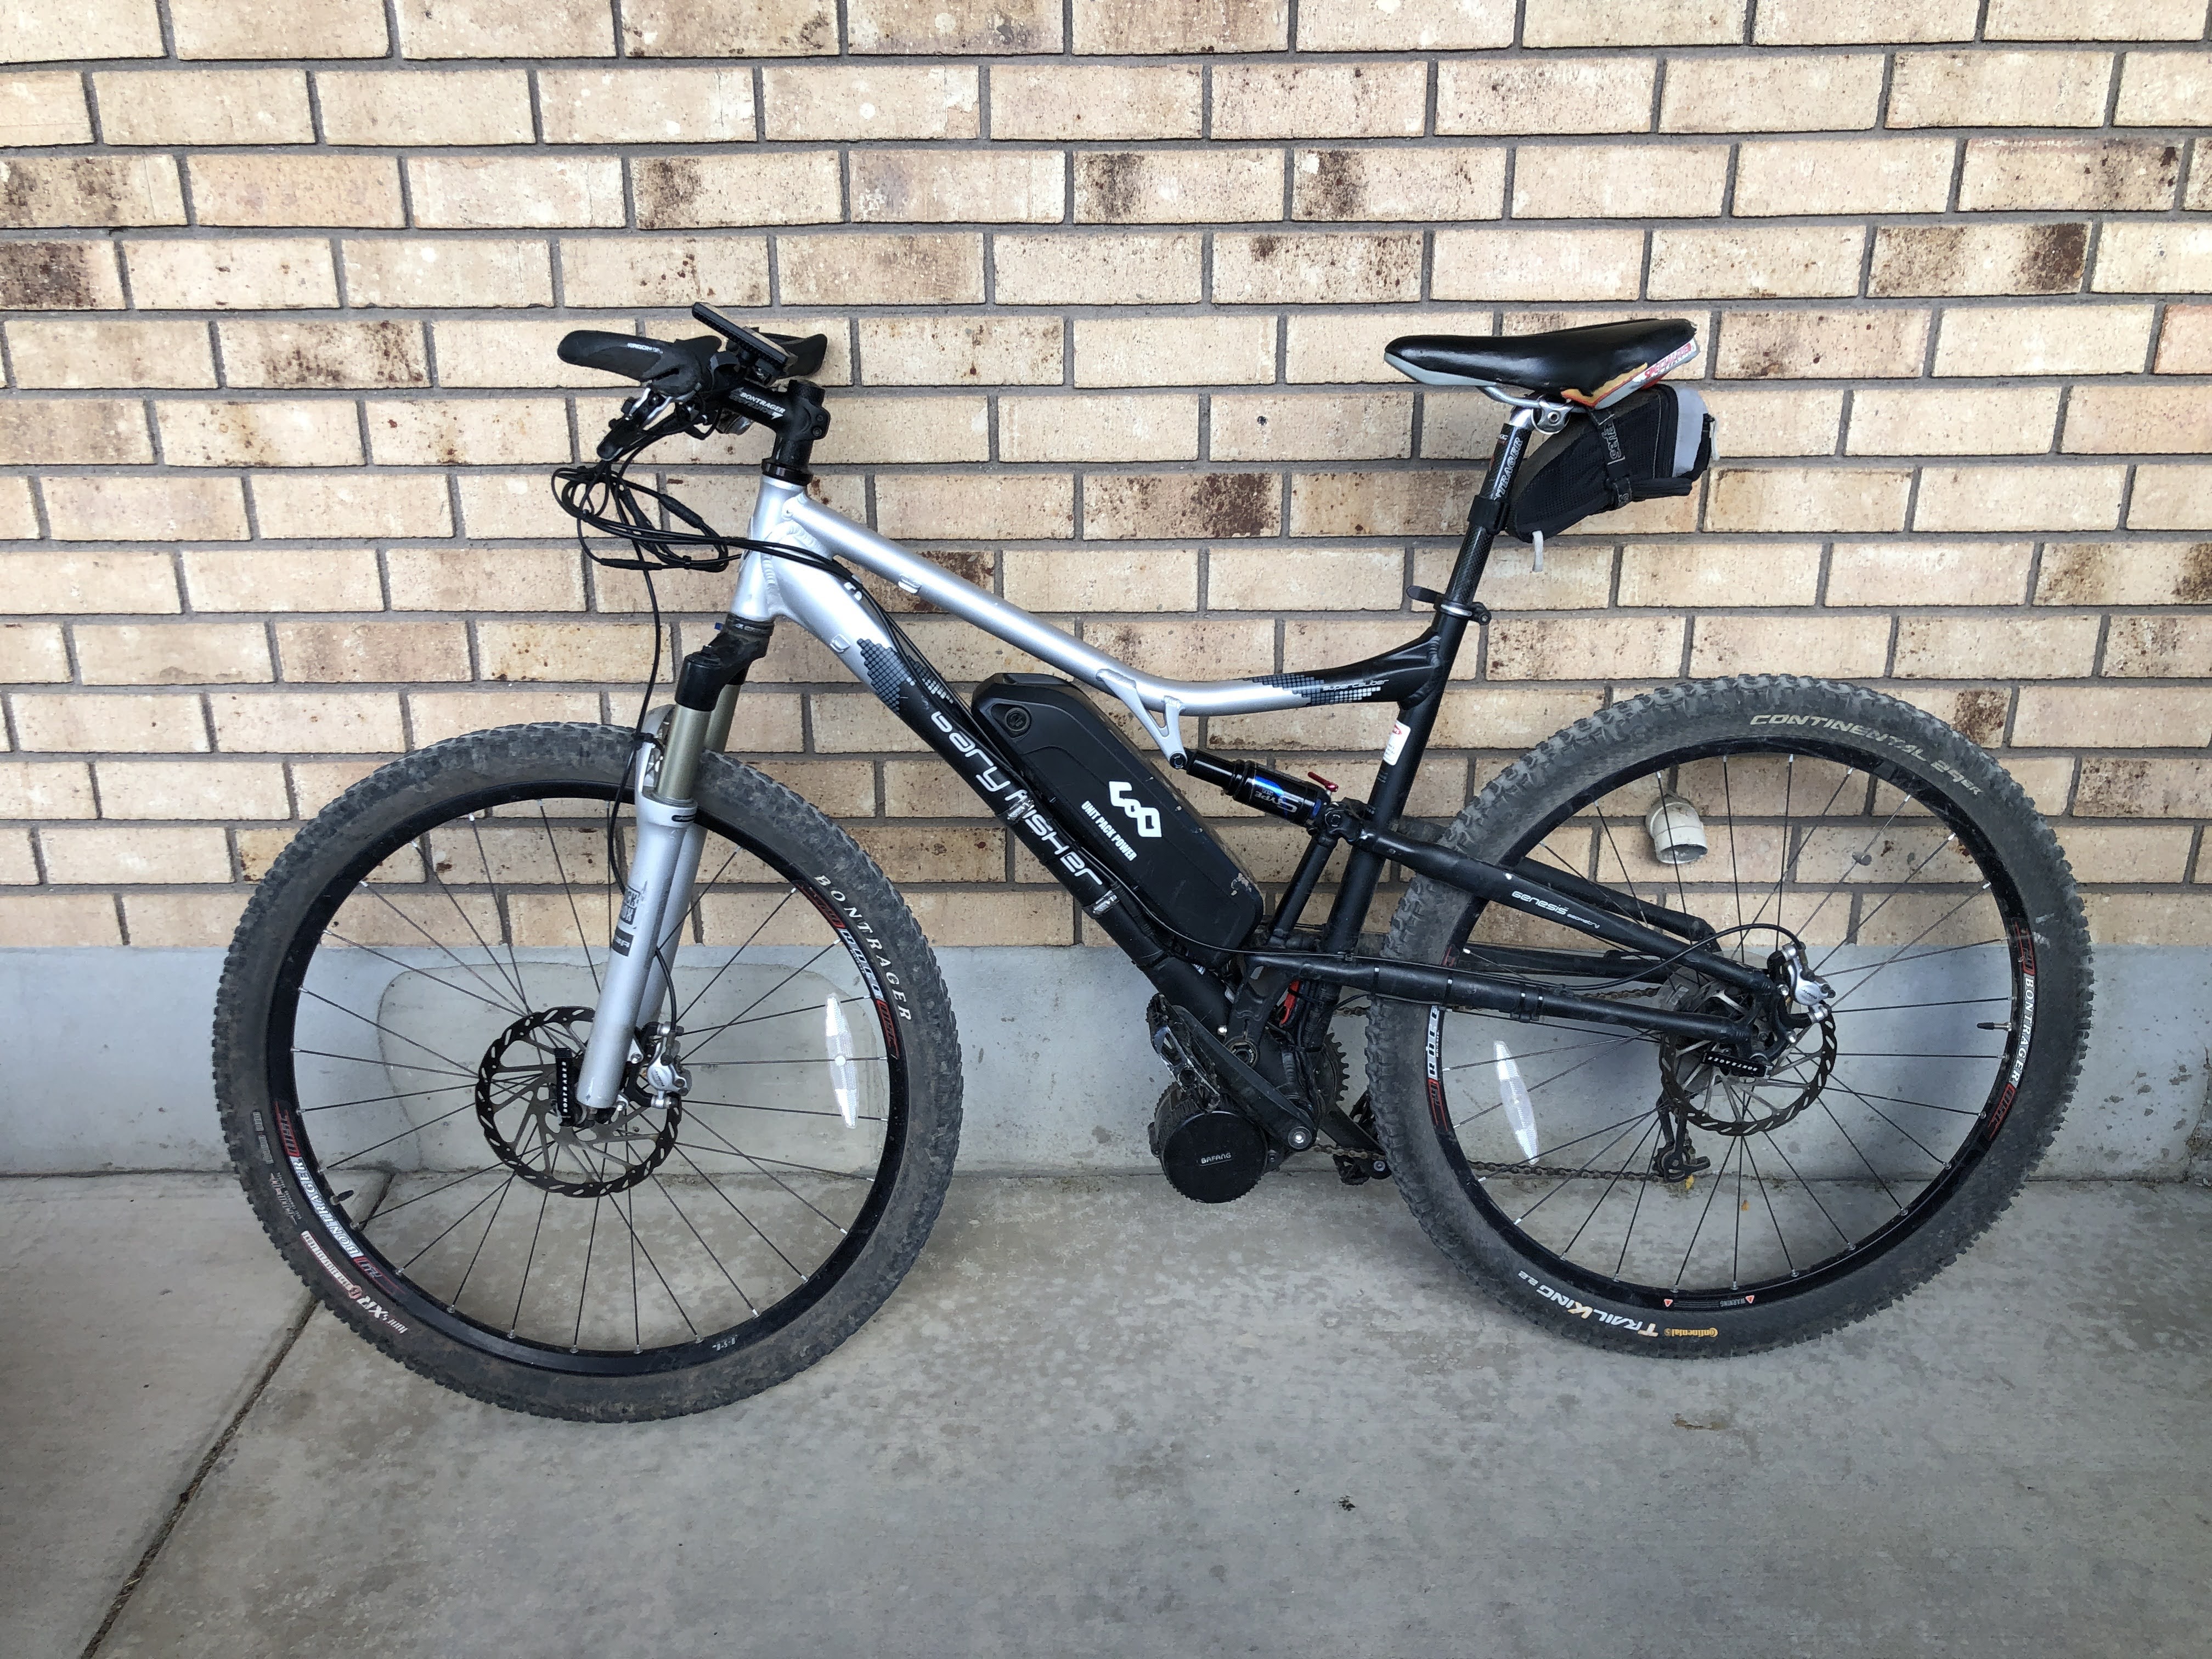
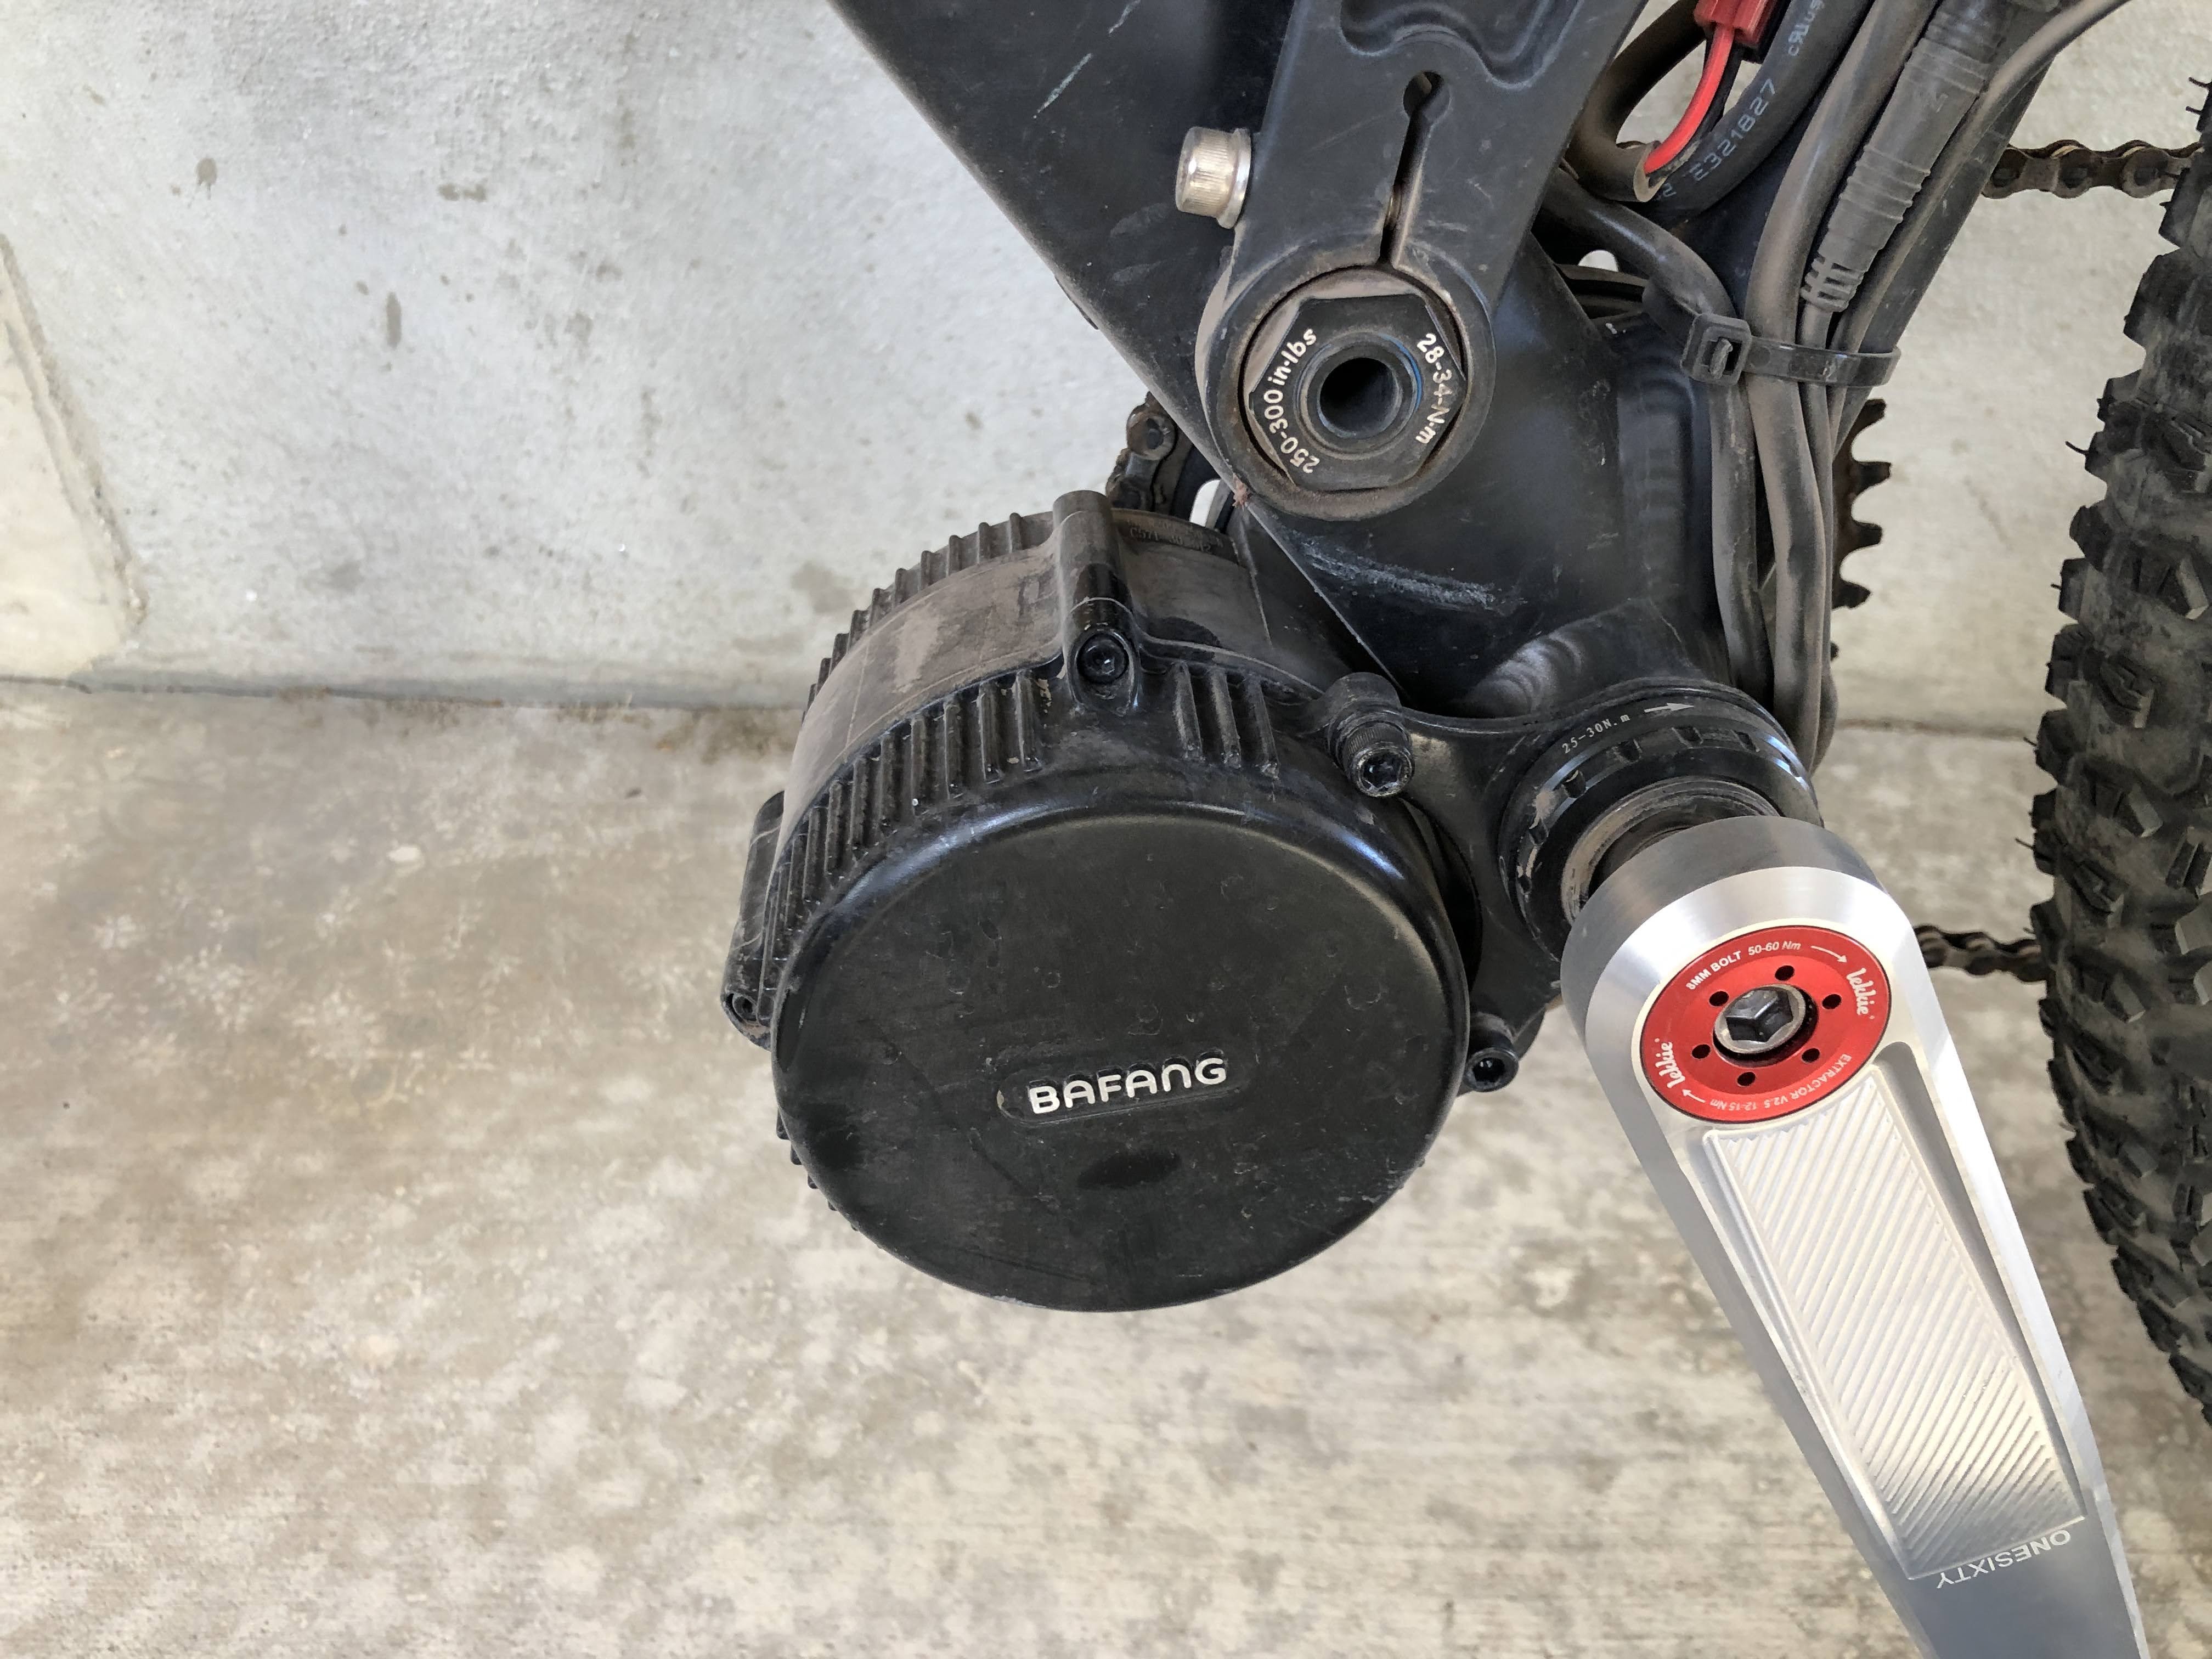
As Johnny points out, the best bike to convert to an ebike is the one hanging in your garage that isn’t being used. Well, I actually had two bikes; my really old Specialized Hardrock, and a 2007 Gary Fisher SuperCaliper 29er. The old Hardrock fit me better and was more comfortable than the full-suspension Gary Fisher, but the Gary Fisher is all around a much better bike. So I decided to add a motor to that bike. I bought a Bafang BBS02 kit from Johnny and did the install. Following his videos, it was really pretty straightforward.
As I mentioned, my old Hardrock was more comfortable than this Gary Fisher bike. The SuperCaliper is an early generation 29er, and the bike handling was always a little sketchy. At low speeds the handlebars just wobble and it felt very unsafe. Once I got up above 7 mph or so, it felt more planted.
Adding the heavy motor and battery to the bottom of the bike made the handling even worse. It was really quite scary to ride this bike on tight, technical trails.
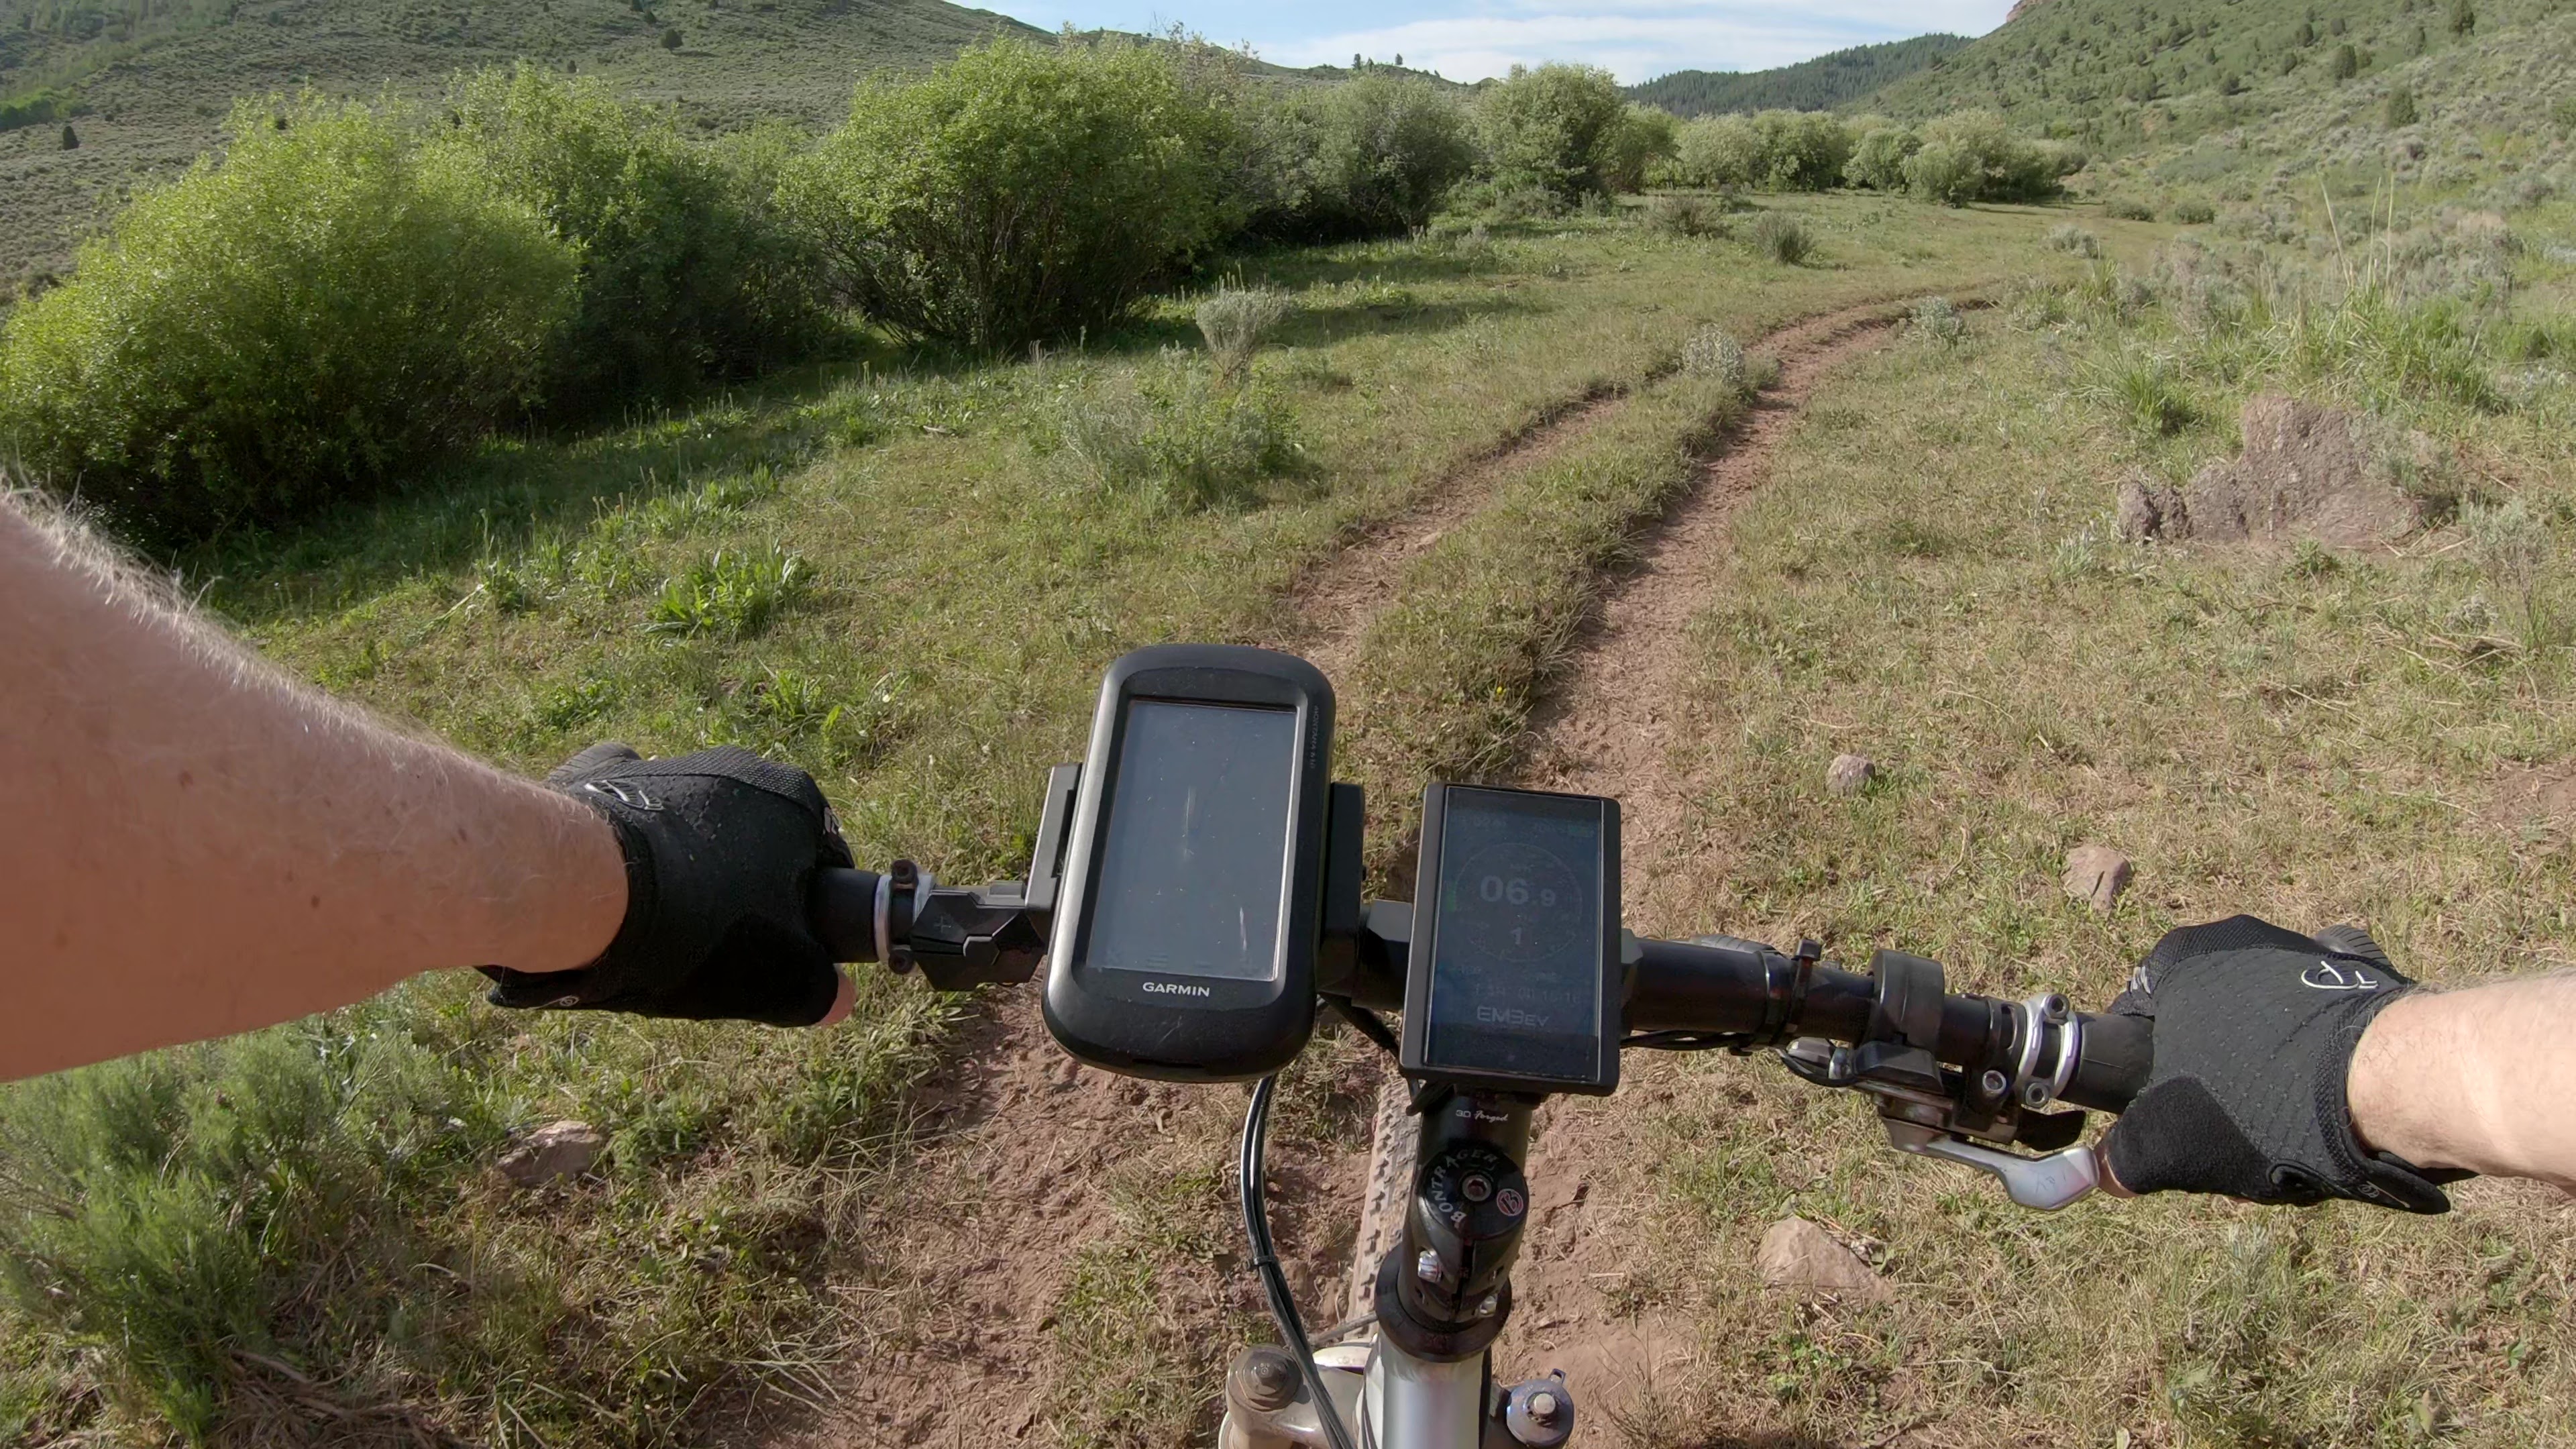
My very first trail ride was such a trail – a tight and semi-technical trail up in Wyoming near our cabin. Here is a video from that first ride:
Lessons Learned
I would recommend starting with a less technical trail for your first ebike ride. There is a learning curve associated with using the motor effectively. It was difficult to focus on the challenges of the trail, and on learning these new skills at the same time. On the next day we rode an ATV trail that had a lot more vertical climbing, but was not narrow and as technical. This was a much better place to work on the bike skills.
I had three major issues to deal with on that first ride:
- The poor handling of the bike,
- Insufficient pedal clearance, and,
- Learning to manage the power effectively.
Each of these topics will be covered in turn, along with a lot of fine tuning I did over the next few months.
Bike Handling
I first played with the suspension tuning and tightened the steering head. This had a very minor impact on handling, but was worth doing.
The next step was to install a longer steering stem. This made the bike less comfortable, but it put more weight on the front wheel, which helped quite a bit.
The biggest improvement came by moving the battery up higher on the bike. I didn’t think this would make much difference, but it made a significant improvement. By turning the rear shock around 180* I was barely able to mount the battery on top of the bottom tube. The bike also looks better this way and my battery isn’t exposed to rocks.
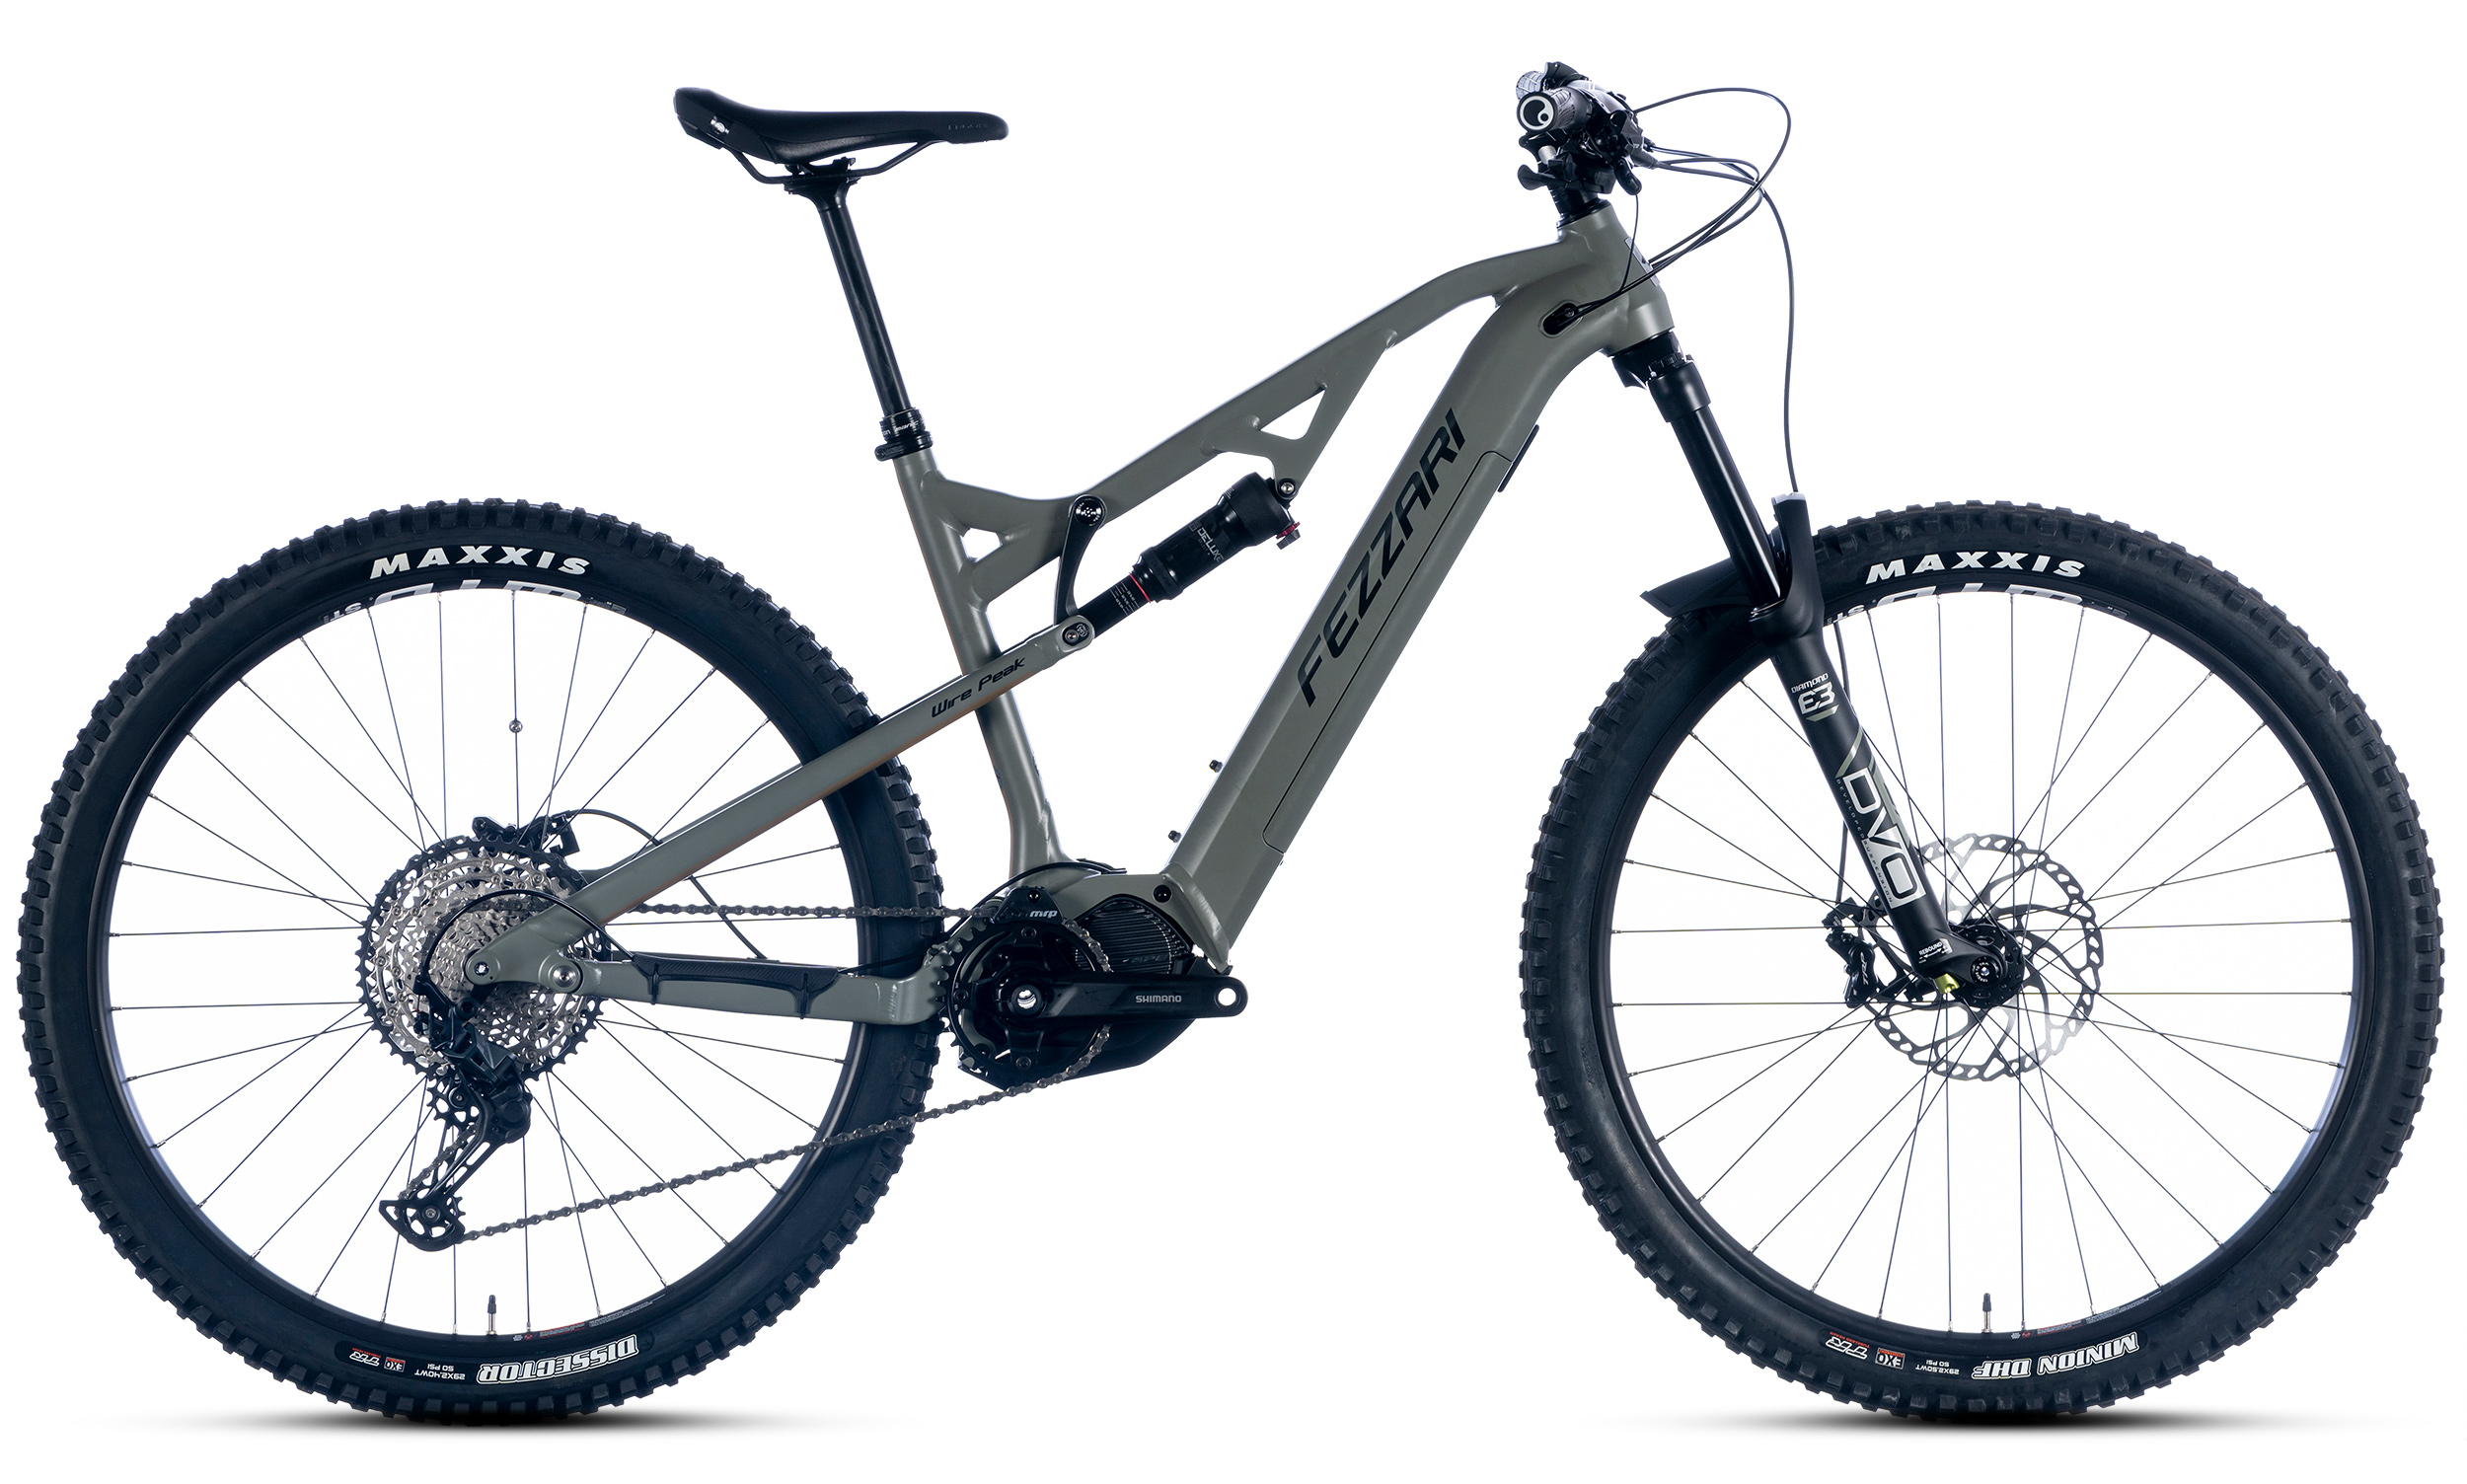
The bike now handles much better, but is still not what I consider comfortable and safe. It now handles more like it did prior to installing the motor. To make sure the handling was a bike issue and not a ‘biker’ issue, I borrowed my daughter’s Fezzari Wire Peak and rode some of the local trails. It was definitely the bike!
Pedal Clearance
Parts of the trail were narrow and deep, and I hit my pedals on the ground frequently. I also had pedal strikes on a lot of the rocks that I thought I could clear. Over the next few months I continued to have frequent pedal strikes, and it was really frustrating.
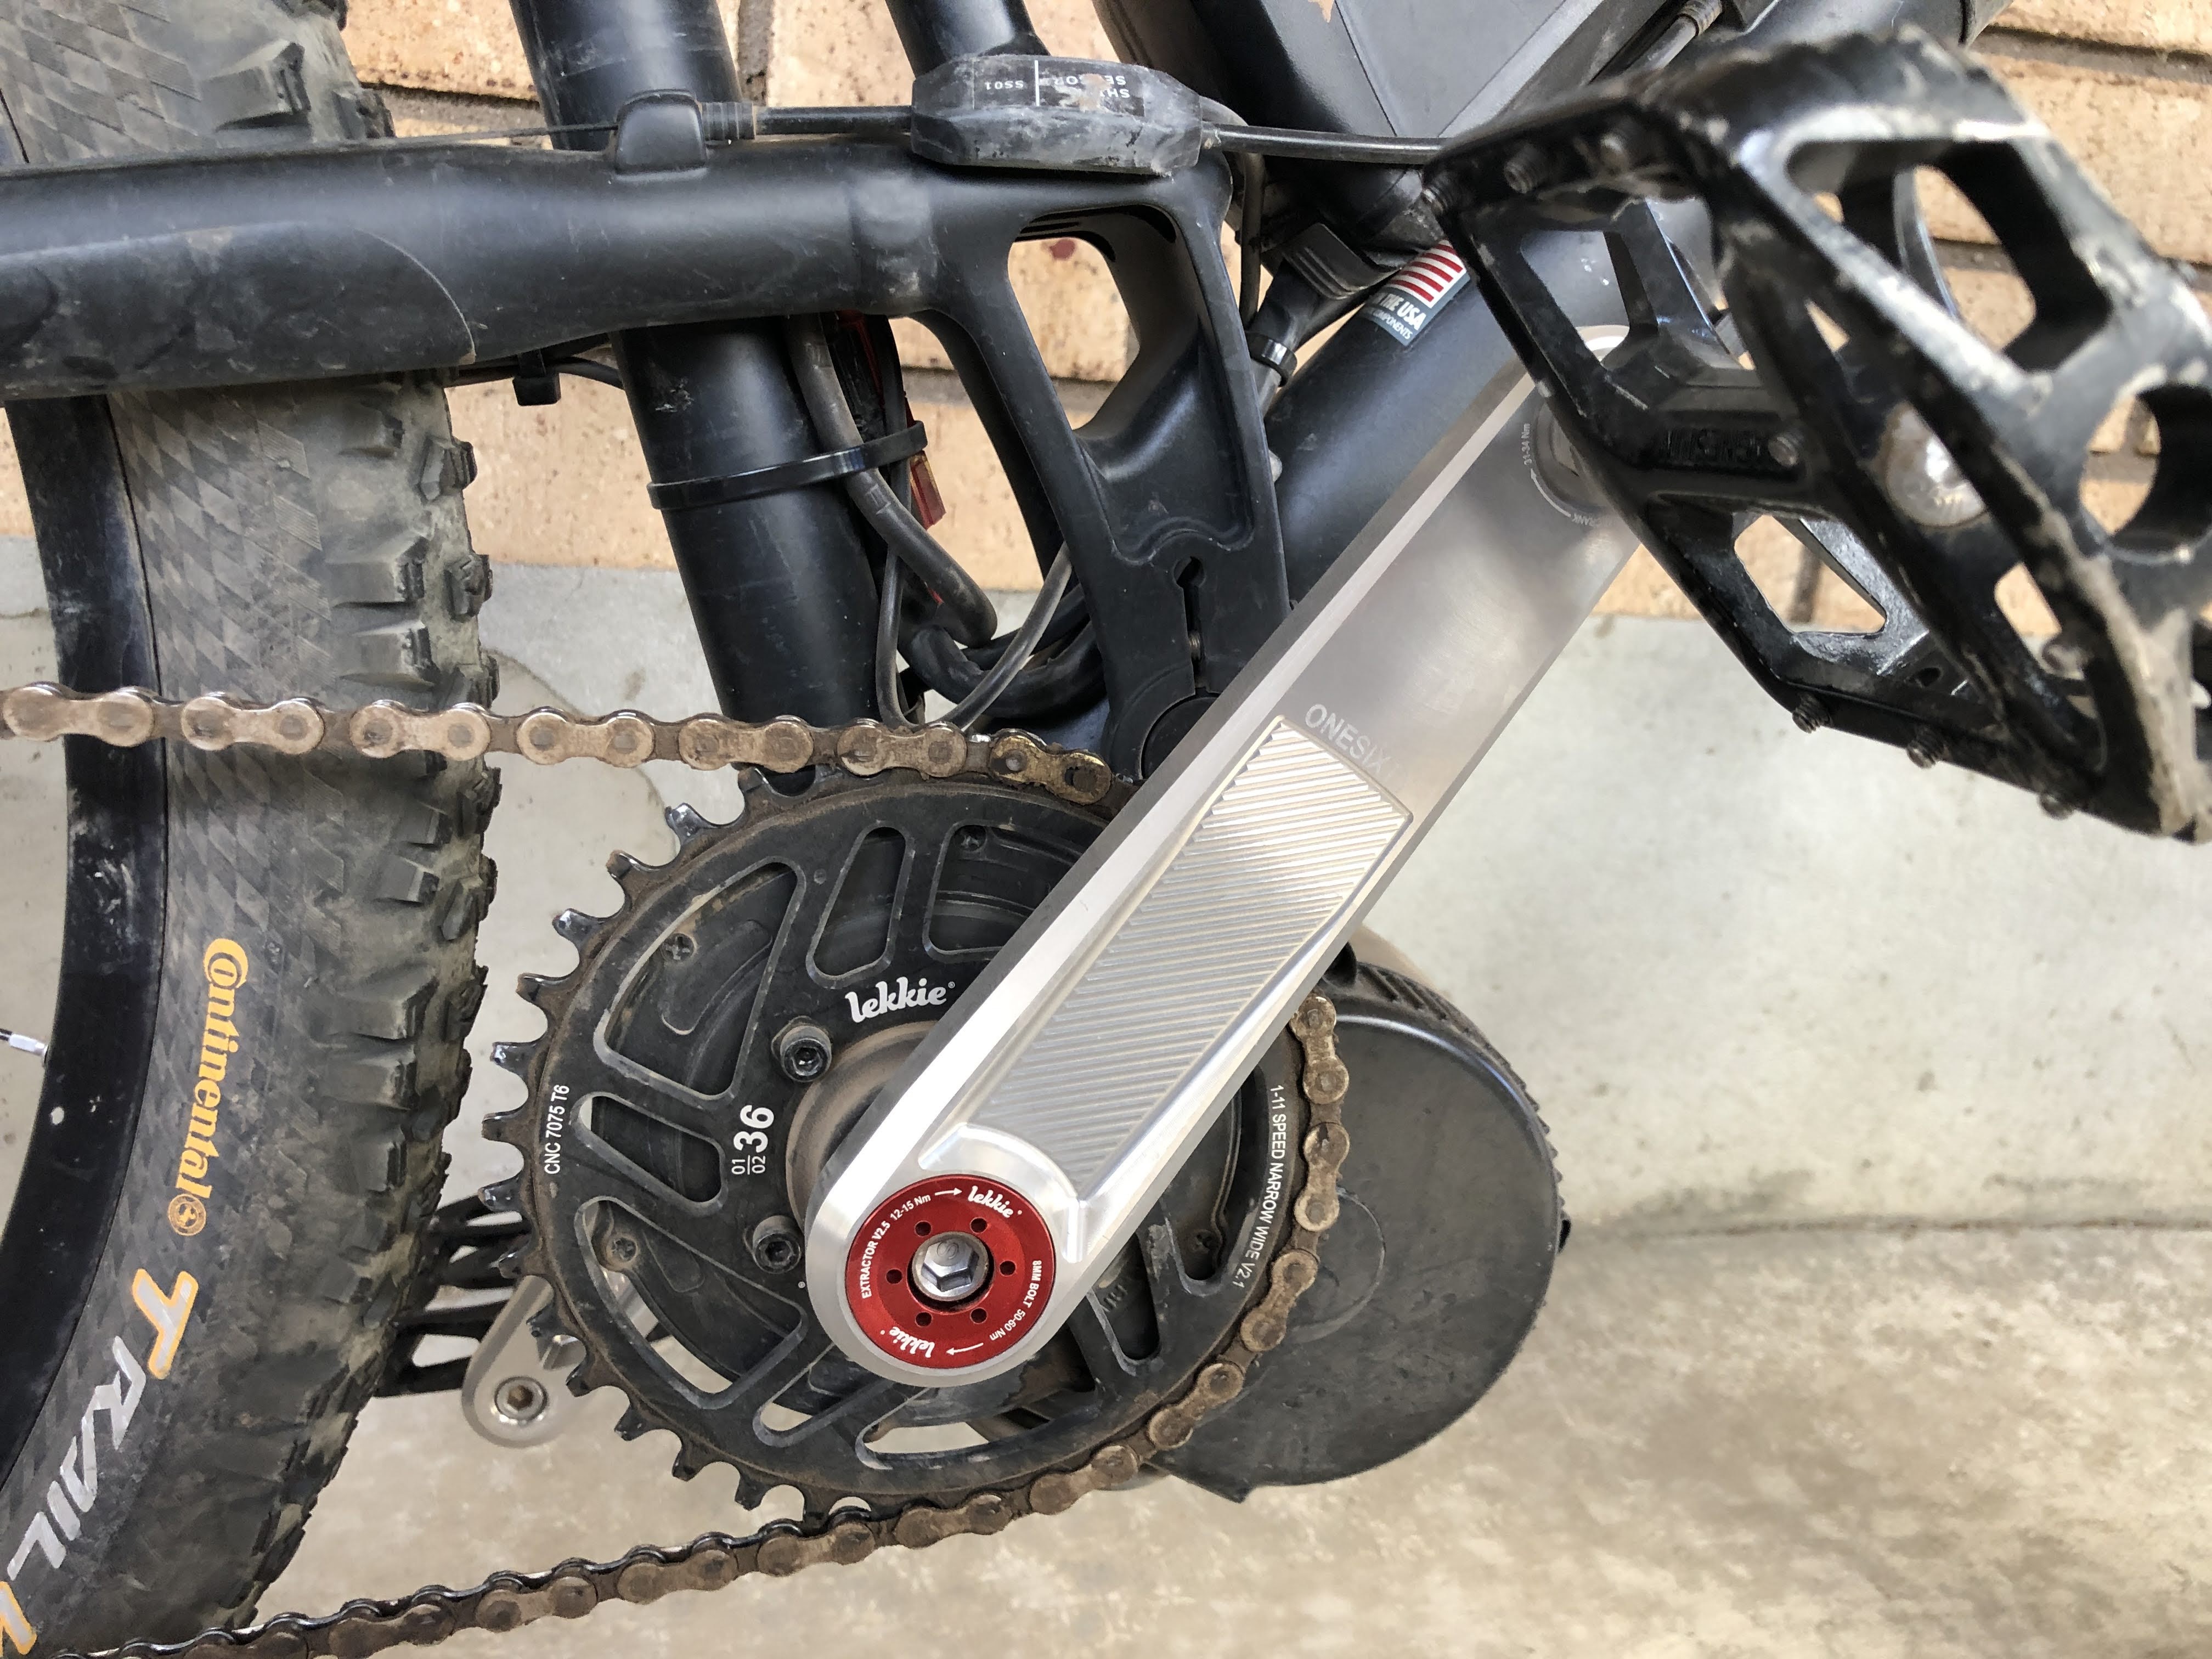
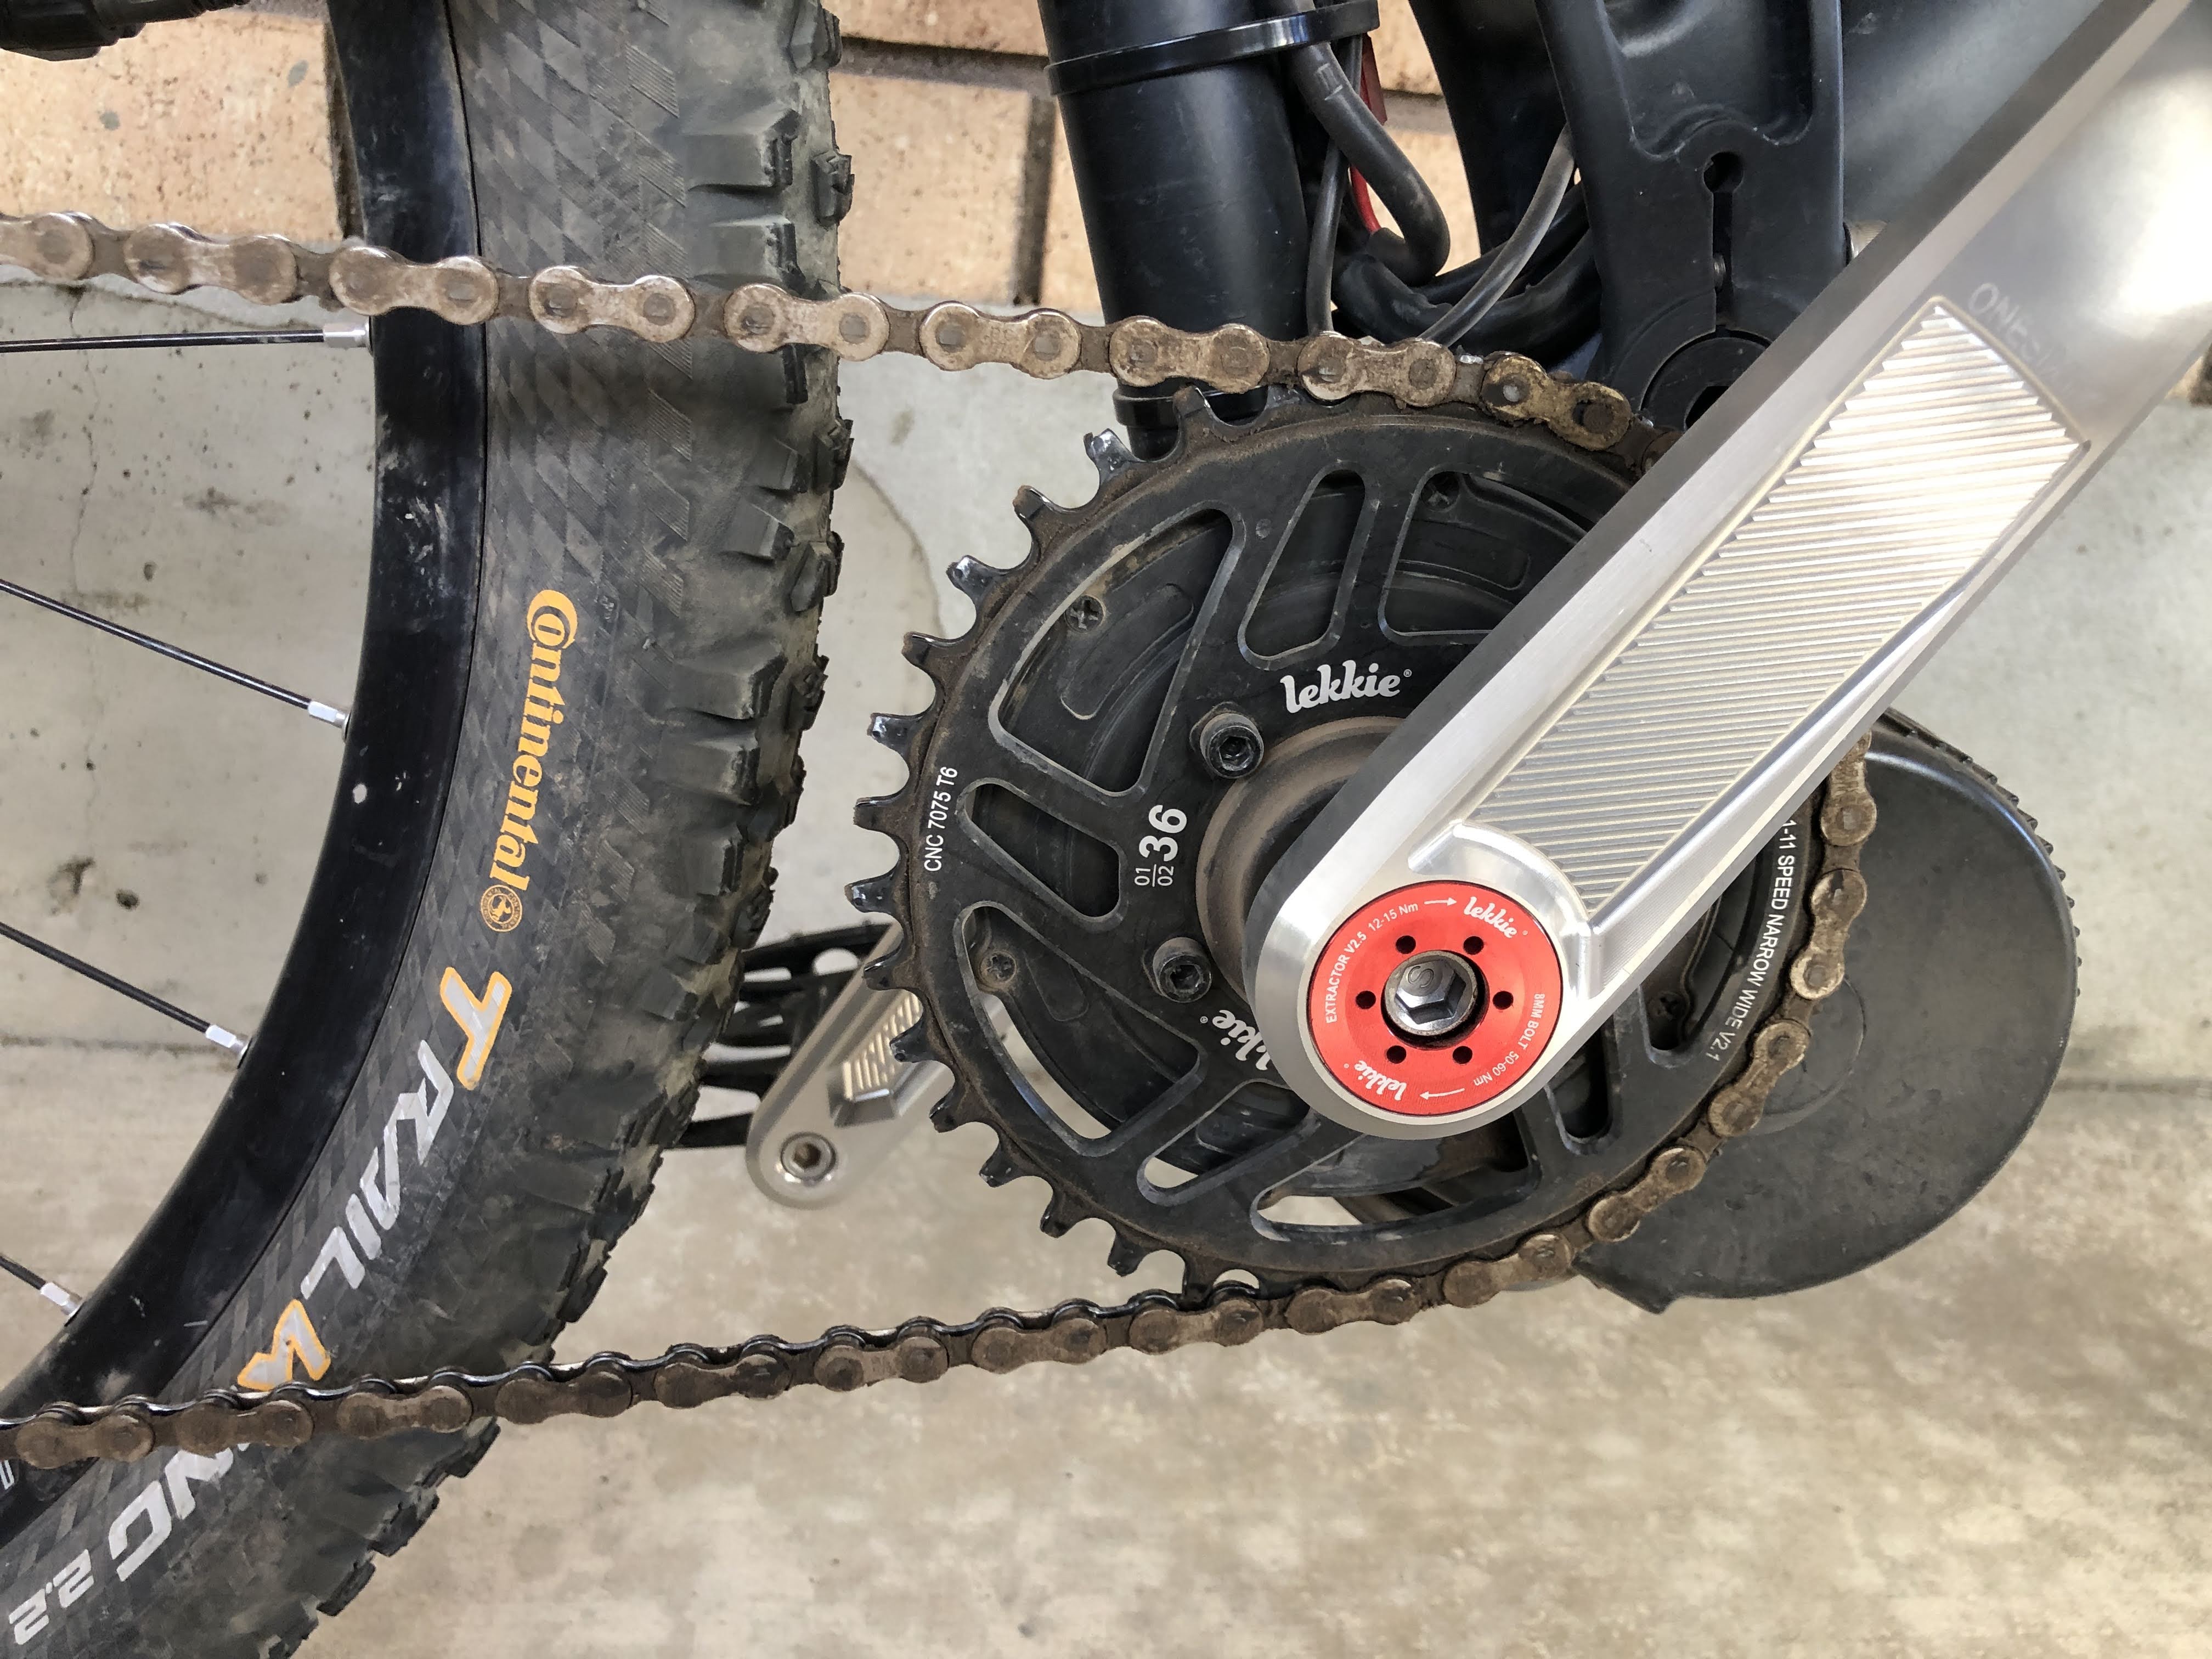
I finally found some shorter crank arms and decided to try them. The Bafang cranks were 170mm, as were my stock cranks. I ordered some Lekkie 160mm cranks. I have only done a few rides since installing them, but have not had a surprise pedal strike since. I was amazed that 1cm could make such a difference. The shorter cranks also make it easier to keep my pedal cadence up, which will be discussed more under the power management section.
Power Management
The learning curve of using the power from the motor was much larger than I expected. You only get power when you are pedaling, and the amount of power is related to your pedal cadence – not how hard you push on the pedals. I had to learn to keep my cadence up by shifting into the proper gear rather than try to muscle my way through.
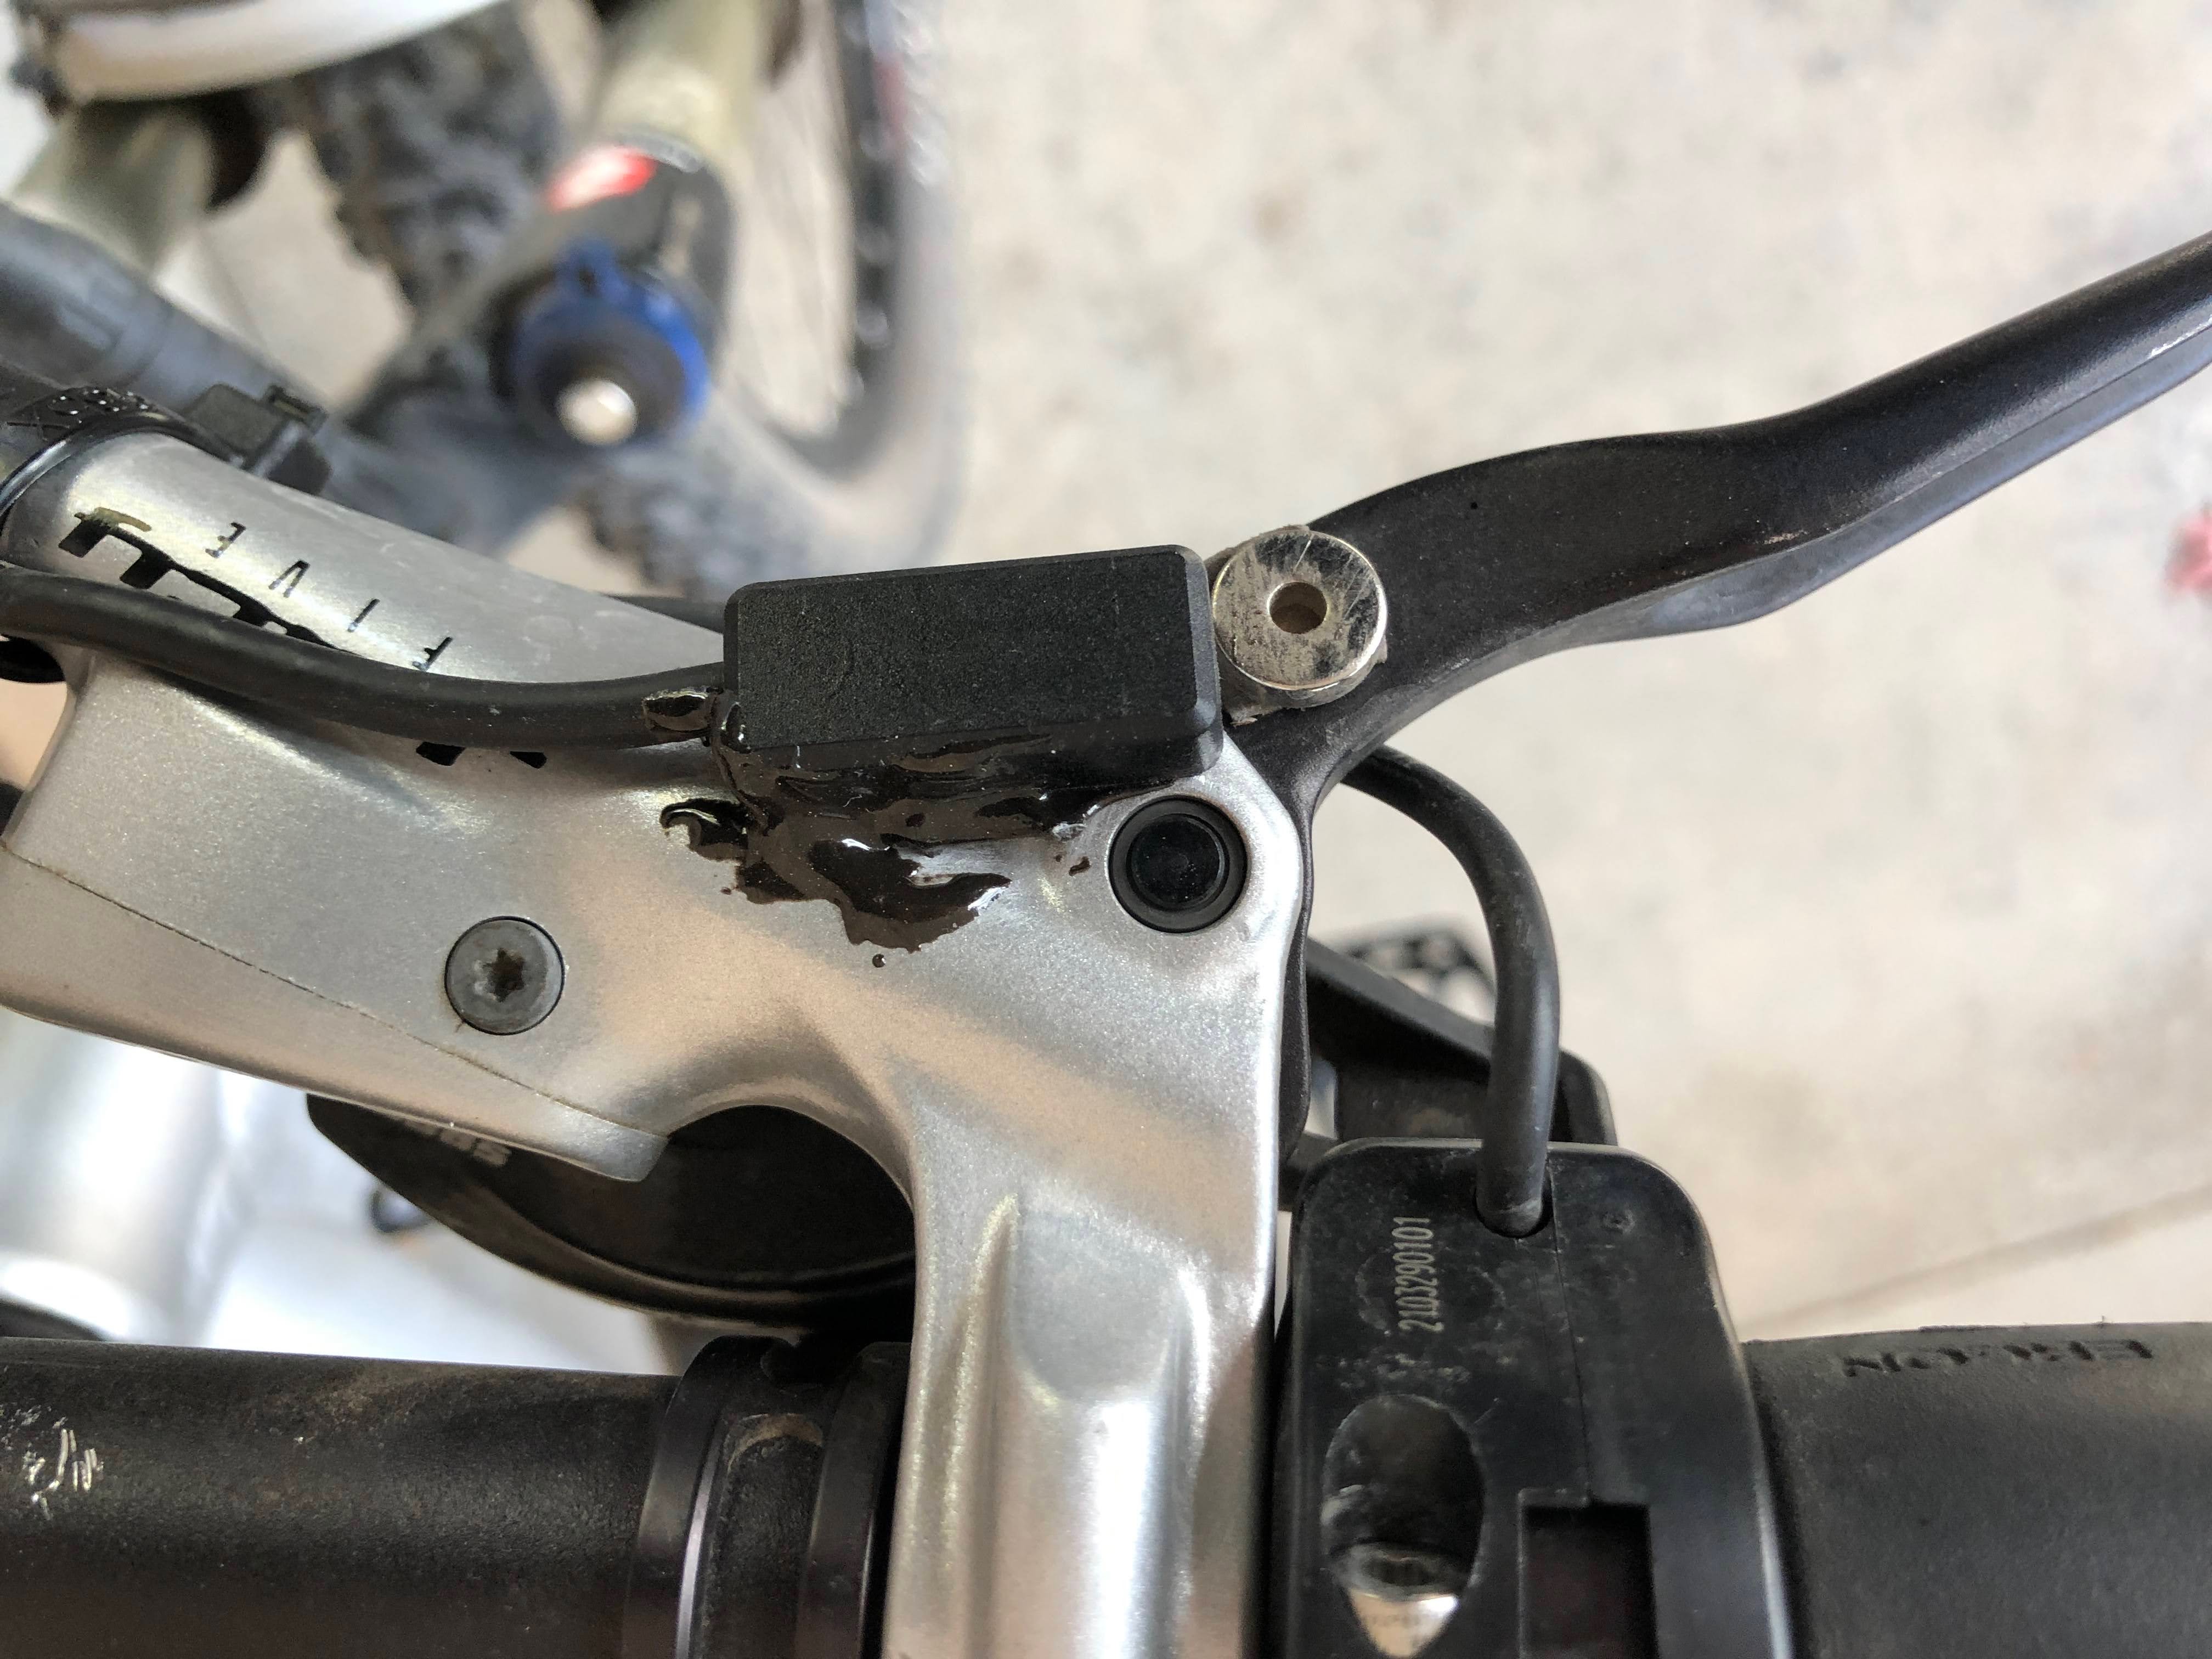
The first thing I noticed was that the motor would cut out when I rode with my fingers on the brake levers. On my mountain bike and my dirt bike I generally ride with one or two fingers on the brake levers. Having to remove my fingers was rather annoying. I also found that the double sided tape that holds on the hydraulic brake sensors would get soft on hot days and slide around, altering the sensitivity. I finally removed the tape and installed the sensors with 5-minute epoxy. I adjusted the alignment so the motor no longer disengages until I start to pull on the levers. Now I can ride with my fingers resting on the levers without issue.
Another thing that took some getting used to was the sudden surge of power when the motor engages, and the sudden lack of power when it disengages. This made the bike lunge forward or slow down suddenly every time I started or stopped pedaling – such as trying to avoid a pedal strike. This surging was aggravated by the handlebar wobble, so it felt really unsafe riding through technical sections of trail. This effect was greatly minimized by reprogramming the motor controller, which will be discussed later.
Other Bike Tuning
Over the next few months I started to get used to riding the bike and dealing with the power management. I was also regaining confidence riding technical sections and tight switchbacks, since I haven’t ridden much in the past several years. But as I adapted, I also noticed finer points of tuning that I wanted to work on.
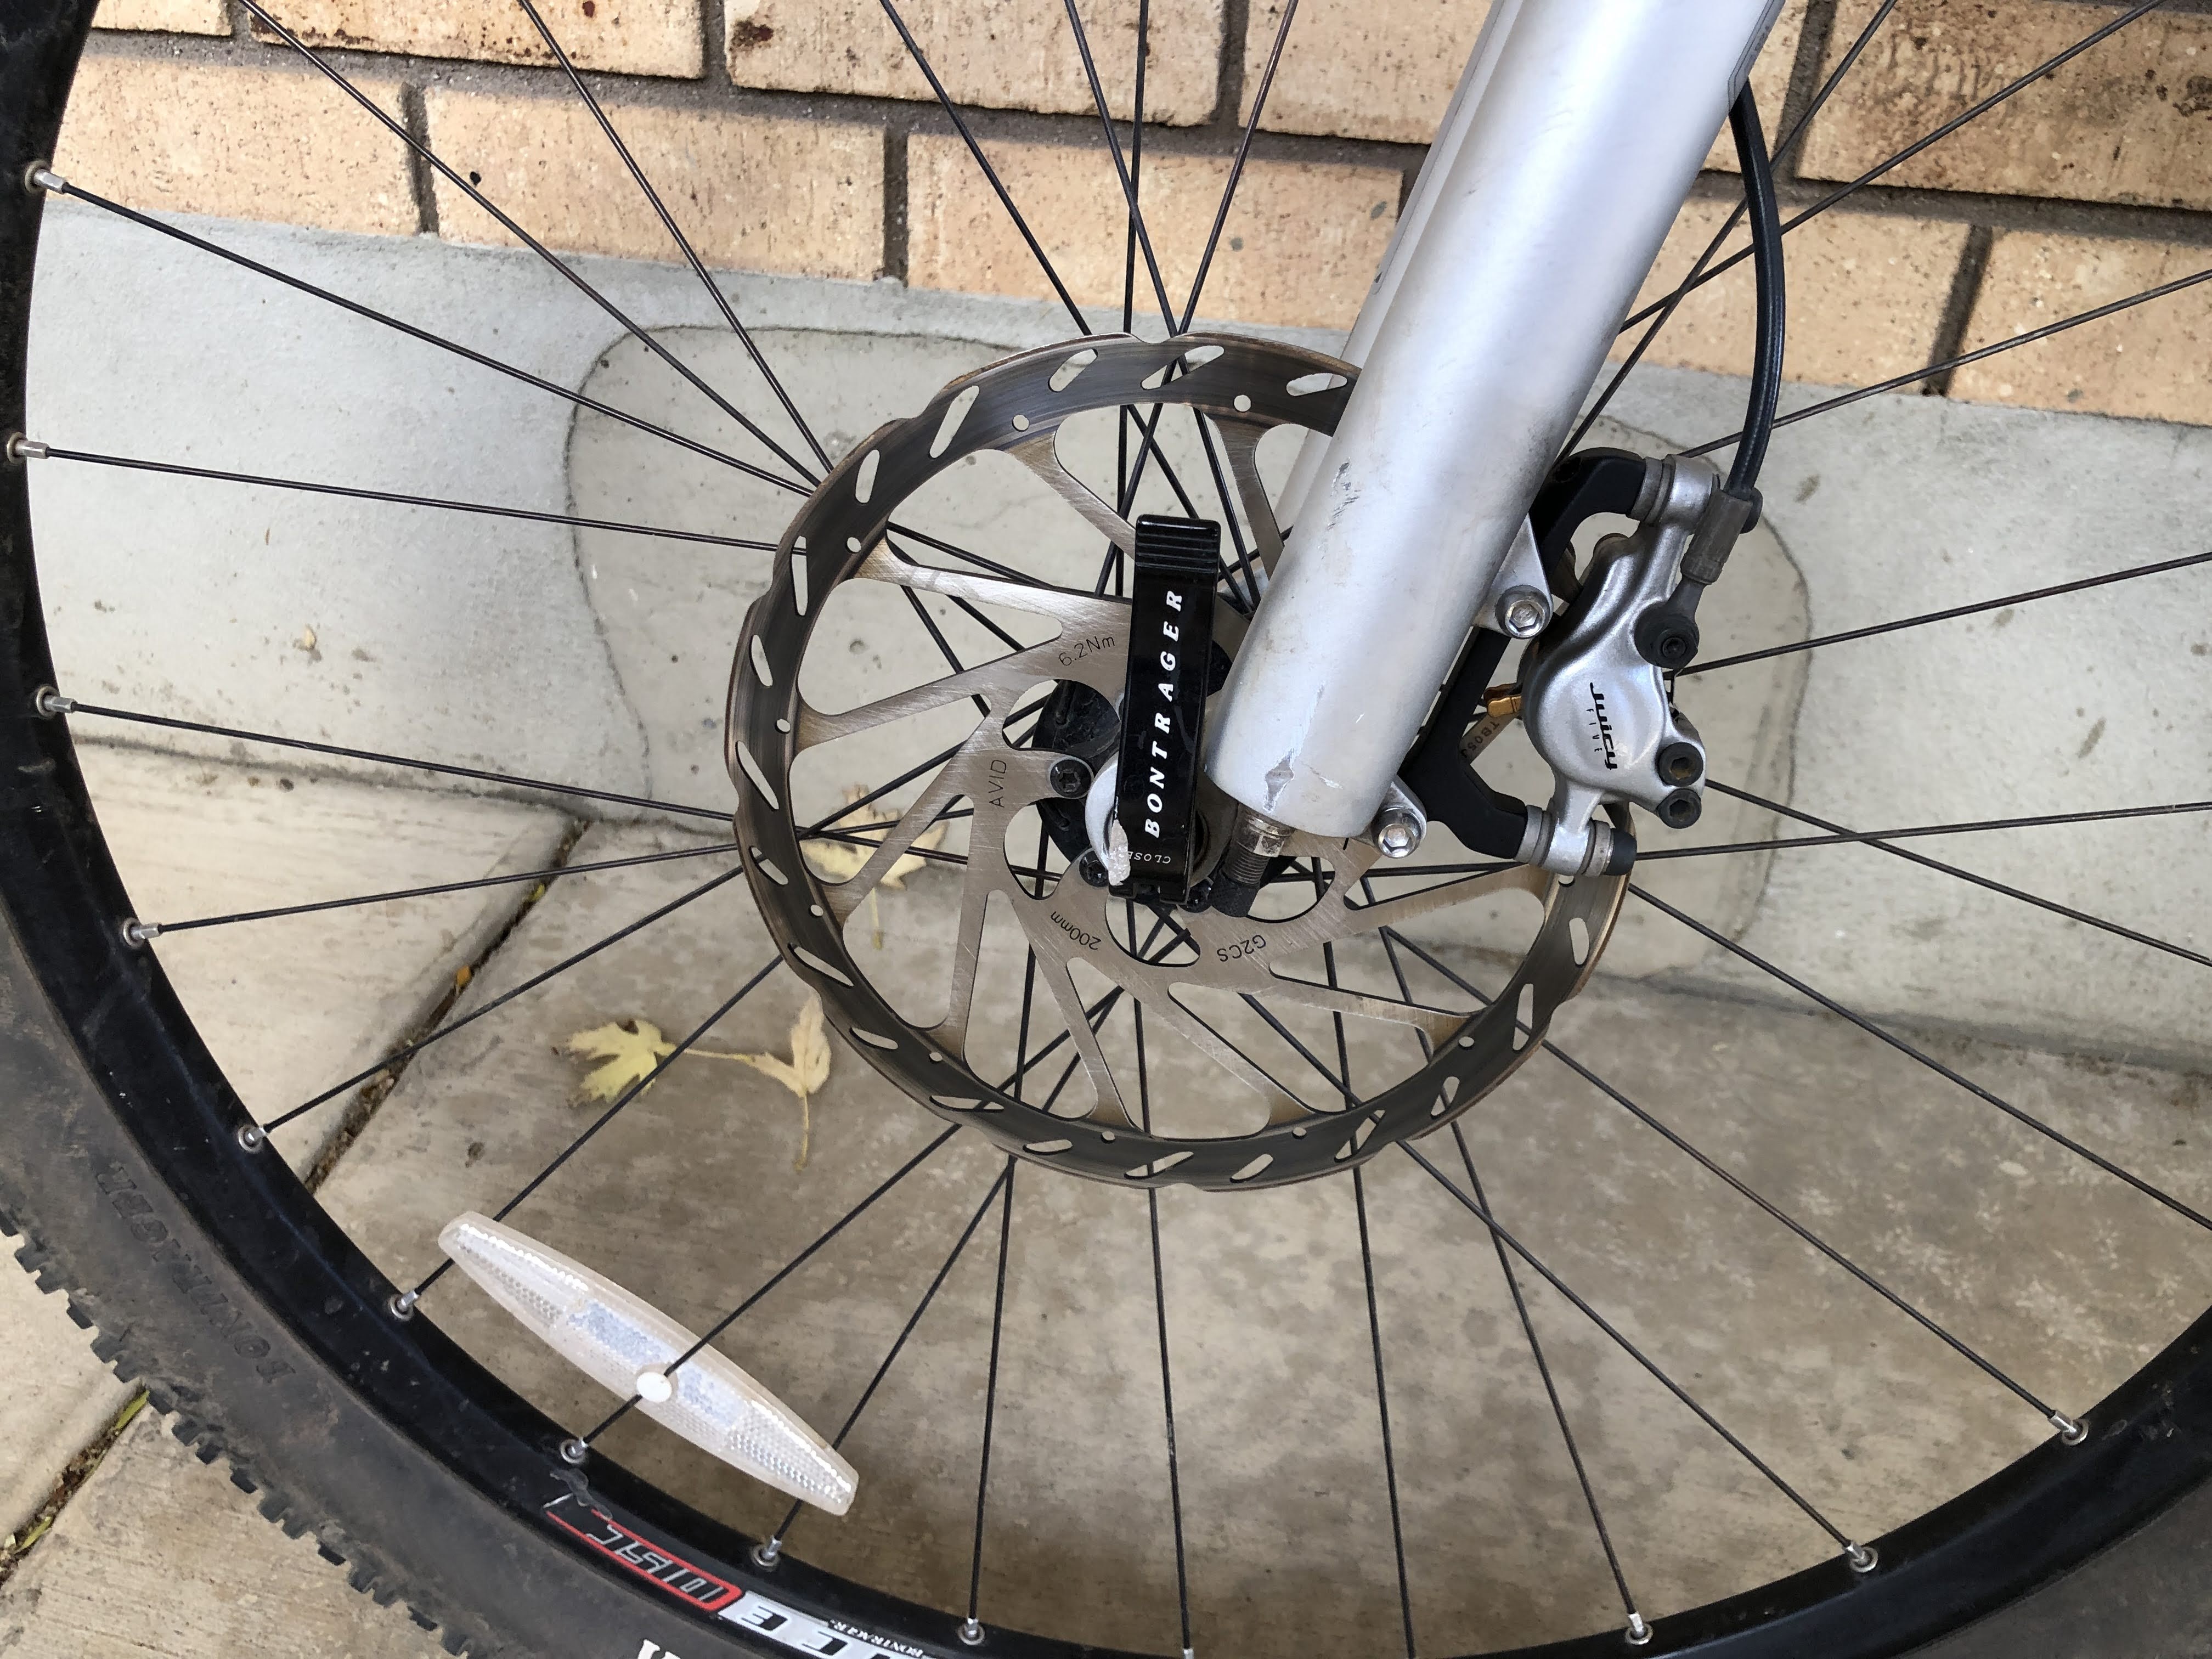
One of the first things that became obvious when riding my local trails was that the stock brakes were totally inadequate. Both wheels had stock 160mm brake rotors. I upgraded the front to a 200mm and the rear to a 180mm. I also moved from organic to sintered pads, greatly improving the stopping ability of the bike.
The default setting of my display unit has 9 levels of assist. The Bafang motor has tons of power, but it took way too many button clicks to move from level 1 to level 9. I changed the mode of the display to only provide 5 levels of assist, which makes it much easier to get from minimum to maximum levels of assist. In this mode, it uses the odd assists levels (1, 3, 5, 7, 9) so the step size is also larger.
On steep hills I was unable to keep my pedal cadence up, so I had to sometimes walk my bike up the hill. The stock Bafang chainring is 44T. I swapped this out with a 36T Lekkie sprocket. This gave up some top speed, but since I mostly enjoy trail riding, the lower gearing helped a great deal.
I also noticed a lot of clunking noise and jerking stress on my chain. It turns out that my motor came loose and was banging back and forth. It is important to periodically inspect the nuts that secure the motor to the bottom bracket.
Bafang Programming
After riding my daughter’s Fezzari, it was obvious that the stock programming of the Bafang motor was not to my liking. The sudden surge when the motor engaged was annoying, and assist level 1 seemed way too strong. On hill climbs I couldn’t ride slow enough to ride with others in my group, and I found that I hardly ever had to go to higher levels of assist.
You can customize the motor controller with a laptop and a USB adapter cable. Instructions can be found on-line, such as this guide.
I am now on my second custom program, but haven’t yet tested my new settings out on the trail. The motor behavior is now much more to my liking, but I will probably still make a few minor adjustments. Here is a short summary of the changes I made and why:
- Start current: to reduce the surge when the motor engages I dropped the start current from 20% down to 12%. I like this setting much better.
- Start degree: I wanted the motor to engage sooner, so I dropped this value from 4 to 2. I now have to pedal about 1/4 of a rotation for the motor to engage. This makes starting on a hill much easier (but the throttle makes it easier still).
- Speed limit: I changed the speed limit for all assist levels to 100%. I don’t understand why you would want lower levels of assist to limit your speed. It doesn’t make sense to me – but maybe I am missing something. Please add comments below if you can explain this to me.
- Current (I will only list the odd levels since I have the display set to 5 levels of assist):
- 1: 52% to 28%, giving a much softer level of assist.
- 3: 64% to 46%, almost like the original level 1.
- 5: 75% to 64%.
- 7: 88% to 82%.
- 9: 100% – no change. I can now get a much broader range of assist with the five levels.
What’s Next?
Ebikes are really fun. You can adjust the amount of exercise you get by adjusting the assist level. Since it is fun, you ride more often, getting more exercise than I typically have with a traditional bike. Even riding around the neighborhood, an ebike is more fun than a regular bike. Instead of cruising at 8 mph, I can easily cruise at 12 mph. The bike is more stable and more fun at that speed. But for me, the real value is out on the trail. I can now ride up the hills on my local trails, and I can keep up with my children.
As I mentioned earlier, my daughter’s Fezzari Wire Peak felt much safer and more stable than my bike. Now that I know I enjoy riding the ebike and I am getting out a few times each week to ride, I have decided to get a new emtb. I did a lot of research and finally decided to order to Fezzari Wire Peak Elite. I think there are better bikes out there, but I felt the Fezzari offered the best value. Plus, it is a local company so I can get support when needed.
As with many other things, bikes are hard to come by. I placed an order for my new bike and hope to get it very soon. Hopefully I can get out and ride it before winter sets in!
Update
I took one last ride on my old bike to test out the new programming. It seems almost ideal. The power level is about half of the stock settings, which is still plenty. Here is a video of that ride on some trails I hadn’t ridden before. Things went well until I hit a big thorn and got a flat tire.
And my new Wire Peak came in a few weeks early. So far I have only taken one ride on it. The geometry of the new mountain bikes is very, very different than my old bike, so it will take some getting used to. But right off the bat I could tell the bike is more stable – no more handlebar wobble. I need to do some fine tuning on the handlebar and control alignment, but I think this is going to be a really fun bike. The power delivery is much smoother than my old bike. It doesn’t have sensors to cut the power when you hit the brakes or shift gears, so it is much more natural to ride.
The Shimano EP8 motor has two user profile settings. I found that profile 1 (the default) was a little weak for my weight. I switched to profile 2 and that felt much better. It is, in fact, very close to my latest settings on my old motor.
